How to Add Ceiling Light: Expert DIY Guide
Are you looking to transform your living space with a touch of brightness? Adding a ceiling light can not only illuminate your room but also enhance its aesthetic appeal.
Whether you’re aiming for a cozy ambiance in your bedroom or a lively atmosphere in your kitchen, the right ceiling light can make all the difference. But where do you start, and how can you ensure it’s done safely and effectively?
This guide is here to help you through every step of the process. You’ll learn how to select the perfect fixture, gather the necessary tools, and install your ceiling light like a pro. Dive in to discover the easy, DIY-friendly way to lighten up your space and make your home shine!
Credit: www.younghouselove.com
Choosing The Right Ceiling Light
Ceiling lights come in different styles. Chandeliers are often fancy and elegant. Pendant lights hang down and look modern. Flush mounts sit close to the ceiling. They are good for small rooms. Each type has its own look and feel.
Big rooms need big lights. Small rooms need small lights. Choose a light that fits the room size. Colors and design matter too. Match the light with the room style. This makes the room look nice and neat. Pick a light that fits both size and style.
Gathering Necessary Tools
To add a ceiling light, some basic tools are needed. A screwdriver is very important. Both a flathead and a Phillips are useful. A wire stripper helps in removing wire coverings. A drill is used for making holes in the ceiling. Also, a voltage tester checks if wires have power. Keep a measuring tape handy for accuracy. With these tools, one can start the work.
Safety equipment keeps everyone safe. A helmet protects the head. Wearing safety goggles shields the eyes. Gloves keep hands safe from cuts. A dust mask is useful for clean air. It is important to have a first aid kit nearby. Safety should always come first.
Preparing For Installation
Safety is important. Turn off power at the breaker box. Use a voltage tester. Check if wires are live. Ensure no electricity flows. This prevents shock.
Remove the old light. Unscrew the fixture from the ceiling. Hold it steady. Disconnect wires carefully. Note wire colors. Remove mounting bracket if needed. Prepare space for the new light.
Credit: www.wayfair.com
Installing The Mounting Bracket
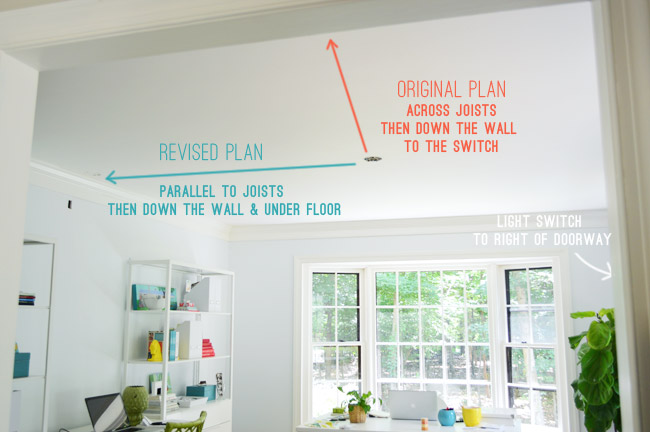
Use a stud finder to locate ceiling joists. Joists are hidden under the ceiling. Move the stud finder across the ceiling. Listen for beeps or watch for lights. Mark the spots with a pencil. Joists provide strong support for your light.
Place the mounting bracket against the ceiling. Align it with the joist marks. Use a drill to make holes. Insert screws into the holes. Tighten them to secure the bracket. Make sure the bracket is stable. It should not move at all. This keeps your light safe and secure.
Wiring The Ceiling Light
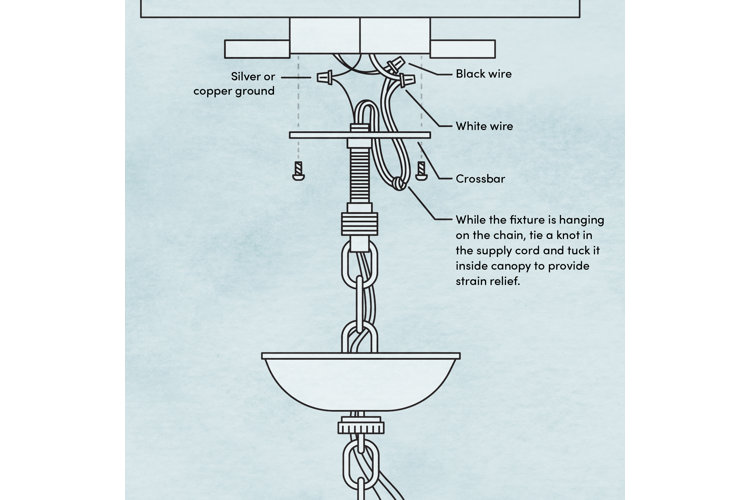
Start by turning off the power. This is very important. Find the wires in the ceiling. There are usually three: black, white, and green. Connect the black wire from the ceiling to the black wire on the light. Do the same with the white wires. Twist them together tightly. Use wire nuts to keep them secure. This prevents loose connections.
The green wire is for grounding. Connect the green wire from the light to the green wire in the ceiling. Grounding is a safety measure. It helps prevent electric shocks. Make sure the ground wire is tightly connected. This keeps the light safe. Check all connections before turning on the power. Safety first.
Attaching The Light Fixture
The light fixture must be centered correctly. Hold the fixture against the ceiling. Ensure the mounting holes line up with the ceiling holes. Proper alignment is vital for safety. Check the wires inside the fixture. They should not be tangled. Make sure the fixture is stable and secure. Use your hand to test its steadiness.
Use the screws that came with the fixture. These screws are important for security. Insert each screw into the mounting holes. Turn the screws clockwise to tighten. Make sure they are tight but not over-tightened. Over-tightening may damage the ceiling. A secure fixture prevents accidents. Once done, double-check the fixture’s stability.
Testing The Installation
Ensure the ceiling light is securely mounted. Turn on the switch to test the electrical connection. Observe if the light illuminates properly, confirming a successful installation.
Restoring Power
Turn the power back on carefully. Use the switch to restore electricity. Make sure all connections are tight. This prevents any short circuits. Safety is most important. Never touch wires with wet hands. Use insulated tools if needed. Look for any sparks or unusual sounds. These are signs of trouble. Fix them before proceeding. Check the fuse box if lights don’t turn on.
Checking For Functionality
Observe the ceiling light closely. Does it light up properly? Check for flickering or dimness. These can signal loose connections. Adjust the bulb if needed. Ensure it fits snugly. Test the switch multiple times. Make sure it works smoothly. Listen for humming sounds. These could mean electrical issues. Inspect the bulb and socket. Replace them if faulty.
Troubleshooting Common Issues
Flickering lights can be very annoying. Loose connections often cause this issue. Check the bulb first. Ensure it is screwed in tightly. Loose bulbs flicker more. If the bulb is fine, inspect the light fixture. Wires might be loose inside. Turn off the power before checking. Safety first! Tighten any loose wires carefully. Sometimes, the problem is in the switch. Loose connections in switches cause flickering too. Check the switch plate and tighten screws. If problems continue, consult an electrician.
Loose connections can cause flickering and other problems. Always check connections first. Bulbs and fixtures must be secure. Ensure wires are tightly connected. Loose wires can be dangerous. Check the switch as well. Loose screws on switch plates cause issues. Tighten everything securely. Turn off power before checking. Safety is important. If unsure, call a professional. Electricity is serious business. Proper connections prevent many issues.
Maintenance Tips
Installing a ceiling light enhances room brightness and style. Turn off electricity before starting. Use a sturdy ladder for safety. Secure the fixture tightly to avoid accidents. Follow manufacturer instructions closely for a seamless setup. Enjoy your new lighting!
Cleaning The Fixture
Keep the ceiling light clean for better brightness. Use a soft, damp cloth. Avoid using water on electrical parts. Dust can dim the light. Clean once a month. Turn off the power before cleaning. Safety first!
Replacing Bulbs
Always use the right bulb. Check wattage first. Make sure the bulb is cool before touching. Unscrew the old bulb gently. Dispose of it safely. Screw in the new bulb firmly. Ensure it is tight but not too tight. Turn on the light to test. If it flickers, adjust the bulb.

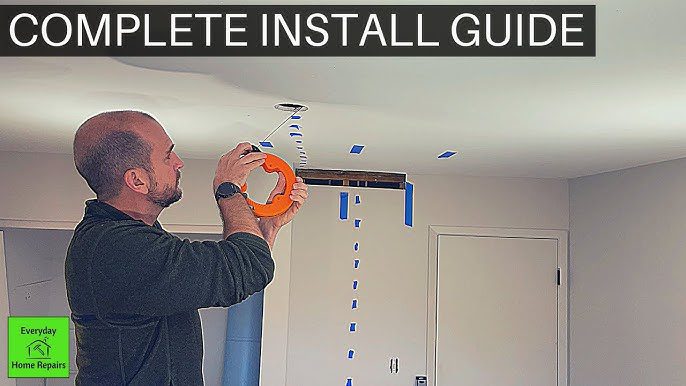
Credit: m.youtube.com
Frequently Asked Questions
Can I Install A Ceiling Light Without Wiring?
Yes, you can install a ceiling light without wiring. Use battery-powered or plug-in lights for easy installation. Choose adhesive or magnetic mounts for quick setup. These options eliminate the need for electrical work. Ideal for renters or temporary lighting solutions.
How Do I Add Another Ceiling Light?
Turn off the power supply. Install a junction box. Run wiring to the new location. Connect wires securely. Mount the light fixture. Turn power back on and test.
How Much Does It Cost To Install A Ceiling Light Without Existing Wiring?
Installing a ceiling light without existing wiring typically costs $150 to $350. Prices vary based on location, complexity, and labor. Electricians charge hourly rates, usually between $50 and $100. Always get estimates from professionals to ensure accurate pricing.
Can I Install A Ceiling Light Myself?
Yes, you can install a ceiling light yourself. Ensure you have basic electrical knowledge and tools. Always turn off the power at the breaker before starting. If unsure, consult a professional to avoid safety hazards.
Conclusion
Adding a ceiling light brightens your room and adds style. Follow the steps carefully for a safe installation. Always turn off power before starting. Gather all necessary tools to avoid delays. Ask for help if you need it. Safety matters most.
With patience, your new light will shine beautifully. Remember, practice makes perfect. If unsure, consult a professional for guidance. Enjoy your well-lit space. A successful installation brings satisfaction and comfort. Keep experimenting with designs and placements. Light up your home, and create the mood you desire.
A ceiling light can transform your space.