How to Adjust Spring-Loaded Door Hinges Easily
Adjusting spring-loaded door hinges might sound tricky, especially if you’re new to home repairs. These hinges are designed to keep doors closed automatically, which is super handy. But sometimes, they might not close quite right, or they might slam too hard.
Learning How to Adjust Spring-Loaded Door Hinges Easily can save you a lot of frustration and keep your doors working perfectly. Don’t worry, it’s simpler than you think. We’ll walk you through it step by step to get your doors swinging just right.
Understanding Spring-Loaded Door Hinges
Spring-loaded door hinges, often called self-closing hinges or pneumatic door closers, are clever mechanical devices. They use a spring and sometimes hydraulic fluid to control the movement of a door. Their main job is to ensure a door returns to a closed position after being opened.
This is useful for security, energy efficiency, and general convenience. For instance, in a busy office, they ensure conference room doors don’t stay open, preventing distractions and maintaining a professional environment. In homes, they can be used on screen doors or attic access doors.
The mechanism inside these hinges typically involves a coiled spring. When the door is opened, the spring is compressed or stretched. As the force is released, the spring’s stored energy pushes or pulls the door back towards its frame.
Many modern versions also incorporate a hydraulic cylinder. This cylinder contains oil that is forced through small passages as the door closes. This process slows down the door’s movement, preventing it from slamming shut.
This controlled closing action is important for preventing damage to the door, frame, and for safety.
Adjusting these hinges is usually about fine-tuning how quickly or forcefully the door closes, or how far it stays open. It’s a common task for homeowners and property managers. Beginners might find it confusing because the internal mechanisms aren’t always obvious, and there are often small adjustment screws that look similar.
The key is to identify the correct adjustment points and understand what each one controls. We’ll break down these common hinge types and the tools you’ll need to make these adjustments yourself.
Types of Spring-Loaded Hinges
There are several common types of spring-loaded hinges you might encounter. Each has its own way of adjusting and its own set of features. Knowing which type you have is the first step to making adjustments.
Surface-Mounted Door Closers
These are the most visible type. They attach to the surface of the door and the frame. You often see them on commercial doors or heavier residential doors.
They have a main arm that connects to the door and a body that mounts to the frame. Adjustments usually involve turning screws on the main body of the closer.
Concealed Door Closers
These are built into the door frame or the door itself. They are less noticeable and offer a cleaner look. Adjusting them can be more challenging because the mechanism is hidden.
Access is typically through small holes in the frame or cover plates.
Wrap-Around Hinges
These hinges cover the top edge of the door and part of the frame. They are common on screen doors or lightweight storm doors. They usually have a spring rod that you can often adjust by tightening or loosening a nut or by rotating a collar.
Adjustable Spring Hinges (Gate Hinges)
Often found on garden gates or lighter utility doors, these hinges have a distinct coiled spring that you can usually see. They typically have a threaded rod and nuts that allow you to increase or decrease the spring tension.
Each of these types has specific points for adjustment. Understanding the basic design will help you locate these points. For example, a surface-mounted closer will have readily accessible screws, while a concealed closer might require removing a cover plate.
Tools You’ll Need for Adjustments
Before you start fiddling with your door hinges, it’s important to have the right tools. Using the wrong tools can damage the hinge or make the adjustment more difficult. Fortunately, most of the tools needed are common household items.
-
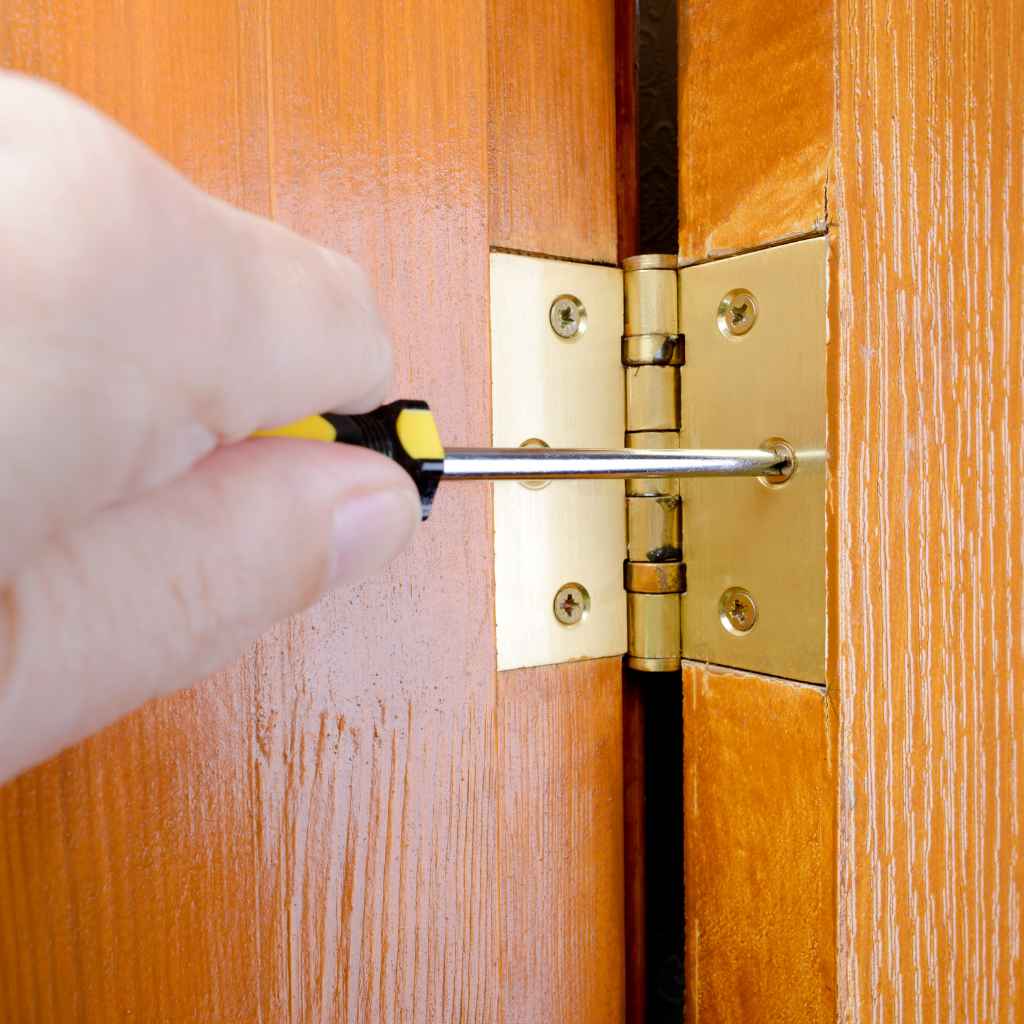
Screwdrivers
You’ll likely need a Phillips head screwdriver and possibly a flathead screwdriver. These are used for tightening or loosening screws that hold the hinge components or for making specific adjustments on the hinge itself. Make sure you have a few different sizes on hand, as hinge screws can vary.
A magnetic tip can be helpful for catching dropped screws.
-
Adjustable Wrench or Pliers
An adjustable wrench or a good pair of pliers is essential for turning nuts and bolts. Many spring hinges have nuts that need to be tightened or loosened to adjust the spring tension. Ensure your wrench is set correctly to avoid stripping the nuts.
-
Allen Wrenches (Hex Keys)
Many modern door closers use set screws that require Allen wrenches. These are L-shaped metal tools that fit into hexagonal holes. You’ll need a set with various sizes, as different hinges use different-sized hex screws.
Sometimes these are included with the door closer hardware.
-
Measuring Tape
While not directly for adjustment, a measuring tape can be useful for noting the initial position of the door or checking if the swing has changed as expected. It helps in keeping track of any changes you make, especially if you need to revert them.
-
Safety Glasses
It’s always a good idea to wear safety glasses when working with tools, especially when dealing with springs or potentially moving parts. This protects your eyes from any dust, debris, or unexpected spring release.
Having these basic tools ready will make the process much smoother. If you’re unsure about the size of a particular screw or nut, it’s better to have a variety of options. This ensures you can tackle whatever your specific hinge requires.
How to Adjust Spring-Loaded Door Hinges Easily
Now let’s get to the core of How to Adjust Spring-Loaded Door Hinges Easily. The process can vary slightly depending on the exact type of hinge, but the general principles are the same. The most common adjustments involve controlling the speed of the closing action and the latching force.
Latching force refers to how firmly the door closes and stays shut.
Adjusting Closing Speed
The speed at which a door closes is typically controlled by one or more adjustment valves or screws. On most surface-mounted door closers, you’ll find these on the main body of the unit. These control the flow of hydraulic fluid within the closer’s cylinder.
Identifying Speed Adjustment Screws
Look for screws that are usually labeled with terms like “speed,” “sweep,” “close,” or have arrows indicating the direction of movement (e.g., fast/slow). There might be one main speed adjustment, or sometimes two: one for the main sweep (the majority of the closing motion) and another for the final few inches, often called the “latch” or “delay” speed.
For example, a common type has two screws. One controls the speed from when the door is opened until it’s about 10-15 degrees from being closed. The other controls the speed for the last 10-15 degrees, ensuring a smooth, controlled latch.
If your door closes too fast, you’ll typically need to turn the speed adjustment screw clockwise. This restricts the flow of hydraulic fluid, slowing down the closing action. Turning it counter-clockwise will open up the flow and make the door close faster.
Making the Adjustment
Make adjustments in small increments. Turn the screw a quarter turn at a time, then test the door’s closing action. Open the door and let it close on its own.
Observe how it behaves. If it’s still too fast, turn the screw a little more. If it becomes too slow or doesn’t close fully, you may have over-adjusted or need to adjust the other speed screw.
A common scenario is a door that slams shut, startling people or damaging the frame. This indicates the closing speed is too high. A simple clockwise turn of the primary speed adjustment screw can fix this.
Conversely, a door that closes too slowly and may not latch properly might need the screw turned counter-clockwise. Some advanced closers have a “delayed action” feature, which keeps the door open for a few extra seconds before closing, useful for areas with high foot traffic where people might be carrying items.
Adjusting Latching Force
The latching force is crucial. It’s what ensures the door clicks shut and stays closed against wind or other pressures. If the latching force is too weak, the door might bounce back or not stay latched.
If it’s too strong, it might be difficult to open or could damage the frame.
Locating the Latch Adjustment
This adjustment is often controlled by a separate screw, sometimes labeled “latch” or “delay.” On some hinges, the main speed adjustment screw might also influence the latching force to some degree. For hinges with two speed adjustments, the second one (for the final sweep) often dictates how strongly the door latches.
If your door doesn’t latch completely, meaning it stops just before clicking into the strike plate, you need to increase the latching force. This usually involves turning the latch adjustment screw clockwise. This adjustment often makes the door close a bit more forcefully in the final inches of its travel.
It’s like giving the door a final nudge to ensure it gets properly into the strike plate.
If the door slams so hard it feels like it’s going to break something, you might need to decrease the latching force. This is less common, as most hinges are designed to prevent slamming. However, if this is the case, you would turn the latch adjustment screw counter-clockwise.
Testing the Latch
After each small adjustment, test the door’s latching action. Open the door and let it close. Listen for the click as it enters the strike plate.
Feel how firmly it stays closed. You want a satisfying click, not a violent slam, and the door should remain securely shut until intentionally opened again. It’s a balance between ensuring it closes reliably and not making it difficult to open.
Adjusting Backcheck and Hold-Open Features
Some spring-loaded door hinges have additional features like “backcheck” and “hold-open.” Backcheck is a feature that slows down the door when it’s opened beyond a certain angle (typically around 70-80 degrees) to prevent it from hitting the wall. Hold-open is a mechanism that keeps the door open at a specific angle, usually around 90 degrees.
Backcheck Adjustment
The backcheck feature is often controlled by a separate valve or screw, sometimes labeled “backcheck” or “BC.” If the door is opening too violently and you fear it will hit the wall, you might need to increase the backcheck resistance. Turning the backcheck adjustment screw clockwise usually increases this resistance, slowing down the door’s opening motion past the backcheck threshold.
Conversely, if the backcheck seems too strong and makes it difficult to open the door to its full extent, you would turn the screw counter-clockwise. It’s important to note that backcheck is an opening control, not a closing control. It prevents damage as the door is pushed open, not as it swings shut.
Hold-Open Adjustment
The hold-open feature is usually a separate mechanism or a setting on the main closer. If your closer has a hold-open function, there might be a lever or a screw that engages or disengages it. Some closers are designed to hold open at specific angles (e.g., 90 degrees), while others might have a range.
If the hold-open isn’t working, check if it’s been accidentally disengaged or if there’s debris preventing it from functioning.
Adjusting the hold-open angle might involve repositioning a shoe on the closer arm or adjusting a specific screw if the model allows for it. Refer to your specific hinge’s manual, as hold-open mechanisms can be quite varied. For simple spring hinges on screen doors, a small tab or clip might be used to prop the door open.
Troubleshooting Common Issues
Even with careful adjustments, you might run into a few common problems. Knowing how to troubleshoot can save you a lot of time.
-
Door Closes Too Slowly or Doesn’t Latch
This often means the spring tension is too low or the hydraulic fluid is leaking, reducing the closing force. For hinges with adjustable spring tension (like gate hinges), you’ll need to increase the tension. For hydraulic closers, if the speed adjustments aren’t helping, there might be an internal issue, or the closer might be undersized for the door’s weight and size.
You might need to adjust the latch speed screw slightly more open (counter-clockwise) to help it get to the strike plate, but this is a delicate balance.
-
Door Slams Shut
This is usually due to too much closing speed or latching force. Make small clockwise adjustments to the main speed and latch speed screws. If the problem persists, the closer might be too powerful for the door, or there could be an issue with the spring mechanism itself.
Ensure there’s no obstruction preventing smooth movement.
-
Hinge Squeaks or Groans
This is often a sign that the hinge needs lubrication or that parts are rubbing together. For hydraulic closers, try applying a small amount of light oil (like 3-in-1 oil) into any visible joints or pivot points. Avoid using WD-40 as a lubricant, as it can attract dirt.
For simple spring hinges, lubricating the spring coils and pivot points can help. If the noise persists, the hinge might be worn out and require replacement.
-
Door Opens Too Far and Hits Wall
This indicates that the backcheck feature is not working or is not adjusted correctly. Find the backcheck adjustment screw and turn it clockwise in small increments to slow down the opening motion. You want to prevent the door from hitting the wall without making it too difficult to open.
Remember to always make adjustments one at a time and test the door after each change. This systematic approach helps you pinpoint what’s working and what’s not.
Real-Life Example Adjusting a Commercial Door Closer
Let’s consider a practical scenario. A small cafe owner noticed that their front door, equipped with a surface-mounted hydraulic door closer, was slamming shut very loudly every time a customer entered or left. This was not only startling but also potentially damaging the door frame over time.
The owner had tried gently pushing the door to slow it down, but this wasn’t a long-term solution.
First, they identified the door closer. It was a common commercial model with two adjustment screws on the main body. One was labeled “Sweep Speed” and the other “Latching Speed.” The owner decided to tackle the “Sweep Speed” first, as the door was slamming from the main closing motion.
Using a Phillips head screwdriver, they turned the “Sweep Speed” screw clockwise by a quarter turn. They then opened the door and let it close. It was slightly slower, but still quite firm.
They repeated the quarter-turn adjustment, making a total of three turns clockwise. After the third adjustment, the door now closed smoothly, without any slamming sound, and stopped a few inches from the frame.
However, they noticed that in this new speed, the door wasn’t quite reaching the latch plate. It would stop a tiny bit short. So, they then turned to the “Latching Speed” screw.
This screw controls the final few inches of closing. They turned the “Latching Speed” screw clockwise by a quarter turn. Testing again, the door now closed at a pleasant pace and firmly latched into the strike plate with a satisfying click.
The cafe owner was happy with the result, having easily fixed the door closer without needing to call a technician.
When to Consider Replacing Your Hinges
While adjustments can fix many common issues, sometimes the hinge is simply worn out or was never the right type for the door. If you find that even after multiple attempts to adjust, the hinge still doesn’t function correctly, or if it makes excessive noise that lubrication doesn’t fix, it might be time for a replacement.
Signs that replacement might be necessary include:
- Rust or corrosion that significantly impedes movement.
- Cracks or bends in the hinge components.
- Constant squeaking or grinding noises even after lubrication.
- The door sagging or not hanging straight because the hinge is failing.
- The closer mechanism being completely unresponsive to adjustments.
- The hinge being undersized for the door’s weight, causing strain and poor performance.
Replacing a hinge is often a straightforward process, similar to installing a new one. Make sure to get a hinge that is the same size and type, or an upgraded model if needed, to match the door and frame specifications.
Advanced Adjustments and Considerations
For certain types of spring-loaded hinges, especially those found on higher-end doors or in commercial settings, there might be more nuanced adjustments available. Understanding these can lead to a more perfectly balanced door operation.
Adjusting the Spring Tension on Gate Hinges
Many garden gate hinges and some lighter screen door hinges feature a prominent spring coil. The tension of this spring can usually be adjusted. This is often done by means of a threaded rod that passes through the center of the spring.
Nuts are threaded onto this rod, which compress or extend the spring when tightened or loosened.
To increase spring tension (making the door close more forcefully), you would typically tighten the nuts closest to the spring coils. To decrease tension, you would loosen these nuts. It’s important to ensure the nuts are equally tightened on both sides of the spring mechanism, if applicable, to maintain balance.
A gate that doesn’t close firmly in the wind is a prime candidate for increased spring tension. Conversely, a gate that’s difficult to open might need its tension reduced.
Here’s a sample scenario for adjusting gate hinges:
- Observe the gate’s closing behavior. Does it swing shut slowly and require a push to latch?
- Locate the spring mechanism on the hinge. You should see a threaded rod and nuts.
- Use a wrench to tighten the nuts that compress the spring by about one full turn. Ensure you tighten them evenly if there are multiple nuts.
- Test the gate. It should now close with more authority.
- If it’s still too weak, tighten the nuts another quarter turn. If it becomes too stiff, loosen them slightly.
Pressure-Regulated Doors
Some heavy-duty commercial doors might have closers with pressure regulation. This ensures that even if the door is forced open with significant effort (e.g., by a gust of wind), the closer can still manage the closing speed and prevent slamming. These systems are more complex and usually involve specialized knowledge to adjust.
If you have such a system and are experiencing issues, it’s often best to consult the manufacturer’s manual or a professional.
Understanding Door Weight and Size
A critical factor often overlooked is matching the door closer to the door’s specifications. Door closers are rated for specific door weights and widths. Using a closer that is too weak for a heavy or wide door will result in poor performance, regardless of adjustment.
It may not close at all, or it might close too quickly because the spring is maxed out.
Similarly, a closer that is too powerful for a light door can make it difficult to open and might still slam despite adjustments. Check the manufacturer’s specifications for your door closer. Typically, this information is stamped on the closer body or can be found in its manual.
According to industry standards, residential exterior doors (which can weigh between 50-100 pounds) and interior doors (20-50 pounds) require closers with different pressure ratings. Commercial doors can weigh upwards of 150 pounds or more and require significantly more robust closers.
Here is a simple table illustrating typical closer ratings:
| Door Type | Approximate Weight | Typical Closer Size |
|---|---|---|
| Interior Residential Door | 20-50 lbs | Size 1 or 2 |
| Exterior Residential Door | 50-100 lbs | Size 2 or 3 |
| Commercial Interior Door | 100-150 lbs | Size 3 or 4 |
| Commercial Exterior Door | 150-200+ lbs | Size 4 or 5 |
If your door is not performing well, and you’ve tried adjusting it without success, check if the closer is appropriately sized for your door. If not, replacing it with the correct size is the most effective solution.
Environmental Factors Affecting Hinges
Environmental conditions can also play a role in how your spring-loaded hinges perform. Extreme temperatures can affect the viscosity of the hydraulic fluid in door closers. In very cold weather, the fluid can become thicker, making the door close more slowly.
In very hot weather, it can become thinner, potentially causing the door to close faster.
Humidity can also affect some types of hinges, particularly those with exposed metal parts that can rust or corrode. Regular cleaning and lubrication can help mitigate these effects. For outdoor hinges, using weather-resistant models and applying protective coatings can prolong their life and ensure consistent performance.
Salt air, common in coastal regions, is particularly corrosive to metal. If you live in such an area, opt for hinges made from stainless steel or other corrosion-resistant materials. Regular inspection and maintenance are key to preventing issues caused by environmental exposure.
Frequently Asked Questions
Question: How do I know which screw adjusts the speed and which adjusts the latch on my door closer?
Answer: Typically, screws are labeled, or there are arrows indicating their function. One screw usually controls the main sweep speed, and another controls the final latching speed. If labels are missing, try making small adjustments to one screw at a time and test the door’s closing action to see its effect.
Question: My door closes too fast and slams shut. What should I do?
Answer: This means the closing speed is too high. You need to slow it down. Look for the speed adjustment screw (often labeled “Sweep Speed” or similar) and turn it clockwise in small increments.
Test the door after each small adjustment until it closes smoothly without slamming.
Question: The door doesn’t close all the way or doesn’t latch. How can I fix this?
Answer: This usually means the latching force is too weak. Find the latch adjustment screw (often labeled “Latching Speed” or “Latch”) and turn it clockwise in small increments. This will make the door close more firmly in the last few inches of its travel, helping it reach the strike plate and latch properly.
Question: Can I adjust a simple spring hinge on my screen door?
Answer: Yes, many simple spring hinges have a visible spring and a threaded rod with nuts. You can adjust the spring tension by tightening or loosening these nuts. Tightening them increases tension, making the door close more forcefully.
Loosening them decreases tension.
Question: How often should I lubricate my spring-loaded door hinges?
Answer: For internal hydraulic closers, lubrication is generally not required unless there’s a specific noise issue that points to it. For external spring hinges, especially those on screen doors or gates, lubricating them every 6-12 months with a light oil can prevent squeaking and ensure smooth operation.
Summary
Learning How to Adjust Spring-Loaded Door Hinges Easily empowers you to maintain your doors. You’ve learned about different hinge types, the tools you’ll need, and how to adjust closing speed and latching force. You also explored advanced features like backcheck and troubleshooting common problems.
By following these steps, you can ensure your doors close smoothly, quietly, and reliably, improving both convenience and safety.