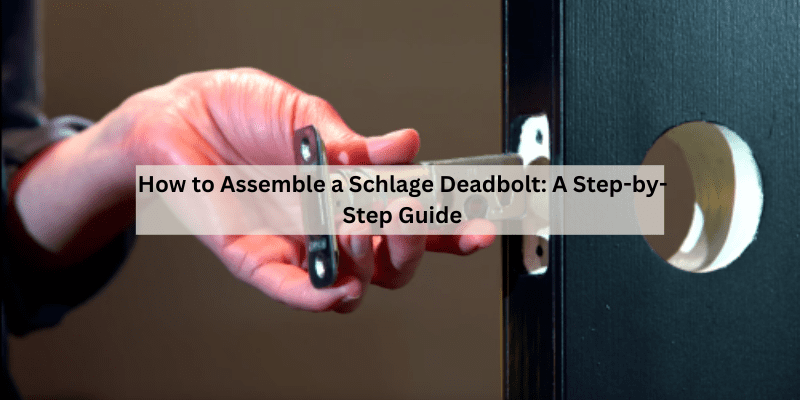
How to Assemble a Schlage Deadbolt: A Step-by-Step Guide
Hey there! So, you’re looking to install a Schlage deadbolt and wondering how to get it done right? I get it—upgrading your home’s security with a new deadbolt can feel like a big deal, especially if you’re new to DIY projects. A few years back, I decided to replace the old, wobbly lock on my front door with a Schlage deadbolt, and let me tell you, it was easier than I expected! I’ve learned a lot along the way, from figuring out the parts to troubleshooting little hiccups.
In this article, I’m going to walk you through how to assemble a Schlage deadbolt step by step, sharing tips and tricks I picked up from my own experience. Whether you’re a first-timer or a seasoned DIYer, this guide is written in simple, friendly language for folks across the USA who want to boost their home security. Let’s dive in and get that deadbolt installed like a pro!
Why Choose a Schlage Deadbolt?
Let’s start with why I picked a Schlage deadbolt in the first place. Schlage is a trusted name in home security, and their deadbolts are known for being tough, reliable, and easy to install. When I moved into my house, the old lock on my front door was flimsy, and I wanted something sturdy to keep my family safe. Schlage deadbolts come in different grades, like Grade 1 or Grade 2, which means they’re built to withstand a lot of force. I also loved that they offer both single-cylinder (keyed on the outside, thumbturn on the inside) and double-cylinder (keyed on both sides) options, so you can pick what fits your needs.
I went with a single-cylinder B60 model because it’s perfect for a front door—easy to lock from the inside with a thumbturn and secure with a key from the outside. Plus, Schlage’s designs look sleek and modern, which was a nice bonus for my home’s curb appeal. Knowing I was investing in a lock that’s been around for decades gave me peace of mind. If you’re looking to upgrade your door’s security, a Schlage deadbolt is a solid choice.
Tools and Materials You’ll Need
Before we get into the assembly, let’s talk about what you’ll need. I learned the hard way that having everything ready makes the process so much smoother. When I started my first installation, I was scrambling to find a screwdriver halfway through! Here’s what you’ll need to assemble a Schlage deadbolt:
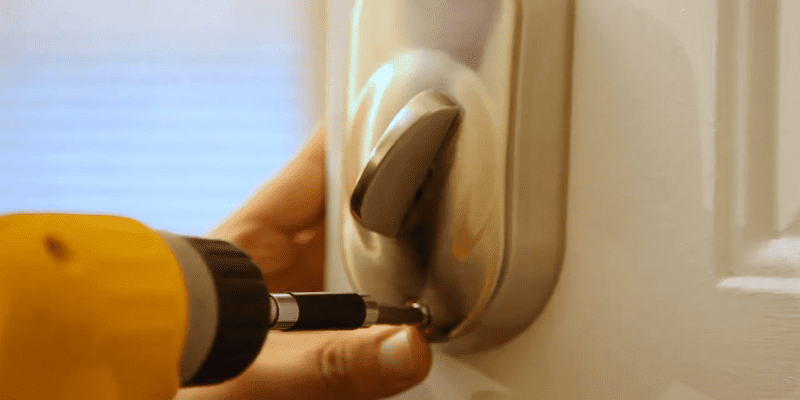
- Phillips screwdriver (#2): This is for tightening the screws. Don’t use a power drill—it can strip the screws and mess up your lock.
- Tape measure: To check your door’s measurements and make sure everything lines up.
- Pencil: For marking spots if you need to adjust anything.
- Schlage deadbolt kit: This includes the outside housing, inside thumbturn, bolt, faceplate, strike plate, reinforcement plate (optional), and screws.
- Optional tools: A flathead screwdriver, hammer, or wood block if you need to make minor adjustments to the door or frame.
I always double-check the kit to make sure all the parts are there. The Schlage box usually comes with a handy checklist, so you don’t miss anything. If your door isn’t pre-drilled, you might need a drill and hole saw, but most modern doors are already set up for standard deadbolts like Schlage’s.
Understanding the Parts of a Schlage Deadbolt
Okay, let’s break down the parts of the deadbolt so you know what you’re working with. When I opened my Schlage deadbolt box, I was a little overwhelmed by all the pieces, but once I understood what each one did, it was like solving a simple puzzle. Here’s what you’ll find in the kit:
| Part | What It Does |
|---|---|
| Outside Housing | Goes on the exterior side of the door where you insert the key. |
| Inside Thumbturn | Goes on the interior side and lets you lock or unlock the door without a key. |
| Bolt | The metal piece that slides into the door frame to lock the door. |
| Faceplate | A metal plate that covers the bolt on the edge of the door (rectangular or round). |
| Strike Plate | Attaches to the door frame and holds the bolt in place for extra security. |
| Reinforcement Plate | An optional piece that strengthens the door frame (great for added security). |
| Screws | Short screws for the bolt and faceplate; long screws for connecting the housing. |
When I first looked at all these parts, I thought, “How do these fit together?” But don’t worry—it’s straightforward once you start. The key is to take it one step at a time.
Preparing Your Door for Installation
Before you start assembling, you need to make sure your door is ready. I learned this the hard way when I tried installing my deadbolt on a door that wasn’t properly aligned. The lock didn’t work smoothly, and I had to start over. Here’s how to prep your door:
First, check if your door has a pre-drilled hole for the deadbolt. Most modern doors have a 2-1/8-inch crossbore (the big hole for the lock) and a 1-inch edge bore (for the bolt). If your door doesn’t have these, you’ll need to drill them using a template, which Schlage usually includes in the box. I recommend measuring twice to avoid mistakes—trust me, I’ve mismeasured before, and it’s a pain to fix!
Next, make sure the door and frame are aligned. Close the door and see if it sits flush against the frame. If it’s crooked or sticks, the deadbolt might not slide smoothly. I had to sand down a small part of my door frame to get a perfect fit. Finally, remove any old deadbolts or hardware from the door to start fresh.
Step-by-Step Assembly of a Schlage Deadbolt
Now, let’s get to the fun part—putting it all together! I’ll walk you through the steps I followed to assemble my Schlage deadbolt. It took me about 20 minutes the first time, and now I can do it in under 10. Here’s how it’s done:
Step 1: Install the Bolt
Start with the bolt, which is the part that locks the door. Take the bolt and slide it into the 1-inch hole on the edge of the door. The bolt usually comes with a rectangular faceplate already attached, but if your door needs a round drive-in faceplate, swap it out now. I had to use the rectangular one for my door, which fit perfectly.
Secure the bolt with the two short screws provided. I made sure to tighten them snugly but not too hard to avoid stripping. Once the bolt is in, test it by pushing it in and out with your finger—it should move smoothly.
Step 2: Attach the Outside Housing
Next, take the outside housing (the part with the keyhole) and position it on the exterior side of the door. The Schlage logo should face up. There’s a tailpiece (a long, flat piece) that sticks out from the housing. You need to slide this tailpiece through the slot in the bolt. This was a little tricky for me at first because the tailpiece has to line up just right.
Some Schlage deadbolts have a Snap and Stay bracket, which holds the housing in place while you work. My model didn’t, so I held it steady with one hand. If your crossbar is 1-1/2 inches instead of 2-1/8 inches, you might need to remove the bracket first—check the instructions for your specific model.
Step 3: Install the Inside Thumbturn
Now, go to the inside of the door and grab the thumbturn. The slot in the thumbturn needs to align with the tailpiece from the outside housing. I found it helpful to wiggle the thumbturn a bit to get it to slide on smoothly. Once it’s aligned, secure it with the two long screws provided. These screws go through the thumbturn, into the outside housing, and hold everything together.
I made the mistake of tightening the screws too much the first time, which made the thumbturn stiff. Just tighten them until they’re snug, and you’re good.
Step 4: Attach the Strike Plate
The strike plate goes on the door frame, where the bolt slides in to lock the door. First, close the door and mark where the bolt hits the frame. Then, place the strike plate over that spot and screw it in with the short screws. If your kit includes a reinforcement plate, install it first for extra strength—I did this for my front door, and it feels rock-solid.
I had to adjust my strike plate slightly because the bolt was catching on the frame. A little sanding and repositioning fixed it right up.
Step 5: Test the Deadbolt
Now comes the moment of truth! Close the door and test the deadbolt. Turn the thumbturn to lock and unlock it, then try the key from the outside. The bolt should slide smoothly without dragging or sticking. When I tested mine, it was a little stiff at first, so I loosened the screws on the thumbturn slightly, and it worked like a charm.
If the bolt doesn’t move easily, double-check the alignment of the housing and strike plate. Sometimes, a small tweak makes all the difference.
Troubleshooting Common Issues
Even with a straightforward process, things can go wrong. Here are some issues I ran into and how I fixed them:
- Stiff Thumbturn: If the thumbturn is hard to turn, the tailpiece might not be aligned properly. I took the thumbturn off and made sure the tailpiece was fully inserted into the bolt’s slot.
- Bolt Drags or Sticks: This usually means the door or strike plate is misaligned. I had to adjust my strike plate by loosening the screws and shifting it slightly.
- Screws Won’t Tighten: If a screw won’t go in straight or stops halfway, you might have cross-threaded it. I removed the screw, cleaned the threads, and tried again with a manual screwdriver.
- Key Gets Stuck: This happened to me once with a double-cylinder deadbolt. The key wasn’t vertical when I tried to remove it. I turned it back to the vertical position, and it came out easily.
If you’re still having trouble, Schlage’s website has great troubleshooting guides and videos. I watched one when I got stuck, and it cleared things up fast.
Tips for a Smooth Installation
Here are a few tricks I learned to make the process easier:
- Read the Instructions: Schlage includes a detailed guide in the box. I skimmed it at first and missed a key step, so take a moment to read it thoroughly.
- Use a Manual Screwdriver: A power drill might seem faster, but it can strip screws or damage the lock. I stuck with my trusty Phillips screwdriver.
- Check Door Alignment: A misaligned door can make the deadbolt stick. I used a level to check my door before starting.
- Test Before Finishing: Always test the lock before calling it done. It’s easier to fix issues right away than after everything’s tightened down.
- Keep the Key Handy: You’ll need it to test the lock, so don’t misplace it during installation!
Why Proper Assembly Matters
Getting the assembly right isn’t just about making the lock work—it’s about keeping your home safe. A poorly installed deadbolt can be easier to pick or force open, which defeats the purpose. When I installed my Schlage deadbolt, I felt a huge sense of relief knowing my front door was secure. Schlage deadbolts are designed to resist tampering, but only if they’re installed correctly. Taking the time to align everything properly and double-check your work makes all the difference.
I also learned that a good deadbolt is just one part of home security. I added a heavy-duty strike plate and longer screws to my door frame for extra strength. If you live in an area with break-ins, like I did when I first moved in, these little upgrades can give you peace of mind.
Maintaining Your Schlage Deadbolt
Once your deadbolt is installed, a little maintenance goes a long way. I’ve had my Schlage deadbolt for years, and it’s still working perfectly because I take care of it. Here’s what I do:
- Lubricate the Lock: Every six months, I spray a bit of graphite powder or silicone lubricant into the keyhole to keep it smooth.
- Check Screws: Over time, screws can loosen. I check mine every year and tighten them if needed.
- Clean the Keyhole: If the key starts sticking, I use compressed air or a cotton swab with rubbing alcohol to clean out dirt or debris.
- Test Regularly: I lock and unlock the deadbolt every few months to make sure it’s still working smoothly.
A Personal Touch
When I installed my first Schlage deadbolt, I was nervous I’d mess it up. But once I got the hang of it, I felt like a DIY rockstar! There’s something satisfying about knowing you’ve made your home safer with your own hands. I even helped my neighbor install hers a few months later, and we had a good laugh when she got the tailpiece backward on her first try. It’s a simple project that anyone can tackle with a little patience.
Conclusion
Assembling a Schlage deadbolt is a straightforward project that can make a big difference in your home’s security. From prepping your door to testing the final lock, each step is manageable if you take your time and follow the process. I remember the pride I felt when I turned the key in my new deadbolt and heard that solid “click” of the bolt sliding into place. It’s not just about installing a lock—it’s about protecting your home and feeling confident every time you walk through the door. So, grab your screwdriver, pop open that Schlage box, and get started. You’ve got this! And if you hit a snag, just go back to the basics—check your alignment, tighten carefully, and don’t be afraid to laugh at the little mistakes along the way. Here’s to a safer, more secure home!
FAQs
What tools do I need to assemble a Schlage deadbolt?
You’ll need a #2 Phillips screwdriver, a tape measure, and a pencil. The deadbolt kit includes all the parts, like the bolt, housing, and screws. A flathead screwdriver or hammer might help for adjustments.
How long does it take to install a Schlage deadbolt?
It usually takes about 15-30 minutes, depending on your experience. My first time took closer to 30, but now I can do it in under 15 minutes.
Can I install a Schlage deadbolt on any door?
Most modern doors with a 2-1/8-inch crossbore and 1-inch edge bore work fine. If your door isn’t pre-drilled, you’ll need to drill holes using a template.
What if my deadbolt doesn’t lock smoothly?
Check the alignment of the bolt and strike plate. Loosen the screws and adjust them slightly. Also, make sure the tailpiece is properly aligned with the bolt.
Can I use a power drill to install the deadbolt?
It’s not recommended. A power drill can strip screws or damage the lock. I always use a manual screwdriver for better control.