How To Build A Hearth For A Wood Burning Fireplace: Pro
Building a hearth for a wood-burning fireplace involves preparing the subfloor, constructing a sturdy frame, pouring a non-combustible base like concrete, and finishing with fire-resistant materials such as tile, brick, or stone. Always follow local building codes and ensure the hearth extends far enough from the fireplace opening for safety.
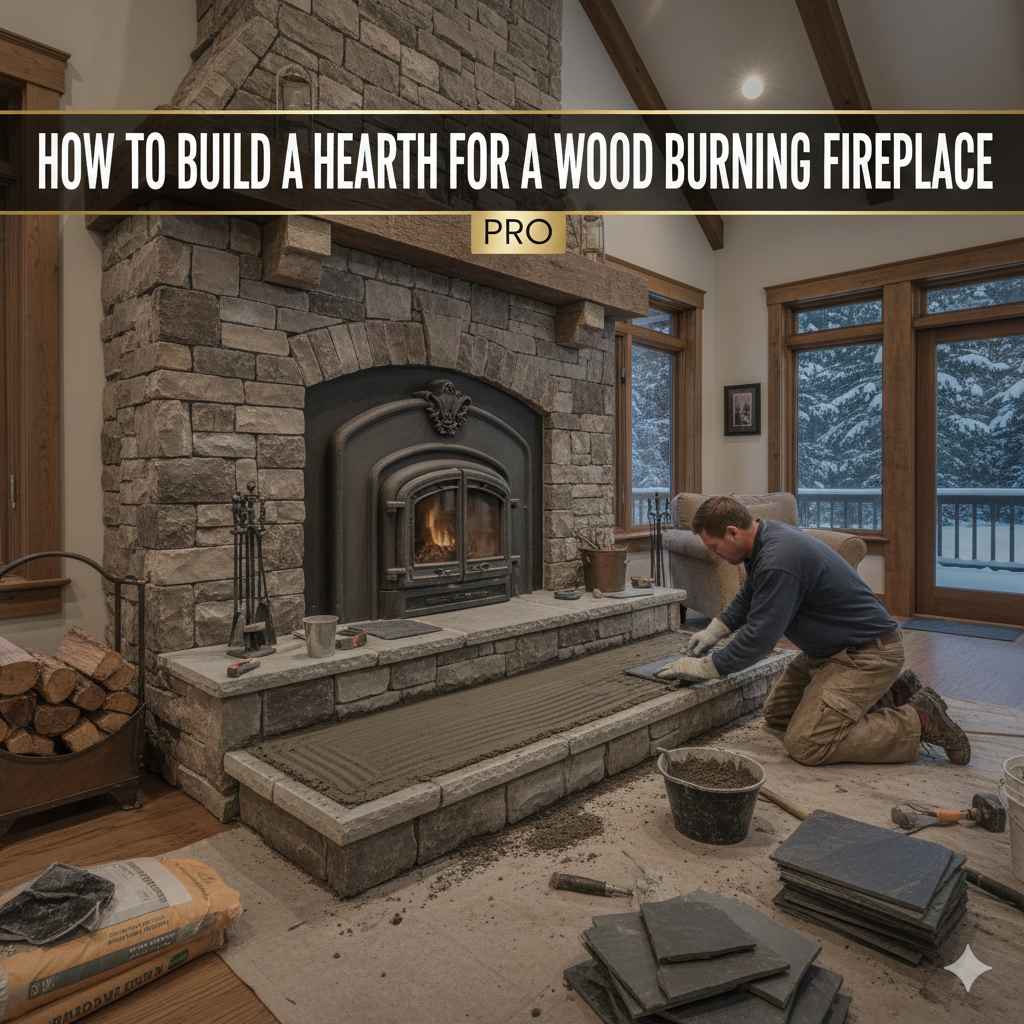
Hello, friend! Md Meraj here. Thinking about building a hearth for your wood-burning fireplace? It might seem like a huge job, but I promise it’s something you can do. A hearth is more than just a pretty base; it’s a crucial safety feature that protects your home from sparks and heat. It adds warmth, character, and peace of mind.
Feeling a little nervous? That’s completely normal. We’re going to break this project down into simple, clear steps. I’ll guide you through everything, from picking materials to laying the final stone. You’ve got this! Let’s get started and build something beautiful and safe together.
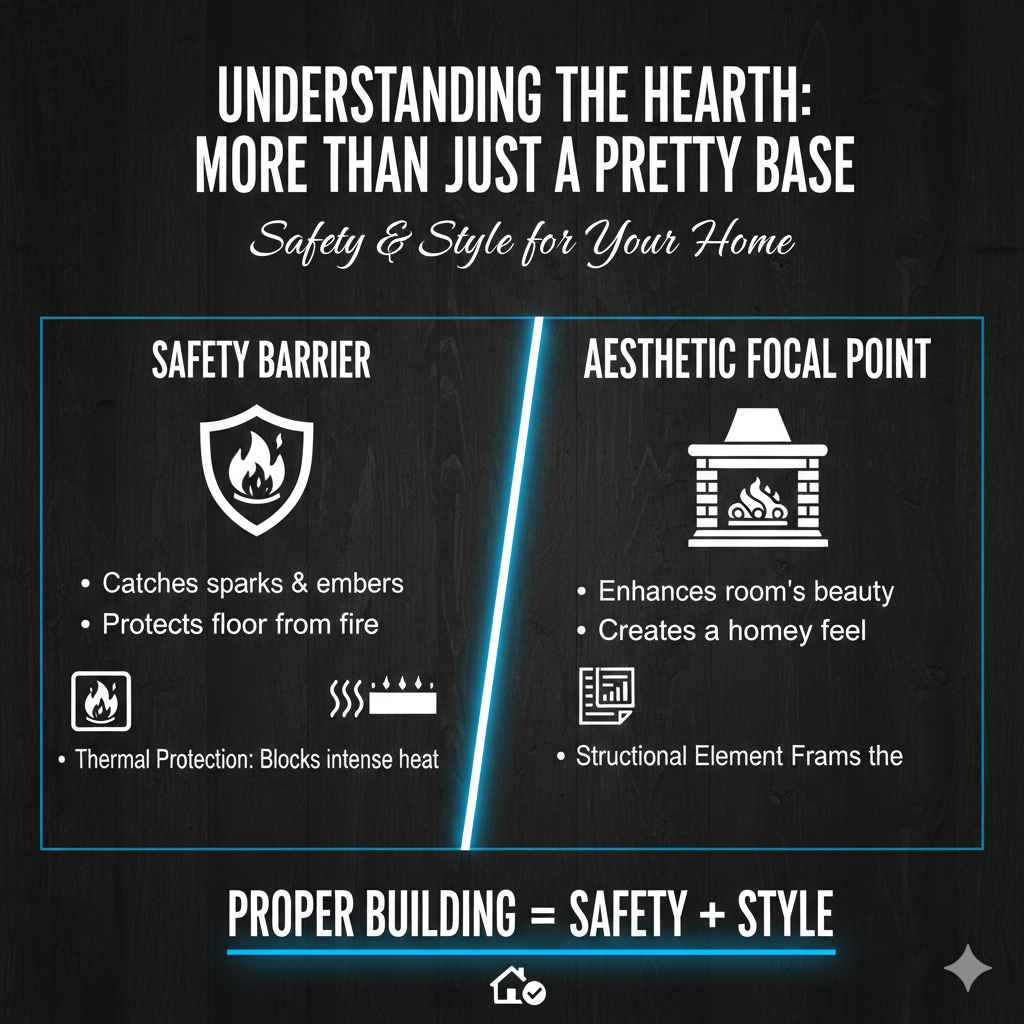
Understanding the Hearth: More Than Just a Pretty Base
Before we grab our tools, let’s talk about what a hearth really does. It has two very important jobs. First and foremost, it’s a safety barrier. A wood-burning fireplace can send sparks and embers flying out when you open the door. The hearth provides a non-combustible surface where these fiery bits can land and burn out harmlessly, protecting your floor and home from fire.
Second, it protects your floor from the intense radiant heat coming from the firebox. Without a proper hearth, this constant heat could damage or even ignite the flooring underneath. Of course, a hearth also adds to the beauty of your fireplace. It creates a focal point in the room, a frame for the cozy fire that makes a house feel like a home. Building one correctly means you get both safety and style.
Safety First: Understanding Hearth Codes and Dimensions
This is the most important part of the project. Building codes aren’t just suggestions; they are rules designed to keep you and your family safe. While codes can vary slightly by location, the guidelines from the National Fire Protection Association (NFPA) provide a strong foundation for what is required.
You MUST check with your local building department for the specific requirements in your area before you begin. They will give you the exact dimensions and material rules you need to follow. Failure to do so can be dangerous and may cause problems if you ever sell your home.
Generally, a hearth is made of two parts: the hearth extension and the hearth itself (the area inside the firebox). We are focusing on the hearth extension, the part that sits on your floor in front of the fireplace.
Here are some common minimum requirements to give you an idea of what to expect:
| Hearth Dimension | Requirement for Fireplace Opening (Less than 6 sq. ft.) | Requirement for Fireplace Opening (6 sq. ft. or more) |
|---|---|---|
| Extension in Front | At least 16 inches | At least 20 inches |
| Extension to Each Side | At least 8 inches | At least 12 inches |
| Hearth Thickness | At least 2 inches of solid, non-combustible material (e.g., concrete) | At least 2 inches of solid, non-combustible material (e.g., concrete) |
Remember, these are just general guidelines. Your local code is the final word!
Choosing Your Hearth Materials: A Look at Your Options
The fun part is choosing the look of your hearth! The key rule is that your material must be non-combustible. This means it won’t catch fire. Luckily, you have many beautiful options.
- Brick: A classic and timeless choice. Bricks are durable, easy to find, and offer a traditional, rustic look. They hold up incredibly well to heat and are relatively easy for a beginner to work with.
- Ceramic or Porcelain Tile: A very versatile option with endless colors, patterns, and styles. Tile is easy to clean and can match any home decor. Make sure you choose a floor-rated tile that can handle the weight and heat.
- Natural Stone (Slate, Granite, Marble): Stone offers a beautiful, high-end look. Slate is a popular choice for its rustic, non-slip texture. Granite is extremely durable and polished, while marble is elegant but can be more prone to staining. Stone can be heavier and more expensive.
- Concrete: A modern and industrial option. You can pour a concrete slab and leave it as is, or stain and polish it for a unique finish. It is extremely durable and fireproof.
For the base of your hearth—the part under your beautiful finish material—you need a solid, non-combustible foundation. The most common choices are either a poured concrete slab or cement backer board. We’ll cover how to build this base in the steps below.
Gathering Your Tools and Supplies
Having everything ready before you start makes the process so much smoother. Here is a checklist of what you’ll likely need. Adjust it based on the finish material you choose.
Tools:
- Tape Measure
- Pencil & Carpenter’s Square
- Safety Glasses & Gloves
- Circular Saw or Jigsaw
- Drill with Screw Bits
- Level (4-foot is ideal)
- Trowel (notched for tile/stone, or a finishing trowel for concrete)
- Bucket for mixing mortar/concrete
- Grout Float
- Large Sponge and a Bucket of clean water
- Caulking Gun
Materials:
- 2×4 Lumber (for the frame)
- Construction Screws (2.5-inch)
- Cement Backer Board (like Durock or HardieBacker) and special screws
- Pre-mixed Concrete Bag (if pouring a base)
- Your chosen finish material (bricks, tiles, stone)
- Thin-set Mortar or Masonry Mortar
- Grout (sanded or unsanded, depending on your material)
- Grout Sealer
- Fire-resistant Caulk
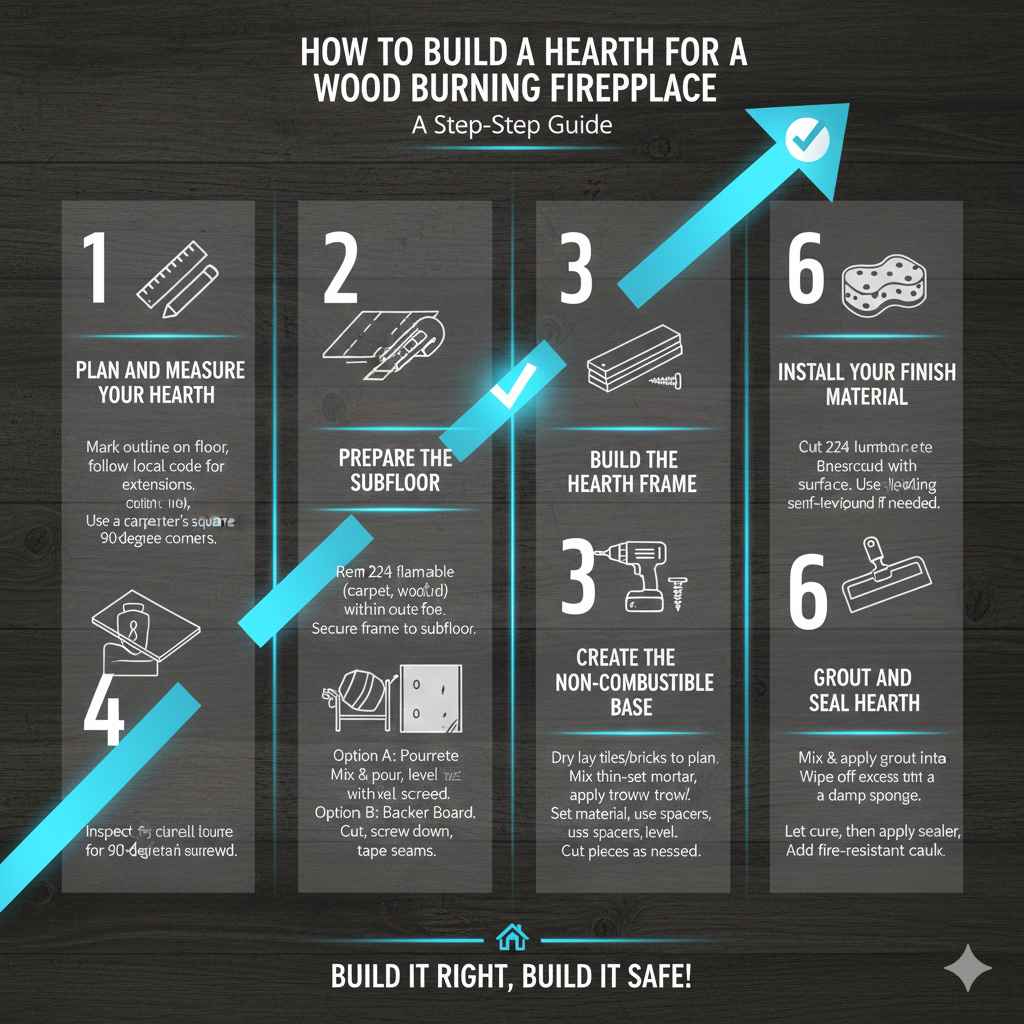
How to Build a Hearth for a Wood Burning Fireplace: A Step-by-Step Guide
Alright, it’s time to get to work! We’ll take this one step at a time. Read through all the steps before you begin so you know what’s coming next. Remember to work safely and double-check your measurements.
Step 1: Plan and Measure Your Hearth
First, figure out the exact size and shape of your hearth. Use your tape measure and pencil to mark the outline on the floor. Remember to follow your local code for the required extensions in front of and to the sides of the fireplace opening.
Use a carpenter’s square to make sure your corners are perfect 90-degree angles. This is a good time to double-check that your layout is centered with the fireplace and looks good in the room. This simple step prevents big headaches later.
Step 2: Prepare the Subfloor
You cannot build a hearth directly on top of flammable flooring like carpet, vinyl, or hardwood. You must remove the existing flooring within the marked outline of your hearth.
- Cut the Flooring: Use a utility knife for carpet or a circular saw set to the depth of the flooring for hardwood or laminate. Be very careful not to cut into the subfloor below.
- Remove the Flooring: Pry up the flooring inside your outline. For carpet, you may need to pull it off tack strips. For wood, you may need a pry bar.
- Inspect the Subfloor: Once the area is cleared, inspect the plywood or concrete subfloor. It should be clean, level, and in good condition. If it’s not level, you may need to use a self-leveling compound to create a flat surface. This is critical for getting your hearth to sit flat.
Step 3: Build the Hearth Frame
Your hearth needs a sturdy frame to contain the base. We’ll use 2×4 lumber for this. This frame will define the shape and height of your hearth.
- Cut the Lumber: Measure and cut your 2x4s to match the perimeter of your hearth outline. For example, if your hearth is 60 inches wide and 20 inches deep, you’ll need two 60-inch pieces and two 17-inch pieces (to fit between the longer ones).
- Assemble the Frame: Arrange the cut 2x4s on the subfloor in a rectangle. Use your drill and construction screws to join them at the corners.
- Secure the Frame: Once your frame is built and square, screw it directly into the subfloor. This ensures it won’t move when you add the concrete or backer board.
Step 4: Create the Non-Combustible Base
Now you need to fill the frame with a solid, fireproof base. You have two excellent options for this.
Option A: Poured Concrete (The Strongest Method)
This method creates an incredibly strong, seamless base. It’s the traditional way to build a hearth.
- Mix the Concrete: In a bucket or wheelbarrow, mix your bag of pre-mixed concrete with water according to the manufacturer’s directions. You want a consistency like thick oatmeal—not too soupy, not too dry.
- Pour and Spread: Pour the mixed concrete into your wooden frame. Use a small shovel or trowel to spread it evenly, making sure it gets into all the corners.
- Level the Surface: Take a straight piece of 2×4 (called a screed) that is longer than the width of your frame. Rest it on the edges of the frame and slide it back and forth in a sawing motion to level the surface of the concrete.
- Let it Cure: Concrete needs time to cure and become hard. This can take several days. Follow the instructions on the bag, but plan for at least 48-72 hours before you can walk on it or do any more work.
Option B: Cement Backer Board (The Simpler Method)
If mixing and pouring concrete seems like too much, using cement backer board is a great alternative. It’s cleaner, faster, and much lighter.
- Cut the Board: Measure the inside of your frame and cut the cement backer board to fit using a utility knife (score and snap) or a saw with a carbide blade. You may need multiple pieces.
- Secure the Board: Lay the backer board inside the frame. Use special cement board screws to fasten it to the subfloor every 6-8 inches.
- Tape the Seams: If you used multiple pieces, apply fiberglass mesh tape over the seams and cover them with a thin layer of thin-set mortar. This creates a single, solid surface. Your goal is to meet the required thickness from your local building code, so you may need to install multiple layers of backer board.
Step 5: Install Your Finish Material
With your solid base ready, it’s time for the final look! The process is similar whether you are using tile, brick, or stone.
- Plan Your Layout: Before mixing any mortar, do a “dry lay.” Place your tiles or bricks on the hearth base to see how they fit. This allows you to plan your cuts and ensure you have an even layout with consistent spacing.
- Mix Your Mortar: Mix your thin-set mortar (for tile/stone) or masonry mortar (for brick) according to the directions. Only mix as much as you can use in about 20-30 minutes, as it will start to harden.
- Apply the Mortar: Using your notched trowel, spread a layer of mortar onto a small section of the hearth base. The notches create ridges that help the tiles or bricks adhere properly.
- Set the Material: Gently press each tile, brick, or stone into the mortar with a slight twisting motion. Use tile spacers if you are using tile to keep the gaps (grout lines) consistent. Use your level frequently to make sure everything is flat and even.
- Cut as Needed: You will likely need to cut some pieces to fit around the edges. A wet tile saw is best for this, and you can often rent one from a local home improvement store.
- Let it Set: Allow the mortar to cure completely. This usually takes at least 24-48 hours. Do not walk on the hearth during this time.
Step 6: Grout and Seal Your New Hearth
The final step is to fill in the gaps between your pieces. This locks everything in place and gives your hearth a finished look.
- Mix the Grout: Mix your grout with water until it has a smooth, peanut butter-like consistency.
- Apply the Grout: Using a grout float, spread the grout over the surface of the hearth. Hold the float at a 45-degree angle and press the grout firmly into all the gaps. Work in small sections.
- Clean Off the Excess: After about 15-20 minutes, the grout will start to haze over. Use a large, damp sponge to wipe the excess grout off the surface of your tiles or bricks. Rinse your sponge frequently in a bucket of clean water. Be careful not to pull the grout out of the joints.
- Let it Cure: Let the grout cure for the time recommended by the manufacturer, typically 48-72 hours.
- Seal the Hearth: Once fully cured, apply a quality grout and tile sealer. This protects your hearth from stains and makes it easier to clean. Apply it with a small brush or applicator as directed.
Finally, apply a bead of fire-resistant caulk where the hearth meets the wall and the floor to seal any small gaps.
Frequently Asked Questions About Building a Hearth
Here are some common questions I get from folks just like you. I hope these help clear things up!
What is a hearth made of?
A hearth must be made of non-combustible materials. The base is typically concrete or cement backer board. The finished surface can be brick, tile, slate, granite, marble, or other natural stones.
How thick does a hearth need to be for a wood stove?
For most wood stoves and fireplaces, the hearth must be at least 2 inches thick. This thickness is for the structural, non-combustible base, not including the finish material. Always confirm with your local building code and the stove manufacturer’s instructions.
Can you put a wood stove directly on a concrete floor?
Yes, a concrete slab floor can serve as the hearth itself, as long as it is thick enough and extends the required distance from the stove. Many people choose to add a decorative hearth pad on top of the concrete for aesthetic reasons.
How far should a hearth extend from a fireplace?
It depends on the size of your fireplace opening. For smaller openings (less than 6 square feet), the hearth should extend at least 16 inches in front and 8 inches to each side. For larger openings, it should be 20 inches in front and 12 inches to the sides. Check your local code for the exact requirements.
Do I need a permit to build a fireplace hearth?
In many areas, yes. Because it is a critical fire safety feature, modifying or building a hearth often requires a building permit and an inspection. It’s always best to call your local building department before you start to be sure.
What is the easiest material for a DIY hearth?
Large format porcelain or ceramic tiles are often the easiest for a beginner. They cover a large area quickly, are easy to set, and come in countless styles. Building the base with cement backer board instead of poured concrete is also a simpler, less messy option.
Can I build a hearth on top of carpet or wood flooring?
No, never. You must remove all combustible flooring down to the subfloor before building your hearth. A hearth must be built on a solid, non-combustible foundation to be safe.
Your Beautiful and Safe Hearth is Complete!
And there you have it! Take a step back and admire your work. You’ve not only added a beautiful feature to your home but also a critical safety element that will protect your family for years to come. You followed the steps, you put in the effort, and you created something solid and lasting with your own two hands.
Building a hearth is a rewarding project that combines practical skills with a touch of creativity. Remember the confidence you feel right now. You can tackle these kinds of projects. Just take them one step at a time, prioritize safety, and don’t be afraid to ask for help. Now, go enjoy that cozy fire—you’ve earned it!