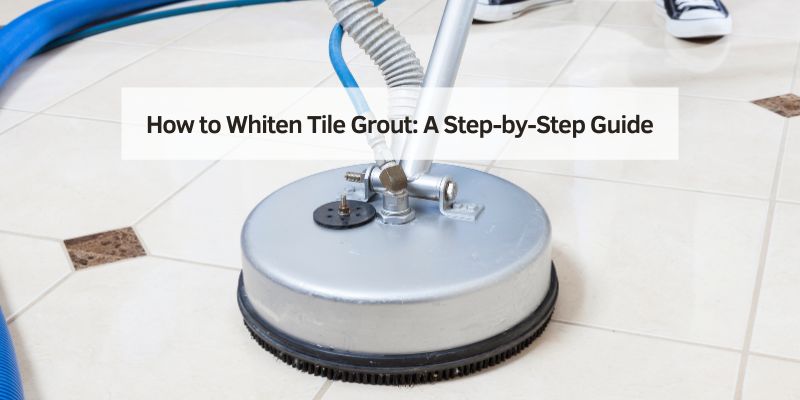
How to Whiten Tile Grout Instantly (Fast Pen Method + 4 More)
The fastest way to whiten tile grout instantly is a grout paint pen – it covers stains in one coat with no scrubbing, bleaching, or waiting, touch-dry in about 30 minutes. Deep cleaning methods like oxygen bleach or steam still work better for genuinely dirty grout, but they take longer and require real scrubbing. This guide covers the instant pen method, 4 real cleaning methods, and how to keep grout white afterward. See our full bathroom fixtures hub for more.
The Fastest Grout Whitening Solution: A Grout Paint Pen
A grout paint pen is the fastest fix when you need results today, not after a weekend of scrubbing. Shake the pen for 2 minutes, prime the tip, then apply in overlapping strokes directly over clean, dry grout – no bleaching or power washing required. Most formulas are touch-dry in about 30 minutes, with a full 2-hour cure for best results.
The tradeoff: a grout pen colors over stains rather than removing them, so it’s a cosmetic fix, not a deep clean. Wipe the grout line clean and fully dry first, or the paint won’t adhere properly. A standard 5mm pen covers up to 60 meters of narrow grout lines – plenty for most bathrooms.
Why Does Grout Get Dirty?
Grout is porous, which means it acts like a sponge. It soaks up dirt, soap scum, mildew, and anything else it comes across. I learned this the hard way when my bathroom grout started looking grimy just a few months after a deep clean. In high-traffic areas like kitchens or bathrooms, spills, foot traffic, and moisture make things worse. Hard water can leave mineral deposits, and mold loves to grow in damp spots like showers. Knowing why grout gets dirty helps you choose the right cleaning method. It’s not just about looks—clean grout also keeps your space healthier by reducing mold and bacteria.
Best Instant Grout Whitening Pick
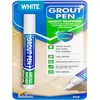
Grout Pen White Tile Grout Paint Marker
The exact pen-style product this guide’s instant method uses – no scrubbing, touch-dry in about 30 minutes.
- Best for: covering stains fast when you need results today
- Why we picked it: narrow 5mm tip, covers up to 60m of grout line
- Main drawback: covers stains rather than removing them – cosmetic, not a deep clean
Compare more grout whitening options
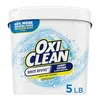 Option 1 OxiClean Oxygen Bleach Powder
|
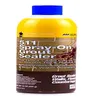 Option 2 Miracle Sealants Grout Sealer
|
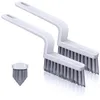 Option 3 V-Shape Grout Cleaning Brush
|
As an Amazon Associate we earn from qualifying purchases.
Gathering the Right Tools and Supplies
Before you start, you’ll need some basic supplies. I’ve tried cleaning grout with whatever I had lying around, and trust me, having the right tools makes a huge difference. Here’s what I recommend keeping on hand:
- Baking soda: A gentle abrasive that’s great for scrubbing stains.
- White vinegar: Cuts through grease and mineral buildup.
- Hydrogen peroxide: Perfect for tackling mold and mildew.
- Oxygen bleach: A powdered cleaner (like OxiClean) that whitens without harsh fumes.
- Old toothbrush or grout brush: For scrubbing those narrow lines.
- Spray bottle: To mix and apply cleaning solutions.
- Microfiber cloths: For wiping away residue.
- Gloves and safety glasses: To protect your hands and eyes from cleaners.
- Bucket: For mixing solutions or soaking cloths.
You can find most of these at your local grocery or hardware store. I always keep a stash under my sink for quick touch-ups. If you want a commercial grout cleaner, look for ones labeled “grout-safe” to avoid damaging your tiles.
Testing Your Cleaning Method
Before you go all-in, test your cleaner on a small, hidden spot. I made the mistake of using a strong bleach solution once, and it discolored some of my grout. Not fun! Mix your solution, apply it to a corner, and let it sit for a few minutes. Wipe it off and check for any damage. This step saves you from bigger headaches later, especially if you have colored or delicate grout.
Cleaning with Baking Soda and Vinegar
This is my go-to method for whitening grout because it’s cheap, safe, and works like a charm. Baking soda and vinegar create a fizzy reaction that lifts dirt and stains. Here’s how I do it:
- Mix a paste of baking soda and water. I use about three parts baking soda to one part water to make it thick but spreadable.
- Spread the paste onto the grout lines with a toothbrush or your finger. Work it into the grout.
- Fill a spray bottle with equal parts white vinegar and water. Spray it over the baking soda paste. You’ll see it fizz—that’s the magic happening!
- Let it sit for 5-10 minutes to loosen the dirt.
- Scrub the grout with a toothbrush. I focus on one small section at a time to avoid wearing myself out.
- Wipe away the paste with a damp microfiber cloth.
- Rinse the area with clean water and dry it with a clean cloth.
This method works great for light to moderate stains. I’ve used it on my kitchen floor, and it brought the grout back to a bright white. If the stains are stubborn, you might need to repeat the process or try something stronger.
Using Hydrogen Peroxide for Tough Stains
When baking soda and vinegar don’t cut it, hydrogen peroxide saves the day. I discovered this when dealing with moldy grout in my shower. Hydrogen peroxide is a mild bleach that kills mold and whitens without the harsh fumes of chlorine bleach. Here’s what I do:
- Pour 3% hydrogen peroxide (the kind you get at the pharmacy) into a spray bottle.
- Spray it directly onto the grout lines. Be generous, but don’t soak the tiles.
- Let it sit for 10-15 minutes. You might see some bubbling as it works on the stains.
- Scrub with a grout brush or toothbrush. I find short, firm strokes work best.
- Wipe away the residue with a damp cloth, then rinse and dry.
I love this method for bathrooms because it tackles mold and mildew without making my eyes water. If you’re dealing with really dark stains, you can mix hydrogen peroxide with baking soda to make a paste for extra scrubbing power.
Oxygen Bleach for Deep Cleaning
Oxygen bleach is my secret weapon for really dirty grout. I used it on my old kitchen backsplash, and the results were amazing. Unlike chlorine bleach, oxygen bleach is color-safe and doesn’t produce strong fumes. Here’s how I use it:
- Mix oxygen bleach powder (like OxiClean) with warm water according to the package instructions. I usually use a small bucket for this.
- Apply the solution to the grout with a sponge or brush. Make sure every line is covered.
- Let it sit for 15-20 minutes to break down stains.
- Scrub with a grout brush. I put on some music to make this part less tedious!
- Rinse thoroughly with clean water and dry with a microfiber cloth.
This method is great for large areas or grout that hasn’t been cleaned in years. Just be patient—it takes a bit of elbow grease, but the results are worth it.
Steam Cleaning for a Hands-Off Approach
If scrubbing isn’t your thing, a steam cleaner can be a game-changer. I borrowed a friend’s steam cleaner for my bathroom tiles, and I was blown away by how easy it was. The hot steam blasts away dirt and kills bacteria without chemicals. Here’s what I learned:
- Use a handheld steam cleaner with a small brush attachment for grout.
- Hold the steamer close to the grout lines and move slowly to let the steam do its work.
- Wipe away loosened dirt with a microfiber cloth as you go.
- Dry the area afterward to prevent water spots.
Steam cleaners aren’t cheap—mine cost about $100—but they’re great for deep cleaning without harsh chemicals. They’re also awesome for people with allergies since they don’t rely on cleaners that might irritate.
Avoiding Common Grout Cleaning Mistakes
I’ve made plenty of mistakes cleaning grout, so let me save you some trouble. First, don’t use too much water. Grout is porous, and soaking it can weaken it over time. I learned this after flooding my bathroom floor during a cleaning spree. Second, avoid abrasive tools like steel wool—they can scratch tiles and damage grout. Stick to nylon brushes or toothbrushes. Finally, don’t mix cleaners like bleach and ammonia. I never did this, but I’ve heard horror stories about toxic fumes. Always read labels and stick to one method at a time.
Sealing Grout to Keep It White
Once your grout is clean, sealing it is the key to keeping it white. I skipped this step for years and regretted it every time the stains came back. A good grout sealer creates a protective barrier that repels water and dirt. Here’s how I seal my grout:
- Make sure the grout is completely clean and dry. I wait at least 24 hours after cleaning.
- Choose a penetrating grout sealer from the hardware store. I like aerosol ones for easy application.
- Apply the sealer with a small brush or applicator, following the grout lines.
- Let it dry for the time specified on the bottle—usually a few hours.
- Wipe away any excess sealer on the tiles with a damp cloth.
I reseal my grout every year or two, depending on how much use the area gets. It’s a small effort that makes a big difference in keeping your grout looking fresh.
Comparing Grout Cleaning Methods
Here’s a quick table to help you choose the best method for your grout:
| Method | Best For | Pros | Cons | Cost |
|---|---|---|---|---|
| Baking Soda & Vinegar | Light to moderate stains | Cheap, safe, easy to find | Requires scrubbing, may need repeats | $0-$5 |
| Hydrogen Peroxide | Mold, mildew, darker stains | Kills bacteria, no harsh fumes | Not as strong for heavy stains | $1-$5 |
| Oxygen Bleach | Heavy stains, old grout | Color-safe, powerful whitening | Takes time, needs rinsing | $5-$10 |
| Steam Cleaning | Deep cleaning, chemical-free | No chemicals, kills bacteria | Expensive equipment, time-consuming | $50-$100+ |
When to Call a Professional
“I had a section of my shower grout that was cracked and crumbling, and no amount of cleaning helped – that’s when I knew it needed a professional, not another scrub session.”
Sometimes, grout is too far gone for DIY methods. If your grout is damaged, discolored beyond repair, or if you’re dealing with persistent mold, a professional can help. They can regrout or replace damaged sections, which costs $500-$1,000 depending on the area. It’s pricey, but it’s better than living with ugly, unhealthy grout. Look for a local tile and grout cleaning service with good reviews to get the job done right.
Preventing Grout Stains in the Future
📊 Mold can begin growing on damp grout within just 24-48 hours — Source: EPA, mold and moisture guide
Keeping grout white is easier if you stay on top of it. I’ve learned a few tricks to prevent stains from coming back. Wipe down tiles after showers to reduce moisture buildup. Use a squeegee or towel—it takes 30 seconds and makes a big difference. In the kitchen, clean up spills right away to avoid grease stains. I also run a dehumidifier in my bathroom during humid months to keep mold at bay.
Regular touch-up cleanings with baking soda or hydrogen peroxide every few months help too. And don’t forget to reseal your grout regularly—it’s like sunscreen for your tiles!
Conclusion
Need results today? Use a grout pen. Have a weekend to spare for a real deep clean? Oxygen bleach or steam cleaning gets there without the cosmetic tradeoff. Either way, seal the grout afterward – it’s the difference between a fix that lasts months and one that lasts years.
FAQs
How often should I clean my tile grout?
Clean your grout every 3-6 months, depending on how much traffic or moisture the area gets. Regular touch-ups keep stains from setting in.
Can I use bleach to whiten grout?
Chlorine bleach can work, but it’s harsh and can damage grout over time. I prefer oxygen bleach or hydrogen peroxide for safer, effective whitening.
Why does my grout keep getting moldy?
Mold grows in damp, poorly ventilated areas. Wipe down tiles after showers, use a dehumidifier, and ensure your bathroom has good ventilation to prevent mold.
How long does grout sealer last?
A good sealer lasts 1-2 years, depending on usage. I reseal my high-traffic areas like bathrooms yearly to keep the grout protected.
Is steam cleaning worth the cost for grout?
If you clean grout often or have allergies, a steam cleaner is a great investment. It’s chemical-free and deep-cleans without scrubbing, but it’s pricier upfront.
Sponsored / affiliate links. As an Amazon Associate I earn from qualifying purchases. I may earn additional commission from eligible campaigns.