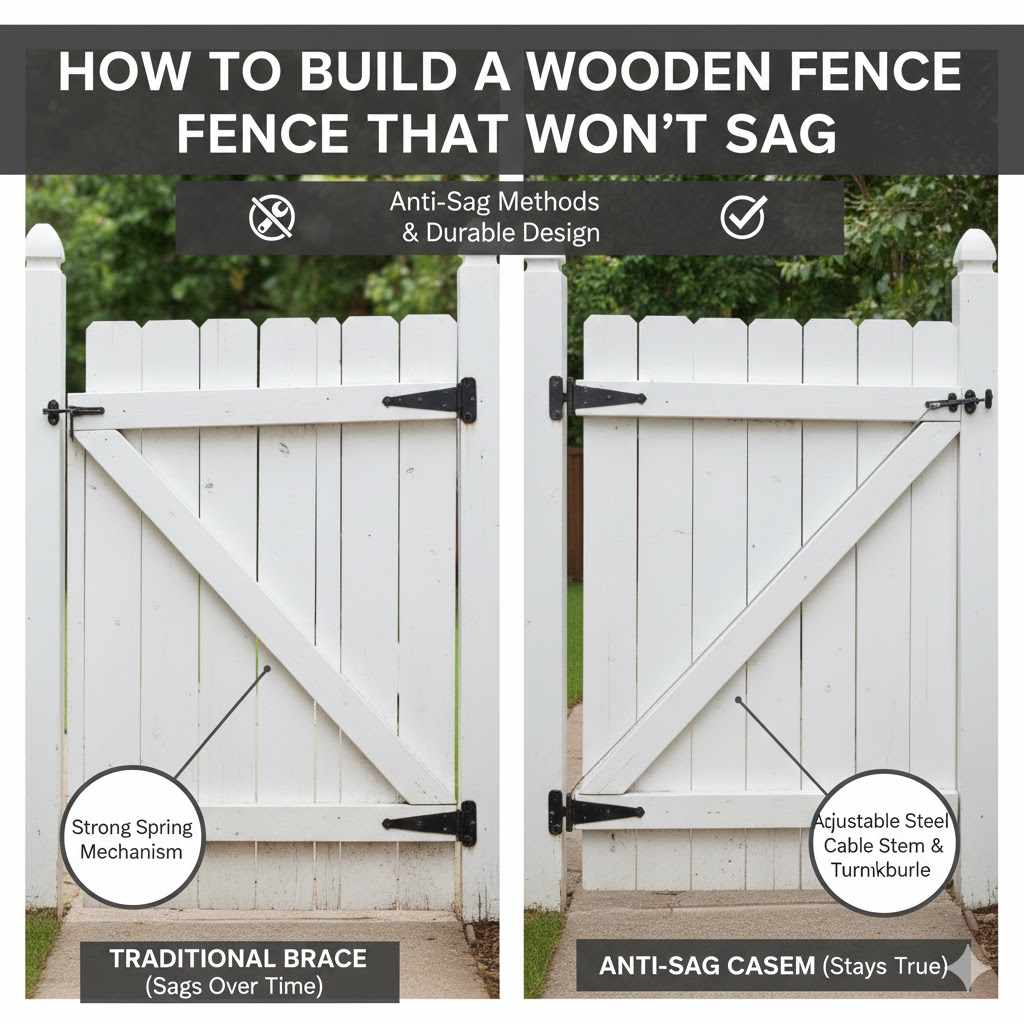
How to Build a Wooden Fence Gate That Won’t Sag
Building a sturdy wooden fence gate that stays straight can feel a bit tricky for many DIYers. It’s easy to end up with a gate that drags on the ground or looks wobbly after a short time. But don’t worry! This guide will show you exactly how to build a wooden fence gate that won’t sag, step by step. We’ll cover everything you need to know to make your gate last and look great for years.
Building a Gate That Stands the Test of Time
This section will walk you through the foundational steps for constructing a wooden fence gate designed for longevity. We’ll focus on understanding the core principles that prevent sagging, ensuring your gate remains functional and attractive. You’ll learn why certain wood choices and joint types are important and how to prepare your materials. Getting these basics right is key to avoiding common gate problems.
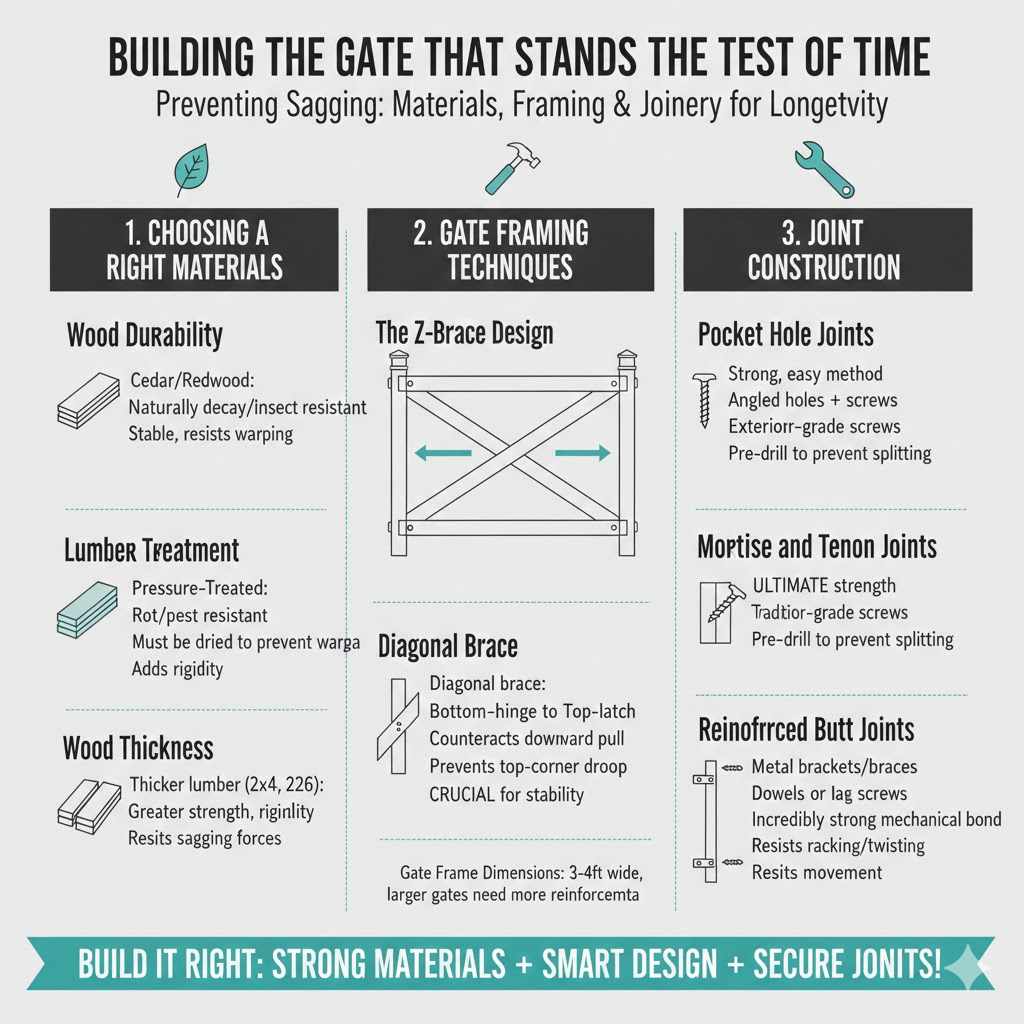
Choosing the Right Materials
Selecting the correct wood is the first critical step in building a gate that won’t sag. Not all wood is created equal when it comes to strength and resistance to warping. Hardwoods like cedar or redwood are excellent choices because they are naturally durable and less prone to swelling or shrinking with changes in humidity. Pressure-treated lumber is another common option, offering good resistance to rot and insects, but it can sometimes warp if not handled properly.
Wood Durability
Hardwoods such as cedar and redwood offer natural resistance to decay and insects. This means your gate will last longer and require less maintenance. Their inherent stability also helps prevent warping, a major cause of sagging.
Lumber Treatment
Pressure-treated lumber is infused with chemicals to protect it from rot and pests. While effective, ensure it is properly dried before construction. Some types of treated lumber can be prone to warping if not supported well.
Wood Thickness
Using thicker lumber for your gate’s frame will provide greater strength and rigidity. A gate frame made from 2x4s or even 2x6s will be far more robust than one made from thinner boards. This thickness helps resist the forces that can cause a gate to sag over time.
Understanding Gate Framing Techniques
The way you build the frame of your wooden fence gate is crucial for its stability. A well-designed frame provides the structural integrity needed to resist the forces of gravity and use. We will explore common framing methods and why they work to keep your gate straight.
The Z-Brace Design
This is a classic and effective method for preventing gate sag. A diagonal brace, often called a “Z-brace” because of its shape, runs from the bottom hinge side of the gate frame to the top latch side. This brace acts like a structural support, counteracting the downward pull on the gate.
The diagonal brace takes on the stress that would otherwise bend the horizontal and vertical pieces of the gate frame. Imagine a square; it can easily be pushed into a parallelogram. But add a diagonal line, and it becomes much more rigid. This is the principle behind the Z-brace in gate construction.
The Diagonal Brace
A simple diagonal brace is often considered the most important element in a sag-free gate. It transfers weight and pressure to the strongest parts of the gate frame, usually the corner posts where the hinges and latch are attached. Without this brace, the weight of the gate itself will eventually cause the top corners to droop.
Gate Frame Dimensions
The size of your gate frame will depend on the opening you need to fill. Standard garden gates might be around 3-4 feet wide. For larger gates, like those for driveways, you may need to reinforce the frame further. Consistent measurements and square cuts are vital for a strong, straight frame.
Joint Construction for Maximum Strength
The way different parts of the gate frame connect is just as important as the materials and overall design. Strong, well-executed joints ensure that the gate holds its shape under stress. We will look at methods that create lasting, stable connections.
Pocket Hole Joints
Pocket holes offer a strong and relatively easy way to join gate frame members. They involve drilling angled holes into one piece of wood and then screwing it into another. This method creates a very secure connection that is less likely to loosen over time than simple butt joints.
When using pocket holes, it’s best to use high-quality exterior-grade wood screws. These screws are designed to withstand moisture and resist rust, which is essential for outdoor projects. Pre-drilling pilot holes can also prevent the wood from splitting, especially when working with hardwoods.
Mortise and Tenon Joints
For the ultimate in strength and durability, mortise and tenon joints are hard to beat. This traditional woodworking technique involves cutting a slot (mortise) in one piece of wood and a corresponding projection (tenon) on another. The tenon fits snugly into the mortise, creating an incredibly strong mechanical bond.
While more time-consuming and requiring specialized tools, mortise and tenon joints provide superior resistance to racking and twisting. They are often used in high-quality furniture and timber framing, and they can make a wooden fence gate virtually sag-proof if executed correctly.
Reinforced Butt Joints
If you are using simpler butt joints, reinforcing them is key. This can be done with metal brackets, corner braces, or by using dowels or lag screws for added strength. The goal is to create a connection that resists movement in all directions.
Using exterior-grade wood glue in addition to screws or nails will further strengthen butt joints. Always ensure the surfaces being joined are clean and fit together well before applying glue and fasteners.
Constructing the Wooden Fence Gate
Now that you understand the principles of building a strong gate, let’s get into the actual construction process. This section will guide you through assembling the gate, step by step, ensuring every part contributes to a gate that won’t sag.
Assembling the Gate Frame
The first major step is to build the main frame of your gate. This forms the skeleton upon which the rest of the gate will be built. Accuracy here is paramount to ensure the gate hangs straight and operates smoothly.
Measure and Cut Lumber
Carefully measure and cut all the pieces for your gate frame according to your plan. Use a speed square or combination square to ensure your cuts are perfectly 90 degrees. Double-check all measurements before cutting to avoid wasting material.
For example, if you are building a 3-foot wide gate frame with 4×4 posts for the vertical members and 2x4s for the horizontal and diagonal pieces, you would cut two vertical pieces to the desired height, two horizontal pieces to 3 feet minus the width of the two vertical pieces (to account for them fitting between the verticals), and one diagonal brace to fit snugly from one corner to the opposite.
Join the Frame Pieces
Lay out the frame pieces on a flat surface. Use your chosen joint method (pocket holes, mortise and tenon, or reinforced butt joints) to connect the top and bottom rails to the vertical stiles. Ensure the frame is perfectly square by measuring the diagonals; they should be equal.
Example Scenario
Imagine you are building a 4-foot tall, 3-foot wide gate. You cut two 4-foot 2x4s for the sides (stiles) and two 3-foot 2x4s for the top and bottom (rails). When you assemble them into a rectangle, the distance from the top-left corner to the bottom-right corner should be the same as the distance from the top-right corner to the bottom-left corner. If they are not equal, your frame is not square, and the gate will likely sag.
Install the Diagonal Brace
Cut the diagonal brace to fit snugly between the top and bottom rails, typically running from the bottom hinge side to the top latch side. Secure it firmly using screws or your chosen joinery method. This brace is the secret weapon against sagging.
Adding Gate Slats or Pickets
Once the frame is solid, you can begin attaching the slats or pickets that will form the visible surface of your gate. Even spacing and secure attachment are key here.
Spacing the Slats
Decide on the spacing between your slats. You can have them butted up against each other for privacy, or leave small gaps for a more open look. Use a spacer block or a tape measure to ensure consistent spacing across the entire gate.
A common spacing for garden gates might be 2-3 inches between pickets. This provides a good balance between privacy and air flow. For a more solid barrier, you would have the pickets touch each other, or overlap them slightly.
Attaching the Slats
Secure each slat to the gate frame using exterior-grade screws. Pre-drilling pilot holes can prevent splitting, especially if you are using hardwoods or thinner slats. Use at least two screws per slat into each frame member it crosses.
Hinging and Latching Your Gate
The hardware you choose and how you install it will greatly affect your gate’s performance and its tendency to sag. Proper hinges distribute weight effectively, and a good latch keeps it secure.
Selecting the Right Hinges
Choose heavy-duty, exterior-grade hinges. Gate hinges are designed to carry more weight than standard door hinges. Strap hinges or T-hinges are often used for wooden gates as they offer good support.
Consider the weight of your gate. A larger, heavier gate will require stronger hinges. For very heavy gates, you might need three or even four hinges. Ensure the hinges are rated for outdoor use to prevent rust and corrosion, which can weaken them over time.
Hinge Placement
Proper hinge placement is critical. The top hinge should be located near the top of the gate stile, and the bottom hinge near the bottom. They should be aligned vertically to support the gate evenly.
Many gate hinges are designed to be surface-mounted, meaning they attach directly to the face of the gate stile and the fence post. Ensure the screws go into solid wood for maximum holding power. If attaching to a hollow metal post, you will need specialized hardware.
Choosing a Latch Mechanism
Select a latch that is appropriate for your gate’s size and the security you need. Options range from simple gravity latches to more complex locking mechanisms. Ensure the latch is easy to operate but secure enough to keep the gate closed.
Real-Life Example: The Drooping Driveway Gate
A homeowner built a beautiful 10-foot wide driveway gate using 2×6 lumber. They used simple butt joints for the frame and only one diagonal brace. After just six months, the gate began to sag noticeably, making it difficult to close properly and scraping the driveway. This was because the wide span and heavy weight of the gate were too much for the basic framing and single brace. A stronger, well-braced frame with more robust hinges would have prevented this issue.
Installing the Gate and Ensuring Sag-Free Performance
The final stages involve physically installing your gate and making any necessary adjustments to ensure it operates perfectly and remains sag-free. This is where all your careful construction pays off.
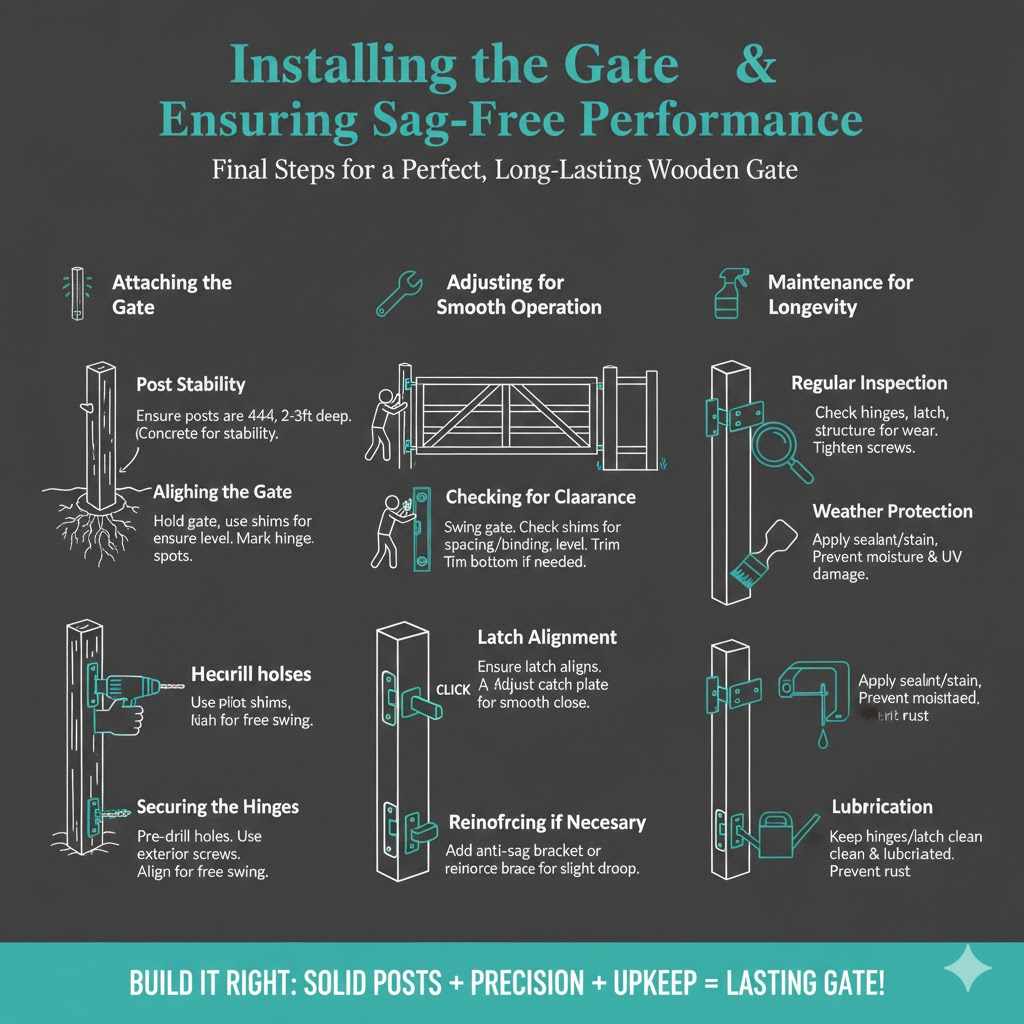
Attaching the Gate to the Fence Post
This is a critical step that requires precision. The fence posts must be strong and securely set to support the weight of the gate.
Post Stability
Ensure your fence posts are firmly set in the ground, ideally with concrete. If your posts are loose, the gate will sag no matter how well it’s built. A wobbly post means a wobbly gate.
For a gate that opens and closes frequently, the posts should be at least 4×4 inches and set 2-3 feet into the ground, depending on your soil type and climate. Using gravel at the bottom of the hole before adding concrete helps with drainage and stability.
Aligning the Gate
With the help of another person, hold the gate in position against the fence post. Use shims to get the correct spacing between the gate and the post, and ensure the gate is level. Mark the hinge locations on both the gate and the post accurately.
Having a helper is crucial here. They can hold the gate steady while you mark and pre-drill for the hinges. This ensures the gate is perfectly aligned before you start screwing.
Securing the Hinges
Pre-drill pilot holes for your hinge screws into both the gate stile and the fence post. This prevents the wood from splitting. Attach the hinges securely, ensuring they are aligned correctly to allow the gate to swing freely without binding.
Adjusting for Smooth Operation
Once the gate is hung, you will likely need to make some minor adjustments to ensure it swings freely and closes properly.
Checking for Clearance
Swing the gate open and closed several times. Check for any rubbing or binding against the ground or the adjacent fence. If the gate is dragging, you may need to adjust the hinges or trim a small amount off the bottom of the gate.
Sometimes, a slightly uneven ground surface can cause a gate to bind. You can address this by trimming the bottom edge of the gate to create clearance.
Latch Alignment
Ensure the latch mechanism aligns perfectly with its catch. If it’s slightly off, you might need to adjust the position of the catch plate on the opposite post or gate stile. Small adjustments can make a big difference in how smoothly the gate operates.
A well-aligned latch provides a satisfying click when closing and ensures the gate stays securely shut. If the latch is hard to engage, check the alignment and make sure there isn’t any warping causing the gate to be out of square.
Reinforcing if Necessary
If, after installation, you notice any slight sagging, you can add additional support. This might involve reinforcing the diagonal brace or adding an anti-sag bracket. These adjustable brackets can be a lifesaver for gates that develop a slight droop over time.
Case Study: The Garden Gate Upgrade
A homeowner had a garden gate that was sagging badly. They decided to rebuild it using the Z-brace method with cedar lumber and pocket hole joints. They also installed heavy-duty gate hinges and ensured their fence post was solid. The new gate swung smoothly, stayed perfectly level, and significantly improved the look of their garden entrance. The key was the combination of good materials, strong joinery, and proper installation.
Maintenance for Long-Term Sag Prevention
Even the best-built gate needs a little attention now and then to keep it in top shape. Regular maintenance will extend its life and prevent sagging.
Regular Inspection
Periodically check the hinges, latch, and the overall structure of the gate for any signs of wear, looseness, or damage. Tighten screws as needed.
Weather Protection
Apply a good quality exterior wood sealant or stain to protect the wood from the elements. This will help prevent moisture absorption and UV damage, both of which can lead to warping and sagging.
Lubrication
Keep the hinges and latch mechanism clean and lubricated. A little oil or grease can prevent rust and ensure smooth operation.
FAQ
Question: What is the best type of wood for a fence gate that won’t sag
Answer: Cedar, redwood, or pressure-treated lumber are excellent choices. Cedar and redwood are naturally durable and resistant to warping. Pressure-treated lumber offers good protection against rot and insects.
Question: How do I prevent my wooden gate from sagging
Answer: The most effective way is to use a diagonal brace (Z-brace) in the gate’s frame. Strong joinery, robust hinges, and properly set posts also play a significant role.
Question: Can I use any hinges for a wooden fence gate
Answer: No, it’s best to use heavy-duty, exterior-grade gate hinges designed to support the weight of your gate. Strap hinges or T-hinges are common choices.
Question: How often should I maintain my wooden gate
Answer: It’s good to inspect your gate for loose screws or signs of wear every few months. Reapplying sealant or stain annually will protect the wood.
Question: My gate is already sagging, can I fix it
Answer: Sometimes, you can fix a slightly sagging gate by reinforcing the diagonal brace or installing an adjustable anti-sag bracket. For severe sagging, rebuilding might be necessary.
Conclusion
Building a wooden fence gate that won’t sag is achievable with careful planning and construction. The key lies in using the right materials, employing a strong frame design with a diagonal brace, and installing robust hardware. Follow these steps to create a durable, functional gate that enhances your property for years to come. You can build a gate that looks great and works perfectly.