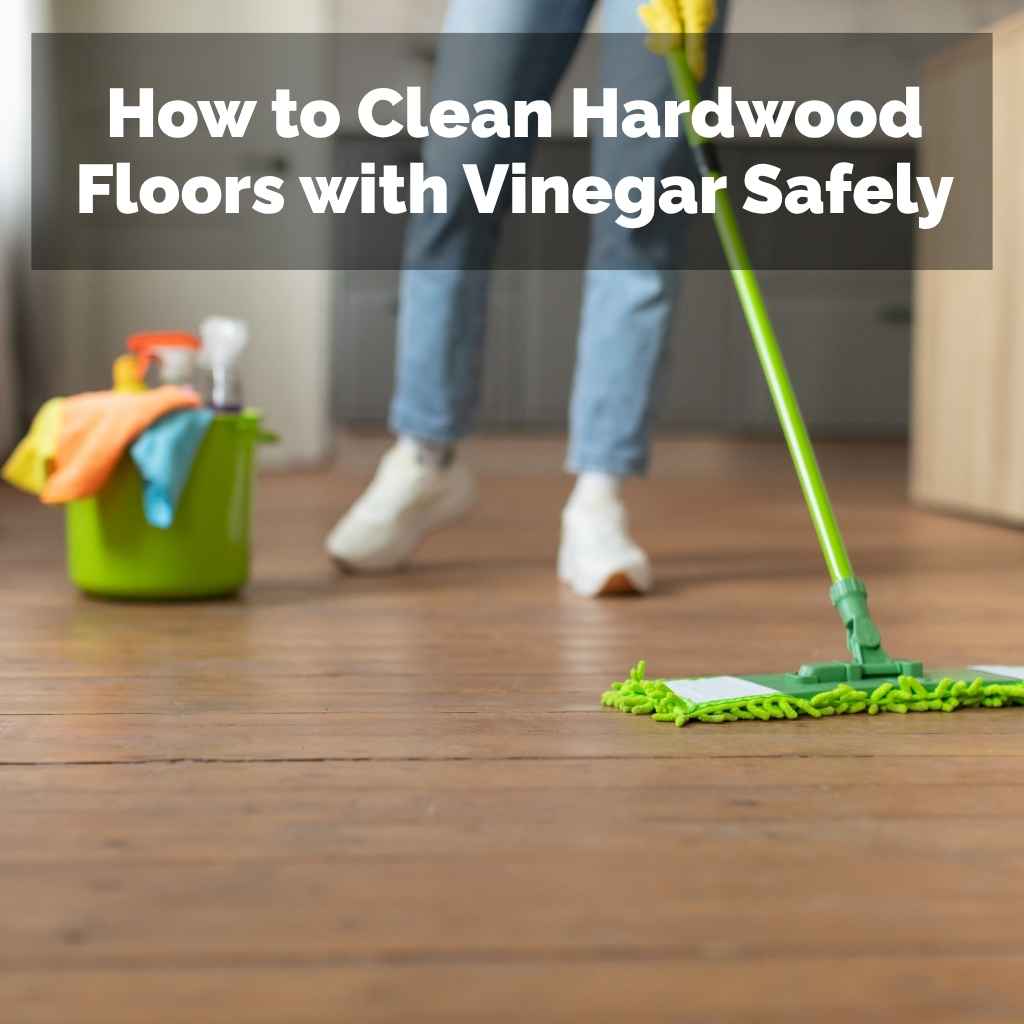
How to Clean Hardwood Floors with Vinegar Safely
Cleaning hardwood floors can feel tricky, especially when you’re new to it. You want them to sparkle, but you also don’t want to cause damage. Using common household items like vinegar seems like a good idea, but it’s important to know exactly how to do it right.
Many people worry about making mistakes. This guide will make it super simple. We’ll walk you through How to Clean Hardwood Floors with Vinegar Safely step-by-step so your floors look great without any worries.
Why Vinegar Is Popular For Cleaning Hardwood
Vinegar is a favorite for many cleaning tasks because it’s a natural disinfectant and degreaser. It can cut through grime and leave surfaces looking shiny. For hardwood floors, people often reach for vinegar because it’s readily available and generally seen as a safer alternative to harsh chemical cleaners.
Its acidic nature helps break down dirt and can even help remove soap scum or water spots. This makes it seem like a perfect all-around cleaner for your home.
The Science Behind Vinegar Cleaning
Vinegar’s cleaning power comes from acetic acid. Acetic acid is a weak acid, but it’s strong enough to break down many types of dirt, grease, and mineral deposits. When diluted with water, it becomes even gentler, making it suitable for many surfaces.
This acid works by dissolving the bonds that hold dirt and grime together. It also has some antibacterial properties, which can help sanitize surfaces. However, its acidity is also why caution is needed with certain materials.
The concentration of acetic acid in white vinegar is typically around 5%. This mild acidity is what makes it effective for cleaning without being too aggressive. It can help lift stains and leave a streak-free shine when used correctly.
Many cleaning solutions use vinegar as their base because of its effectiveness and affordability. It’s a well-understood cleaning agent that has been used for generations.
Is Vinegar Always Safe For All Hardwood
While vinegar is effective, it’s not always safe for every type of hardwood floor finish. Over time, repeated use of undiluted or improperly diluted vinegar can damage the protective sealant on your floors. This can lead to dullness, discoloration, or even etching of the wood itself.
It’s crucial to understand the finish of your hardwood floors before using vinegar.
Some finishes are more sensitive to acidic cleaners than others. For instance, waxed or oiled finishes might react differently than polyurethane finishes. The key is always to test in an inconspicuous area first.
This ensures that the vinegar solution won’t harm your specific floor type. Proper dilution is the most important factor in preventing damage.
Vinegar can also dry out wood if not used with enough water. Wood is a natural material that needs a balance of moisture. Too much or too little can cause problems.
When vinegar dries too quickly, it can leave behind residues that dull the finish. Therefore, using a damp cloth and ensuring proper ventilation are also important steps.
Common Mistakes When Cleaning Hardwood With Vinegar
One of the biggest mistakes people make is using vinegar straight from the bottle. This is far too concentrated. It can strip away the floor’s finish much faster than intended.
Another error is using too much water, which can lead to water damage. Water can seep into the wood and cause it to swell or warp, especially at the edges of the planks.
Not drying the floor thoroughly after cleaning is also a common oversight. Leaving standing water, even from a diluted vinegar solution, can be detrimental to hardwood. It can create water spots or damage the wood over time.
People also sometimes forget to sweep or vacuum first, which means they are just pushing dirt around, not cleaning.
Using the wrong type of cloth or mop can also cause issues. Abrasive materials can scratch the finish. Using a mop that is too wet can saturate the wood.
It is important to use a soft cloth or a microfiber mop that is only slightly damp. These simple errors can turn a cleaning task into a costly repair.
The Importance of Dilution Ratios
The exact ratio of vinegar to water is critical for safe cleaning. A common and effective ratio is one cup of white vinegar to one gallon of warm water. This dilution significantly reduces the acidity of the vinegar, making it much safer for most hardwood floor finishes.
This ratio helps to clean effectively without damaging the protective layer of the floor.
Using a stronger mixture might seem like it would clean better, but it significantly increases the risk of damage. The goal is to lift dirt and disinfect, not to etch the finish. Always measure your ingredients to ensure consistency.
This methodical approach prevents accidental overuse of vinegar and protects your investment in your flooring.
If you’re unsure, it’s always better to err on the side of caution and use a weaker solution. You can always try a slightly stronger mix if needed, but starting too strong can cause permanent damage. Proper dilution is the cornerstone of how to clean hardwood floors with vinegar safely.
How To Clean Hardwood Floors With Vinegar Safely Step-By-Step
Achieving sparkling clean hardwood floors using vinegar is straightforward when you follow a few key steps. This method focuses on protecting your floors while still getting them clean. It’s a simple process that won’t take much time but will make a big difference in how your floors look and feel.
Let’s get started with the easy-to-follow guide.
Gather Your Supplies
Before you begin, make sure you have everything you need. This will make the cleaning process much smoother. Having all your tools ready prevents interruptions and ensures you can complete the task efficiently.
It also helps you avoid using the wrong items out of necessity.
- White vinegar
- Warm water
- A bucket
- A microfiber mop or soft cloths
- A broom or vacuum cleaner
- A separate dry cloth for buffing (optional)
Having a good quality microfiber mop is highly recommended. Microfiber is excellent at picking up dirt and dust without scratching the floor. It also holds less water than traditional mops, which is vital for hardwood.
Soft cloths work well for spot cleaning or for smaller areas.
A clean broom or vacuum cleaner is essential for the first step: removing loose debris. Without this, you’ll just be pushing dust and grit around, which can scratch your floors when mixed with liquid. Ensure your broom has soft bristles suitable for hardwood.
Prepare The Cleaning Solution
Now it’s time to mix your cleaning solution. The key to safety here is the right ratio. Remember, we are aiming for a gentle yet effective clean.
This mixture is designed to clean without harming the finish.
In your bucket, combine one cup of white vinegar with one gallon of warm water. Make sure the water is warm, not hot, as extremely hot water can also be problematic for some finishes. The warm water helps the vinegar dissolve dirt and grime more easily.
Stir the mixture gently. You want a well-combined solution. Avoid using too much vinegar.
The 1:1 ratio of cup-to-gallon is a safe starting point for most finishes. If you have a very old or delicate floor, you might even consider diluting it further.
Dilution Ratios For Different Finishes
While the 1:1 ratio is a good general guideline, some floor finishes might require even more dilution. For instance, if you have a very matte or water-sensitive finish, you might want to use half a cup of vinegar to a gallon of water. It’s always best to consult the manufacturer’s recommendations for your specific flooring if possible.
Polyurethane finishes, which are common, can generally handle the 1:1 ratio well. However, older wax or oil-based finishes are more susceptible to damage from acids. For these, a much weaker solution or even a different cleaning method might be best.
When in doubt, always test on a hidden spot.
The purpose of diluting is to leverage vinegar’s cleaning power without its potential to strip finishes. It’s a balance. The warm water helps to rinse away the vinegar residue, preventing it from drying on the surface and leaving streaks or dullness.
This careful approach is central to how to clean hardwood floors with vinegar safely.
The Cleaning Process
Start by sweeping or vacuuming your hardwood floors thoroughly. This removes all loose dirt, dust, and debris. Skipping this step is like washing dirty dishes without rinsing them first – you’re just moving the mess around.
Next, dip your microfiber mop or soft cloth into the vinegar-water solution. Wring it out very well. The mop should be damp, not wet.
You want to see a slight sheen of moisture, not puddles. Excess water is the enemy of hardwood floors.
Begin cleaning your floors in sections. Work with the grain of the wood. Lightly wipe the surface.
For tougher spots, you might need to go over them a couple of times. The goal is a gentle wipe, not scrubbing.
Drying And Buffing
After you’ve mopped a section, it’s important to ensure it dries quickly. If your mop was properly wrung out, the floor should dry on its own within a few minutes. Good ventilation helps.
You can open windows or use a fan.
For an extra shine and to ensure no streaks are left behind, you can lightly buff the area with a dry, clean cloth after it dries. This step is optional but recommended if you want your floors to gleam. It also helps to remove any faint residue.
Make sure the entire floor is dry before allowing foot traffic. This prevents dirt from being tracked onto the damp surface and helps the finish set properly. A clean, dry floor is the sign of a job well done.
When To Avoid Vinegar On Hardwood Floors
While vinegar is a popular choice, there are specific situations and floor types where it’s best to steer clear. Understanding these exceptions is just as important as knowing how to use vinegar correctly. This ensures you protect your valuable flooring.
Unsealed Or Damaged Finishes
If your hardwood floors have an unsealed finish, or if the finish is already chipped, scratched, or peeling, vinegar should not be used. The acidity can penetrate these damaged areas and cause further degradation of the wood. Unsealed wood is naturally porous and can absorb liquids, leading to swelling and warping.
Even if the finish is sealed but shows signs of wear, it’s wise to be cautious. Small cracks in the sealant can allow the vinegar solution to reach the wood itself. For floors with damaged finishes, it’s better to repair the finish first or opt for a pH-neutral cleaner specifically designed for wood floors.
The integrity of the floor’s protective layer is paramount. If that layer is compromised, acidic cleaners can wreak havoc. Always inspect your floors for any signs of damage before deciding on a cleaning method.
A visual inspection can save you from bigger problems down the line.
Natural Oil Or Wax Finishes
Hardwood floors treated with natural oils or waxes have a different type of protection than modern sealants like polyurethane. These natural finishes provide a more matte, natural look but are more sensitive to acidic cleaners. Vinegar can break down the oils and waxes, dulling the finish and potentially leaving it unprotected.
For oiled or waxed floors, it’s recommended to use cleaners specifically formulated for these types of finishes. These products are designed to nourish and protect the oil or wax layer, rather than strip it away. Using vinegar on these surfaces can lead to discoloration and a loss of sheen.
It is crucial to identify your floor’s finish to clean it properly.
If you’re unsure about your floor’s finish, it’s best to stick to gentle, pH-neutral cleaners or consult a flooring professional. Trying to clean a waxed floor with vinegar is a common mistake that can lead to extensive re-waxing or refinishing. Preservation is key for these delicate finishes.
Very Old Or Antique Floors
Antique or very old hardwood floors often have unique finishes and historical significance. They may also have finishes that are no longer produced or understood by modern cleaning products. The wood itself might also be more brittle or sensitive due to age.
For these delicate floors, it is always best to consult with a specialist in antique flooring restoration. They can advise on the safest cleaning methods and products that will preserve the floor’s integrity and value. Using standard cleaning solutions, even diluted vinegar, could cause irreversible damage.
The risk of damage to historic floors is simply too high. The goal with these floors is preservation. Therefore, conventional cleaning methods should be avoided in favor of expert advice.
The peace of mind that comes from knowing you are not harming a valuable antique is well worth the effort of seeking professional guidance.
Alternatives To Vinegar For Hardwood Floors
If you decide vinegar isn’t the right choice for your floors, or if you want to mix things up, several effective alternatives exist. These options offer great cleaning power without the potential risks associated with vinegar.
- pH-Neutral Wood Floor Cleaners: These are specifically formulated for hardwood. They are designed to clean effectively without harming the finish. Many are readily available at home improvement stores and supermarkets. They are safe for most finishes and offer a good balance of cleaning power and gentleness.
- Water and Mild Dish Soap: A very small amount of mild dish soap (just a drop or two) in a bucket of warm water can be effective for general cleaning. Again, the key is to use very little soap and ensure the mop is only damp. Too much soap can leave a residue.
- Specialty Wood Floor Polishes: Some polishes also contain cleaning agents. These can be used periodically to both clean and enhance the shine of your floors. Always choose products that are compatible with your floor’s finish.
When using any alternative cleaner, always test it on an inconspicuous area first. This is a crucial step to ensure compatibility with your floor’s finish. Reading product labels carefully for instructions and warnings is also important.
The key takeaway is that many safe and effective cleaning options exist for hardwood floors. It’s about choosing the right one for your specific needs and floor type. The goal is always to clean effectively while preserving the beauty and longevity of your wood flooring.
Maintaining Your Hardwood Floors After Cleaning
Once you’ve cleaned your hardwood floors, keeping them looking their best is all about ongoing care. Regular maintenance prevents dirt from building up and reduces the need for deep cleaning. It also helps to protect the finish and the wood itself.
Regular Sweeping And Vacuuming
Make sweeping or vacuuming a daily or every-other-day habit. This is the most important step in keeping your hardwood floors clean and scratch-free. Grit, sand, and dirt act like sandpaper underfoot, damaging the finish over time.
Using a broom with soft bristles or a vacuum cleaner with a hard floor attachment is ideal.
Pay special attention to high-traffic areas like entryways and hallways. These spots tend to collect the most dirt. Regular removal of these particles prevents them from being ground into the wood.
This simple habit extends the life of your floors significantly.
Avoid using vacuums with beater bars that spin, as these can scratch or dent the wood. Many modern vacuums have settings for hard floors that disable the beater bar. Always ensure your vacuum is clean and free of any debris that could cause damage.
Protecting Against Scratches And Dents
Use furniture pads on the legs of all your furniture. This is a critical step that many people overlook. Felt pads are excellent for preventing scratches when chairs or tables are moved.
These are inexpensive and easy to apply. Regularly check and replace them as they wear out.
Be mindful of pet claws. Keep your pets’ nails trimmed to minimize scratching. Consider using rugs or runners in high-traffic areas to provide an extra layer of protection, especially in entryways and dining areas.
These can also add comfort and style to your home.
Avoid wearing high heels or cleats on your hardwood floors, especially indoors. These can cause dents and significant damage. Ask guests to remove their shoes at the door if possible.
This simple courtesy can save your floors a lot of wear and tear.
Dealing With Spills And Stains Promptly
Spills happen, but it’s how you handle them that matters. Address any liquid spills immediately. Use a clean, dry cloth to blot up the spill.
Do not wipe, as this can spread the liquid and push it further into the wood or between the planks.
For sticky spills or tougher stains, use a slightly damp cloth with a pH-neutral cleaner or your diluted vinegar solution (if appropriate for your floor type). Again, ensure the cloth is only damp and not wet. Blot the area gently and then dry it thoroughly with a clean, dry cloth.
The faster you deal with a spill, the less likely it is to cause a permanent stain or water damage. Leaving liquids to sit on hardwood can lead to discoloration, warping, or even mold growth in severe cases. Prompt action is key to maintaining pristine floors.
Periodic Deep Cleaning
Even with daily maintenance, a periodic deeper clean is beneficial. This is where your diluted vinegar solution comes into play, provided it’s suitable for your floor’s finish. Aim to do a deeper clean once every few months, or as needed.
Always follow the step-by-step guide provided earlier for the best results. Ensure thorough sweeping first, followed by a well-wrung-out damp mop with your cleaning solution. The drying and optional buffing steps are also important for a professional finish.
Remember, the frequency of deep cleaning depends on how much traffic your floors get and how quickly they tend to show dirt. It’s better to clean a little more often with a gentler solution than to wait too long and need a harsh cleaner. Consistent care is the best approach.
Frequently Asked Questions
Question: Can I use apple cider vinegar on hardwood floors
Answer: It is generally not recommended to use apple cider vinegar on hardwood floors. White vinegar is preferred because it has a clearer composition and is less likely to leave behind color residue that could stain your floors. White vinegar’s acidity is also better understood for cleaning purposes on wood.
Question: How often should I clean my hardwood floors with vinegar
Answer: You should only use vinegar for a deeper clean every few months. Daily cleaning should involve sweeping or vacuuming. Overuse of vinegar, even diluted, can damage the finish over time.
Stick to pH-neutral cleaners for more frequent cleaning if needed.
Question: Will vinegar remove wax from my hardwood floors
Answer: Yes, vinegar is acidic and can break down wax. This is why it is not recommended for waxed or oiled hardwood floors, as it will strip away the protective wax coating. If your floors are waxed, use cleaners specifically designed for wax finishes.
Question: How do I know if my hardwood floor finish is safe for vinegar
Answer: Most modern polyurethane finishes are reasonably tolerant of diluted vinegar. However, older finishes, natural oil finishes, waxed finishes, or any unsealed or damaged finish are not. If you are unsure, always test in an inconspicuous area first.
When in doubt, avoid vinegar.
Question: What is the best way to dry hardwood floors after cleaning
Answer: The best way to dry hardwood floors is to ensure your mop is well-wrung out so it is only damp, not wet. This allows the floor to air dry quickly on its own. Good ventilation by opening windows or using a fan can speed up the process.
Buffing with a dry cloth can also help ensure no moisture remains.
Summary
Cleaning hardwood floors with vinegar can be a safe and effective method if done correctly. Always dilute white vinegar with warm water, typically a 1:1 ratio of cup-to-gallon. Sweep or vacuum first, use a damp, well-wrung-out mop, and dry thoroughly.
Avoid vinegar on unsealed, waxed, oiled, or damaged finishes.