How to Cut Tile With a Dremel: Master the Art of Precision Cutting
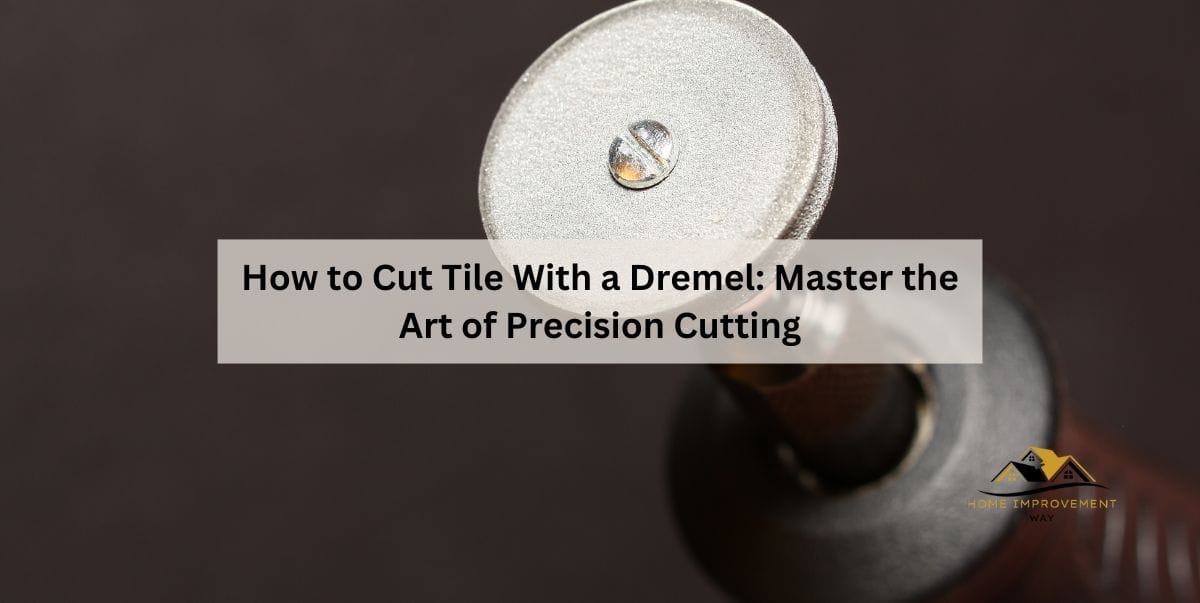
To cut tile with a Dremel, you need to use a diamond wheel attachment.
Choosing The Right Dremel Tool For Tile Cutting
When it comes to cutting tile with precision and ease, using a Dremel tool can be a game-changer. But with so many different Dremel models available, how do you know which one is the best choice for your tile cutting needs? In this section, we will explore the considerations for tile cutting and provide a comparison of different Dremel models to help you make an informed decision.
Considerations For Tile Cutting
Before diving into the different Dremel models, it’s important to consider a few key factors when selecting a tool for tile cutting:
- Power: The power of the Dremel tool is crucial for cutting through tough tile materials. Ensure that the model you choose offers sufficient power to handle your specific tile cutting tasks.
- Speed: Tile cutting requires precise and controlled cuts. Look for Dremel tools with variable speed settings, allowing you to adjust the cutting speed based on the material and desired results.
- Attachments and Accessories: To simplify tile cutting, some Dremel models come with specialized attachments and accessories. These can include tile-cutting wheels, diamond-coated bits, and tile guides. Evaluate whether these additional features align with your cutting needs.
- Ease of Use: Cutting tile can be a delicate process, so choosing a Dremel tool that is comfortable to hold and easy to maneuver is essential. Consider the ergonomics of the tool and ensure it fits comfortably in your hand.
Comparison Of Different Dremel Models
Now let’s dive into a comparison of a few popular Dremel models for tile cutting:
| Model | Power (Watts) | Speed Range (RPM) | Attachments and Accessories |
|---|---|---|---|
| Dremel 3000 | 130W | 5,000 – 32,000 | Tile-cutting wheels, diamond-coated bits |
| Dremel 4000 | 175W | 5,000 – 35,000 | Tile-cutting wheels, diamond-coated bits, tile guides |
| Dremel 4300 | 175W | 5,000 – 35,000 | Tile-cutting wheels, diamond-coated bits, tile guides, flex shaft attachment |
These models offer a range of power and speed options, allowing you to find the right balance for your tile cutting projects. The attachments and accessories also provide added versatility and precision during the cutting process.
By considering these factors and comparing the different Dremel models, you can confidently choose the right tool for your tile cutting needs. With the right Dremel tool in hand, you’ll be able to achieve clean and accurate cuts for your tiling projects.

Preparing The Work Area
Preparing the work area is an essential step before you start cutting tile with a Dremel. By gathering the necessary tools and materials and setting up a safe and clean workspace, you can ensure a smooth and efficient process. Let’s dive in to learn more about each aspect in detail.
Gathering The Necessary Tools And Materials
Before you begin cutting tile with a Dremel, it’s important to gather all the tools and materials you’ll need. Having everything on hand will save you time and frustration later on. Here’s a list of items you should have:
- A Dremel rotary tool
- Diamond cutting wheel attachment
- Tape measure or ruler
- Pencil or marker
- Safety glasses
- Dust mask
- Clamps (optional, for securing the tile)
- Tile adhesive or double-sided tape (if needed)
- Tile spacer (if needed)
Make sure you have all these tools and materials ready before you start the tile cutting process. It’s always better to be prepared!
Setting Up A Safe And Clean Workspace
Creating a safe and clean workspace is vital to avoid accidents and maintain the quality of your work. Follow these simple steps to set up your work area:
- Cover the area: Use a drop cloth or plastic sheet to protect the floor or workbench from tile debris and dust.
- Secure the tile: If required, use clamps to secure the tile in place. This step will help you maintain stability and accuracy while cutting.
- Put on safety gear: Always remember to wear safety glasses and a dust mask to protect your eyes and respiratory system from flying debris.
- Clear the surroundings: Keep the work area free from any obstacles or unnecessary objects that may hinder your movement or cause accidents.
- Good lighting: Ensure you have adequate lighting to clearly see the tile and your cutting line. Proper lighting will enhance precision and reduce the chances of errors.
By following these steps and setting up a safe and clean workspace, you’re ready to begin cutting tile with your Dremel. Remember, a well-prepared work area is the foundation for a successful and enjoyable tile cutting experience.
Selecting The Right Cutting Bit
Cutting tile with a Dremel requires selecting the right cutting bit. It’s important to choose a bit specifically designed for tile to ensure clean and precise cuts.
Understanding Different Types Of Dremel Cutting Bits
When it comes to cutting tile with a Dremel, selecting the right cutting bit is crucial for achieving precise and clean cuts. Dremel offers a variety of cutting bits that can be used for different materials, including tile. Understanding the different types of Dremel cutting bits will help you choose the best one for your tile cutting needs.
Here are some of the most commonly used Dremel cutting bits for tile:
- Diamond Wheel: With its abrasive surface, the diamond wheel cutting bit is ideal for cutting through hard materials like ceramic or porcelain tile. Its tough and long-lasting design ensures clean and accurate cuts.
- Carbide Cutting Bit: The carbide cutting bit is suitable for cutting softer materials like ceramic or glass tiles. It features a sharp, pointed tip that helps to score the tile before making the final cut.
- Cut-Off Wheel: The cut-off wheel cutting bit is perfect for making straight cuts on tiles. It is designed to cut through both ceramic and porcelain tiles with ease. With its high-speed rotation, it delivers smooth and precise cuts.
- Sanding Drum: While not specifically a cutting bit, the sanding drum attachment can be used to smoothen the edges of the cut tiles. It helps to remove any rough edges or burrs left after cutting.
Choosing The Best Bit For Your Tile
Now that you have a better understanding of the different types of Dremel cutting bits available, it’s time to choose the best one for your tile cutting project.
The type of tile you are working with will play a significant role in determining the most suitable cutting bit. For hard materials like ceramic or porcelain, the diamond wheel cutting bit is the ideal choice. Its durability and effectiveness in producing clean cuts make it a top pick for these materials.
On the other hand, if you are working with softer materials like ceramic or glass tiles, the carbide cutting bit is a better option. Its ability to score the tile prior to cutting ensures precise and accurate results.
For making straight cuts on both ceramic and porcelain tiles, the cut-off wheel cutting bit is your go-to choice. Its high-speed rotation provides smooth and controlled cuts, allowing you to achieve the desired shape effortlessly.
Remember, always wear safety goggles and protective gloves when operating the Dremel tool, regardless of the cutting bit you choose. Safety should never be compromised when working with power tools.
Step-by-step Tile Cutting Process With A Dremel
Cutting tiles can be a tricky and time-consuming task if you don’t have the right tools. One tool that can make the job easier and more precise is a Dremel. A Dremel is a versatile rotary tool that can be used for a variety of projects, including cutting tiles. In this step-by-step guide, we will walk you through the process of cutting tiles with a Dremel, ensuring a clean and accurate cut every time.
1. Marking Your Cutting Line
Before you start cutting, it is important to mark the cutting line on the tile. This will guide you and ensure that you make an accurate and straight cut. To mark your cutting line, use a pencil or a marker to draw a line on the surface of the tile. Make sure the line is straight and clearly visible.
2. Securing The Tile
Once you have marked your cutting line, it’s time to secure the tile. Place the tile on a flat and stable surface, such as a workbench or a table. Use clamps or a tile holder to secure the tile in place. This will prevent it from moving while you are cutting and ensure a clean and precise cut.
3. Wearing Protective Gear
Before you start cutting, it is important to prioritize safety. Make sure to wear the necessary protective gear, such as safety glasses and gloves, to protect your eyes and hands from any potential hazards. It is also a good idea to wear a dust mask to prevent inhaling any dust or debris that may be produced during the cutting process.
4. Using The Dremel To Make The Cut
Now it’s time to use the Dremel to make the cut. Start by inserting a tile cutting bit into the Dremel. These bits are specifically designed for cutting through tiles and will provide a clean and precise cut. Adjust the speed of the Dremel to a medium setting.
Hold the Dremel firmly and position the cutting bit on your marked cutting line. Slowly guide the Dremel along the line, applying gentle and steady pressure. Let the Dremel do the work and avoid pushing or forcing it through the tile. Continue cutting until you have made a complete cut.
It is important to note that cutting through tiles can generate heat, which may cause the tile to crack. To prevent this, you can dip the cutting bit in water periodically while cutting. This will help to cool down the bit and reduce the risk of cracking.
Once the cut is complete, remove the clamps or tile holder and carefully lift the tile off the surface. You can then smooth out any rough edges with a sanding attachment on the Dremel, if needed.
Don’t forget to clean up any dust or debris that may have accumulated during the cutting process. This will ensure a clean and tidy workspace.
By following these step-by-step instructions, you can confidently cut tiles with a Dremel and achieve professional-looking results. Remember to prioritize safety, use the right tools and techniques, and take your time to ensure a clean and precise cut every time.
Finishing Touches And Tile Care
Once you’ve successfully cut your tile with a Dremel, it’s time to focus on the finishing touches and maintaining the tile surface for long-lasting beauty. In this section, we will discuss smoothing the cut edges and cleaning and maintaining the tile surface to ensure your project is flawless and stands the test of time.
Smoothing The Cut Edges
After cutting the tile, you may notice that the edges are rough and uneven. To refine the edges and achieve a professional finish, follow these steps:
- Start by using a 400-grit sandpaper to gently sand the cut edges. This will help remove any sharp or jagged edges.
- Next, switch to a 600-grit sandpaper and continue sanding the edges until they are smooth to the touch.
- For an even smoother result, finish off with a 1200-grit sandpaper to achieve a polished look.
Cleaning And Maintaining The Tile Surface
To keep your tiles looking their best and ensure they last for years to come, it’s essential to follow proper cleaning and maintenance practices. Here are some tips to help you:
- Regularly sweep or vacuum the tile surface to remove dirt and debris that can scratch the surface over time.
- Mop the tiles with a mild detergent or a pH-neutral cleaner. Avoid using abrasive or acidic cleaners that can damage the surface.
- Wipe up spills immediately to prevent staining, especially with substances like wine, coffee, or oil-based products.
- Use a non-abrasive brush or sponge when cleaning to avoid scratching the tile surface.
- To maintain the shine, apply a high-quality tile sealer according to the manufacturer’s instructions.
By following these steps and incorporating them into your tile care routine, you can keep your newly cut tile looking beautiful and extend its lifespan.

Tips And Tricks For Precision Cutting
When it comes to cutting tile with a Dremel, precision is key. Whether you’re a beginner or an experienced DIY enthusiast, mastering the art of precise cutting can elevate your projects to a whole new level. In this section, we’ll share some valuable tips and tricks to help you achieve precise cuts with your Dremel. From mastering speed and pressure control to avoiding common mistakes, and even experimenting with different cutting techniques, these insights will help you enhance your tile-cutting skills.
Mastering Speed And Pressure Control
One of the most important factors in achieving precise cuts with a Dremel is mastering speed and pressure control. The speed at which you operate the Dremel and the pressure you apply can significantly affect the outcome of your cuts.
- Start with a low speed: When cutting tile, it’s best to begin with a low speed setting on your Dremel. This will allow you to have better control over the tool and prevent accidental slips.
- Gradually increase the speed: As you gain confidence and control, you can gradually increase the speed to achieve smoother cuts. Experiment with different speeds to find the one that works best for you.
- Apply consistent pressure: While cutting, it’s crucial to apply consistent pressure to ensure an even and precise cut. Avoid exerting too much force, as it can cause the tile to crack or break. Remember, slow and steady wins the race!
Avoiding Common Mistakes
Avoiding common mistakes is essential when it comes to precision cutting. By being aware of potential pitfalls, you can save time and effort while achieving accurate and clean cuts.
- Using inappropriate attachments: Selecting the right cutting attachment is crucial for precise results. Make sure to choose a cutting wheel specifically designed for tiles, as using the wrong attachment can lead to ineffective or uneven cuts.
- Not marking your tiles: Before cutting, always mark the area you intend to cut. This will help you visualize the desired shape and avoid mistakes. Use a pencil or a marker designed for tile surfaces.
- Skipping safety precautions: Precision cutting involves working with sharp tools and potentially hazardous materials. Always wear safety goggles and gloves to protect your eyes and hands. Additionally, work in a well-ventilated area to avoid inhalation of dust or debris.
Experimenting With Different Techniques
Every project has its own unique requirements, and sometimes, trying different techniques can make a world of difference in precision cutting. By experimenting with alternative approaches, you can find the one that suits your project best.
| Technique | Description |
|---|---|
| Score and snap: | This technique involves scoring a line on the tile’s surface using the Dremel, then applying pressure to snap it along the scored line. It works well for smaller tiles and those that don’t require complex cuts. |
| Smooth edge cuts: | If you need to create smooth edge cuts, try using a tile cutting bit in conjunction with a straight edge guide. This method provides more control and precision for intricate cuts. |
Conclusion
Cutting tiles with a Dremel has never been easier thanks to the techniques and tips shared in this blog post. By following the step-by-step instructions and using the right accessories, you can achieve clean and precise cuts in your tile projects.
From intricate designs to simple straight cuts, a Dremel is a versatile tool that can handle it all. So, get your Dremel ready and start cutting those tiles with confidence!


