How to Drill a Straight Hole With a Hand Drill
Drilling a perfectly straight hole can seem tough when you’re just starting out with a hand drill. It’s a common worry because it’s easy to let the drill bit wander. But don’t worry, it’s a skill you can learn!
This guide breaks down exactly how to drill a straight hole with a hand drill, step by step. We’ll cover everything you need to know to get it right every time.
Mastering the Hand Drill Straight Hole
This section is all about getting your hand drill working for you to make clean, straight holes. We’ll explore the basic setup and the right way to hold the drill. You’ll learn how to start the hole and keep it going in the right direction.
This is the foundation for all good drilling projects.
Choosing the Right Drill Bit
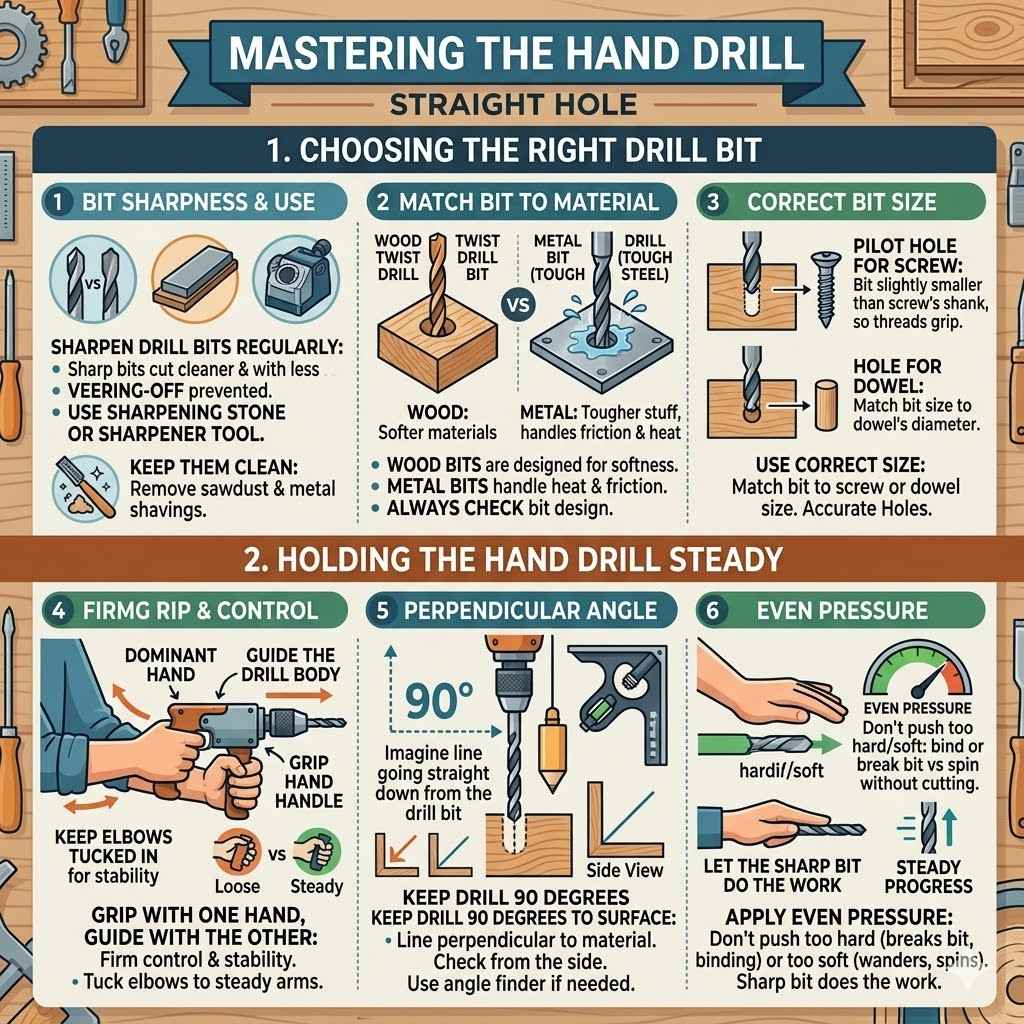
Picking the correct drill bit is super important. For wood, you’ll want a twist drill bit. For metal, you might need a bit made for tougher stuff.
The size of the bit matters too. It needs to be sharp and the right size for the screw or fastener you plan to use. A dull or wrong bit makes drilling harder and less accurate.
Sharpen your drill bits regularly. A sharp bit cuts cleaner and with less effort. This means less chance of the drill veering off course. You can use a sharpening stone or a drill bit sharpener tool. Keep them clean too; sawdust or metal shavings can dull them faster.
Match the bit to the material. Using a wood bit on metal, or a metal bit on wood, won’t work well. Wood bits are designed to cut through softer materials. Metal bits are harder and can handle the friction and heat of drilling into metal. Always check what your bit is designed for.
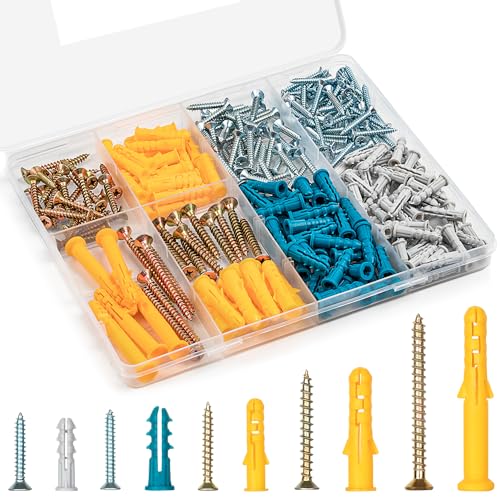
Use the correct bit size. If you’re drilling a pilot hole for a screw, make sure the bit is slightly smaller than the screw’s shank. This gives the screw threads something to grip. If you’re drilling a hole for a dowel, match the bit size to the dowel’s diameter.
Holding the Hand Drill Steady
Steady hands are key to drilling straight. You need to hold the drill firmly and at the right angle. It sounds simple, but it makes a big difference.
If your grip is loose, the drill will wobble. If you hold it at an angle, the hole will be crooked.
Grip the drill body with one hand. Use your dominant hand for the handle and the other hand to guide the drill body. This gives you good control and stability. Keep your elbows tucked in a bit to help steady your arms.
Keep the drill 90 degrees to the surface. Imagine a line going straight down from the drill bit. This line should be perfectly perpendicular to the material you’re drilling into. You can check this by looking from the side. Some people use a small angle finder if they struggle.
Apply even pressure. Don’t push too hard or too soft. You want steady progress. Too much pressure can cause the bit to bind or break. Too little pressure means the bit will spin without cutting, making it wander. Let the sharp bit do the work.
Preparing Your Workspace for Precision Drilling
Before you even pick up the drill, getting your workspace ready is important. This means making sure the material is stable and you know exactly where the hole should go. A little preparation saves a lot of trouble later.
It helps ensure your hole is straight and in the right spot.
Marking Your Drilling Spot
Accurate marking stops you from drilling in the wrong place. Use a pencil or an awl to make a clear mark. This mark acts as your target.
It helps you aim the drill bit perfectly. A little dot is usually enough.
Use a pencil for wood and softer materials. Make a clear, dark mark where you want the center of the hole. You can also draw a small ‘X’ if that helps you see the exact center better.
Use an awl for harder materials like metal or harder woods. An awl makes a small indentation. This indentation helps prevent the drill bit from “walking” or slipping across the surface when you start. Just press down firmly and twist the awl.
Use a ruler and square for precise placement. If the hole needs to be a specific distance from an edge or another feature, use a ruler and a carpenter’s square. Mark your lines first, then find the intersection for your drilling spot. This is crucial for furniture or anything requiring symmetry.
Securing Your Workpiece
A wobbly piece of material is a sure way to get a crooked hole. You need to secure whatever you’re drilling. Clamps are your best friend here.
This stops the material from moving while the drill is running. It also keeps your hands safe.
Use clamps to hold the material firmly to your workbench. Place clamps so they don’t get in the way of your drilling path. Make sure the material cannot shift at all. Test it by trying to wiggle it with your hand. If it moves, add more clamps or adjust them.
Consider using a vise for smaller pieces. A vise offers very secure clamping. It’s great for small parts that might be awkward to clamp to a bench. Make sure the part is snug in the vise jaws.
If clamping isn’t possible, try bracing the material. Sometimes, you might be drilling into something already installed. In such cases, try to brace it against a solid surface or have someone hold it very still. This is less ideal than clamping but can work in a pinch.
Techniques for Drilling a Straight Hole With a Hand Drill
Now we get to the actual drilling. This part focuses on the motions and techniques that will keep your drill bit on track. It’s a combination of steady control and knowing how to start and guide the bit.
Following these steps will help you achieve that perfect straight hole.
Starting the Hole Correctly
The beginning of the drilling process is critical. A good start makes the rest of the job much easier. If the bit slips at the start, the hole will be off from the get-go.
This is where that awl mark really helps.
Place the tip of the drill bit directly on your marked spot. Hold the drill straight up and down, perpendicular to the surface. This is the most important step for a straight hole.
For harder materials, make a small starter dimple with an awl. This indentation gives the drill bit a place to sit and grip, preventing it from sliding. For softer materials, the awl mark might be enough.
Apply gentle pressure and start turning the drill slowly. Just a light touch is needed to get the bit to bite. Let the bit cut a small groove into the material. Once you see the bit has started to cut, you can increase speed and pressure slightly.
Maintaining Drill Direction
Once you’ve started, keeping the drill going straight is about consistent control. This involves how you push and how you watch the drill. It’s a continuous process of checking your angle and pressure.
Keep your eyes on the drill bit as you drill. Watch it from the side to ensure it stays at a 90-degree angle to the surface. Your goal is to keep the bit perfectly vertical.
Drill at a consistent speed. Don’t rush. Slow, steady turns are better than fast, jerky ones. If you’re drilling wood, you might hear a change in sound when you’re about to break through the other side.
Use a drill guide if needed. For very critical applications, a drill guide can help. It’s a small tool that holds the drill bit straight for you. This is especially useful if you have trouble keeping your hands steady.
Periodically pull the bit out slightly. This helps clear out sawdust or metal shavings. It also helps to cool the bit, preventing it from getting too hot. Pulling out briefly also lets you check your angle again.
Dealing with Breakout
The moment the drill bit is about to come out the other side is called breakout. If you’re not careful, the material can splinter or tear at this point. This can mess up the exit of your straight hole.
Slow down as you approach the other side. Reduce your drilling speed and pressure significantly. This gives you more control over the bit as it exits.
Consider drilling partway from the other side. If you can access the other side of the material, drill into it from that side until you meet the first hole. This creates a cleaner exit with less tear-out. You can often feel when the bits meet.
Place a scrap piece of wood on the exit side. Clamp a small piece of scrap wood to the surface where the drill bit will emerge. This scrap piece acts as a backing. It gives the drill bit something to cut into instead of tearing out the main material.
Troubleshooting Common Hand Drilling Issues
Sometimes things don’t go perfectly. You might hit a knot in wood, or the drill bit might feel stuck. Knowing how to fix these problems will save your project and your patience.
These are common hurdles that most people face at some point.
The Drill Bit Wanders or Slips
This is one of the most common issues. It happens when the bit doesn’t bite into the material right away. It slides across the surface, making a scratch instead of a hole.
Ensure you used an awl or made a clear starting mark. The awl creates a tiny crater that helps guide the bit’s tip. If you’re working with metal, a center punch is even better for a small, defined starting point.
Apply just enough pressure to get the bit started. Let the sharp point of the bit dig in slightly before you start turning the drill. Sometimes, starting the drill in reverse briefly can help seat the bit on the mark.
Use a piece of tape. For very smooth surfaces, you can place a piece of masking tape over your mark. Then, make your mark on the tape. This gives the drill bit a bit more grip and prevents it from slipping.
The Drill Bit Gets Stuck or Binds
This can happen if you drill too fast, apply too much pressure, or if there’s a knot or hard spot in the wood. The bit stops turning freely and can even twist your wrist.
Stop drilling immediately and reverse the drill. Gently back the bit out of the hole. Don’t force it.
Clear any debris from the flutes of the drill bit. Sawdust or metal chips can pack into the spiral grooves of the bit, causing it to bind. Use a brush or compressed air.
Reduce your drilling pressure and speed. Let the bit do the cutting without forcing it. If you encounter resistance, try backing out and re-engaging the bit a little further down the hole.
Check the drill bit for damage. Sometimes, a bent or dull bit will bind more easily. If it’s damaged, it might be time to replace it.
The Hole Is Not Straight
If you notice your hole is leaning, it’s usually because the drill wasn’t held perfectly straight or the surface wasn’t flat. This is frustrating but often fixable.
Go back to the section on holding the drill steady and maintaining direction. Use visual cues to keep the drill 90 degrees to the surface.
If the hole is slightly off, you might be able to correct it by angling the drill slightly as you continue drilling. However, this can create an oval hole. It’s best to start over if possible for a truly straight hole.
For future projects, consider using a drill press or a drilling jig for guaranteed straight holes. These tools provide a stable guide for the drill bit.
Overheating the Drill Bit
Drilling creates friction, which creates heat. Too much heat can damage the drill bit, making it soft and less effective. It can also burn the material.
Use cutting fluid or a lubricant when drilling metal. This reduces friction and heat significantly. For wood, water can sometimes help, but be careful not to soak the wood too much.
Drill in short bursts. Don’t drill continuously for long periods. Pull the bit out of the hole every 10-20 seconds to let it cool. This also helps clear shavings.
Ensure your drill bits are sharp. A sharp bit cuts more efficiently, generating less friction and heat than a dull bit.
Real-World Scenarios and Practical Tips
Applying these techniques in real situations will make them stick. Let’s look at some common tasks and how to approach them. These examples show how to use what you’ve learned in practice.
Scenario 1 Building a Birdhouse
Imagine you’re building a simple birdhouse. You need to drill pilot holes for the screws that hold the pieces together. You also need a few larger holes for the birds to enter and perch.
First, mark all your screw locations with a pencil. Use a ruler and square to make sure they’re straight and aligned.
For the entry hole, use a larger drill bit. Measure and mark the center carefully. Make sure the bit is sharp and the correct size for the bird species you want to attract.
Secure each piece of wood with clamps before drilling. This is crucial to avoid splitting the thin wood.
When drilling the entry hole, start slowly and keep the drill steady. If the wood is thin, place a scrap piece behind it to prevent tear-out on the other side.
For the screw pilot holes, use a bit slightly smaller than your screws. Drill straight down into your marked spots. Let the drill bit do the work.
Scenario 2 Hanging a Shelf
You want to hang a new shelf on your wall. You need to drill holes in the shelf itself for mounting brackets and then drill into the wall to insert anchors.
Measure and mark where the bracket holes will go on the shelf. Ensure they are evenly spaced and centered.
Clamp the shelf securely. Use a drill bit that matches the size of your mounting screws. Drill straight through the shelf at your marked locations.
For the wall, find the exact spot where the bracket will sit. Use a stud finder if you’re attaching to a stud. Mark the center of your hole.
If you’re not hitting a stud, drill a hole large enough for your wall anchor. Use a drill bit that matches the anchor’s size. Make sure this hole is straight into the wall.
Insert the anchor, then attach the shelf with screws. Having straight holes makes the shelf sit flush and securely against the wall.
Tips for Different Materials
Working with different materials requires slight adjustments. What works for soft pine might not work for hard oak or thin metal.
Softwoods like pine or fir: These are easy to drill. Use sharp wood bits. Be careful not to apply too much pressure, as they can splinter easily. Scrap wood backing is good for preventing tear-out.
Hardwoods like oak or maple: These require more effort and sharper bits. You might need to drill slower. A pilot hole is almost always necessary to prevent splitting and make drilling easier. Cutting fluid can help if you’re drilling into very dense hardwood.
Metal: Use drill bits specifically designed for metal. They are harder and can withstand the heat and friction. Always use cutting fluid or oil to keep the bit cool and lubricated. Start with a small pilot hole, then use a larger bit if needed. Never force metal bits; let them cut.
Plastic: Plastic can melt if you drill too fast or too hot. Use sharp bits and drill at a moderate speed. A backing board can help prevent the plastic from cracking as the bit exits. Clean the bit often to remove melted plastic.

Frequently Asked Questions
Question: How do I keep my hand drill from wobbling?
Answer: Grip the drill body firmly with one hand and the handle with your dominant hand. Keep your elbows tucked in for stability. Ensure the drill bit is at a perfect 90-degree angle to the surface you are drilling.
Question: What if I don’t have clamps?
Answer: If clamps aren’t an option, try to brace the material firmly against a solid object. You could also ask someone to hold it steady for you, but clamps are always the safest and most secure method.
Question: My drill bit keeps slipping on the surface. What can I do?
Answer: Make sure you have a clear starting mark, ideally made with an awl or center punch. For very smooth surfaces, a piece of masking tape over the mark can provide extra grip for the drill bit.
Question: How do I know when to stop drilling?
Answer: As you approach the other side of the material, slow down and reduce pressure. You can often feel the drill bit start to cut through the surface on the exit side. For precise holes, measure the depth before you start drilling.
Question: Can I fix a hole that’s already crooked?
Answer: It’s difficult to perfectly fix a crooked hole. You might be able to widen it slightly to make it less noticeable, but for a clean result, it’s often best to fill the hole and start over on a new spot.
Summary
Drilling a straight hole with a hand drill is achievable with practice and the right techniques. Always start with sharp, appropriate bits. Secure your workpiece firmly.
Mark your spot accurately. Hold the drill steady at a 90-degree angle and apply even pressure. Paying attention to the breakout point helps prevent damage.
With these steps, you’ll get clean, straight holes every time.