How To Fill Gaps In Woodworking: Easy Techniques Explained
In the realm of woodworking, achieving a seamless finish is often complicated by unsightly gaps and imperfections that can compromise both structural integrity and aesthetic appeal. Understanding the nuances of materials, adhesives, and filler compounds is crucial for effectively addressing these voids. Techniques such as epoxy resin infill, wood glue utilization, and the employment of specialized fillers come into play as integral methods for gap management. This comprehensive exploration delves into various strategies and materials, revealing how to fill gaps in woodworking with precision and artistry, ensuring that your projects not only stand the test of time but also captivate the eye.
Discover the secrets within!
How To Fill Gaps In Woodworking: Essential Techniques
When working with wood, achieving a perfect finish often involves addressing imperfections and gaps. Understanding how to fill gaps in woodworking is essential for both aesthetic appeal and structural integrity. This process can enhance the durability of your projects while ensuring a smooth, professional appearance. Various materials and techniques are at your disposal, allowing for tailored solutions depending on the size and nature of the gaps. Mastering these methods will elevate your craftsmanship and contribute to a more polished final product.
Understanding Different Types of Gaps in Woodworking
Explanation of common gaps in woodworking projects. Importance of identifying the type of gap for proper filling.
Woodworking can lead to various types of gaps. Identifying these gaps is important for a successful project. Here are common types:
- Wood Shrinkage: This happens when wood dries out, leaving small spaces between pieces.
- Joint Gaps: Incorrectly fitted joints can create noticeable holes.
- Seasonal Expansion: Wood can swell or shrink due to temperature changes, causing gaps.
Recognizing these gaps helps you choose the right filling method for a neat finish.
Materials Needed for Filling Gaps
List of tools and supplies for gap filling. Comparison of different materials (wood filler, epoxy, caulk).
To tackle gaps in woodworking like a pro, you’ll need a few trusty materials. Consider wood filler for small cracks—it’s easy to sand and paint. Epoxy is your buddy for larger gaps; it’s strong and super sticky, perfect for tough jobs. Caulk is great for flexible spaces, like trim or corners.
Here’s a handy comparison table to help you choose the best option for your project:
| Material | Best For | Pros | Cons |
|---|---|---|---|
| Wood Filler | Small cracks | Easy to sand and paint | Not as strong as others |
| Epoxy | Larger gaps | Very strong and durable | Can be tricky to apply |
| Caulk | Flexible joints | Good for moving parts | Not for heavy-duty filling |
Gather these materials, and you’ll be one step closer to a flawless finish – no gap left behind, right?
Step-by-Step Guide to Filling Gaps in Woodworking
Preparing the area: cleaning and sanding. Application techniques for various fillers. Tools needed for smooth application.
Start by cleaning the area. Remove any dust and debris using a soft cloth or vacuum. Next, sand the gaps using fine-grit sandpaper. This helps the filler stick better.
Choose the right filler based on the size of the gap:
- Wood glue for small cracks
- Wood putty for larger holes
- Epoxy for very deep gaps
Use a putty knife or a caulking gun for smooth application. Make sure to work with the grain of the wood. Wait for the filler to dry, then sand it down for a perfect finish.
Choosing the Right Filler Based on Wood Type
Recommendations for softwood vs. hardwood. Color matching for different wood grains.
Choosing the right filler depends on the type of wood you are working with. Softwoods like pine and cedar need lightweight fillers. These fillers blend well and won’t weigh down the wood. For hardwoods such as oak or maple, a denser filler is better.
- Softwoods: Use lightweight, flexible fillers.
- Hardwoods: Opt for denser, strong fillers.
Color matching is also crucial.
For different wood grains, try to find fillers that match the natural shades. This will help create a smooth finish, making repairs less noticeable.
Common Mistakes to Avoid When Filling Gaps
List of frequent errors and how to prevent them. Tips for achieving a flawless finish.
Filling gaps in woodworking can be tricky. Here are some common mistakes to avoid:
- Not cleaning the gap first. Dust can stop the filler from sticking.
- Using too much filler.This can create an uneven surface.
- Skipping sanding. A smooth finish is vital for a professional look.
To achieve a flawless finish, try these tips:
- Choose the right filler for the wood type.
- Apply thin layers and let them dry completely.
- Finish with paint or stain to match the wood.
Finishing Techniques After Filling Gaps
Sanding and polishing methods. Staining and sealing options for a seamless look.
After filling the gaps, it’s time to make your woodworking look perfect. Start with sanding to smooth the surface. Use fine-grit sandpaper for the best results. Next, polish the area for a shiny finish.
Consider these options for a seamless look:
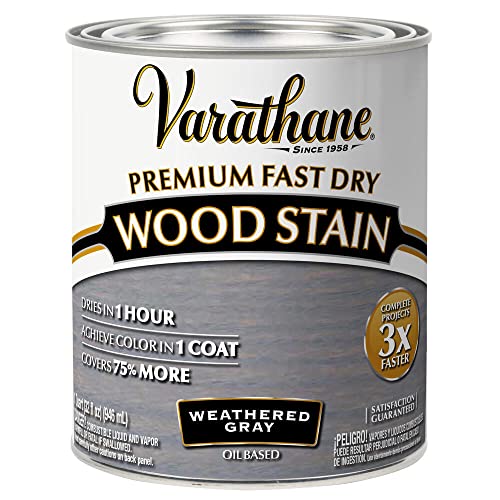
- Staining: Choose a stain that matches the wood color.
- Sealing: Apply a clear sealer to protect the wood.
This will give your project a beautiful, finished appearance.
Maintaining Finished Woodwork to Prevent Future Gaps
Best practices for care and maintenance. Environmental factors that contribute to gap formation.
Taking care of finished woodwork is like giving your favorite toy a bath — it keeps it looking fresh! Regular dusting and using a gentle cleaner can help. Humidity can be a sneaky culprit for gaps and cracks. Too much moisture can make wood swell, while too little can cause shrinkage.
Check the weather and adjust your home’s humidity levels! Here’s a quick table to help you remember:
| Care Tips | Environmental Factors |
|---|---|
| Dust regularly | High humidity |
| Use a soft cloth | Low humidity |
| Apply wax or polish | Rapid temperature changes |
By following these tips, your wood will stay gap-free and as happy as a puppy at a park!
Frequently Asked Questions About Filling Gaps in Woodworking
Addressing common queries and concerns. Expert tips for troubleshooting issues.
Woodworkers often wonder about those pesky gaps. Can they be filled? Yes! First, many ask about materials.
Plywood, caulk, or wood filler work great. Others worry about durability. Don’t fret!
A little sanding goes a long way in making your project look neat.
| Common Questions | Answers |
|---|---|
| Can I paint over filled gaps? | Sure!Just wait until it dries. |
| What if the gap is too big? | Use multiple layers of filler.Patience is key! |
| Will it look good? | With the right technique, it’ll look as good as new! |
If you run into issues, don’t panic.
Take a deep breath and maybe a snack break. Then, simply adjust your approach and keep going. Remember, every great woodworker was once a beginner!
Conclusion
In conclusion, mastering the art of filling gaps in woodworking not only enhances the aesthetic appeal of your projects but also ensures their longevity and durability. By employing techniques such as using wood filler, epoxy, or even sawdust mixtures, you can achieve flawless finishes. Keep experimenting and refining your skills to elevate your woodworking craftsmanship to new heights.
Happy woodworking!
FAQs
What Are The Most Effective Materials For Filling Gaps In Woodworking Projects?
The most effective materials for filling gaps in woodworking projects include epoxy, wood filler, and caulk. Epoxy is ideal for larger gaps and can be colored to match the wood, providing a durable finish. Wood filler, often made from a combination of wood dust and binders, is suitable for smaller imperfections and can be sanded and stained. Caulk is best for filling gaps between wood and other materials, offering flexibility and a smooth finish.
How Do I Choose The Right Color And Texture Of Wood Filler To Match My Project?
To choose the right color and texture of wood filler, first, assess the wood species in your project to determine its natural color and grain pattern. Next, select a filler that closely matches these characteristics; many brands offer color-matched options. Additionally, consider using a stainable filler if your project will be stained or painted, as it can better blend in. Finally, always test the filler on a scrap piece of wood to ensure a proper match before applying it to your project.
What Is The Best Method For Applying Wood Filler To Ensure A Smooth And Seamless Finish?
The best method for applying wood filler is to use a putty knife to spread it evenly into the damaged area, ensuring you work it into any cracks or holes. After the filler has dried, sand the surface using fine-grit sandpaper until it’s smooth and flush with the surrounding wood. For an extra seamless finish, consider applying a second coat of filler if necessary, then sand again. Finally, clean the area of dust before painting or staining to achieve the best results.
Can You Provide Tips For Repairing Large Gaps Or Cracks In Wood Furniture Or Cabinetry?
To repair large gaps or cracks in wood furniture or cabinetry, start by cleaning the area to remove any dust and debris. Use a wood filler or epoxy that matches the wood’s color, applying it generously into the gap and smoothing it out with a putty knife. Once dried, sand the area flush with the surrounding wood and finish with paint, stain, or sealant to match the rest of the piece. Finally, consider using clamps to hold the wood together until the filler fully cures for the best results.
What Are The Advantages And Disadvantages Of Using Epoxy Vs. Traditional Wood Filler For Gap Filling?
Epoxy offers superior adhesion, durability, and resistance to moisture, making it ideal for filling larger gaps and cracks. Traditional wood filler, however, is easier to sand, stain, and paint over, providing a more natural finish for smaller repairs. The disadvantages of epoxy include longer curing times and potential difficulty in application, while traditional wood fillers may not hold up as well in high-stress or outdoor environments. Ultimately, the choice between the two depends on the specific repair needs and desired finish.

