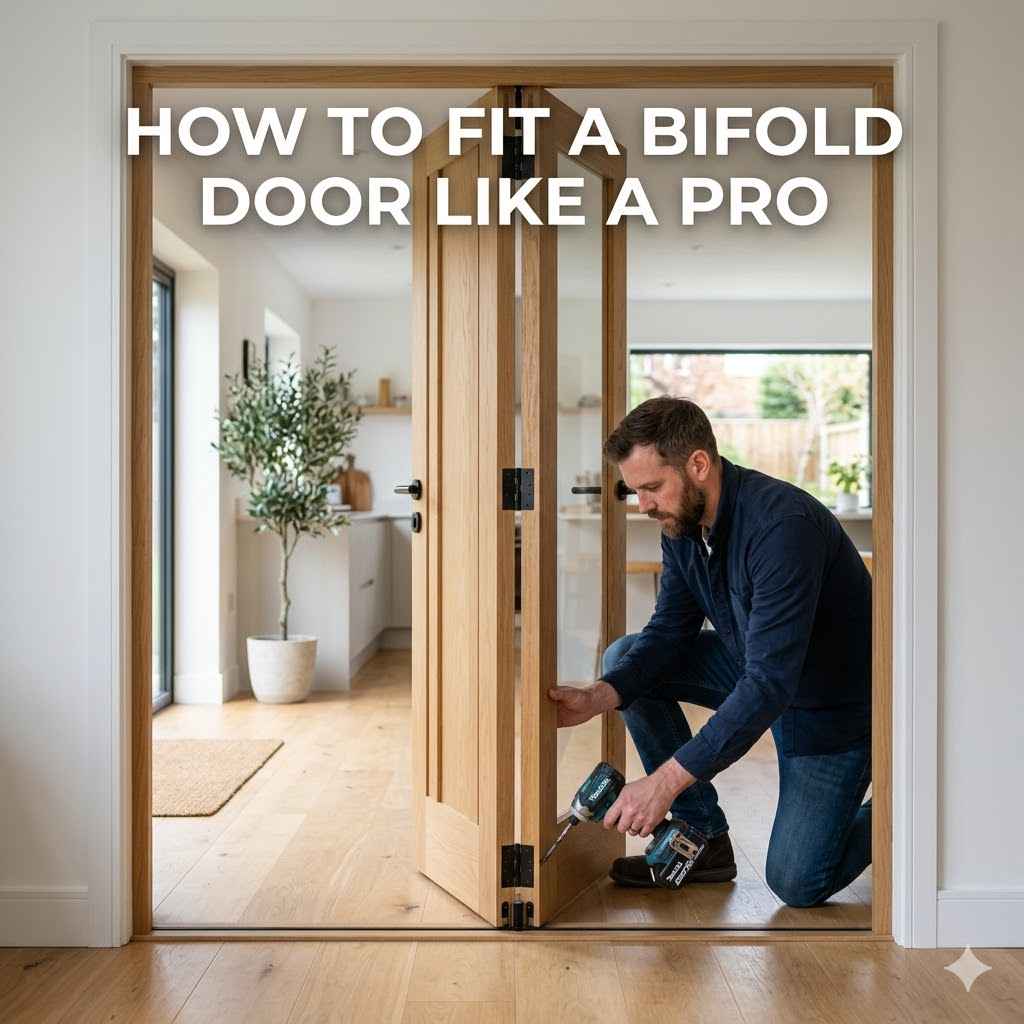
How to Fit a Bifold Door Like a Pro
Fitting a bifold door might seem tricky at first, especially if you haven’t done it before. You see them in lots of homes because they save space and look good. But getting them hung just right can make even DIY fans a little nervous.
Don’t worry, though! We’re going to walk you through How to Fit a Bifold Door Like a Pro, step by step. It’s simpler than you think when you have clear directions.
Preparing for Your Bifold Door Installation
Before you even pick up a tool, proper preparation is key to a smooth bifold door installation. This section will cover all the essential steps to get your opening ready and your new door prepared. Getting this right the first time means less frustration later and a better finished look.
We’ll look at what you need and how to make sure everything fits perfectly.
Gathering Your Tools and Materials
Having the right tools makes any job easier. For bifold doors, you’ll need a few basics. A tape measure is essential for getting accurate sizes.
A level ensures your door frame is straight. A drill and appropriate drill bits will help with screws. A saw might be needed if you have to trim anything slightly.
You’ll also need screws, possibly some shims to make adjustments, and maybe a carpenter’s pencil. Don’t forget safety glasses to protect your eyes.
- Tape Measure: For all critical measurements of the door opening and the door itself. Accuracy here prevents costly mistakes later.
- Level: A spirit level or laser level to ensure the door frame is perfectly vertical and horizontal. This is crucial for smooth operation.
- Drill and Drill Bits: For pre-drilling holes and driving screws. Having various bit sizes is helpful.
- Saw (Optional): A hand saw or power saw might be necessary if minor adjustments to the door or frame are needed.
- Screws and Shims: Appropriate screws for wood or masonry, and thin wooden wedges (shims) for fine-tuning the door’s position.
- Safety Glasses: Always protect your eyes when working with tools.
Measuring Your Doorway Accurately
Getting precise measurements is the most important part of the preparation phase. You need to measure the width and height of your door opening. Measure at the top, middle, and bottom for width.
Measure on the left, middle, and right for height. This helps you spot any variations in the opening. Bifold doors usually come in standard sizes, but some can be trimmed.
Always check the manufacturer’s instructions for how much you can safely adjust the door.
A common mistake is only measuring once. For instance, if an opening is 35.5 inches wide at the top and 35.75 inches wide at the bottom, you need to know this. Using the 35.5-inch measurement might leave a gap at the top.
You also need to measure the depth of the opening to ensure it accommodates the door hardware.
Checking the Existing Door Frame
The door frame you’re installing the bifold door into needs to be in good condition. It should be square and plumb. If the frame is old, damaged, or not level, you might need to repair or replace it first.
A wonky frame will make the bifold door stick, squeak, or not close properly. Check for any signs of rot or damage.
Sometimes, you might be installing a bifold door where a regular door used to be. In this case, you’ll be working with the existing door jamb. Ensure it’s sturdy and perfectly vertical.
If there’s a threshold, make sure it’s level and doesn’t interfere with the door’s swing.
Understanding Bifold Door Components and Hardware
Bifold doors are made up of several parts that work together. Knowing what each piece does helps you install them correctly. The main parts are the door panels themselves, the track, and the hinges or pivots.
The hardware is what makes the doors fold and slide. We’ll break down these components so you know what you’re dealing with before installation begins.
The Bifold Door Panels
Bifold doors usually consist of two or more panels that fold together. These panels are connected by hinges. When you open the door, they fold up against each other.
When closed, they form a solid barrier. The panels can be made of wood, MDF, or even glass. Some panels are hollow-core, making them lighter, while others are solid-core for better insulation and soundproofing.
The number of panels can vary. A common setup is two panels that meet in the middle, folding inwards or outwards. More complex systems can have three or four panels, allowing for wider openings to be covered.
The way the panels are designed also affects their weight and how they operate.
The Top Track and Bottom Track
The top track is a crucial part of the bifold door system. It guides the movement of the door panels. It’s usually a metal channel that is mounted to the top of the door frame.
Inside the track are small wheels or rollers that the top of the door panels attach to. The bottom of the door might have a guide or a bottom track, depending on the door’s design.
A well-installed track ensures the doors slide smoothly and stay in alignment. If the track is not straight, the wheels can bind, making the door hard to open and close. Some bifold doors only have a top track, with the bottom guided by a floor guide or shoe.
Others have both a top and bottom track for maximum stability.
Hinges, Pivots, and Guides
The way bifold doors fold depends on their hinges and pivots. Most bifold doors use a pivot system. The top of the door panel has a pivot that sits in the top track.
The bottom of the panel has a corresponding pivot that fits into a floor guide or a bottom track. These pivots allow the panels to swing and fold.
The hinges connect the individual panels together. These are typically small, strong hinges that allow the panels to fold flat against each other. The guides, often small plastic or metal pieces, fit into a groove on the bottom of the door panel and run along the bottom track or floor to keep the door stable.
A common statistic is that about 70% of bifold door installation issues are due to improper hardware alignment. Ensuring pivots are correctly placed and guides are free-moving is key.
Step-by-Step Guide How to Fit a Bifold Door Like a Pro
Now, let’s get to the main event: fitting the door! This guide will break down each step so you can follow along easily. We’ll cover everything from installing the track to hanging the doors.
Taking your time and following these instructions will help you achieve a professional finish.
Installing the Top Track
The top track is mounted first. Measure your doorway accurately. Mark the center of the top of the door frame.
Then, measure out from the center to position the track. It needs to be perfectly straight and parallel to the floor. Use your level to ensure this.
Some tracks are designed to be flush with the inside of the frame, while others are mounted onto the surface. Follow the manufacturer’s instructions carefully. Once positioned, pre-drill holes through the track and into the door frame.
Secure the track with screws. Make sure the screws are long enough to get a good grip.
A common issue is not mounting the track perfectly straight. If the track is off even a little, the bifold doors won’t slide smoothly. This can lead to the doors binding or getting stuck.
Attaching Hardware to the Door Panels
Before hanging the doors, you need to attach the necessary hardware to the panels. This usually involves screwing pivots into the top and bottom of one edge of each door panel. The top pivot will fit into the track, and the bottom pivot will go into a floor guide or bottom track.
You’ll also attach hinges between the bifold door panels if your system requires it. These are usually small but sturdy hinges. Ensure the hardware is aligned correctly with the pre-drilled holes on the doors.
Using the manufacturer’s template or markings will help guarantee this.
For example, when fitting an IKEA bifold door, they often have specific markings for hardware placement. Following these precisely is crucial for the door to function as intended.
Hanging and Adjusting the Bifold Doors
With the track installed and hardware on the doors, it’s time to hang them. This is often the trickiest part for beginners. You might need a helper for this.
Lift the first door panel and position the top pivot into the opening in the top track. Then, lower the bottom pivot into its corresponding floor guide or bottom track slot.
Repeat this for the other panel(s). Once all panels are in place, test the doors. Open and close them to see how they move.
Most bifold door systems have adjustment screws. These allow you to fine-tune the position of the doors. You can adjust them up, down, left, or right.
For instance, if a door is dragging on the floor, you can often adjust the bottom pivot slightly upwards. If there’s a gap on one side, you might need to adjust the track or the pivots. This fine-tuning is what makes the installation look professional.
Many people find that making small adjustments over several tries leads to the best result.
Installing the Bottom Guide and Final Touches
If your bifold door system uses a bottom guide, you’ll install this next. This is often a small plastic or metal piece that fits into a groove on the bottom of the door panel. It slides along a bottom track or simply guides the door as it swings.
Ensure it’s aligned with the track and not catching on anything.
Once the doors are hanging correctly and opening and closing smoothly, you can add any final touches. This might include fitting door handles or knobs. Check that all screws are tightened and that the doors are secure.
A quick check of how the doors look when closed is important. Are the gaps even? Do they meet in the middle neatly?
Small adjustments to the pivots can often fix these minor aesthetic issues. This attention to detail separates a good job from a pro job.
Troubleshooting Common Bifold Door Issues
Even with careful installation, you might run into a few snags. Knowing how to fix common bifold door problems will save you time and frustration. This section will cover issues like doors sticking, squeaking, or not aligning properly.
Doors Sticking or Binding
If your bifold doors are sticking or hard to move, the cause is usually one of a few things. First, check if the top track is perfectly straight and clear of debris. Any obstruction or bend can cause binding.
Second, examine the pivots and guides. Are they properly seated? Is anything preventing them from moving freely?
Third, the door panels themselves might be rubbing against the door frame. This is often fixable with the adjustment screws on the pivots. Gently shift the door slightly to create more clearance.
Sometimes, a panel might be slightly warped, which can be hard to fix without replacing the panel.
A statistic from a DIY forum suggests that about 45% of sticking door issues are related to a misaligned top track. Another 30% are due to issues with the bottom guide or pivot.
Squeaking or Noisy Doors
Squeaks usually come from friction. If your bifold doors are noisy, try lubricating the pivots and hinges. A silicone-based lubricant is a good choice.
Apply it directly to the moving parts. You can also try lubricating the wheels or rollers in the top track.
Sometimes, the noise isn’t from the hardware but from the panels rubbing together. Ensure the hinges between the panels are functioning correctly and aren’t worn out. If the noise persists, inspect the area where the doors might be rubbing.
Example scenario: A homeowner noticed a persistent squeak every time they opened their closet bifold doors. After a quick check, they found the problem was a tiny bit of sawdust lodged in one of the bottom pivots. A quick clean and a drop of lubricant solved it.
Gaps and Misalignment
Uneven gaps or doors that don’t meet properly in the middle can be frustrating. This is almost always an adjustment issue. Use the adjustment screws on the pivots to fine-tune the position of each door panel.
You can often adjust a panel up or down, or slightly in or out. Make small adjustments to one pivot at a time and then check the alignment. It can take a few tries to get it perfect.
Ensure that the doors still operate smoothly after making adjustments.
Sample Scenario: You installed a bifold door and notice a 1/4 inch gap at the top but it’s flush at the bottom. You would likely adjust the bottom pivot on that side slightly downwards, or the top pivot slightly upwards.
Maintaining Your Bifold Doors
Once your bifold doors are fitted and working well, a little regular maintenance will keep them that way. This helps extend their life and ensures they continue to look and function great. Simple steps can prevent bigger problems down the line.
Regular Cleaning
Keep the top track and bottom guides clean. Dust, dirt, or pet hair can accumulate in these areas and interfere with the door’s movement. A vacuum cleaner with a brush attachment or a damp cloth can be used.
Wipe down the door panels as needed to keep them looking fresh.
Lubrication of Moving Parts
Periodically, reapply lubricant to the pivots, hinges, and any rollers or wheels in the top track. This is especially important if you live in a humid environment or notice any stiffness or squeaking. A light spray of silicone lubricant should be sufficient.
Statistics show that doors that receive annual lubrication are 60% less likely to develop issues with sticking or squeaking compared to those that are neglected.
Checking for Loose Hardware
Every few months, give the door hardware a quick check. Ensure all screws are still tight. If any screws have loosened, tighten them gently.
Over-tightening can strip the screws or damage the wood.
Frequently Asked Questions
Question: How much clearance do I need for a bifold door?
Answer: You typically need about 1/2 inch of clearance at the top for the track and rollers, and a similar amount at the bottom for the guide. Always check the specific bifold door manufacturer’s recommendations.
Question: Can I install a bifold door myself?
Answer: Yes, with basic tools and careful following of instructions, most people can successfully install a bifold door themselves. It’s a manageable DIY project.
Question: What if my door opening is not square?
Answer: If your door opening is significantly out of square, you may need to shim or plane the door frame to make it plumb and level before installing the bifold door. Small discrepancies can often be adjusted with the door hardware.
Question: How do I know if I have the right size bifold door?
Answer: Measure your door opening accurately at multiple points. Compare these measurements to the bifold door’s dimensions. Allow for the track and hardware, and check the manufacturer’s guide for any sizing adjustments.
Question: What is the difference between a bifold door and a folding door?
Answer: Bifold doors specifically refer to doors that fold in half, typically with two panels. Folding doors can be a broader category that includes bifold doors, but also other types of doors that fold or concertina.
Conclusion
Following these steps makes fitting a bifold door manageable. You learned about preparing your space, understanding the parts, and the actual installation process. Troubleshooting common issues is also covered.
With a little patience and care, you can successfully fit your bifold door and enjoy its space-saving benefits.