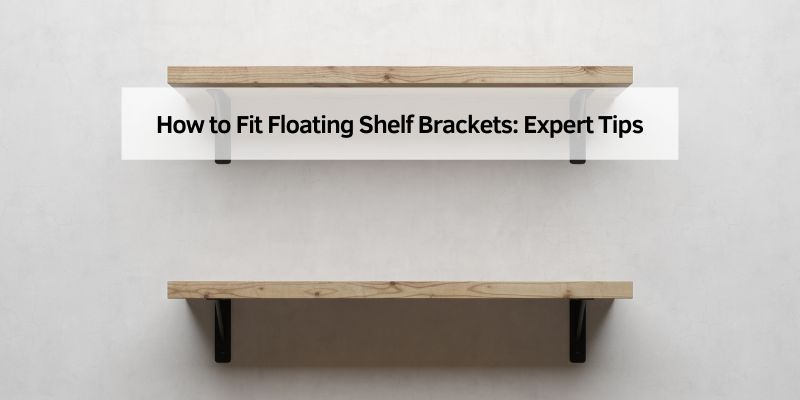
How to Fit Floating Shelf Brackets: Expert Tips
Have you ever admired the sleek look of floating shelves and wondered how you could achieve the same elegant style in your own home? You’re not alone.
Floating shelves can transform a room, offering both aesthetic appeal and practical storage. However, fitting the brackets that hold these shelves can seem daunting. But fear not, this task is easier than you think, and you don’t need to be a professional to get it right.
You’ll discover simple, step-by-step instructions that will help you fit floating shelf brackets with confidence. Imagine the satisfaction of seeing your favorite books, decor, or plants elegantly displayed on shelves you’ve installed yourself. Keep reading to unlock the secret to achieving this modern, clutter-free look in your space.
Choosing The Right Floating Shelf Brackets
Wood, metal, or plastic are common bracket materials. Each has its own look. Metal is strong and shiny. Wood is warm and natural. Plastic is light and can be colorful. Choose a material that matches your room style.
Brackets must hold the shelf and items safely. Check the weight limit before buying. Heavy items need strong brackets. Light items can use simple brackets. Always double-check the capacity to avoid accidents.
Brackets come in many styles. Some are hidden behind the shelf. Others are decorative and show off. Think about how you want the shelf to look. Match the brackets to your room decor.
Credit: www.youtube.com
Tools And Materials Needed
A drillis very important for making holes. You will need a screwdriverto tighten screws. A levelhelps keep the shelf straight. Use a measuring tapeto find the right spot. A pencilmarks where to drill.
Wear safety gogglesto protect your eyes. Gloveskeep your hands safe. A dust maskhelps you breathe clean air.
You might want some wall anchorsfor extra strength. Have a stud finderto locate studs in the wall. A spirit levelis good for checking balance. Keep some extra screwshandy.
Preparing Your Wall
First, know what type of wall you have. It could be drywall, plaster, or brick. Each wall type needs different tools. Drywall is common in homes. Plaster is older and harder. Brick walls are strong and need special tools. Knowing your wall type helps you choose the right screws and anchors.
Studs are wooden beams inside the wall. They make shelves strong. Use a stud finder to locate them. Move it slowly on the wall. It beeps when it finds a stud. Mark the spot with a pencil. Studs are usually 16 inches apart.
Measure where you want the shelf. Use a tape measure for accuracy. Mark the spots for the brackets with a pencil. Ensure the marks are level. Use a spirit level to check. This keeps your shelf from tilting. Double-check your marks before drilling holes.
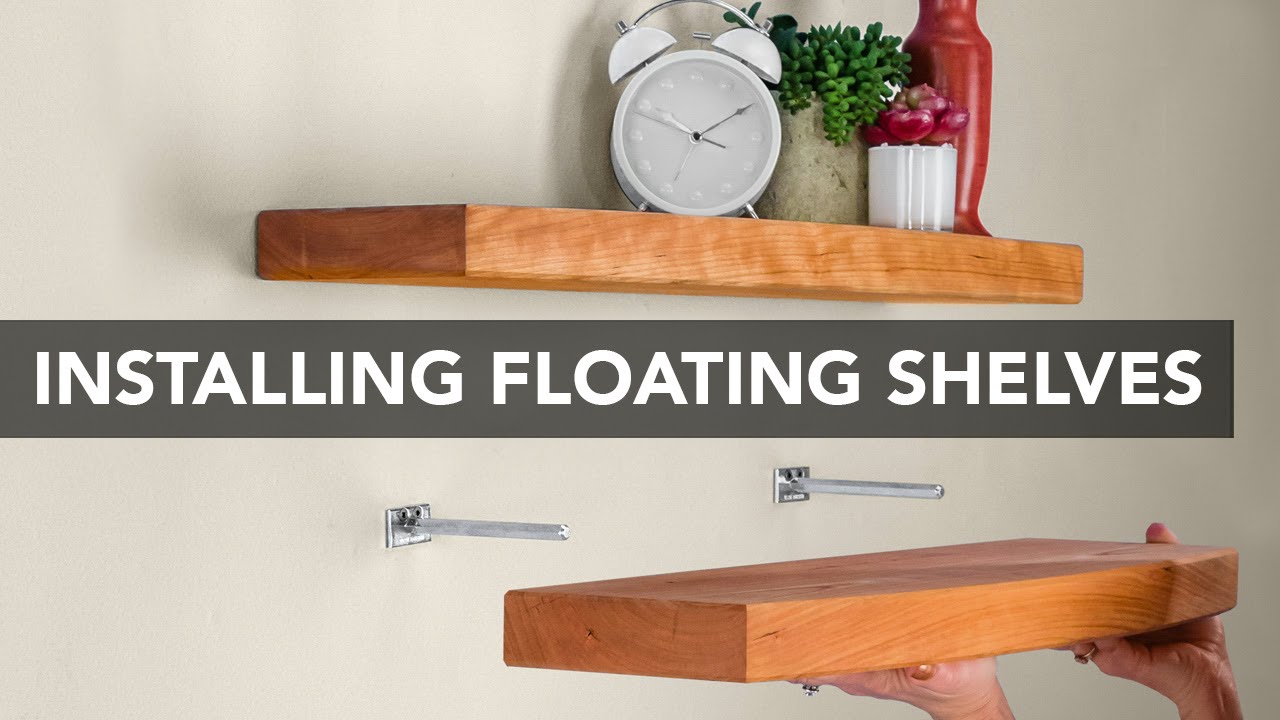
Installing The Brackets
First, mark the spots for the holes. Use a pencil for this. Make sure the marks are even. Next, take a drill and make the holes. Be careful while drilling. Use the right size drill bit. The holes should be deep enough.
Insert the bracket into the holes. Hold it steady. Use screws to secure the bracket. Tighten the screws well. This keeps the bracket firm. Check if the bracket is strong.
Use a level tool to check alignment. The bracket should be straight. Adjust if it is not level. Make sure it looks neat. A straight bracket is important for safety. Double-check everything before using the shelf.
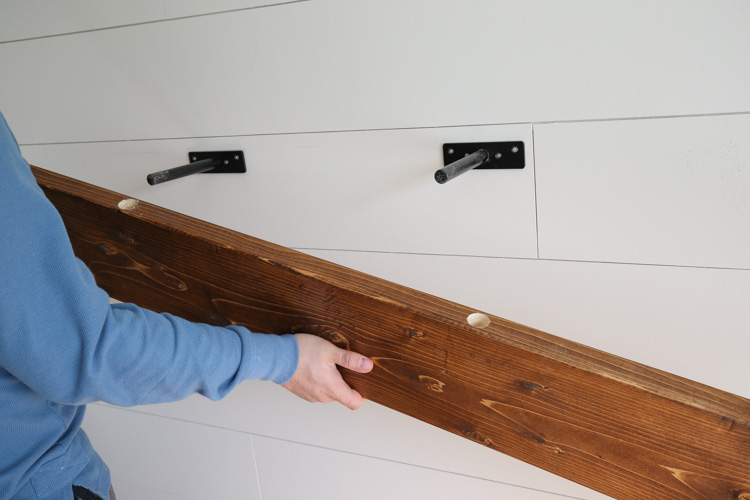
Mounting The Shelves
Place the shelf bracket against the wall. Use a level to check if it is straight. Make sure all brackets are at the same height. This keeps the shelf straight. Mark the holes on the wall with a pencil. Now, you know where to drill. This step is very important for balance.
Drill holes into the wall where you marked. Use the right drill bit size. Attach the brackets to the wall with screws. Make sure they are tight. Check the brackets again with the level. Place the shelf onto the brackets carefully. The shelf should fit snugly.
Check if the shelf is stable. Gently push on it. If it moves, tighten the screws more. Make sure everything is straight with the level. Adjust the shelf if it is not straight. Your shelf should now be secure and ready for use.
Credit: angelamariemade.com
Troubleshooting Common Issues
Shelves can look uneven if the wall isn’t flat. Use a level toolto check your shelf. Adjust the brackets if needed. Sometimes, the holes in the wall are not aligned. This can make shelves tilt. Make sure the holes are even before you install.
Brackets can become loose over time. Tighten the screws with a screwdriver. If screws don’t hold, use wall anchors. These give extra grip. Check that the brackets are straight and tight. Loose brackets can make shelves fall.
Walls can get damaged if brackets are not fitted right. Use a drillto make holes. Avoid making holes too big. This prevents damage. Use the right screws and anchors. They help keep the wall safe. Check the wall after fitting the brackets.
Maintenance And Care
Installing floating shelf brackets requires precision and care. Begin by marking the wall and drilling holes for the brackets. Secure the brackets with screws, ensuring they’re level for stability and a clean look. Proper maintenance ensures longevity and prevents damage to the wall or shelf.
Regular Checks
Check your floating shelf brackets every month. Look for loose screws or cracks. Tighten any loose parts to keep the shelf safe. Replace broken pieces right away. Regular checks keep your shelves strong. They help avoid accidents.
Cleaning Tips
Use a soft, damp cloth to clean brackets. Avoid harsh cleaners as they might damage the surface. Dry with a clean towel to prevent rust. Clean your shelves every few weeks. It keeps them looking new and tidy.
Repair Suggestions
Small cracks can be fixed with wood glue. Apply glue and press the parts together. Use a clamp to hold until dry. For metal brackets, use metal epoxy for repairs. If damage is severe, consider buying new brackets.

Credit: www.prettyrealblog.com
Frequently Asked Questions
What Tools Are Needed For Fitting Brackets?
To fit floating shelf brackets, you need a drill, level, measuring tape, and screws. A stud finder is also helpful for securing brackets to wall studs. Ensure you have the correct drill bit size for the screws. Having a pencil handy for marking positions can be useful too.
How To Find Wall Studs For Brackets?
Use a stud finder to locate wall studs behind the drywall. Move it slowly across the wall until it indicates a stud. Mark the stud location with a pencil. Studs are usually spaced 16 or 24 inches apart, so measure accordingly to ensure proper bracket support.
Can I Install Brackets On Drywall?
Yes, you can install brackets on drywall using wall anchors. Choose anchors suitable for the weight of your shelves and items. Drill holes for the anchors, insert them, and then attach the brackets using screws. Always ensure the wall can support the intended load.
How High Should I Place The Shelves?
The height of floating shelves depends on their purpose and location. For kitchen or bathroom shelves, place them around eye level for easy access. In living areas, consider placing them 4 to 5 feet from the floor. Adjust according to your room’s design and personal preference.
Conclusion
Fitting floating shelf brackets can be easy with simple steps. Measure carefully. Use the right tools. Secure brackets firmly. Align shelves properly for balance. This ensures stability and safety. Always double-check your work. This guarantees shelves hold weight. A well-installed shelf adds elegance to any room.
Practice these tips for a neat finish. Enjoy the satisfaction of a job well done. With patience and care, you can achieve great results. Happy DIY shelving!