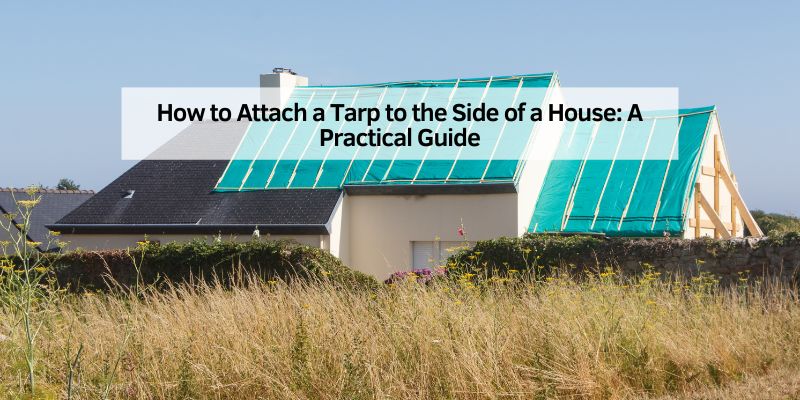
How to Attach a Tarp to the Side of a House: A Practical Guide
Hey there, neighbor! So, you’re thinking about attaching a tarp to the side of your house? Maybe you want some shade for a backyard barbecue, protection for your patio furniture, or a temporary shelter for your car. I’ve been there. Over the years, I’ve rigged up tarps on my house for all sorts of reasons—everything from shielding my porch during a stormy summer to creating a cozy outdoor workspace. Let me share what I’ve learned about how to attach a tarp to the side of a house the right way. By the end, you’ll have all the know-how to get it done safely and securely.
I’ve wrestled with flapping tarps in windy Ohio afternoons and figured out what holds up (and what doesn’t). This guide is packed with my hands-on experience, from picking the right tarp to anchoring it so it stays put. Whether you’re a DIY newbie or a seasoned homeowner, I’ll break it down into simple steps. Let’s get that tarp up and make your outdoor space work for you!
Why Attach a Tarp to Your House?
When I first moved into my home, I didn’t think much about tarps. But then a big rain ruined my outdoor furniture, and I realized a tarp could be a lifesaver. Attaching a tarp to the side of your house creates a quick, affordable shelter. It’s perfect for protecting patios, cars, or equipment from rain, sun, or snow. I’ve used tarps to make shaded spots for summer parties or to keep my firewood dry in winter.
Tarps are versatile. They’re cheaper than building a permanent structure like an awning. You can put them up when you need them and take them down when you don’t. Plus, they come in all sizes and colors, so you can pick one that fits your needs and looks decent. But the trick is attaching it securely so it doesn’t flap, tear, or damage your house. That’s what I’ll show you.
Choosing the Right Tarp
Not all tarps are the same. I learned this after buying a cheap one that shredded in a storm. Here’s what I look for when picking a tarp:
- Material: Most tarps are polyethylene, vinyl, or canvas. Polyethylene is lightweight and waterproof but less durable. Vinyl is tougher and great for heavy-duty use. Canvas is breathable and eco-friendly but heavier. I usually go with vinyl for long-term setups.
- Size: Measure the area you want to cover. Add a few extra feet for overlap and anchoring. For my patio, a 10×12-foot tarp works well.
- Thickness: Thicker tarps last longer. Look for a thickness of at least 10 mils. My heavy-duty tarp is 12 mils, and it’s held up for years.
- Grommets: These are the metal rings along the tarp’s edges. Make sure they’re rust-proof and spaced every 2-3 feet. More grommets mean more anchor points.
- Color: Dark colors absorb heat, while light ones reflect it. I use a silver tarp for shade because it keeps things cooler.
Here’s a quick table to help you choose:
| Feature | What to Look For | Why It Matters |
|---|---|---|
| Material | Vinyl or polyethylene | Durability and weather resistance |
| Size | Affects temperature under the tarp | Allows for secure anchoring |
| Thickness | 10 mils or more | Prevents tearing |
| Grommets | Rust-proof, every 2-3 feet | More anchor points for stability |
| Color | Light for shade, dark for warmth | Affects the temperature under the tarp |
Picking the right tarp sets you up for success. Don’t skimp here—it’s worth spending a bit more.
Tools and Supplies You’ll Need
Before you start, gather your gear. I’ve tried doing this with whatever I had lying around, and it’s a hassle. Here’s what I use now:
- Tarp: Based on your choice above.
- Rope or Bungee Cords: I prefer bungee cords for flexibility, but paracord works for tight setups.
- Screws and Washers: Use 2-inch exterior screws with wide washers to secure to the house.
- Screw Anchors: For brick or masonry, get plastic anchors to hold screws.
- Drill and Bits: A cordless drill with masonry and wood bits covers most surfaces.
- Ladder: Make sure it’s sturdy and tall enough to reach your attachment points.
- Tape Measure: To size the tarp and mark anchor points.
- Level: Ensures your tarp hangs evenly.
- Microfiber Cloth: To clean the house surface before attaching.
- Stakes or Poles: For anchoring the tarp’s outer edge to the ground.
Having everything ready saves time and frustration. I keep a toolbox just for outdoor projects like this.
Preparing Your House Surface
Before attaching the tarp, prep the house. I once skipped this and ended up with a loose screw that pulled out. Here’s my prep routine:
- Clean the Area: Wipe down the siding, brick, or stucco with a microfiber cloth. Remove dirt or cobwebs. This helps screws grip better.
- Check for Damage: Look for cracks or weak spots in the siding. Avoid attaching to damaged areas—they won’t hold. I had to patch some stucco before one setup.
- Mark Attachment Points: Use a tape measure to mark where you’ll attach the tarp. I space screws every 2-3 feet along the top edge of the tarp. Use a level to keep them straight.
- Choose the Height: Decide how high you want the tarp. For shade, I attach mine about 8 feet up. For rain protection, angle it lower to let water run off.
Prepping takes 15 minutes but makes the tarp secure and professional-looking.

Attaching the Tarp to a Wood or Vinyl Siding House
Most houses in the USA have wood or vinyl siding. I’ve attached tarps to both, and it’s straightforward if you’re careful. Here’s how I do it:
- Drill Pilot Holes: Use a drill bit slightly smaller than your screws. Drill into the siding at your marked points. I go slowly to avoid cracking the siding.
- Add Washers: Slide a wide washer onto each screw. This spreads the pressure and prevents the tarp from tearing at the grommets.
- Secure the Tarp: Line up a tarp grommet with a pilot hole. Screw through the grommet and washer into the siding. Don’t overtighten—it can strip the hole. I use a cordless drill on low torque.
- Repeat Across the Top: Attach all top grommets the same way. Check the level to ensure the tarp hangs evenly.
- Seal the Holes: Apply a dab of exterior caulk around each screw to prevent water leaks. I missed this once and had a small drip inside.
This method is solid for wood or vinyl. It’s held my tarp through windy days without a hitch.
Attaching the Tarp to a Brick or Masonry House
If your house is brick or stucco, like mine was for a few years, you’ll need a different approach. Here’s what I do:
- Use Masonry Anchors: Drill pilot holes with a masonry bit at your marked points. Tap plastic screw anchors into the holes with a hammer.
- Attach with Washers: Slide a washer onto a screw, then line up a tarp grommet. Screw through the grommet and washer into the anchor. I tighten until snug but not forced.
- Space evenly: Repeat for all top grommets, using a level to keep the tarp straight.
- Check Stability: Tug gently on the tarp to ensure the anchors hold. I had one pull out once because I drilled too shallow.
- Seal Around Screws: Use masonry caulk to seal screw heads. This stops water from seeping into the brick.
Masonry takes a bit more effort, but it’s rock-solid when done right.
Securing the Tarp’s Outer Edge
Once the tarp is attached to the house, you need to anchor the outer edge. I’ve tried a few methods, and here’s what works best:
- Ground Stakes: For a ground-level setup, drive metal stakes through the tarp’s outer grommets into the soil. I use 12-inch stakes for a firm hold.
- Poles for Elevation: If you want the tarp raised, use adjustable aluminum poles. Loop bungee cords through the grommets and attach to the pole tops. I set my poles at a slight angle for stability.
- Weights for Hard Surfaces: On a patio or driveway, use sandbags or concrete blocks. Tie bungee cords from the grommets to the weights. I’ve used gallon jugs filled with water in a pinch.
- Angle for Drainage: Slope the tarp slightly away from the house so rain runs off. I aim for a 10-degree angle to avoid pooling.
Securing the outer edge keeps the tarp taut and functional. Check it after setup to ensure it’s tight.
Making Your Tarp Setup Weatherproof
Weather can be tough on tarps. I’ve had them flap in wind or sag under rain. Here’s how I make mine weatherproof:
- Tighten Everything: Loose tarps tear or collect water. I check all straps and screws for snugness.
- Add Reinforcements: For windy areas, tie extra bungee cords to mid-point grommets. I loop them to nearby trees or stakes.
- Patch Small Tears: If your tarp gets a small rip, use tarp repair tape. I keep a roll handy for quick fixes.
- Clear Debris: Remove leaves or branches that land on the tarp. They can hold water and cause sagging. I check mine after storms.
- Use a Waterproof Tarp: Ensure your tarp has a high waterproof rating (1,500mm or more). My vinyl tarp has a 2,000mm rating and sheds rain like a champ.
These steps keep your tarp strong through rain, wind, or snow.
Safety Tips to Keep in Mind
Safety is huge when attaching a tarp. I’ve had a few close calls, like a wobbly ladder, that taught me to be careful. Here’s what I do:
- Use a Stable Ladder: Ensure your ladder is on flat ground. Have a friend hold it if you’re going high.
- Avoid Power Lines: Check for overhead wires before raising poles or tarps. I nearly touched one once—scary stuff.
- Don’t Overload the Tarp: Heavy snow or pooled water can collapse it. I shake off snow after winter storms.
- Secure Loose Ends: Tie down bungee cords or ropes so they don’t trip anyone. I tuck extras under the tarp.
- Check Screws Regularly: Screws can loosen over time. I inspect mine monthly to avoid damage to the house.
Being cautious keeps you, your house, and your tarp safe.
Creative Uses for Your Tarp Setup
Once your tarp is up, you’ll find it’s super versatile. Here are some ways I’ve used mine:
- Outdoor Living Room: I strung lights under my tarp for a cozy patio hangout.
- Car Shelter: My tarp protected my classic car during a hailstorm.
- Work Area: I set up a tarp to cover my woodworking tools while building a deck.
- Kids’ Play Area: A tarp with a kiddie pool underneath made a shaded splash zone.
- Garden Protection: I used a tarp to shield plants during a late frost.
Tarps are like a blank canvas for outdoor projects. Get creative!
Maintaining and Storing Your Tarp
To make your tarp last, take care of it. I’ve had tarps last year with a little TLC. Here’s how:
- Clean It: Hose off dirt or bird droppings. I use mild soap for stubborn stains.
- Dry Before Storing: Wet tarps get moldy. I air-dry mine completely before folding.
- Store Properly: Fold the tarp neatly and keep it in a dry garage or shed. I use a plastic bin to keep critters out.
- Check Grommets: Rust or bent grommets weaken the tarp. I replace damaged ones with a grommet kit.
- Take It Down in Winter: If you don’t need it, remove the tarp before heavy snow. I store mine from December to March.
Good maintenance saves you from buying a new tarp every year.
My Tarp Adventures
One of my favorite memories is setting up a tarp for a family reunion. It poured rain, but my vinyl tarp kept everyone dry while we grilled burgers. But I’ve had flops too—like when a cheap tarp tore during a windy day, leaving my patio soaked. Each setup taught me something new, and I’m excited to pass those lessons to you.
Conclusion
Attaching a tarp to the side of your house is a simple, budget-friendly way to create shelter, shade, or storage. With the right tarp, tools, and techniques, you can set it up securely and make it last. From prepping your house to anchoring the tarp and weathering storms, every step counts. Avoid my early mistakes, like skipping caulk or using weak tarps, and you’ll have a setup that works like a charm.
I love how a tarp transforms my outdoor space, whether it’s for a party or protecting my gear. I hope this guide gives you the confidence to tackle your own tarp project. Grab your tools, pick a sunny day, and get that tarp up—your backyard is about to get a whole lot better!
FAQs
What kind of tarp is best for attaching to a house?
Vinyl or heavy-duty polyethylene tarps are best. They’re waterproof and durable. I use a 12-mil vinyl tarp for most setups.
Can I attach a tarp to vinyl siding without damaging it?
Yes, if you’re careful. Drill pilot holes and use washers with screws. Seal with caulk to prevent leaks.
How do I stop my tarp from flapping in the wind?
Tighten all straps and screws. Add extra bungee cords to mid-point grommets for windy days.
Do I need to slope my tarp?
Yes, angle it slightly away from the house. A 10-degree slope lets rain run off and prevents pooling.
Can I leave my tarp up all year?
You can, but check it regularly for wear. I take mine down in winter to avoid snow damage.
How do I clean a tarp after use?
Hose it off with water. Use mild soap for tough stains. Dry it completely before storing.
What if my tarp tears during use?
Patch small tears with tarp repair tape. For big rips, replace the tarp to avoid leaks.