How to Fix Spackle: Ultimate Guide to Repairing Drywall
To fix spackle, apply spackle to the hole with a putty knife, scrape off excess, let it dry, then apply another layer if needed. Spackling is a quick and easy way to repair minor holes and cracks in drywall.
Whether it’s a small nail hole or a larger repair, spackling can be used to fill in the damaged area and create a smooth surface for painting. By following a few simple steps, you can effectively fix spackle and restore your wall to its original condition.
We’ll discuss the process of repairing spackle, including the tools and materials you’ll need, as well as the steps to achieve a professional-looking finish. Additionally, we’ll provide tips for hiding spackle spots and reconstituting dried spackle for future use.
Common Issues With Drywall
Dealing with drywall can bring about various challenges, and it’s essential to be equipped with the right knowledge to address these issues effectively. From identifying nail holes and wall texture problems to dealing with drywall holes and cracks, understanding the common issues with drywall is crucial for maintaining the integrity and aesthetics of your walls.
Identifying Nail Holes And Wall Texture Problems
Nail Holes: Nail holes are a common issue that can detract from the smooth appearance of your walls. Identifying these imperfections is the first step toward achieving a flawless finish.
Wall Texture Problems: Inconsistencies in wall texture can create an uneven and unappealing surface. It’s important to recognize these issues to effectively address and restore the uniformity of the wall surface.
Dealing With Drywall Holes And Cracks
Holes and Cracks: Whether caused by accidental impact or settling, holes and cracks in drywall can compromise the structural integrity of your walls. Understanding the best practices for repairing these imperfections is essential for maintaining a seamless and polished wall surface.
Materials And Tools Needed
To fix spackle, you will need materials such as spackling paste, sandpaper, drywall mud, joint compound, paint, and plaster. Tools required include a putty knife, sanding sponge, and a drywall saw. Apply spackle to the hole with a putty knife, let it dry, sand it smooth, and paint over it to finish the job.
Essential Tools For Repairing Drywall
- Putty Knife: For applying spackle
- Sanding Block: Smoothens the spackled area
- Utility Knife: Cutting drywall if needed
- Measuring Tape: Ensures accurate measurements
Types Of Spackle And Their Uses
| Spackle Type | Uses |
|---|---|
| All-Purpose Spackle | For general repairs on walls and ceilings |
| Lightweight Spackle | Ideal for small holes and dents |
| Quick-Dry Spackle | Best for quick fixes and small projects |
Materials and Tools Needed:
- Putty knife, sanding block, utility knife, measuring tape
- All-purpose spackle, lightweight spackle, quick-dry spackle
Repairing Small Holes
Repairing Small Holes: Small wall holes can be easily fixed with the right techniques. Follow these steps to repair them effectively.
- Assess the hole size and gather necessary materials like spackle, putty knife, sandpaper, and paint.
- Clean the area around the hole to ensure a smooth application of spackle.
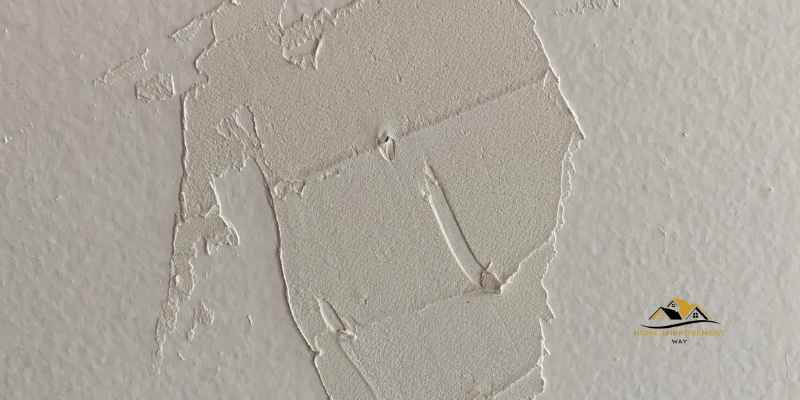
- Apply spackle to the hole using downward strokes with a putty knife, filling it completely.
- Smooth out the excess spackle and let it dry as per the product instructions.
- Once dry, sand the area gently to blend the spackled hole with the wall surface.
- Apply a primer and paint over the repaired area to match the wall color.
After spackling small holes, proper sanding and painting are crucial to achieve a seamless finish.
- Use fine-grit sandpaper to gently sand the spackled area for a smooth texture.
- Clean the sanded area to remove any dust particles before painting.
- Apply a primer to the repaired spot to ensure the paint adheres evenly.
- Paint over the patched area with the same color as the surrounding wall for a seamless look.
Handling Large Holes
Repairing large holes in drywall can be a challenging task, but with the right techniques and tools, it can be done effectively. Here’s a guide on how to handle large holes in spackle, ensuring a smooth and seamless finish.
Techniques For Repairing Large Holes In Drywall
When dealing with large holes in drywall, it’s important to use the right techniques for a successful repair. Here are some effective methods:
- Use a drywall saw to create clean edges around the hole.
- Apply mesh tape over the hole to provide a strong foundation for the spackle.
- Gradually layer spackle over the mesh tape, allowing each layer to dry before applying the next.
- Sand the spackled area to achieve a smooth and even finish.
Installing New Drywall And Applying Joint Compound
If the hole is too large to repair with spackle alone, consider installing new drywall and applying joint compound. Here’s how to do it:
- Cut out the damaged section of drywall using a utility knife or drywall saw.
- Measure and cut a new piece of drywall to fit the hole, ensuring a precise fit.
- Secure the new drywall in place with screws or nails.
- Apply joint compound over the seams and screw/nail heads to blend them with the existing wall.
- After the compound dries, sand the area and apply additional coats if necessary for a seamless finish.
Advanced Spackling Methods
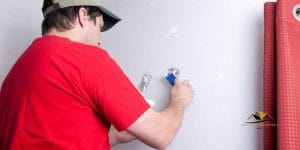
When fixing screw holes and dents:
- Use a putty knife for precise application.
- Apply spackle in thin layers for smooth results.
- Sand the area gently for a seamless finish.
For seamless repairs:
- Apply mesh tape over larger holes for added reinforcement.
- Fill gaps with caulk for a professional look.
- Smooth out any excess caulk for a flawless surface.
Fixing Mistakes And Bad Spackling
When it comes to spackling, mistakes and bad jobs can happen. But don’t worry, there are ways to fix them. Whether it’s repairing poor spackle jobs or reconstituting dried spackle, these solutions will help you achieve a smooth and flawless finish.
Repairing Poor Spackle Jobs
If you’ve ended up with a poor spackle job, there’s no need to panic. Here’s how you can fix it:
- Assess the damage: Before you start fixing the spackle, assess the extent of the poor job. Look for any uneven surfaces, bumps, or areas with too much or too little spackle.
- Reapply spackle: Using a putty knife, carefully reapply spackle to the problem areas. Make sure to feather the edges to blend the new spackle with the surrounding surface.
- Sand and smooth: Once the spackle has dried, lightly sand the repaired areas to create a seamless finish. Use a sanding block or sandpaper to gently smooth out any imperfections.
- Prime and paint: After sanding, prime the repaired areas to ensure proper adhesion of the paint. Once the primer is dry, paint the surface to match the rest of the wall.
Reconstituting Dried Spackle
If you find that your spackle has dried out, you can reconstitute it to make it usable again. Follow these steps:
- Add water: Start by adding a small amount of water to the dried spackle. Use a putty knife to mix the water thoroughly into the spackle until it reaches a smooth consistency.
- Test the consistency: Check the consistency of the spackle to ensure it’s not too thin or too thick. It should be easy to spread but not runny.
- Adjust as needed: If the spackle is too thick, add a bit more water and mix it in. If it’s too thin, let it sit for a few minutes to thicken up.
- Use the reconstituted spackle: Once you’ve achieved the right consistency, use the reconstituted spackle to fill in any holes or imperfections as needed.
Final Touches And Maintenance
When it comes to final touches and maintenance of spackle, there are key steps to ensure a flawless finish. From ensuring proper priming and painting to maintaining a smooth drywall surface, attention to detail is crucial.
Ensuring Proper Priming And Painting
Before painting over spackled areas, it is essential to prime the surface to ensure proper adhesion and a smooth finish. Use a high-quality primer specifically designed for drywall to seal the spackled area and create a uniform base for painting.
Tips For Maintaining A Smooth Drywall Surface
Once the spackled area has been primed and painted, proper maintenance is key to preserving the finish. Here are some tips to help maintain a smooth drywall surface:
- Regularly inspect the painted surface for any signs of damage or wear.
- Touch up any areas where the paint has chipped or peeled to prevent further deterioration.
- Keep the painted surface clean by dusting or wiping with a damp cloth as needed.
- Avoid using abrasive cleaners or scrubbing the painted surface to prevent damage.
Frequently Asked Questions
How Do You Fix Bad Spackling?
To fix bad spackling, scrape away the excess and reapply spackle to the hole. Let it dry and assess the repair. Sand, prime, and paint the area to finish. If the spackle is old, reconstitute it by adding water and stirring thoroughly.
How Do You Repair A Hole In Spackle?
To repair a hole in spackle, use a putty knife to apply spackle with angled, downward strokes. Scrape away excess product and let it dry. Assess and apply another layer if needed. Ensure the spackle is flush, prime, and paint the area.
How Do You Fix Spackle Spots?
To fix spackle spots, ensure the spackle is flush with the wall and prime the area. For larger repairs, paint the repaired area first before painting the wall. To repair a hole in spackle, use a putty knife to apply spackle to the hole and scrape away any excess.
Let it dry and apply another coat if necessary. To reconstitute dried spackle, follow the instructions on the container. Sand the patch smooth and clean the tools after use.
How Do You Fix Old Spackle?
To fix old spackle, reconstitute dried spackle by adding water and stirring until smooth and usable.
Conclusion
Fixing spackle can be a simple and easy task if you follow the right steps. From choosing the right materials to applying spackle and sanding the surface, you can achieve a flawless finish on your walls. Remember to take your time, use the right tools and techniques, and don’t forget to prime and paint your repaired areas.
With these tips, you can fix spackle like a pro and enjoy a smooth and polished wall surface in no time.