How To Fix Stained Wood: Simple Tips For Stunning Results
In the realm of woodworking and furniture restoration, encountering stained wood surfaces presents a frequent challenge. Whether due to water damage, excessive sunlight, or accidental spills, these unsightly marks can compromise the aesthetic integrity of your wooden pieces. Understanding the underlying causes of discoloration is essential for selecting the most effective restoration techniques.
From chemical treatments to mechanical refinishing, there are various methodologies available that can rejuvenate your cherished items. As we delve into the multifaceted approaches to rectify these unsightly blemishes, you’ll discover the nuances of how to fix stained wood and bring your furniture back to life.
How To Fix Stained Wood: Effective Solutions And Tips
This article provides practical solutions for effectively addressing stained wood surfaces. It covers a range of techniques tailored to different types of stains, including water, oil, and heat marks, ensuring that you can restore your wooden furniture and fixtures to their former glory. Additionally, it highlights essential tools and materials needed for the repair process, along with expert tips to achieve optimal results. Whether dealing with minor blemishes or more serious discoloration, discover how to fix stained wood and enhance your home’s aesthetic appeal.
Understanding Wood Stains
Types of wood stains and their characteristics. Common causes of wood stains. Identifying the type of stain on your wood.
Wood stains come in various types, each with unique traits. Here are some common types:
- Oil-based stains: Provide deep color and durability.
- Water-based stains: Dry quickly and are easy to clean.
- Gel stains: Thicker consistency that adheres well to different surfaces.
Stains can appear due to spills, water damage, or sun exposure. Identifying the stain type is key to fixing it. Look for:
- Color changes or dark spots.
- Surface feel—smooth or rough.
- Consistency—thin or thick stains.
Assessing the Damage
How to examine the stained area. Differentiating between surface stains and deep stains. Tools needed for assessment.
First, take a close look at the stained area. Use good lighting; shadows make stains play hide-and-seek! Is the stain just sitting on the surface, like a stubborn pancake syrup, or has it soaked deep into the wood, making friends with the fibers?
To tell the difference, gently wipe the area with a damp cloth. If it comes clean, it’s a surface stain! If not, you’ve got a deep stain on your hands, like a mystery in a detective book.
You’ll need some handy tools for this assessment.
The basic kit includes:
| Tool | Purpose |
|---|---|
| Cloth | Wipe and check the stain |
| Magnifying glass | Examine deeper damage |
| Flashlight | Spot hidden stains |
With your detective tools ready, you can now tackle the stains like a pro! Time to become the superhero of your wood surfaces!
Tools and Materials Needed
Essential tools for fixing stained wood. Recommended cleaning agents and products. Safety gear and precautions.
To tackle stained wood, you need the right tools. Begin with a paintbrush for applying cleaners. Don’t forget a sponge for scrubbing those stubborn spots!
A sandpaper set is essential for smoothing out rough patches. Safety first—grab some gloves and a mask to keep dust and chemicals away from you. Now, let’s look at recommended cleaners:
| Cleaning Agent | Use |
|---|---|
| Vinegar | Great for water stains |
| Wood cleaner | Perfect for everyday grime |
| Mineral spirits | Best for tough stains |
With your tools in hand and a pinch of humor, you’re ready to kick those stains to the curb!
Cleaning Stained Wood
Stepbystep guide to cleaning light stains. Dealing with tough stains: best practices. Natural remedies vs. chemical solutions.
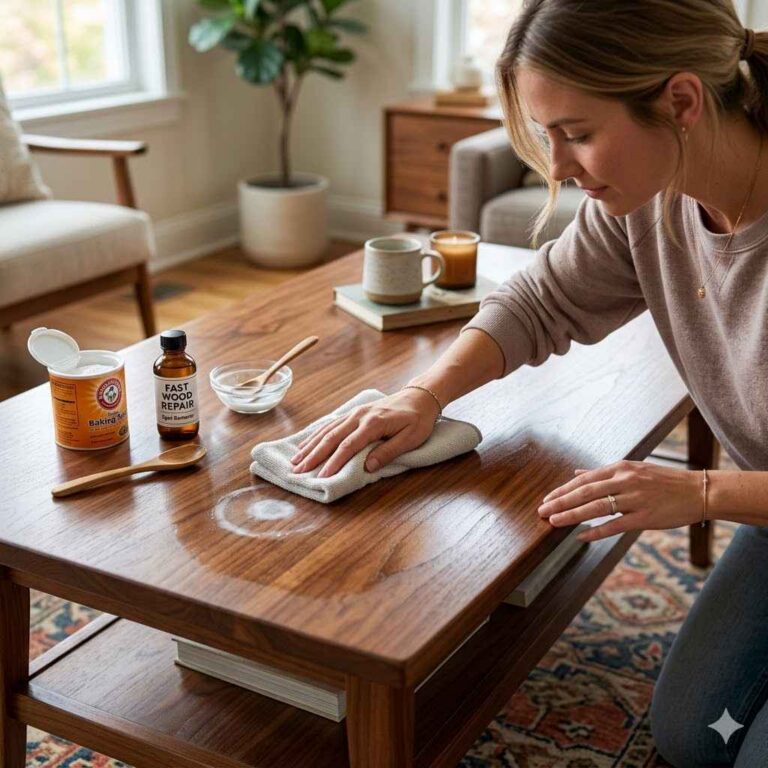
Cleaning stained wood can be easy with the right steps. Start by gently rubbing the stain with a soft cloth and warm, soapy water. For tougher stains, consider using a mix of vinegar and olive oil. Here are some best practices:
- Test any solution on a small area first.
- Use a soft brush for deeper stains.
- Wipe with a dry cloth after cleaning.
Natural remedies, like lemon juice or baking soda, are safe and eco-friendly.
However, tough stains may need chemical solutions. Remember to follow safety guidelines when using chemicals!
Repairing Stained Wood
Techniques for fixing deep stains and discoloration. Methods for refinishing: sanding and restaining. Applying protective finish after repair.
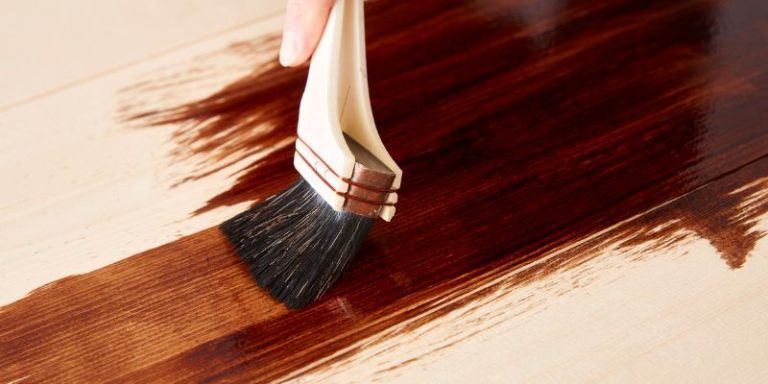
Deep stains can be a real headache, but don’t worry, we’re about to turn that frown upside down! First, use sanding to buff away tough blemishes. Grab some sandpaper and smooth the surface until it shines like a superstar!
Next is where the magic happens: restaining the wood to give it a fresh look. Choose a color you love and apply it evenly. Finally, don’t forget to apply a protective finish. This will keep your wood shining bright and safe from future mishaps, like spilled juice!
| Technique | Steps |
|---|---|
| Sanding | Use sandpaper. Smooth the surface carefully. |
| Restaining | Pick a stain color.Apply it evenly. |
| Protective Finish | Choose a finish.Apply to seal the wood. |
Preventing Future Stains
Maintenance tips for wooden surfaces. Best practices for protecting wood from stains. Recommended products for longterm protection.
Keeping wood surfaces clean is important to avoid stains. Regular dusting helps remove dirt and grime. Use a soft cloth to wipe down surfaces often.
Sealant can act as a barrier against spills. Apply it every few years to maintain protection. Here are some best practices:
- Use coasters for drinks.
- Place mats under hot items.
- Clean spills immediately.
For long-term protection, products like wood oils or specialized cleaners work best. Choose the right product to keep your wood looking new.
When to Seek Professional Help
Signs that a DIY approach may not be enough. How to choose a professional service. Cost considerations for hiring experts.
Sometimes, fixing stained wood can be tricky. Here are a few signs that a DIY attempt may not work:
- Deep stains that won’t come out with simple cleaning.
- Extensive damage that requires skills you don’t have.
- Large areas that need repair and look uneven.
Choosing the right professional is important. Look for experience and good reviews. Don’t forget to consider costs.
Some experts charge by the hour, while others by the job. Compare a few options to find a fair price.
Conclusion
In summary, fixing stained wood requires a combination of careful cleaning, sanding, and applying the right finish to restore the material’s original beauty. By following the methods outlined in this article—such as using vinegar, baking soda, or wood bleach—you can effectively tackle stains and breathe new life into your wooden surfaces. With patience and the right techniques, restoring stained wood is entirely achievable.
FAQs
What Are The Most Common Causes Of Wood Stains, And How Can They Be Prevented?
The most common causes of wood stains include water damage, oil spills, mold growth, and substances like food or beverages. To prevent these stains, it is important to regularly seal and finish wood surfaces with protective coatings, promptly clean up any spills, and maintain low humidity levels to avoid moisture exposure. Additionally, placing coasters under drinks and using mats can help protect against potential stains. Regular maintenance and care are key to preserving the wood’s appearance.
What Materials And Tools Do I Need To Effectively Clean And Fix Stained Wood?
To effectively clean and fix stained wood, you’ll need a few essential materials and tools. Gather mild soap or wood cleaner, a soft cloth or sponge, fine-grit sandpaper, wood stain or finish that matches the original color, and a clean applicator pad or brush. Additionally, a vacuum or brush for dust removal will help ensure a clean surface before applying any products. Don’t forget to wear gloves and work in a well-ventilated area for safety.
How Do I Determine The Type Of Stain On The Wood To Choose The Appropriate Cleaning Method?
To determine the type of stain on wood, first inspect the surface closely for color, texture, and finish. You can perform a small water or solvent test; if water beads up, it’s likely a water-based finish, while if it soaks in, it might be oil-based. Additionally, you can check for compatibility by applying a small amount of the cleaner in an inconspicuous area. Finally, consider the manufacturer’s recommendations if available, as this can guide you toward the correct cleaning method.
Can I Use Homemade Solutions To Treat Wood Stains, And If So, What Recipes Are Effective?
Yes, you can use homemade solutions to treat wood stains effectively. A common recipe involves mixing equal parts of vinegar and olive oil, which can help clean and condition the wood. For tougher stains, a paste made from baking soda and water can be applied gently and scrubbed with a soft cloth. Always remember to test any solution on a small, inconspicuous area first to ensure it doesn’t damage the finish.
What Steps Should I Follow To Refinishing Stained Wood For A Brand New Appearance?
To refinish stained wood, start by removing any existing finish using a chemical stripper or sanding the surface with progressively finer grits of sandpaper. Once the surface is smooth and clean, apply a wood conditioner to ensure even stain absorption, then choose your desired stain color and apply it evenly. After the stain dries, seal the wood with a protective topcoat, such as polyurethane, for durability and a polished finish. Finally, allow the finish to cure completely before using the item.