How to Restain a Deck (Water-Bead Test + Steps)
A deck needs restaining when water soaks in within a minute instead of beading up on the surface – water-based stains last 2-3 years, oil-based 3-5 years, depending on sun and foot traffic. Skipping prep or restaining over a failing finish wastes the new coat within a season. This guide covers stain selection, prep, application, and maintenance.
How To Restain A Deck: A Step-By-Step Guide
Restaining a deck is an essential maintenance task that not only enhances its appearance but also extends its lifespan. This process involves several key steps, including preparation, cleaning, and applying new stain. Understanding the right materials and techniques is critical to achieving a smooth and lasting finish. Proper timing, weather conditions, and deck condition also play significant roles in the successful outcome. This summary provides a brief overview of the essential steps and considerations for effectively restaining a deck.

Understanding the Importance of Deck Restaining
Imagine your deck as a superhero. Over time, it battles rain, snow, and sun. With wear and tear, it loses its strength.
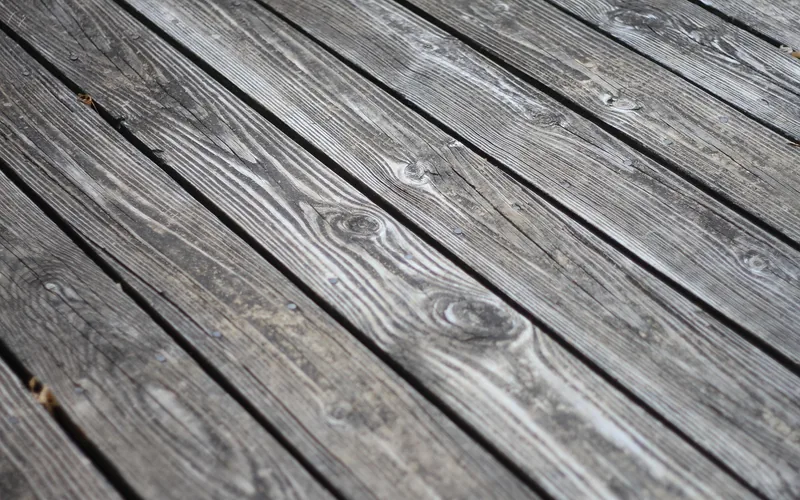
Restaining gives it a fresh shield! Benefits include protection from the elements and a beautiful look that makes neighbors jealous. But how do you know it needs help? The quickest test: sprinkle water on the deck boards – if it soaks in within a minute or two instead of beading up, the old finish has worn through and it’s time to restain. Also look for fading colors, rough spots, or even cracks.
Think of it as your deck asking for a spa day!
| Signs Your Deck Needs Restaining | Benefits of Restaining |
|---|---|
| Faded color | Protection against weather |
| Rough texture | Boosts appearance |
| Cracking or peeling | Increases lifespan |
Choosing the Right Stain for Your Deck
Deck stains come in two main types: oil-based and water-based – and there’s also a choice between transparent and semi-transparent finishes. Oil-based stains soak deep into the wood and offer great protection, while water-based ones dry faster and clean up easily. When choosing a stain, think about the color you want.
Do you prefer a bright look or something more natural? Transparency is another factor; clear stains show wood grain, while solid ones hide it. Finally, consider durability. A tough stain keeps your deck looking fresh through rain and sunshine.
Here’s a quick comparison:
| Type | Pros | Cons |
|---|---|---|
| Oil-based | Long-lasting | Longer drying time |
| Water-based | Quick drying | Less durable |
Preparing Your Deck for Restaining
To prepare your deck for restaining, gather essential tools and materials. You will need:
- Deck cleaner
- Wood repair filler
- Sandpaper or an electric sander
- Brushes or a roller for staining
- Protective gloves and goggles
Next, clean the deck thoroughly. You can use a pressure washer, or see our guide on how to clean a wood deck without a pressure washer.
This removes dirt and old stain. After cleaning, inspect for damage. Repair any cracks or holes with wood filler to ensure a smooth finish. Sand the surfaces to prepare them for the new stain, making your deck look great!
Best Deck Stain Pick
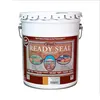
Ready Seal Semi-Transparent Oil-Based Stain
The oil-based, semi-transparent type this guide’s 3-5 year durability figure covers, penetrating deep into the wood grain.
- Best for: wood decks that need deep, long-lasting protection
- Why we picked it: no need to back-brush, self-levels for an even finish
- Main drawback: longer drying time than water-based alternatives
Compare more deck restaining essentials
 Option 1 Restore-A-Deck Wood Cleaner
|
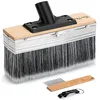 Option 2 7.5″ Deck Stain Applicator
|
 Option 3 Assorted Grit Sandpaper Sheets
|
As an Amazon Associate we earn from qualifying purchases.
Step-by-Step Process of Restaining a Deck
To start applying the first coat of stain, prepare your tools. Use a brush for tight areas and a roller for larger sections. This will help you cover the wood evenly. Here are some tips for a smooth application:
- Work in small sections.
- Apply the stain in the direction of the wood grain.
- Remove excess stain with a clean cloth.
After the first coat, wait at least four to six hours for drying.
Always check the manufacturer’s instructions for the best results. Once dry, you can apply a second coat for added protection.
Maintaining Your Newly Restained Deck
To keep your deck looking fresh, follow these simple tips:
- Clean regularly: Sweep away dirt and leaves. Use a gentle cleaner to wash the surface.
- Choose the right products: Look for stains and cleaners made for decks.Brands like Thompsons or Behr are great choices.
- Inspect often: Check for signs of wear and damage. Look for loose or broken boards.
- Plan routine upkeep: Reapply stain every two to three years.
By following these steps, you can make your newly restained deck last longer and look beautiful!
Common Mistakes to Avoid When Restaining a Deck
Restaining a deck can be tricky. Here are some common mistakes to steer clear of:
- Overapplication of stain: Too much stain can lead to a sticky finish. Always apply thin, even coats.
- Ignoring weather conditions: Rain or sun can affect how the stain dries. Choose a dry day with mild temperatures – check what temperature is too cold to stain a deck first.
- Skipping preparation steps: Cleaning and sanding the deck first ensures better stain adhesion. It’s worth the extra effort!
📊 Professional deck restaining averages $550-$1,250 total ($1-$4/sq ft); DIY materials alone run $20-$250. – Source: HomeAdvisor
“If water beads up on the surface, the finish is still protecting the wood. If it soaks in, it’s time to reseal.”
Frequently Asked Questions about Deck Restaining
How Often Should I Restain My Deck?
It varies by stain type: water-based semi-transparent stains typically last 2-3 years, oil-based semi-transparent lasts 3-5 years, and solid stains last longest – though heavy sun or foot traffic shortens any of these.
Can I Restain My Deck Without Stripping The Old Stain?
Yes – you can often restain without fully stripping the old stain, as long as the surface is clean and sound.
What Should I Do If The Stain Doesn’t Adhere Properly?
Check for moisture or dirt on the surface. Lightly sanding the area can help the new stain bond properly.
What Materials And Tools Do I Need To Restain A Deck Effectively?
To restain a deck effectively, you’ll need the following materials and tools: deck stain or sealant, a deck cleaner, a wood brightener, and possibly a wood filler for any repairs. For tools, gather a power washer or a stiff broom, a deck scrub brush, painter’s tape, and either a paint roller or a brush for application. Additionally, having a drop cloth and safety gear like gloves and a mask is recommended. Make sure to prepare the wood surface properly for optimal stain adherence.
How Do I Prepare The Deck Surface Before Applying The New Stain?
To prepare the deck surface for staining, start by thoroughly cleaning it to remove dirt, mildew, and old stains using a deck cleaner or a mixture of water and soap. Next, scrub the surface with a stiff bristle brush and rinse well to ensure all cleaning agents are removed. Once dry, sand any rough spots or splintered areas to create a smooth surface for the stain to adhere to. Finally, ensure that the deck is completely dry before applying the new stain.
What Is The Best Type Of Stain For Different Deck Materials (Wood Type, Composite, Etc.)?
The best type of stain for wood decks is typically a penetrating oil-based stain, as it enhances the natural grain and provides good protection. For high-quality composite decks, a solid acrylic stain or specialized composite deck coating is recommended to avoid potential issues with adhesion and discoloration. Additionally, pressure-treated wood can benefit from semi-transparent stains to allow for some grain visibility while protecting against moisture and UV damage. Always check manufacturer guidelines for specific recommendations based on the material and desired finish.
How Long Should I Wait Between Coats Of Stain, And How Do I Ensure Proper Drying Time?
You should typically wait 4 to 6 hours between coats of stain, but always check how long stain needs to dry before rain hits too. To ensure proper drying time, apply the stain in a well-ventilated area and maintain a consistent temperature. Additionally, avoid applying thick layers, as this can prolong drying time. Conduct a touch test to confirm that the previous coat is dry before applying the next one.
What Techniques Can I Use To Achieve An Even Finish When Restaining My Deck?
To achieve an even finish when restaining your deck, start by thoroughly cleaning the surface to remove dirt, mildew, and old stain. Use a high-quality stain applicator, such as a pad or roller, to ensure consistent application, and work in small sections to prevent overlapping. Apply the stain in thin, even coats, allowing each coat to dry fully before applying another. Finally, consider back-brushing with a natural bristle brush to help distribute the stain evenly and eliminate any pooling or runs.
Conclusion
In summary, properly restaining your deck enhances its longevity and aesthetic appeal. By following the steps outlined—cleaning, preparing, and applying the stain—you can rejuvenate your outdoor space. Regular maintenance not only protects the wood but also ensures your deck remains a beautiful gathering place for years to come.
Invest time in restaining for lasting enjoyment!
Sponsored / affiliate links. As an Amazon Associate I earn from qualifying purchases. I may earn additional commission from eligible campaigns.