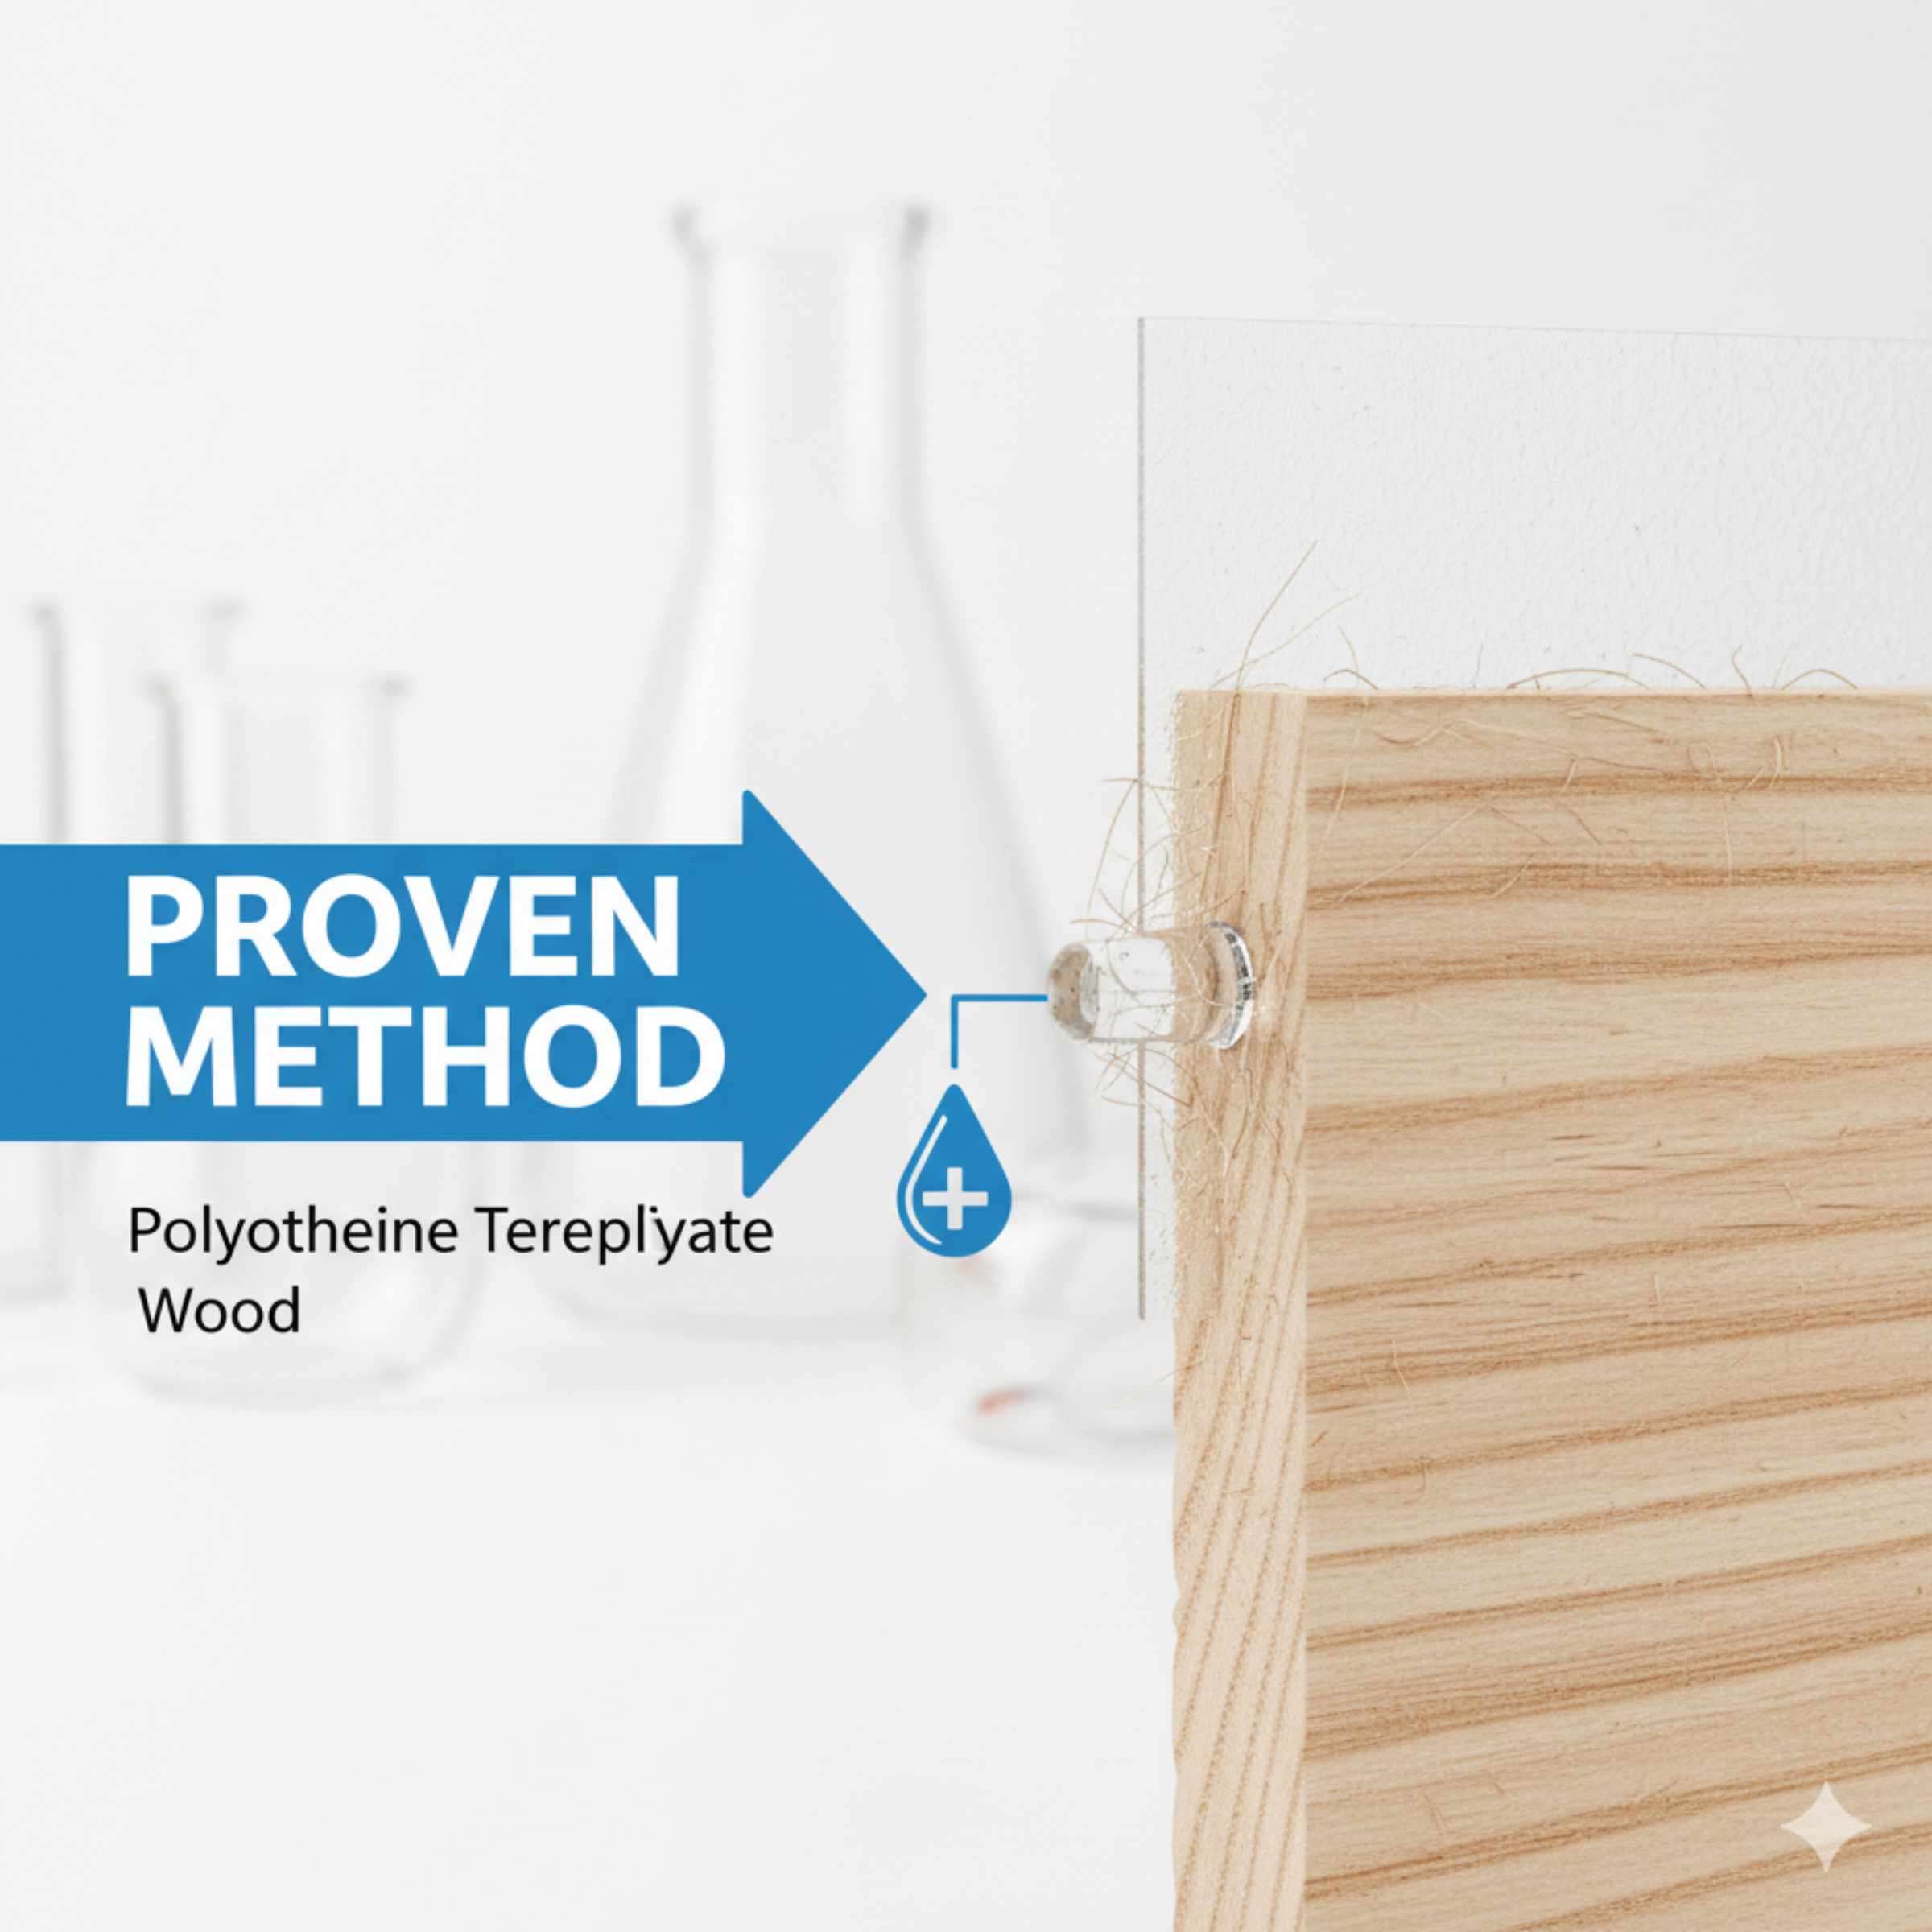
How To Get Polyethelene Terephthalate To Stick To Wood: Proven Method
Quick Summary: To successfully bond Polyethylene Terephthalate (PET) to wood, a specialized adhesive like a two-part epoxy or a strong cyanoacrylate (super glue) designed for plastics is essential. Proper surface preparation, including cleaning and light abrasion of both the PET and wood, is crucial for a durable bond. Heat application can also improve adhesion.
Ever tried to attach something made of that common plastic, PET, to a piece of wood for a DIY project, only to find it just won’t stick? It’s a common frustration for many home renovators and crafters. Whether you’re adding a decorative plastic trim to a wooden shelf or fixing a broken plastic part onto a wooden frame, getting these two very different materials to bond securely can feel like a puzzle. But don’t worry! With the right approach, you can achieve a strong, lasting connection.
This guide is designed to help you, the DIY homeowner, overcome this challenge. We’ll walk through a proven method, breaking down each step into easy-to-understand instructions. You’ll learn about the best materials to use, how to prepare your surfaces for success, and the techniques that make PET and wood friends. By the end, you’ll have the confidence to tackle your projects and get those materials to stick, beautifully and reliably.
Understanding Polyethylene Terephthalate (PET) and Wood
Before we dive into the “how-to,” let’s briefly chat about why PET and wood can be tricky to bond. Understanding their properties helps us pick the right methods.
What is Polyethylene Terephthalate (PET)?
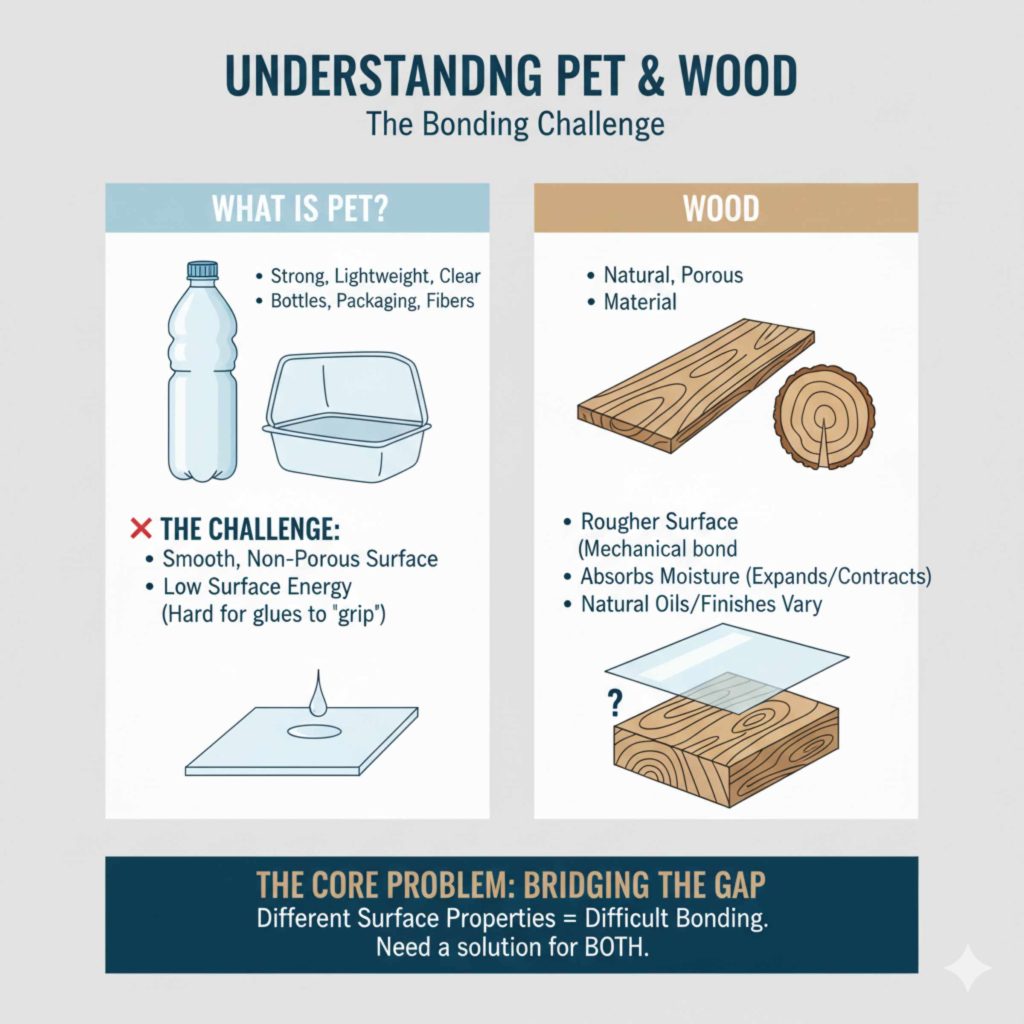
Polyethylene Terephthalate, commonly known as PET or PETE, is a type of plastic you see everywhere. It’s famous for being strong, lightweight, and clear, which is why it’s used for things like:
- Water and soda bottles
- Food packaging (like clamshell containers)
- Synthetic fibers (like polyester)
- Some films and sheets
One of the key characteristics of PET is its smooth, non-porous surface. This smooth surface makes it difficult for many common glues to get a good grip. Think of trying to stick tape to a freshly waxed car – it just slides right off! PET also has a relatively low surface energy, meaning it doesn’t readily “wet” or spread out when a liquid adhesive is applied, which is essential for good adhesion.
What Makes Wood Different?
Wood, on the other hand, is a natural, porous material. Its surface is rougher and has tiny openings that can help some adhesives penetrate and create a mechanical bond. However, wood also has its own challenges. It can absorb moisture, expand and contract with changes in temperature and humidity, and its natural oils or finishes can interfere with glue adhesion. Different types of wood and different finishes (like paint or varnish) will behave differently.
The Bonding Challenge
The core problem when bonding PET to wood is bridging the gap between these two materials with vastly different surface properties. A glue that works perfectly on wood might slide right off PET, and a glue that sticks to plastic might soak into the wood and not create a strong bond. We need a solution that can tackle both the non-stick nature of PET and the varied surface of wood.
The Proven Method: Step-by-Step Guide to Bonding PET to Wood
Getting PET to stick to wood requires careful preparation and the right adhesive. Here’s a step-by-step method that consistently delivers strong results. We’ll focus on using a strong, reliable adhesive that can handle both materials.
Step 1: Gather Your Supplies
Having everything ready before you start makes the process smooth and prevents interruptions. Here’s what you’ll need:
- Polyethylene Terephthalate (PET) piece: The plastic item you want to attach.
- Wood piece: The wooden surface you’re attaching it to.
- Adhesive: We’ll discuss the best options below, but a good starting point is a two-part epoxy or a strong cyanoacrylate (super glue) formulated for plastics.
- Cleaning supplies: Isopropyl alcohol (rubbing alcohol) and clean, lint-free cloths.
- Abrasive materials: Fine-grit sandpaper (around 180-220 grit) or a Scotch-Brite pad.
- Masking tape or painter’s tape: For holding pieces in place.
- Optional: Heat source: A heat gun or even a hairdryer on a medium setting.
- Safety gear: Gloves and eye protection.
Step 2: Prepare the PET Surface
This is a critical step for PET. Its smooth surface needs to be roughened up so the adhesive has something to grab onto.
- Clean the PET: Wipe down the area of the PET that will be bonded with isopropyl alcohol and a lint-free cloth. This removes any oils, dirt, or residues that could prevent the glue from sticking. Let it dry completely.
- Lightly Abrade the PET: Using your fine-grit sandpaper or Scotch-Brite pad, gently scuff up the surface of the PET where you’ll apply the adhesive. You don’t need to remove material, just create a dull, matte finish. This creates microscopic grooves for the glue to adhere to. Wipe away any dust with a clean cloth.
Step 3: Prepare the Wood Surface
Wood also needs preparation, especially if it has a finish.
- Clean the Wood: Wipe the wood surface with isopropyl alcohol to remove dust, oils, or any contaminants. If the wood is unfinished, a light sanding with fine-grit sandpaper can help create a better surface. If it’s finished (painted, varnished, etc.), lightly scuff the surface with sandpaper to break the sheen and improve adhesion.
- Remove Dust: Ensure all dust from sanding is completely removed. A tack cloth is excellent for this, or you can use a slightly damp cloth followed by a dry one.
Step 4: Choose and Apply the Right Adhesive
The adhesive is key. For PET and wood, you need something with strong bonding power that can work on both materials.
Best Adhesive Options for PET to Wood:
Here are some top choices, with their pros and cons:
| Adhesive Type | Pros | Cons | Best For |
|---|---|---|---|
| Two-Part Epoxy (e.g., 5-minute or 30-minute cure) | Excellent strength, fills gaps, good for porous and non-porous surfaces, durable, water-resistant. | Requires mixing, can be messy, longer cure times for maximum strength, some epoxies don’t bond well to all plastics. | Most DIY projects requiring a strong, permanent bond. |
| Cyanoacrylate (Super Glue) – Plastic Bonding Formula | Very fast curing, strong initial bond, readily available. Look for formulas specifically mentioning bonding plastics. | Can be brittle, may not fill gaps well, can bond skin instantly, less effective on very large surface areas or if there’s stress. | Small repairs, quick bonds, when speed is essential. |
| Specialty Plastic Adhesives (e.g., Plastic Bonder) | Formulated for specific plastics, can offer good flexibility and durability. | May be less common, can be more expensive, need to verify compatibility with PET. | When standard options fail or a specific property is needed. |
Recommendation: For most DIYers and for the strongest, most reliable bond between PET and wood, a good quality two-part epoxy is generally the best bet. Look for one that specifically states it bonds to plastics. Many hardware stores carry reputable brands.
Application Steps (using Epoxy as an example):
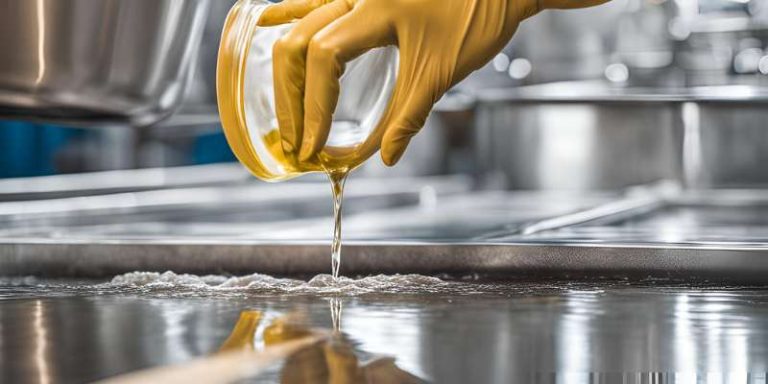
- Mix the Epoxy: Follow the manufacturer’s instructions precisely. Typically, you’ll mix equal parts of resin and hardener on a disposable surface (like cardboard or a plastic lid) with a stirring stick. Mix thoroughly but avoid whipping air into it.
- Apply the Adhesive: Apply a thin, even layer of the mixed epoxy to one of the prepared surfaces (either the PET or the wood). Don’t use too much, as it can squeeze out and create a mess. A small spatula or even a toothpick can help with precise application.
- Join the Pieces: Carefully align the PET piece with the wood and press them together firmly.
- Secure the Bond: Use masking tape or painter’s tape to hold the pieces securely in place while the epoxy cures. This is crucial to prevent movement.
Step 5: Enhance Adhesion with Heat (Optional but Recommended)
For an even stronger bond, especially with PET, a bit of heat can help. Heat softens the PET slightly, allowing the adhesive to penetrate microscopic irregularities more effectively. This is sometimes referred to as “thermal activation” or improving “wetting.”
- Gentle Heating: After applying the adhesive and joining the pieces (but before they are fully clamped or taped, if possible, or carefully afterward), use a heat gun or hairdryer on a medium setting.
- Apply Heat Briefly: Move the heat source back and forth over the PET surface for about 30-60 seconds, keeping it a safe distance away so you don’t melt or warp the plastic. The goal is to make it slightly pliable, not to melt it.
- Press and Secure: Immediately after heating, press the pieces together firmly and secure them with tape. The warmth helps the adhesive to flow and bond.
Caution: Be very careful not to overheat the PET, as it can deform or melt. Always test on a scrap piece first if you’re unsure.
Step 6: Curing Time
This is where patience pays off. Most adhesives need time to reach their full strength, not just to feel dry to the touch.
- Allow Full Cure: Let the bonded pieces sit undisturbed for the full recommended cure time specified by the adhesive manufacturer. This can range from a few minutes for some super glues to 24-72 hours for epoxies to reach maximum strength.
- Avoid Stress: During the curing period, avoid putting any stress, weight, or moisture on the bond.
Tip: For epoxies, the “handling time” (when you can carefully remove tape) is much shorter than the “full cure time” (when the bond is strongest). Always wait for the full cure time for the best results.
Factors Affecting Adhesion Strength
Even with the best method, several factors can influence how well your PET sticks to wood. Understanding these will help you troubleshoot and ensure success:
Surface Contamination
This is the number one enemy of any bond. Oils from your skin, dust, dirt, grease, or residues from manufacturing processes on the PET can all prevent an adhesive from making direct contact with the material. Always clean both surfaces thoroughly with a solvent like isopropyl alcohol before bonding. For wood, be mindful of any finishes, waxes, or natural oils that might be present.
Surface Preparation Quality
As we discussed, roughening the surface of the PET is crucial. If you don’t sand or abrade it enough, the adhesive won’t have enough surface area to grip. Conversely, sanding too aggressively can damage the PET or create dust that’s hard to remove. The goal is a dull, matte finish, not deep scratches.
Adhesive Choice and Application
Using the wrong type of glue is a common mistake. Standard wood glue or craft glue will likely fail on PET. Using too little adhesive won’t provide enough coverage, while using too much can lead to a weak bond if it doesn’t cure properly or squeezes out excessively. Ensure you’re mixing two-part adhesives accurately.
Environmental Conditions
Temperature and humidity during application and curing can affect bond strength. Most adhesives perform best within a specific temperature range (usually room temperature, around 65-75°F or 18-24°C). High humidity can sometimes interfere with the curing process of certain adhesives. For wood, extreme changes in humidity can cause it to expand or contract, potentially stressing the bond.
Stress and Load
Consider how the bonded pieces will be used. If the joint will be subjected to significant pulling, bending, or shear forces, you need an adhesive specifically designed for those stresses. Epoxies generally offer good all-around strength, but for highly flexible applications, a different adhesive might be needed (though less common for PET-to-wood). For structural applications, always consult the adhesive’s datasheet and consider mechanical fasteners in addition to adhesive.
Type of Wood and Finish
Some woods, like oily exotics (teak, rosewood), can be challenging to bond to due to their natural oils. Softwoods might be more prone to crushing under pressure. Painted or heavily varnished wood requires thorough sanding to break through the finish. Unfinished, clean hardwood will generally offer the best adhesion for wood.
Tools and Materials Deep Dive
Let’s take a closer look at some of the key tools and materials you’ll be using, and why they are important for this project.
Adhesives in Detail
Two-Part Epoxies
Epoxies are thermosetting resins that cure irreversibly when mixed. They consist of a resin component and a hardener component. When mixed, a chemical reaction occurs, creating a strong, rigid bond. For bonding plastics like PET, it’s crucial to select an epoxy that is known to bond to plastics. Some “all-purpose” epoxies might not perform well. Look for epoxies that list plastics on their compatibility list. Many come in convenient dual-syringe applicators that make mixing easier and more accurate. Check out resources like Epoxyworks.com’s Epoxy Basics for a deeper understanding of how epoxies work.
Cyanoacrylates (Super Glues)
These are fast-acting adhesives that polymerize rapidly when they come into contact with moisture, which is present in the air and on most surfaces. While incredibly fast, they can be brittle and may not be suitable for areas that experience flexing or impact. For plastics, it’s best to use a “plastic bonding” formula, which often includes an activator or a primer to help the glue adhere to low-surface-energy plastics like PET. These are readily available at most hardware and craft stores.
Surface Preparation Tools
Isopropyl Alcohol (Rubbing Alcohol)
This is a go-to solvent for cleaning surfaces in DIY projects. It evaporates quickly and leaves behind very little residue, making it ideal for removing oils, grime, and fingerprints from both plastic and wood without damaging most finishes. Ensure you use at least 70% concentration for best results.
Fine-Grit Sandpaper
For PET, you want something fine, like 180-220 grit. The goal is to create a surface texture, not to remove significant amounts of material. For wood, depending on its condition, you might use a similar grit for scuffing finishes or a slightly coarser grit (like 120) if the wood is rough. Always finish with a finer grit for a smoother surface.
Lint-Free Cloths / Tack Cloths
Essential for wiping away dust and residue after sanding or cleaning. Standard paper towels can leave behind lint, which can interfere with the bond. Microfiber cloths or specialized tack cloths are excellent choices for ensuring a perfectly clean surface.
Securing and Clamping
Masking Tape / Painter’s Tape
While not a clamp, these tapes are invaluable for holding pieces together securely while the adhesive cures. They provide gentle, even pressure and are less likely to damage the surfaces than more aggressive clamps. Ensure the tape is applied firmly to hold the pieces without shifting.
Optional: Heat Gun or Hair Dryer
A heat gun offers more controlled heat, but a hairdryer on a medium or high setting can work in a pinch for small projects. The key is to apply heat gently and evenly, focusing on the PET surface to improve its receptiveness to the adhesive.
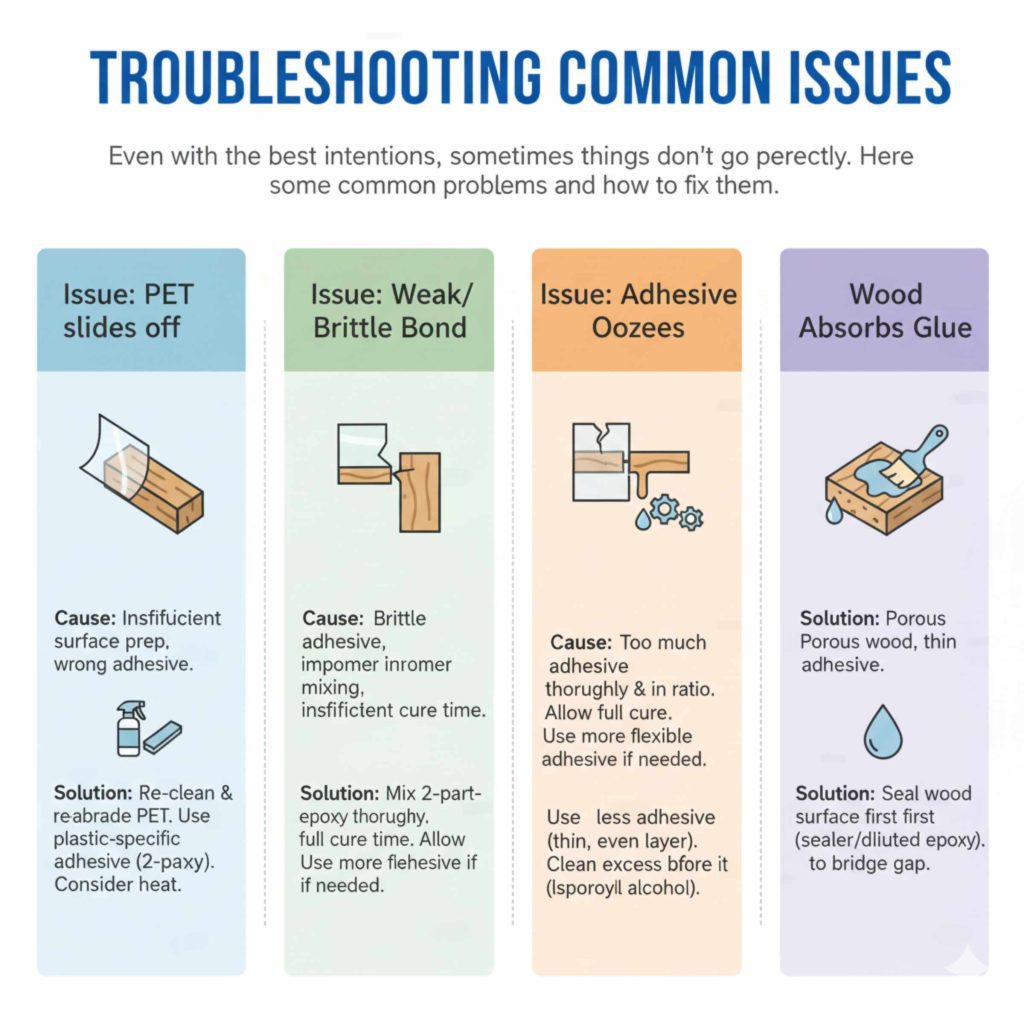
Troubleshooting Common Issues
Even with the best intentions, sometimes things don’t go perfectly. Here are some common problems and how to fix them:
Issue: The PET piece slides off the wood after the adhesive dries.
Cause: Insufficient surface preparation on the PET, or using the wrong type of adhesive.
Solution:
- Carefully try to remove the PET piece. If the adhesive is still relatively fresh, you might be able to peel it off.
- Thoroughly re-clean and re-abrade the PET surface.
- Ensure you are using an adhesive specifically designed to bond to plastics (like a two-part epoxy or plastic-specific super glue).
- Consider using the heat application step during re-bonding.
Issue: The adhesive bond is weak or brittle.
Cause: Using an adhesive that is too brittle, improper mixing of two-part adhesives, or insufficient cure time.
Solution:
- If using a two-part epoxy, ensure you mixed the resin and hardener in the correct ratio and mixed them thoroughly.
- Allow the adhesive to cure for the full recommended time, especially if the joint is under any stress.
- If the bond is failing due to brittleness and the application requires some flexibility, consider a more flexible adhesive, though these are less common for bonding PET.
Issue: The adhesive oozes out and creates a mess.
Cause: Using too much adhesive.
Solution:
- For future applications, use less adhesive. A thin, even layer is usually sufficient.
- Carefully clean up any excess adhesive that squeezes out before it cures. Isopropyl alcohol can sometimes help remove uncured epoxy or super glue. For cured adhesive, you might need a scraper or solvent, but be careful not to damage the surrounding surfaces.
Issue: The wood surface is absorbing too much of the adhesive, leaving the PET side weak.
Cause: Highly porous wood or using a very thin adhesive.
Solution:
- Consider sealing the wood surface first with a thin coat of wood sealer or even a diluted coat of the epoxy itself, allowing it to dry before applying the main bond.
- For two-part epoxies, they are generally good at filling gaps and adhering to wood, so ensure you’re using enough to create a bridge.
Frequently Asked Questions (FAQ)
Q1: Can I use regular wood glue to stick PET to wood?
A1: No, regular wood glue is generally not effective for bonding PET. PET is a non-porous plastic with a smooth surface that wood glue cannot adhere to properly. You need a specialized adhesive designed for plastics.
Q2: What is the strongest adhesive for bonding PET to wood?
A2: For most DIY applications, a high-quality two-part epoxy is considered one of the strongest and most reliable adhesives for bonding PET to wood. Ensure the epoxy is rated for plastic adhesion.
Q3: Do I need to prime PET before gluing?
A3: While some specific plastic bonding systems use primers, for general purposes with epoxy or super glue, proper cleaning and mechanical abrasion (sanding) of the PET surface are usually sufficient to achieve good adhesion. Primers are typically for more specialized applications or very difficult-to-bond plastics.
Q4: How long does it take for PET and wood to bond permanently?
A4: The “permanent” bond strength is achieved after the adhesive has fully cured. For two-part epoxies, this can take anywhere from 24 hours to 72 hours, depending on the product and environmental conditions. Always refer to the adhesive manufacturer’s instructions for the specific cure time.
Q5: Can I use a hot glue gun to attach PET to wood?
A5: While hot glue can offer a temporary bond, it is generally not strong or durable enough for a permanent or reliable connection between PET and wood. The bond can weaken over time, especially with temperature fluctuations, and it may not hold up to stress.
Q6: What if my wood is painted? Will the glue stick?
A6: For painted wood, you’ll need to lightly sand the painted surface to create a rough texture and remove any gloss. This helps the adhesive get a better mechanical grip. Clean off all dust before applying the adhesive. For the best results, ensure the paint is well-adhered to the wood itself.
Conclusion
Successfully bonding Polyethylene Terephthalate (PET) to wood is entirely achievable with the right preparation and materials. By understanding the unique properties of both PET and wood, you can select the most appropriate strong adhesive, such as a two-part epoxy. Remember that the cornerstone of a lasting bond lies in meticulous surface preparation: thoroughly cleaning and lightly abrading both the plastic and wood surfaces are non-negotiable steps.
Don’t underestimate the power of a little heat to enhance adhesion, especially with PET. And most importantly, be patient. Allowing the adhesive to cure fully, undisturbed, is crucial for realizing its maximum strength. With this proven method, you’re now well-equipped to confidently tackle projects that involve joining these diverse materials. You’ll build stronger, more durable creations and gain valuable DIY confidence along the way. Happy building!