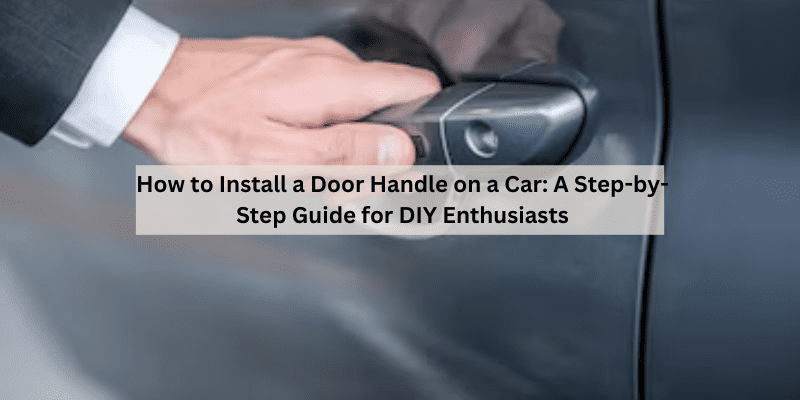
How to Install a Door Handle on a Car: A Step-by-Step Guide for DIY Enthusiasts
Hey there! If you’re a car lover like me, you know the thrill of working on your ride, whether it’s a quick oil change or a bigger project. One day, I noticed my car’s door handle was loose, and soon it broke off completely—talk about a bad day! Instead of paying a shop hundreds of bucks, I decided to install a new door handle myself. It was easier than I thought, and I’m excited to share what I learned.
In this article, I’ll walk you through every step to install a door handle on a car, share tips from my garage, and make it fun for all you DIY folks out there. Whether you’re fixing a classic Mustang or a daily driver, let’s get your car’s door swinging smoothly again!
Why You Might Need to Replace a Car Door Handle
Car door handles take a beating. I found this out when my driver’s side handle started sticking. Constant pulling, weather exposure, or just age can make them crack, loosen, or break. Plastic handles, common in newer cars, wear out faster than metal ones. My 2008 sedan had a plastic handle that snapped after years of use.
Sometimes, the handle’s internal mechanism fails, making it hard to open the door. I had this issue on my passenger side once. Replacing the handle is also a chance to upgrade to a sturdier or sleeker design, like swapping stock wheels for alloys. A broken handle isn’t just annoying—it can be a security risk, like a faulty car lock.
Types of Car Door Handles
Before you start, know your handle type. I made the mistake of ordering the wrong one at first! Most cars have exterior pull handles, which you grab to open the door. Some are flush or pop-out, like on luxury models. Interior handles are usually levers or buttons inside the door.
My car has a standard exterior pull handle with a keyhole. Some handles include lock cylinders, while others are purely mechanical. Check your car’s make, model, and year to get the right part. It’s like picking the correct spark plug for your engine—fit matters.
Gathering Tools and Materials
You don’t need a pro mechanic’s toolbox, but the right tools make the job easier. I used a Phillips and flathead screwdriver, a socket wrench with a 10mm socket, and a trim removal tool. A putty knife works if you don’t have a trim tool. I also grabbed needle-nose pliers for small clips.
You’ll need a replacement door handle, which costs $20-$100, depending on the car. I got mine online for $30. Keep a small container for screws, like I do for car bolts. A flashlight helps you see inside the door, and gloves protect your hands from sharp edges. It’s like prepping for a brake pad swap—have everything ready.

Safety First: Preparing for the Job
Safety is my top rule, whether I’m under the hood or inside a door. Disconnect the car battery to avoid electrical issues, especially if your handle has power locks. I popped the hood and unhooked the negative terminal, like prepping for a stereo install.
Park on a flat surface and engage the parking brake. I worked in my garage to avoid wind or rain. Keep the door propped open with a block or bungee cord to prevent it from swinging. Wear gloves to avoid cuts from metal edges, like handling a car’s exhaust parts.
Finding the Right Replacement Handle
Buying the correct handle is key. I checked my car’s manual for the part number, then confirmed it online using my vehicle’s make, model, year, and trim. Sites like AutoZone or Amazon have fitment guides. My sedan needed a specific handle with a lock cylinder, so I double-checked.
Aftermarket handles are cheaper, but check reviews for quality. OEM (original equipment manufacturer) handles costs more, but fits perfectly, like factory car parts. I went with an aftermarket handle that matched my car’s color to save cash. Take your old handle to the store if possible, like matching a car’s belt size.
Removing the Interior Door Panel
To get to the handle, you need to remove the interior door panel. I started by prying off any screw covers with a flathead screwdriver. Look for screws around the armrest, handle, or panel edges. My door had three Phillips screws—one near the handle, two at the bottom.
Use a trim removal tool to gently pop the panel off, starting at the bottom. I worked my way up, listening for clips snapping free. If it resists, check for hidden screws. Unplug any electrical connectors for windows or locks, like disconnecting a car’s wiring harness. Set the panel aside carefully to avoid scratches.
Accessing the Exterior Door Handle
With the panel off, you’ll see a plastic vapor barrier. I peeled mine back gently, keeping the adhesive intact for reuse. Inside the door, find the handle’s mounting points—usually bolts or screws. My handle was held by two 10mm bolts and a clip.
Use a socket wrench to remove the bolts. I kept a flashlight handy to spot them in the dark door cavity. Look for a rod or cable connecting the handle to the latch. I unhooked mine with needle-nose pliers, like removing a car’s throttle cable. Note how it’s attached for reinstallation.
Removing the Old Door Handle
Now it’s time to pull the old handle out. I wiggled mine gently to free it from the door’s exterior. Some handles slide out after removing bolts, while others need a push from inside. My handle had a clip that I released with a flathead screwdriver.
If the handle has a lock cylinder, remove it carefully. I turned the key to a specific position (check your manual) and pulled it out with pliers. Keep all parts in a container, like organizing car bolts during a repair. Check for damage to the door’s mounting area, like inspecting a car’s frame for rust.
Preparing the New Door Handle
Before installing, compare the new handle to the old one. I laid mine side by side to confirm that the size, shape, and mounting points matched. If your handle includes a lock cylinder, transfer it from the old handle or install the new one. I reused my old cylinder to avoid rekeying.
Clean the door’s mounting area with a cloth to remove dirt or rust. I sprayed a bit of WD-40 to loosen any grime, like cleaning a car’s brake rotor. Test-fit the new handle to ensure it slides in smoothly, like checking a new car part before bolting it on.
Installing the New Door Handle
Here’s the fun part—putting the new handle in. I slid mine into the door’s exterior slot, aligning it with the mounting holes. From inside, reattach the bolts or screws you removed earlier. I tightened my 10mm bolts with a socket wrench, being careful not to overtighten, like torquing a car’s lug nuts.
Reconnect the rod or cable to the latch. I clipped mine back in with pliers, testing the handle’s pull to ensure it worked. If your handle has a lock cylinder, insert it and secure it per the manual. It’s like reassembling a car’s headlight—patience makes it perfect.
Reattaching the Interior Door Panel
With the handle installed, put the door panel back. I reattached the vapor barrier first, pressing the adhesive to seal it. Reconnect any electrical plugs for windows or locks, like plugging in a car’s sensor. Align the panel’s clips with the door’s slots and press firmly to snap it into place.
Replace all screws and screw covers. I tightened mine with a Phillips screwdriver, checking for gaps. Test the window and lock buttons to ensure they work, like test-driving a car after a repair. If the panel feels loose, check for missed clips or screws.
Testing the New Door Handle
Before you celebrate, test everything. I pulled the exterior handle to confirm it opened the door smoothly. Try it with the door locked and unlocked, using both the key and remote if applicable. I also tested the interior handle to ensure it worked.
If the handle sticks or doesn’t open the door, check the rod or cable connection inside. I had to adjust mine slightly with pliers. Make sure the lock cylinder turns easily. It’s like checking a car’s alignment after new tires—small tweaks ensure it’s right.
Adjusting for a Perfect Fit
Sometimes, the handle needs fine-tuning. My new handle felt a bit loose at first. Check the mounting bolts for tightness. If the handle doesn’t sit flush with the door, loosen the bolts and reposition it, like adjusting a car’s hood latch.
If the door doesn’t open smoothly, the latch or striker plate (on the door frame) might need adjustment. I loosened my striker with a socket wrench and shifted it slightly. Test repeatedly to get it perfect, like balancing a car’s wheels for a smooth ride.
Maintaining Your New Door Handle
A new handle needs care to last, like regular oil changes for your car. I clean mine monthly with soapy water and a cloth to remove dirt or grease. Avoid harsh chemicals that could fade the finish, like using the wrong wax on a car’s paint.
Lubricate the handle’s mechanism yearly with WD-40 or graphite spray. I spray a bit into the keyhole and moving parts, like lubing a car’s door hinges. Check screws and bolts every few months to ensure they’re tight, preventing rattles or looseness.
Troubleshooting Common Installation Issues
I hit a few snags, so let’s cover potential problems. If the handle doesn’t open the door, the rod or cable might be misconnected—double-check inside the door. I re-clipped mine to fix this. If the handle feels loose, tighten the mounting bolts or check for missing clips.
If the lock cylinder won’t turn, ensure it’s properly seated. I had to wiggle mine into place. If the door panel won’t snap back, look for bent clips or obstructions. It’s like troubleshooting a car’s misfire—methodical checks solve the issue.
Connecting to the Automotive Lifestyle
As a car enthusiast, I love how this project fits our DIY spirit. Installing a door handle is like swapping a car’s air filter—accessible, rewarding, and budget-friendly. A working handle makes your car feel fresh, like a clean interior after detailing.
This fix also keeps your ride secure, protecting your tools or mods inside. I fixed my handle to ensure my garage-stored car was safe. The skills—using tools, troubleshooting, and attention to detail—are the same ones I use for car projects, making it a perfect crossover.
Cost and Budget Tips
This job is easy on the wallet. A replacement handle costs $20-$100, depending on your car. I spent $30 on mine. Tools like screwdrivers or a socket wrench are likely in your garage already. If you need a trim tool, they’re $5-$15, like a cheap car cleaning brush.
Shop online or at auto parts stores for deals. I compared prices on Amazon and AutoZone to save $10. Doing it yourself saves $100-$300 in labor, like changing your own oil instead of paying a shop. Invest the savings in car mods or gas for a road trip!
When to Call a Professional
Most folks can handle this, but sometimes you need a pro. If the door’s internal mechanism is damaged—like a broken latch or wiring—I’d call a shop. I considered this when my lock cylinder was tricky but figured it out myself. Professional repairs cost $200-$500, like a complex car fix.
If you lack tools or confidence, a mechanic or locksmith can help. Check reviews to find a reliable one, like choosing a good tire shop. For rare or luxury cars, a pro ensures precision, like taking a vintage car to a specialist.

Alternative Upgrades for Door Handles
While you’re at it, consider upgrading. I thought about chrome handles for my sedan but stuck with stock for now. Aftermarket handles come in colors or finishes like carbon fiber, like custom car trim. Some include keyless entry features, like a car’s push-button start.
Smart handles with fingerprint or code access are pricier ($100-$300) but cool, like adding a touchscreen to your car. Ensure any upgrade fits your car’s specs, like checking a car part’s compatibility. Upgrades add style and function, making your ride stand out.
Table: Common Installation Challenges and Fixes
Here’s a table I made to summarize fixes for common issues, like a car repair cheat sheet.
| Challenge | Cause | Fix | Prevention Tip |
|---|---|---|---|
| Handle doesn’t open door | Misconnected rod/cable | Check connections before closing the panel | Follow the manual for cylinder install |
| Handle feels loose | Loose bolts or missing clips | Tighten bolts, check for clips | Tighten gradually, test fit |
| Lock cylinder won’t turn | Poorly seated cylinder | Reseat or lubricate with WD-40 | Remove the panel carefully to avoid damage |
| Door panel won’t snap on | Bent clips or obstructions | Align clips, check for debris | Follow the manual for cylinder installation |
This table kept me on track, and it’ll help you stay organized.
Environmental and Practical Benefits
This project is eco-friendly since you’re repairing instead of replacing the door. I reused my old lock cylinder, like recycling car parts. It’s also practical—no need for specialized skills or expensive tools, unlike rebuilding an engine.
It’s quick too, taking 1-2 hours, leaving time for other car projects. A new handle boosts your car’s resale value, like a fresh paint job. Plus, it’s satisfying to fix something yourself, like hearing your car purr after a tune-up.
Conclusion
Installing a door handle on a car is a rewarding DIY project that any car enthusiast can tackle. From removing the door panel to testing the new handle, I’ve shared my journey to make your repair as smooth as a Sunday drive. With a few tools, a bit of patience, and these steps, you’ll have your car’s door working like new, saving money and boosting your pride. Whether you’re fixing a daily driver or a show car, this project is a win for your skills and your ride. So grab your screwdriver, roll up your sleeves, and let’s get that handle installed! Thanks for joining me—here’s to functional doors and epic drives!
FAQs
What tools do I need to install a car door handle?
A Phillips and flathead screwdriver, a 10mm socket wrench, a trim removal tool, needle-nose pliers, and a flashlight. Gloves and a screw container help too.
How do I know which door handle to buy for my car?
Check your car’s make, model, year, and trim in the manual or online. Compare the old handle’s size and lock cylinder to the new one.
Can I install a door handle myself?
Yes, it’s a DIY-friendly job with basic tools. Follow the steps, take your time, and test the handle to ensure it works.
Why is my new door handle sticking?
The rod or cable might be misconnected, or bolts may be loose. Check inside the door and adjust or tighten as needed.
How much does a car door handle replacement cost?
A handle costs $20-$100, and tools are cheap if you don’t own them. Doing it yourself saves $100-$300 in shop labor.