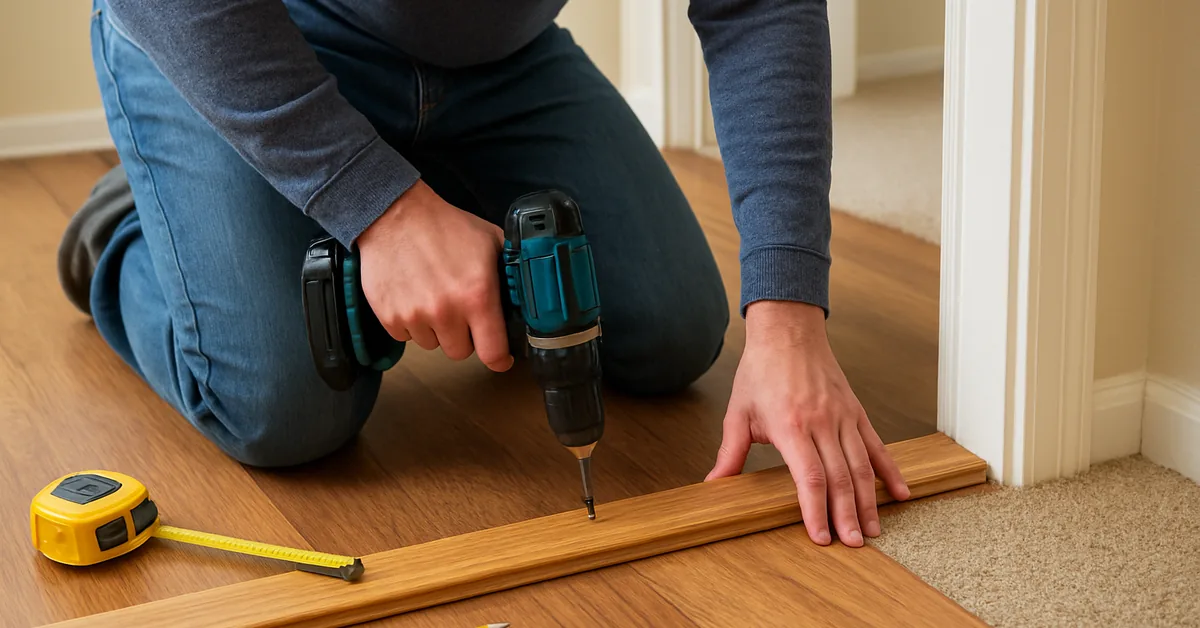
How to Install a Threshold Between Rooms (Reducer vs Ramp)
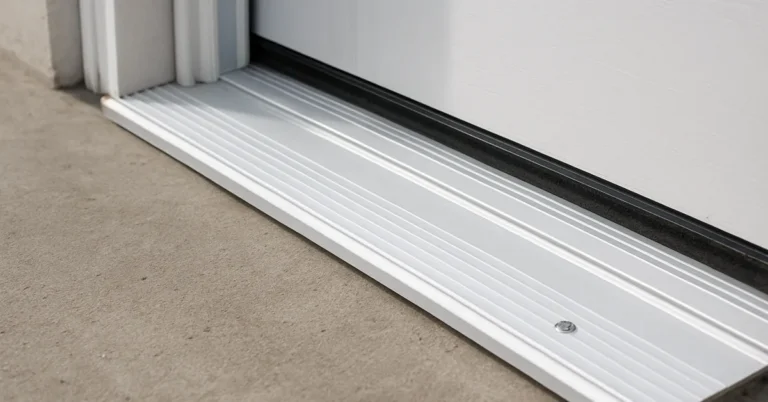
A threshold (transition strip) bridges the height gap between two floors, usually wood, metal, or vinyl matched to the higher-traffic side — but a gap over 3/8 inch needs a ramped reducer instead of a flat strip. Skip it and you get a trip hazard plus exposed flooring edges prone to chipping. This guide covers measuring the gap correctly, choosing a reducer vs. adapter vs. ramp, and securing it to wood, concrete, or tile subfloor.
Why Installing a Threshold Between Rooms is Essential
A threshold, often called a transition strip, does more than just look nice. It plays a crucial role in the health and longevity of your flooring. Think of it as the bridge connecting two different worlds under your feet. When you skip this step, you invite problems.
The Key Roles of a Floor Threshold
Understanding why we need this piece helps you choose the right one and install it correctly. Here are the main benefits:
- Safety: The most important reason! Thresholds eliminate dangerous trip hazards caused by abrupt height changes between floors (like wood to tile).
- Protection: They shield the edges of your flooring materials from chipping, wear, and moisture damage where they meet.
- Aesthetics: A clean transition makes your home look finished and polished. No more ugly, frayed edges!
- Moisture Barrier: In areas like bathrooms or kitchens, a well-sealed threshold prevents water from wicking under the adjacent flooring.
Understanding Different Types of Transitions
Before we grab the tools, we need to know what we are installing. Thresholds come in different styles based on the height difference between the two floors.
| Threshold Type | Use Case (Height Difference) | Common Material |
|---|---|---|
| Reducer/T-Molding | When floors are nearly the same height (0 to 1/4 inch difference). | Wood, Laminate, Vinyl, Aluminum |
| Threshold/Adapter | When one floor is significantly higher than the other (often used between carpet and hard surface). | Wood, Metal |
| Threshold Ramp | Used when a small, gradual slope is needed for accessibility or doorways. | Rubber, Vinyl |
For most standard doorway transitions between finished rooms, you will likely use a Reducer or a standard Threshold Strip. These are usually made of real wood, engineered wood to match your floors, or aluminum for high-traffic areas.
Gathering Your Tools and Materials: Preparation is Key
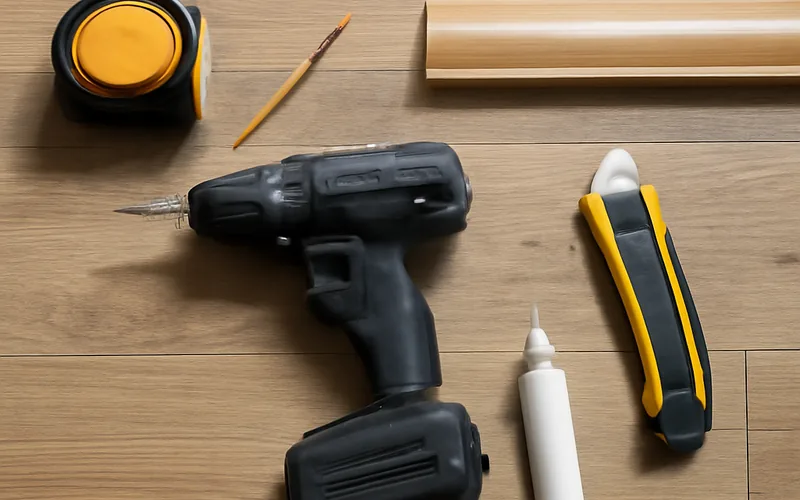
As your guide, I always stress preparation. Having everything ready means you won’t stop mid-cut to search for a tape measure. This project requires surprisingly few specialized tools, making it very budget-friendly.
Essential Tool Checklist
Don’t worry; you probably already own most of these items. If you need to buy anything, invest in quality tools for better accuracy.
- Tape Measure: For accurate measurements.
- Pencil: For marking cuts.
- Miter Saw or Hand Saw with Miter Box: A miter saw makes square and angled cuts much easier and faster. If using a hand saw, a miter box ensures straight cuts.
- Utility Knife: For trimming carpet edges or adhesive residue.
- Drill/Driver: Needed if you are screwing the threshold down (common for wood bases).
- Level: To check that your subfloor is flat where the strip will sit.
- Safety Gear: Safety glasses are non-negotiable when cutting!
Materials Checklist
- The Threshold Strip: Make sure it matches the height and material of the adjacent floors as closely as possible.
- Fasteners: Usually small brad nails (for wood bases) or screws, depending on the specific threshold kit you buy.
- Construction Adhesive (Optional but Recommended): A strong adhesive helps prevent squeaks and movement over time.
- Caulk or Sealer: To finish the ends neatly.
Best Threshold Strip Pick
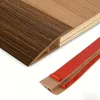
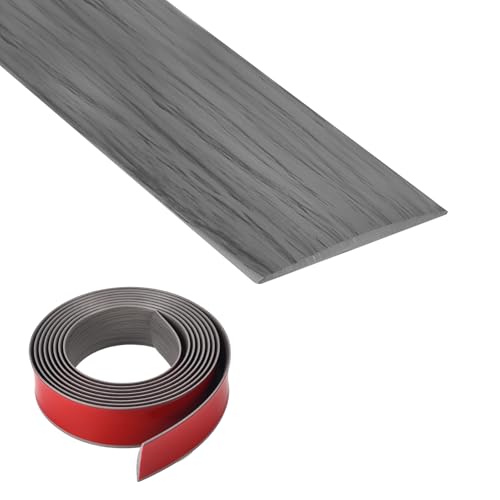
Vinyl Threshold Ramp & Reducer Strip – $15.99
A self-adhesive vinyl strip molded with a built-in ramp bevel and reducer edge in one piece — the two transition styles this guide’s threshold-type table treats as separate categories.
- Best for: Doorways where the height gap exceeds the 3/8-inch flat-strip limit this guide flags in the intro.
- Why we picked it: This guide notes anything over 3/8 inch needs a ramped reducer instead of a flat strip — this strip is molded with that ramp bevel built in, so there’s no separate ramp piece to source.
- Main drawback: Vinyl wood-grain finish, not real wood — won’t perfectly match solid hardwood floors the way the guide’s wood-threshold steps assume.
Compare more threshold strip options
 Option 1 Maxiroc Carpet-Wood-Tile Reducer Strip – $12.99
|
 Option 2 Trimold Carpet-to-Tile Threshold Strip – $15.00
|
 Option 3 Solid Oak Overlap Threshold – $46.99
|
As an Amazon Associate we earn from qualifying purchases.
Step-by-Step Guide: How To Install A Threshold Between Rooms
We are going to break this down into five manageable stages. Follow these steps carefully, and you will have a professional-looking result. Remember to work slowly and double-check your measurements!
Step 1: Clear the Area and Assess the Gap
First things first: you need a clean workspace. Remove any old transition strips, debris, or loose flooring pieces from the doorway. Use a utility knife to carefully trim away any excess carpet or vinyl backing that extends into the gap.
Use your tape measure to determine the exact width of the opening. Measure this gap in at least three places: left side, center, and right side. Floors are rarely perfectly square. You must use the longest measurement if they differ, but trim the material down to fit the shortest point if possible, or trim the ends to fit the actual opening.
Next, check the height difference. Place a long level across the two floors. If the difference is more than 3/8 inch, you might need a different type of transition piece or a shim underneath to create a safer slope.
Step 2: Preparing the Subfloor
The success of your threshold depends on a solid foundation. If you are using a threshold that requires a base plate (common with wood or carpet transitions), you need to secure that base first.
- Lay down a thin bead of construction adhesive along the center of the subfloor where the base plate will sit.
- Place the base plate (if supplied with your kit) over the gap.
- Secure the base plate using the provided screws or nails, driving them into the subfloor joists if possible for maximum stability. Keep fasteners about 1 inch from the ends.
If your kit is a simple, one-piece metal or wood strip that attaches directly to the floor (often glued or nailed directly), you can skip the base plate but ensure the subfloor is clean and dry before applying adhesive.
Step 3: Measuring and Cutting the Threshold Strip
This is where precision matters most. Measure the opening again, just before cutting. Remember: it’s easier to trim a little off than to try and add wood back on!
Cutting Technique:
- Measure the exact distance between the finished edges of the two floorings. Mark this length onto the top face of your threshold material.
- If you are using a miter saw, set the blade to a perfect 90-degree (square) angle. Cut slowly and steadily.
- Test fit the piece. It should slide snugly into the gap without forcing it. If it’s too tight, trim tiny amounts off one end until it fits perfectly flat against both floor surfaces.
Pro Tip: If your doorway is not perfectly square (the walls aren’t exactly 90 degrees to the floor), you might need to cut slight bevels (angles less than 90 degrees) on the ends of the threshold to make the face sit flush against the existing trim or wall. For beginners, aiming for a perfect 90-degree cut is usually sufficient for standard interior doors.
Step 4: Securing the Threshold
Now we attach the main visible piece. The method depends heavily on the material and the base you installed in Step 2.
Attaching Wood Thresholds (Often with a Base Plate)
If you used a base plate, the top wood piece usually slides or snaps onto it. If it slides, apply a thin line of construction adhesive to the bottom of the top piece before sliding it onto the base. Once seated, you may use small finishing nails (brad nails) along the edges where the nails will be less visible, driving them in at a slight angle.
Attaching Metal or Vinyl Strips (Direct Mount)
For metal or vinyl strips that secure directly to the floor, use the recommended fasteners. If drilling pilot holes into a hard surface like ceramic tile or concrete subfloor, you must use a masonry or carbide-tipped bit and drill very carefully to avoid cracking the surface. If installing over wood subfloor, pilot holes prevent splitting.
Apply adhesive to the entire bottom surface of the strip before setting it down. Press firmly and secure with screws or nails as directed by the manufacturer. Wipe away any excess adhesive immediately with a damp cloth.
Step 5: Final Touches and Finishing
The last step ensures a beautiful, lasting result. Inspect the entire length of the threshold. Is it rock solid? Does it wobble anywhere?
- Check for Gaps: Look closely where the threshold meets the wall or existing baseboard. Small gaps are normal, but large ones should be filled.
- Caulking: Use a small bead of color-matched latex caulk along the edges where the threshold meets the wall or baseboard trim. Smooth the caulk line with a damp finger or a caulk smoothing tool. This seals out dust and moisture and gives a professional, clean line.
- Curing Time: Allow the adhesive and caulk to cure completely before heavy foot traffic. Check the product label for drying times, usually 12 to 24 hours.
📊 Standard building practice caps the gap under a door at 3/4 inch, including over a threshold — NFPA 80 sets this same 3/4″ limit as the maximum clearance for fire-rated doors — Source: UpCodes, Thresholds at Doors
Choosing the Right Fastening Method for Your Floor
The way you secure the threshold impacts both its appearance and how easily you can remove it later. Since you are aiming for a permanent, high-quality installation, choosing the right anchor is crucial. This table summarizes common choices based on the subfloor material underneath.
| Subfloor Material | Best Fastener/Adhesive | Pros & Cons for Thresholds |
|---|---|---|
| Plywood/OSB (Wood Subfloor) | Brad Nails or Wood Screws driven into joists. | Easy to fasten into; excellent grip. Screws offer easy removal later. |
| Concrete Slab | Construction Adhesive or Masonry Screws (Tapcons). | Adhesive is best for a seamless look. Screws offer superior holding power but require drilling. |
| Existing Tile/Hard Surface | Heavy-Duty Construction Adhesive only. | Nailing/screwing risks cracking the tile. Adhesive allows flexing without damage. |
When dealing with concrete, remember that screws must penetrate deep enough to anchor securely, often requiring specialized masonry bits and drills. For most residential installations over wood subfloors, a combination of adhesive beneath the strip and finishing nails along the edges provides the best balance of strength and finish quality.
Troubleshooting Common Threshold Installation Issues
Even with the best planning, DIY projects sometimes present unexpected snags. Don’t sweat it! Here are solutions to the most common hurdles beginners face when learning how to install a threshold between rooms.
Problem 1: The Threshold Doesn’t Sit Flat
If the strip rocks or lifts slightly in the middle, it means the subfloor isn’t perfectly flat, or the gap measurement was slightly off.
- The Fix: If it’s minor rocking, use extra construction adhesive—especially in the center—and weigh the strip down heavily (using bricks or heavy tools) while it cures. If the gap is uneven, you might need to slightly sand or trim the underside of the threshold where it contacts the high spots until it lies flat.
Problem 2: The Cut Ends Look Rough
If your saw blade dulled or you rushed the cut, the ends might look jagged, especially on wood or vinyl.
- The Fix: If the cut is slightly rough but the fit is good, you can use fine-grit sandpaper (220 grit) to smooth the visible end faces. If the gap is visible due to the rough cut, use your color-matched caulk or wood filler to hide the imperfection before painting or staining the end cap.
Problem 3: The Threshold Keeps Slipping Out of the Base Track
This usually happens with T-moldings or two-piece metal transitions.
- The Fix: Check the manufacturer’s instructions. Most systems require a small finishing nail driven through the base plate, right next to the track, to prevent lateral (sideways) movement of the top piece. If your kit didn’t include this anchoring nail, use a very small brad nail (tapped in gently) just shy of the track opening.
Maintaining Your New Threshold for Longevity
You’ve successfully installed your threshold! Now, let’s keep it looking great for years. Proper care ensures this transition remains safe and attractive.
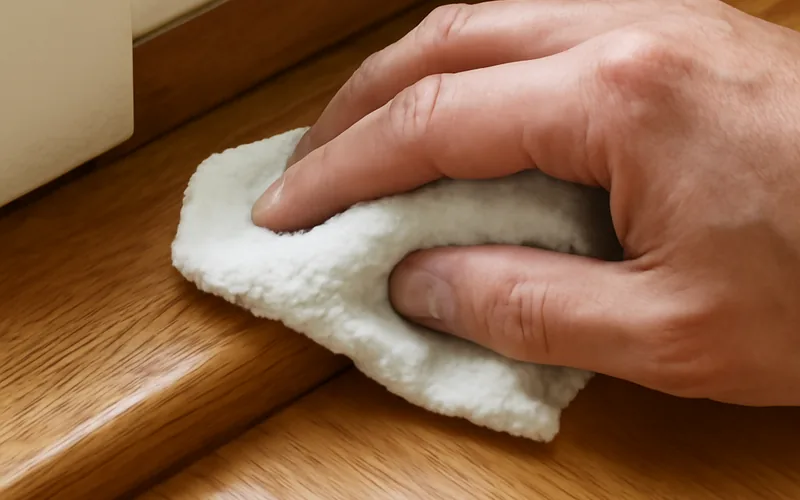
Cleaning is simple, but be mindful of what you use. Harsh chemicals or abrasive pads can scratch metal or dull the finish on wood strips.
For routine cleaning, use a damp mop or cloth with a mild, pH-neutral floor cleaner. Avoid letting excess water pool around the edges, as this can eventually weaken the adhesive or cause swelling in wood components. If you notice any slight lifting after a few years, don’t panic—a quick application of a small amount of fresh construction adhesive under the lifted spot, weighted down for 24 hours, is usually all it takes to secure it again.
Frequently Asked Questions (FAQ) About Threshold Installation
Do I need to remove the baseboards to install a threshold?
Sometimes, yes, especially if the threshold needs to sit flush against the wall or if the gap is very wide. Often, you can install the threshold right up to the baseboard and seal the small remaining gap with caulk for a clean finish, avoiding baseboard removal entirely.
How much clearance should there be between the floor and the bottom of the door?
Generally, you want about 1/2 inch to 3/4 inch of clearance between the top of the finished flooring (including the threshold) and the bottom of the door for smooth operation. Always check this before finalizing your cut length.
Can I use construction adhesive instead of screws or nails?
Yes, for many modern, low-profile transitions, heavy-duty construction adhesive alone works great, especially over concrete. It prevents squeaks and leaves a cleaner look since no fasteners are visible on top.
What if my two floors are made of completely different materials (e.g., hardwood meets ceramic tile)?
You must use a transition strip specifically designed for height differences. Ceramic tile is often thicker than hardwood. Look for a “Reducer” or an “Adapter” strip that has a built-in slope to safely bridge the height gap between the two materials.
Do I cut metal thresholds the same way as wood ones?
Yes, most standard aluminum or brass thresholds are cut using a miter saw set to 90 degrees, just like wood. For very thick, heavy-duty metal, you might need a hacksaw or a specialized metal-cutting blade on your saw for the cleanest cut.
How do I handle a curved doorway opening?
Curved openings are tricky. You cannot use a standard straight threshold. You will need to purchase flexible transition strips, often made of rubber or vinyl, which are designed to bend to the curve, or you must use a small, specialized jigsaw to cut a matching curve into a solid wood threshold.
Conclusion: Confidence in Your New Transition
Learning how to install a threshold between rooms might seem like a small detail in the grand scheme of home improvement, but tackling these transitions confidently makes a huge difference in the final look and safety of your home. You’ve learned the essential steps: measure precisely, secure the base firmly, cut accurately, and finish neatly with caulk.
Remember, every successful DIY project starts with patience. If your first cut isn’t perfect, that’s okay! Woodworking is all about refinement. Keep your tools sharp, measure twice, and cut once, and you will achieve a smooth, professional transition that seamlessly connects your spaces. You now have the proven knowledge to handle this essential step, adding value and beauty to your home!
Sponsored / affiliate links. As an Amazon Associate I earn from qualifying purchases. I may earn additional commission from eligible campaigns.