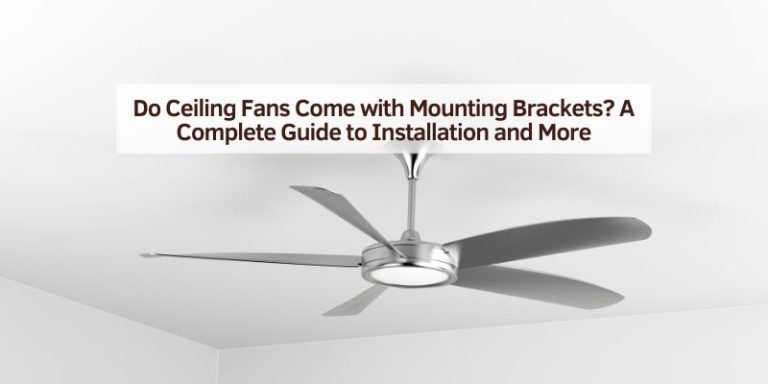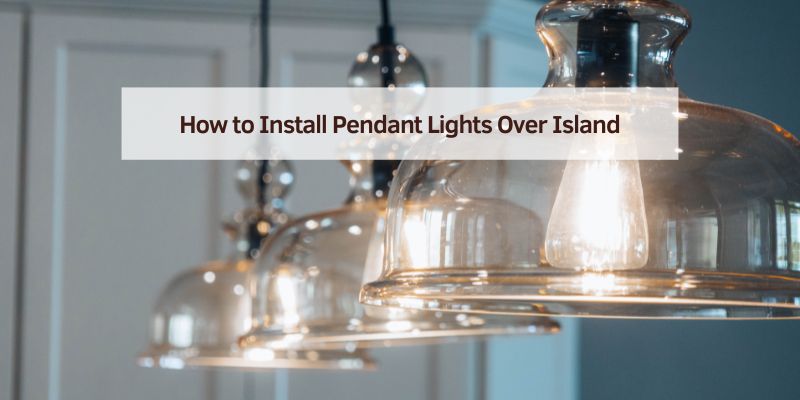
How to Install Pendant Lights Over Island
Hey there! So, you’re looking to jazz up your kitchen island with some sleek pendant lights, and I’m so excited to help you out. As a car enthusiast, I love putting the same care into my home as I do my rides, and installing pendant lights over my kitchen island was one of my favorite projects. It’s like adding custom rims to a car—those lights can totally transform the vibe of your space.
When I first tackled this, I was a bit nervous about getting the wiring and placement right, but after some trial and error (and a few calls to my electrician buddy), I figured it out. Now, my kitchen island is the star of the show, glowing with style and function.
In this article, I’m going to walk you through every step of installing pendant lights over your island, from picking the perfect lights to wiring them up safely. Whether you’re a DIY newbie or a seasoned pro, I’ve got simple tips to make your kitchen shine. Let’s get started and light up your island like a show car!
Why Pendant Lights Are Perfect for Your Kitchen Island
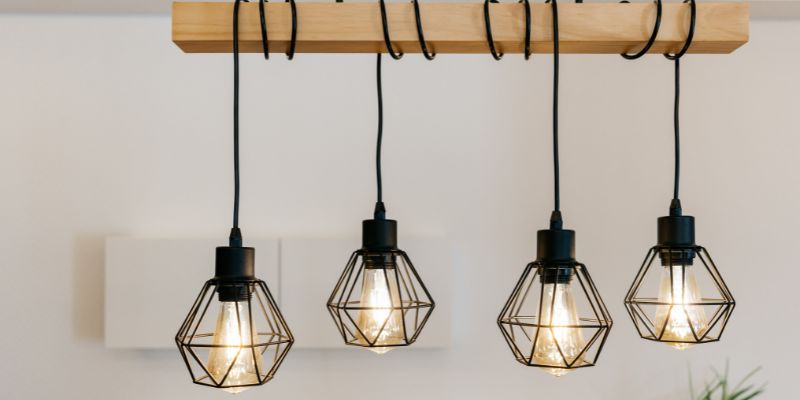
I fell in love with pendant lights the moment I saw them at a friend’s house. They’re like the cherry on top of a kitchen island, adding style and focused light. Pendant lights hang down from the ceiling, casting a warm glow right where you need it—whether you’re chopping veggies, sipping coffee, or showing off your latest car sketches. They’re practical but also make a bold design statement, kind of like a custom paint job on a classic car.
In my kitchen, pendant lights create a cozy, inviting vibe. They’re great for task lighting, like when I’m prepping meals, but also set the mood for casual hangouts. Plus, they come in endless styles—modern, rustic, industrial—so you can match them to your kitchen’s personality. Before we dive into installation, let’s talk about picking the right lights and planning your setup.
Choosing the Right Pendant Lights
Picking pendant lights is like choosing the perfect wheels for your car—it’s all about style, size, and fit. When I shopped for mine, I wanted lights that matched my modern kitchen but didn’t break the bank. Here’s what I learned.
First, think about your kitchen’s style. My space is sleek with stainless steel appliances, so I went for minimalist glass and metal pendants. If your kitchen has a farmhouse vibe, try lantern-style pendants. Industrial kitchens look great with exposed-bulb designs. Pick something that feels like “you.”
Size is super important. My island is 6 feet long, so I chose three 10-inch-wide pendants. For smaller islands (3-4 feet), one or two larger pendants (12-16 inches) work well. For bigger islands, three or four smaller ones (8-10 inches) create balance. I made sure the total width of the pendants was about two-thirds the length of my island to keep things proportional.
Height matters too. I hung my pendants 30 inches above the countertop, which is perfect for task lighting without blocking my view. Anything between 28 and 36 inches usually works, depending on your ceiling height. If you’re tall, go a bit higher to avoid bumping your head.
Finally, check the light output. I chose LED bulbs with 800 lumens each for bright, energy-efficient light. Dimmable bulbs are a game-changer—I can crank up the brightness for cooking or dim them for a cozy dinner.
Planning the Placement of Your Pendant Lights
Before I grabbed my tools, I spent time planning where my pendants would go. This step is like mapping out a car’s suspension upgrade—you need to get the layout right. My island is 6 feet long, so I decided on three pendants, spaced about 24 inches apart, centered over the island.
To figure out placement, I measured the island’s length and width, then marked the ceiling with painter’s tape to visualize the spots. I made sure the lights were centered over the island, not the room, so the light hits where I work. For a 4-foot island, two pendants spaced 18-24 inches apart work great. For larger islands, you might need three or four, spaced evenly.
I also checked the ceiling height. My standard 8-foot ceiling meant I could hang the lights at 30 inches above the counter. If your ceiling is higher, like 10 feet, you might need longer cords or rods to lower the lights. I sketched my plan on paper first—it’s like drawing a wiring diagram for a car stereo.
One tip: avoid placing lights directly above where you’ll sit or stand. I made this mistake early on, and the glare was annoying. Offset them slightly to light the workspace, not your face.
Gathering the Right Tools and Materials
I keep a toolbox ready for projects like this, and installing pendant lights doesn’t need much. Here’s what I used:
- A screwdriver (Phillips or flathead, depending on your fixture).
- Wire strippers for trimming wires.
- Wire nuts for secure connections.
- Electrical tape to insulate wires.
- A voltage tester to check for live wires.
- A drill and bits for mounting.
- A stud finder to locate ceiling joists.
- A ladder for reaching the ceiling.
- A measuring tape and a pencil for marking.
I also had my pendant light kit, which included the fixture, mounting hardware, and instructions. If your kit doesn’t come with a canopy (the part that covers the ceiling hole), you’ll need one. For safety, I wore rubber-soled shoes and kept a flashlight handy. It’s like prepping for a car repair—having everything ready saves time.
Preparing Your Kitchen for Installation
Before I started, I made sure my kitchen was ready. Safety is huge, just like when you’re working under a car. First, I turned off the power at the breaker box. I used a voltage tester to confirm the wires in the ceiling box were dead. I got a small shock once when I skipped this step—never again!
I cleared my island to avoid knocking over dishes or tools. I also laid a drop cloth under the work area to catch dust or debris. My ceiling had an existing junction box from an old light, which made things easier. If you don’t have a junction box, you’ll need to install one, and I’d recommend calling an electrician for that. It’s like adding a new fuse box to a car—tricky if you’re not experienced.
I used a stud finder to locate ceiling joists, just in case I needed extra support for heavy pendants. My lights were light, so the junction box was enough, but heavier fixtures might need a brace. I also measured and marked the spots for each pendant with painter’s tape, double-checking my spacing.
Wiring the Pendant Lights
Wiring was the part that made me nervous, but it’s not as hard as it sounds. If you’ve ever wired a car stereo, you can handle this. Here’s how I did it.
Inside the ceiling junction box, I found three wires: black (hot), white (neutral), and green or bare (ground). My pendant light had matching wires. I started by connecting the ground wires. I twisted the fixture’s green ground wire with the house’s ground wire, secured them with a wire nut, and wrapped it with electrical tape. This keeps everything safe, like grounding a car’s battery.
Next, I connected the black (hot) wires together, twisting them tightly and capping with a wire nut. I did the same for the white (neutral) wires. I made sure the connections were snug by giving them a gentle tug. Loose wires can cause flickering, like a bad connection in a car’s electrical system.
If your pendant has a canopy, you’ll thread the wires through it before connecting. My kit had adjustable cords, so I set the length to 30 inches above the counter, then trimmed any excess wire with strippers. Always follow the fixture’s instructions—some have specific wiring steps.
Mounting the Pendant Lights
Once the wires were connected, I moved on to mounting the lights. This part felt like bolting on a new car part—satisfying when it clicks into place. My pendants came with a mounting plate that screws into the junction box. I attached the plate first, making sure it was level.
Then, I threaded the pendant’s canopy over the wires and screwed it to the mounting plate. I checked that everything was secure by gently shaking the fixture. If it wobbles, tighten the screws. For multiple pendants, I repeated the process for each one, ensuring they were evenly spaced and aligned.
If your ceiling is sloped or uneven, you might need a special canopy or swivel mount. I had this issue in my old house, and a quick trip to the hardware store fixed it. It’s like adjusting a car’s suspension for a smooth ride—small tweaks make a big difference.
Testing and Adjusting the Lights
With the pendants mounted, I was eager to see them in action. I turned the power back on at the breaker and flipped the switch. My kitchen lit up beautifully, but I noticed one light was slightly off-center. I turned off the power again and adjusted the cord length to match the others.
I also tested the dimmer switch I’d installed. It let me dial down the brightness for a cozy vibe or crank it up for cooking. If your lights flicker or don’t turn on, check the wire connections. I had a loose wire nut once, and tightening it fixed everything. It’s like troubleshooting a car’s misfire—check the basics first.
If the height or spacing looks off, now’s the time to tweak it. I raised one of my pendants an inch to get them all level. Take your time here—it’s worth it for that perfect look.
Adding a Dimmer Switch
I can’t recommend a dimmer switch enough. It’s like adding a throttle to your lights—you control the vibe. I installed a dimmer for my pendants, and it’s perfect for switching from bright task lighting to a chill dinner atmosphere.
Installing a dimmer is similar to wiring the light. I turned off the power, removed the old switch, and connected the dimmer’s wires to the house’s hot and neutral wires. My dimmer had clear instructions, but if you’re unsure, an electrician can do it in 20 minutes. Make sure your bulbs are dimmable LEDs—non-dimmable ones won’t work right.
Maintaining Your Pendant Lights
Once your pendants are up, they’re pretty low-maintenance, like a well-built car. I clean mine every few months with a microfiber cloth to remove dust. If they’re near the stove, grease can build up, so I wipe them with a damp cloth and a tiny bit of dish soap, then dry them immediately.
Check the wiring every year or so. I had a wire nut loosen over time, and tightening it kept things safe. If a bulb burns out, replace it with the same type (lumen and color temperature) for consistency. It’s like swapping spark plugs—stick with what works.
Table: Pendant Light Installation Guide
Here’s a table I made to sum up the key steps and tips for installing pendant lights over your island.
| Step | Tools Needed | Tips |
|---|---|---|
| Choosing Lights | Measuring tape, pencil | Match style to kitchen; 8-12 inch diameter; 28-36 inches above counter. |
| Planning Placement | Painter’s tape, measuring tape | Space 18-24 inches apart; center over island; avoid glare spots. |
| Wiring | Wire strippers, wire nuts, voltage tester | Connect ground, hot, and neutral wires; secure with tape. |
| Mounting | Screwdriver, drill, stud finder | Use mounting plate; check for level; secure heavy fixtures to joists. |
| Testing/Adjusting | Voltage tester, screwdriver | Check connections if flickering; adjust height for balance. |
My Journey with Pendant Light Installation
When I moved into my house, my kitchen island had a single, boring fixture that did nothing for the space. As a car guy, I wanted something with style, so I decided to install pendant lights. My first attempt was a mess—I wired one wrong and hung it too low, bumping my head every time I leaned over the counter. After some research, a few YouTube videos, and advice from my electrician friend, I got it right.
Three sleek pendants now hang over my island, making it the perfect spot for everything from meal prep to late-night chats. The process was like building a custom car part—challenging but so rewarding when it’s done. I’m excited to share what I’ve learned to help you nail your own project.
Conclusion
Installing pendant lights over your kitchen island is one of those projects that feels like a big win when you’re done. I’ve been through the ups and downs, from picking the perfect lights to wrestling with wires, and I can tell you it’s worth every second. With the right planning, tools, and a bit of patience, you can transform your island into a stylish, functional centerpiece.
Whether you’re wiring them yourself or calling in a pro, these lights will make your kitchen feel like a custom-built masterpiece. So, grab your measuring tape, turn off that breaker, and get ready to light up your space like a show car at a rally. Your kitchen is about to glow like never before!
FAQ
How many pendant lights should I install over my island?
For a 6-foot island, I use three pendants, spaced 24 inches apart. Smaller islands (3-4 feet) need one or two; larger ones might need four. Keep them proportional.
Can I install pendant lights myself?
Yes, if you’re comfortable with wiring. I did mine, but called an electrician for the junction box. Always turn off the power and use a voltage tester.
What height should pendant lights be above the island?
I hung mine 30 inches above the counter. Anywhere from 28 to 36 inches works, depending on your ceiling height and how you use the island.
Do I need a dimmer switch for pendant lights?
It’s not required, but I love mine. It lets you adjust the mood. Make sure your bulbs are dimmable and follow the dimmer’s wiring instructions.
What if my ceiling doesn’t have a junction box?
You’ll need one installed. I hired an electrician for this—it’s tricky and needs to be up to code, like wiring a car’s new accessory.