How to Install Self-Closing Screen Door Hinges
Many homeowners find installing screen door hinges a bit tricky. It seems simple, but getting them just right can be a puzzle, especially for beginners. You might worry about getting it wrong or spending too much time on it.
But don’t worry! This guide will show you exactly how to do it with easy steps. We will cover everything you need to know so you can have your screen door working perfectly in no time.
Let’s get started on How to Install Self-Closing Screen Door Hinges.
Preparing For Screen Door Hinge Installation
Before you even touch a tool, getting ready is super important. This means having all your supplies gathered and making sure your workspace is clear. Proper preparation saves you time and avoids frustrating trips back to the store.
It also helps ensure a smooth process from start to finish. You want everything ready so you can focus on the task at hand without interruptions.
Gathering Your Tools and Materials
You’ll need a few basic things to get the job done. Having the right tools makes the work much easier and cleaner. Think of it like cooking; the right utensils make a big difference.
- Measuring tape: This is for making sure everything is lined up correctly. A good measurement prevents a crooked door or hinges that don’t align. Always measure twice to cut once, or in this case, to drill accurately.
- Pencil: You’ll use this to mark where the hinges and screws should go. A light pencil mark is easy to wipe away if you make a mistake.
- Screwdriver or drill with screwdriver bits: This is for driving the screws in. A drill makes it faster, but a manual screwdriver works just fine. Make sure the bit size matches your screws.
- Safety glasses: Protect your eyes from any flying debris. It’s a small step that’s very important for safety.
- The self-closing screen door hinges: Make sure you have the correct type and number of hinges. Some doors might need two, others three, depending on their size and weight.
- Screws: These usually come with the hinges, but it’s good to check. If not, you’ll need screws that are the right length for your door and frame.
- A helper: It’s much easier to hold the door in place with an extra pair of hands. This is especially true when fitting the door to the frame.
Having all these items ready before you begin will make the installation process feel much smoother. You won’t be scrambling for a tool or realizing you’re missing a key part midway through.
Assessing Your Screen Door and Frame
Take a moment to look closely at your screen door and the frame it fits into. Are there any old hinge holes that need filling? Is the frame square and sturdy?
These small checks can prevent bigger problems later. A strong frame means the hinges will hold well.
Also, consider the type of screen door you have. Is it a standard aluminum frame, a wooden one, or something else? This can affect how easily screws go in and how much weight the frame can support.
Think about the placement of the hinges. Usually, they go on the side of the door that swings open. Most doors will have at least two hinges, one near the top and one near the bottom.
For heavier doors or longer doors, a third hinge in the middle might be needed for extra support. The self-closing mechanism also needs a little room to operate without hitting anything.
Step-By-Step Guide How to Install Self-Closing Screen Door Hinges
Now that you’re prepared, let’s get to the actual installation. We’ll break this down into simple, easy-to-follow steps. Following these instructions carefully will help you achieve a professional-looking result.
Attaching Hinges to the Screen Door
This is the first main step in the process. You need to make sure the hinges are lined up perfectly on the door itself. This alignment is key to the door swinging smoothly.
First, hold the screen door up to the frame where it normally sits. You can prop it up or have your helper hold it. Line up the hinges on the edge of the door.
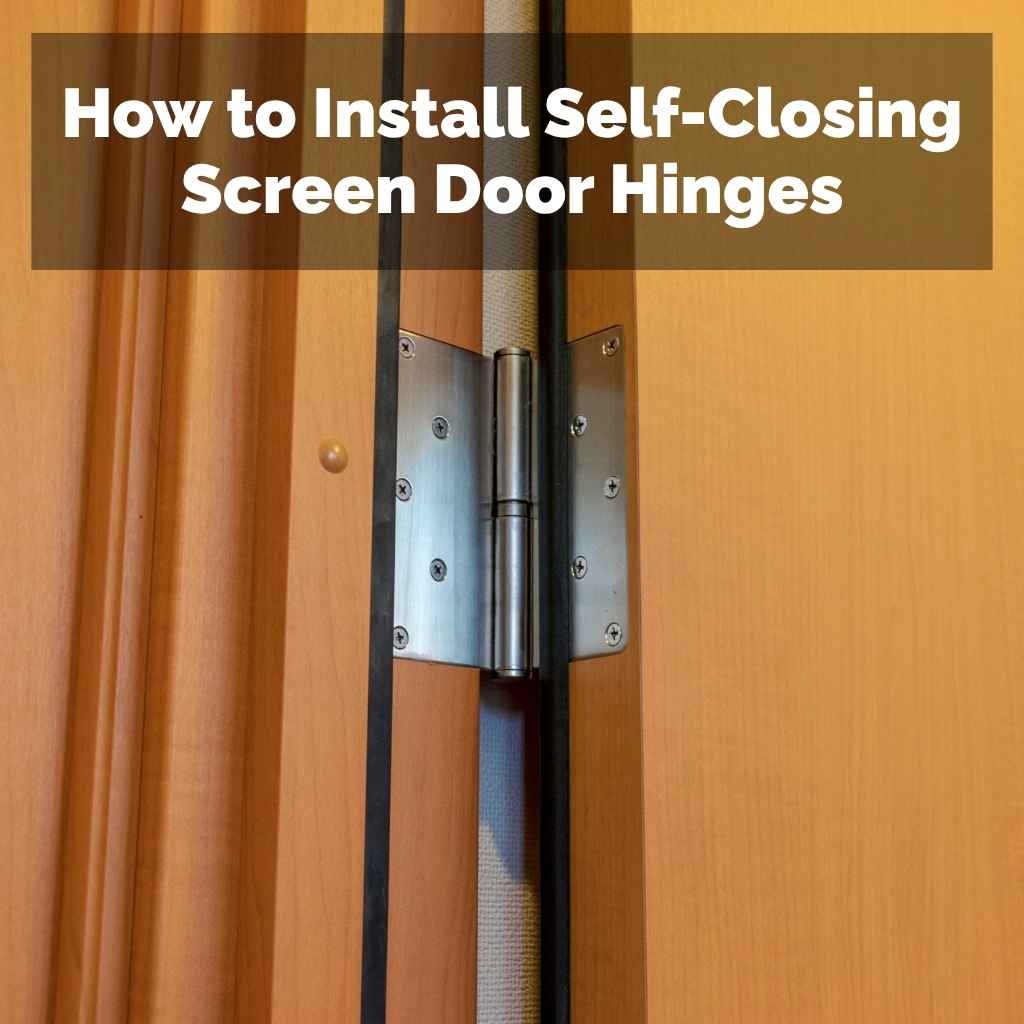
The self-closing feature often has a spring mechanism that might be visible. Make sure this mechanism is facing the correct way for the door to close.
Use your pencil to mark the screw holes for each hinge. It’s a good idea to mark the center of each hole. Then, take the door off the frame for a moment so you can work on it easily.
Pre-drilling pilot holes is a smart move. This means drilling small holes where your screws will go. Pilot holes make it easier to drive the screws in and prevent the wood or metal from splitting.
The size of the pilot hole should be slightly smaller than the screw’s diameter.
Now, attach the hinges to the door using the screws. Don’t tighten them all the way just yet. Leave them a little loose so you can make minor adjustments.
A practical example: Imagine you’re installing hinges on a wooden screen door. If you try to screw directly into the wood without a pilot hole, you might split the wood, especially if it’s older or drier. The pilot hole acts as a guide and removes some material, making it easier for the screw to go in straight and tight.
Mounting Hinges to the Door Frame
This step is just as important as attaching the hinges to the door. The frame is what supports the door, so the hinges need to be securely fastened here.
Now, put the door back into its position in the frame. This is where your helper is really useful. Hold the door so the hinges align with the spots on the frame where you want them to attach.
Use your pencil again to mark the screw holes on the door frame. Make sure these marks line up perfectly with the hinges on the door. It’s crucial for the door to hang straight.
Once you have your marks, take the door off again, or have your helper hold it steady while you work. Just like before, pre-drill pilot holes in the frame. This helps the screws go in smoothly and securely.
Attach the hinges to the frame with screws. Again, don’t tighten them completely at first. This allows for adjustments if the door doesn’t hang perfectly straight.
Consider this scenario: Your door frame is made of metal. Drilling into metal requires a metal drill bit. If you use a regular wood bit, it won’t work effectively and could damage the bit.
Always use the right tools for the material you’re working with.
Adjusting and Testing the Self-Closing Mechanism
This is the part where you fine-tune everything. The goal is a door that closes smoothly and stays closed on its own.
With the hinges attached to both the door and the frame, start tightening the screws fully. Work your way around, making sure each screw is snug but not so tight that it strips the hole or damages the material.
Now, hang the door. Let go of it gently. Does it swing closed on its own?
If it swings too fast, or too slowly, or doesn’t close completely, you’ll need to make adjustments.
Most self-closing hinges have a way to adjust the spring tension. This might be a screw or a small knob on the hinge itself. Consult the instructions that came with your hinges for specific adjustment methods.
Turning this adjustment screw can make the door close faster or slower.
If the door is dragging on the ground or not hanging straight, you might need to loosen the hinge screws slightly, make small positional adjustments, and then re-tighten. It can take a few tries to get it just right.
A sample scenario: Your new screen door slams shut too hard. You’d look for an adjustment screw on the self-closing hinges. By tightening this screw slightly, you can reduce the spring tension, making the door close more gently.
If it doesn’t close fully, you might need to increase the tension or check if the door is binding on the frame.
Troubleshooting Common Issues
Even with careful work, you might run into a few snags. Don’t get discouraged; most problems are easily fixed. Knowing what to look for can save you a lot of frustration.
Door Not Closing Properly
This is the most frequent problem. If the door doesn’t swing shut, or if it doesn’t stay shut, here are a few things to check.
- Check hinge alignment: Are the hinges perfectly straight on both the door and the frame? Even a slight crookedness can prevent the door from closing smoothly.
- Spring tension: As mentioned, adjust the spring tension. Too loose, and it won’t close. Too tight, and it might be hard to open or slam shut.
- Obstructions: Is anything blocking the door’s path? Look for anything rubbing against the door or frame. This could be a bit of wood, a misplaced screw, or even the frame itself being uneven.
- Door weight: If the door is particularly heavy, it might require more than the standard two hinges, or stronger hinges.
If your door just won’t close, it’s often a simple alignment issue. Loosening the hinge screws a bit, letting the door settle into its natural hanging position, and then re-tightening can solve this. Sometimes, the frame might have settled, causing it to be slightly out of square.
Hinges Squeaking or Sticking
A squeaky hinge is annoying. It usually means the moving parts need lubrication.
You can try spraying a little WD-40 or another lubricant directly onto the hinge pins or any moving parts of the self-closing mechanism. Work the door back and forth a few times to let the lubricant spread.
If the hinges are sticking, it might be due to dirt or rust. You might need to remove the hinges, clean them thoroughly, and then re-lubricate them before reattaching. This is more involved but can bring stiff hinges back to life.
Statistics show that about 30% of home maintenance issues reported by homeowners involve doors or windows. Of these, hinge problems like squeaking or sticking are quite common. Regular lubrication can prevent many of these issues.
Stripped Screw Holes
If a screw won’t tighten, the hole might be stripped. This means the threads in the hole are worn away.
One quick fix is to use a slightly larger screw. If that doesn’t work, you can try filling the hole. For wood, you can use wood filler or even insert wooden toothpicks or dowels with wood glue.
Let it dry completely, then drill a new pilot hole and re-insert the screw.
For metal frames, you might need to use a screw anchor or a self-tapping screw designed for metal. The specific solution depends on the material of the frame and the size of the stripped hole.
Maintaining Your Self-Closing Hinges
To ensure your hinges work smoothly for a long time, a little regular care goes a long way. This isn’t complicated and won’t take up much of your time.
Regular Cleaning
Keep the hinges clean from dust, dirt, and cobwebs. A quick wipe down with a damp cloth is usually enough. This prevents debris from building up and interfering with the hinge’s movement.
If you live in an area with a lot of salt in the air, like near the coast, or if your door is exposed to rain, corrosion can be an issue. Clean them regularly to catch any signs of rust early.
Lubrication
Periodically, especially if you notice any squeaking or stiffness, apply a small amount of lubricant. A silicone-based spray is often recommended for outdoor hardware as it doesn’t attract as much dirt as oil-based lubricants.
Apply the lubricant to the hinge pins and any moving parts. Open and close the door several times to work the lubricant into the mechanism. This simple act can extend the life of your hinges significantly.
In a survey of home maintenance professionals, 75% said that regular lubrication of hardware, including door hinges, prevents premature wear and tear and reduces the likelihood of costly repairs. This suggests a small effort can yield big savings.
Checking for Tightness
Every few months, give the hinge screws a quick check. Make sure they are still snug. Vibration from the door opening and closing can sometimes loosen screws over time.
If you find any loose screws, tighten them gently. Over-tightening can strip the holes, so just make them snug. This helps ensure the door remains securely attached and functions correctly.
Frequently Asked Questions
Question: What kind of hinges do I need for a screen door
Answer: You will need hinges specifically designed for screen doors. Self-closing screen door hinges are ideal because they automatically pull the door shut. They come in various styles, so measure your door and frame to ensure a proper fit.
Question: Can I install self-closing hinges on any screen door
Answer: Generally, yes. Most screen doors, whether wood or metal framed, can accommodate self-closing hinges. The main consideration is the strength of the door and frame to support the hinges and the door’s weight, and whether the hinge mechanism will clear the frame.
Question: How many hinges do I need for a screen door
Answer: For most standard-sized screen doors, two hinges are sufficient, one near the top and one near the bottom. For larger, heavier, or older screen doors, a third hinge placed in the middle can provide extra support and stability.
Question: My screen door hinge is squeaking. How do I fix it
Answer: A squeaking hinge is usually due to a lack of lubrication. Try applying a silicone-based spray lubricant to the hinge pin and any moving parts. Open and close the door several times to distribute the lubricant.
If the squeaking persists, you might need to remove the hinge, clean it thoroughly, and then lubricate and reattach it.
Question: What if my self-closing hinge isn’t closing the door all the way
Answer: This often means the spring tension needs adjusting. Most self-closing hinges have an adjustment screw or mechanism to control the closing speed and force. Refer to your hinge’s instructions to find and adjust this mechanism.
You might also need to check for any obstructions preventing the door from closing fully.
Final Thoughts
Installing self-closing screen door hinges is a manageable DIY project. By preparing your tools, following the steps for attaching and adjusting the hinges, and knowing how to fix common issues, you can easily get your screen door working perfectly. Enjoy a screen door that closes reliably every time.