How To Install Threshold Strip: Proven & Essential
Quick Summary:
Installing a threshold strip is a straightforward DIY project that enhances your home’s appearance and prevents drafts. This guide provides simple, step-by-step instructions for securely fitting a threshold strip between different flooring types, ensuring a professional finish and improved comfort.
Welcome, fellow DIYers! Ever notice that little strip of material where one type of flooring meets another, like where your cozy hardwood floor butts up against a cool tile area? That’s a threshold strip, and it’s more important than you might think. It’s not just about looks; it’s about creating a smooth transition, sealing out drafts, and protecting your floors. Sometimes, these can look a bit daunting to install, especially if you’re new to home improvement. But don’t worry! With a few simple tools and this easy-to-follow guide, you’ll be able to install a threshold strip like a pro. We’ll walk through everything, from picking the right strip to making sure it’s perfectly in place.
Why You Need a Threshold Strip (It’s More Than Just a Trim!)
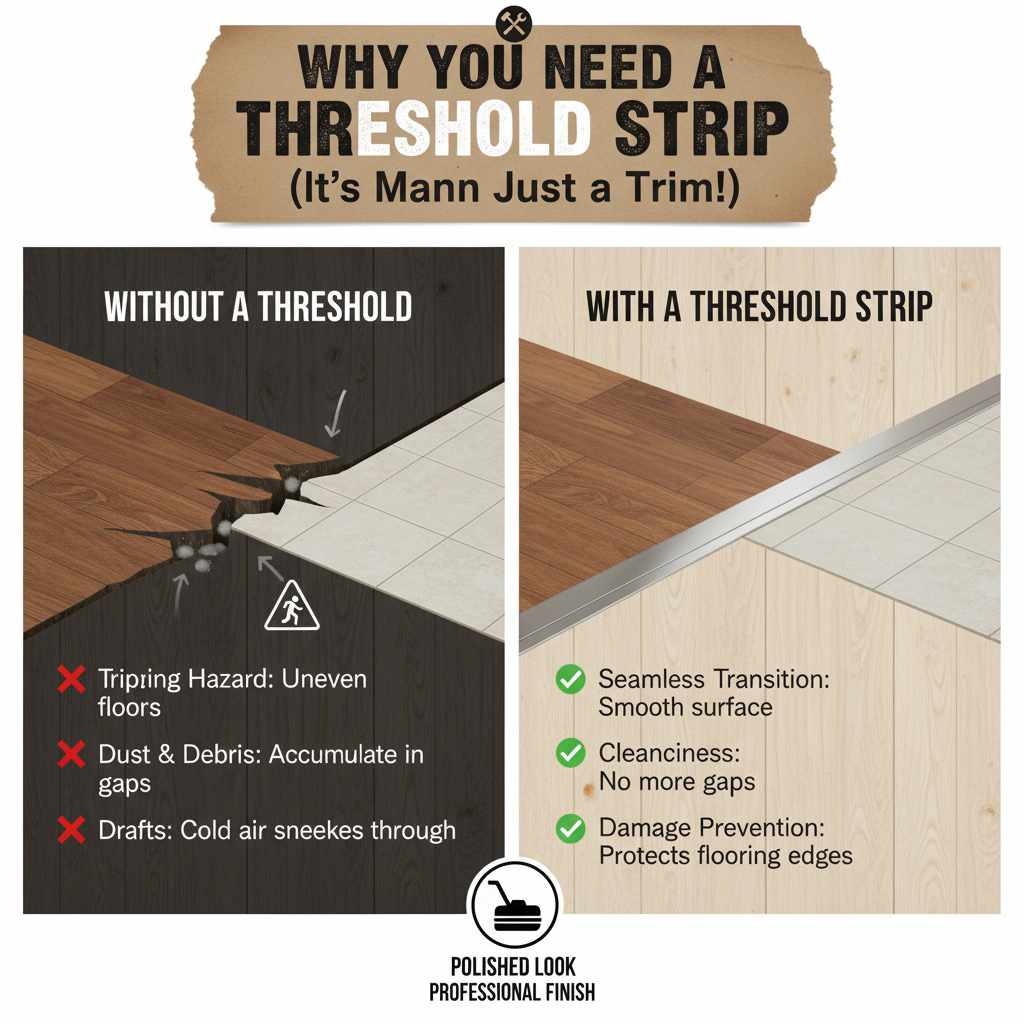
A threshold strip, also known as a reducer or transition strip, is a crucial element in flooring. It’s the unsung hero that bridges the gap between different flooring materials, such as hardwood and tile, carpet and laminate, or even two different heights of the same flooring. Its primary purpose is to create a seamless, safe, and aesthetically pleasing transition. Without one, you risk tripping over the uneven edge, allowing dust and debris to accumulate in the gap, and letting those annoying drafts sneak in.
Think about it: hardwood floors can expand and contract with temperature and humidity changes, while tile is much more rigid. A threshold strip accommodates these differences, preventing damage to your flooring. It also adds a polished look, making your home feel more complete and professionally finished. For those looking to tackle this themselves, understanding the “how to install threshold strip between hardwood and tile” is a key skill that adds value and beauty to your home.
Choosing the Right Threshold Strip
Before we grab our tools, let’s talk about choosing the perfect threshold strip. This is an important first step, as the right strip will make installation much easier and give you the best result. There are several types, each suited for different situations.
Types of Threshold Strips
- Square Edge/Square Nose: This is a simple, flat strip that works well when two flooring surfaces are at the same height. It’s often used between two pieces of hardwood or laminate.
- Bullnose/Rounded Edge: This type has a rounded profile and is ideal for transitions where one flooring is slightly higher than the other, or where you want a softer edge.
- Reducer/Ramp: As the name suggests, this strip gradually slopes from a higher flooring surface down to a lower one. This is perfect for transitions between thicker flooring like hardwood and thinner flooring like vinyl or tile.
- T-Molding: This strip has a T-shaped cross-section and is designed to bridge expansion gaps between large areas of similar flooring, like extensive hardwood or laminate installations.
- Overlap Reducer: This type is specifically designed to cover a gap and overlap the edge of a lower flooring material.
Material Matters
Threshold strips come in various materials, each with its own look and durability:
- Wood: Often matching your hardwood flooring, wood strips offer a classic and seamless look. They can be stained to match any color.
- Laminate/Vinyl: These are typically made to match common laminate and vinyl flooring styles, offering a budget-friendly option.
- Metal (Aluminum, Brass, Stainless Steel): Metal strips are very durable and can add a modern or industrial touch. They are great for high-traffic areas and can be found in various finishes.
- Composite: A blend of materials, offering durability and often a more affordable price point.
When deciding, consider the height difference between your floors, the types of flooring you’re connecting, the overall style of your room, and how much foot traffic the area will see. For our focus on “how to install threshold strip between hardwood and tile,” you’ll likely be looking at a reducer or an overlap reducer, depending on the height difference.
Tools and Materials You’ll Need
Gathering all your tools and materials before you start is key to a smooth installation. It saves time and prevents frustrating interruptions. Here’s a list of what you’ll likely need:
Essential Tools:
- Measuring Tape: For accurate measurements of your doorway or transition area.
- Pencil: To mark your cut lines.
- Safety Glasses: Always protect your eyes when cutting or drilling.
- Work Gloves: To protect your hands.
- Miter Saw or Hand Saw with Miter Box: For making precise angled cuts on wood or composite strips. A miter saw makes this much easier and more accurate.
- Utility Knife: Useful for trimming smaller adjustments or scoring materials.
- Drill/Driver: For pre-drilling holes and driving screws.
- Drill Bits: Appropriate sizes for pilot holes and clearance holes.
- Countersink Bit: To allow screw heads to sit flush or slightly below the surface.
- Hammer: For tapping pieces into place or setting nails (if using nails).
- Pry Bar (small): Might be needed to gently adjust flooring if necessary.
- Vacuum Cleaner: To clean up dust and debris.
- Level: To ensure your strip is installed straight.
Materials:
- Threshold Strip: Your chosen strip (wood, metal, etc.).
- Screws: Appropriate length and type for your subfloor and threshold material. Wood screws are common for wood or composite strips.
- Wood Glue (optional): For added stability with wood strips.
- Sandpaper (optional): For smoothing edges if you’re working with wood.
- Wood Filler/Putty (optional): To fill screw holes for a seamless look.
- Caulk (optional): For sealing edges, especially if there are small gaps.
It’s always better to have a tool and not need it, than to need it and not have it! For a professional finish, investing in a good miter saw can be a game-changer for any DIYer.
Step-by-Step Guide: How to Install Threshold Strip Between Hardwood and Tile
Now for the main event! We’ll focus on the common scenario of installing a threshold strip between hardwood and tile flooring. This process can be adapted for other flooring types as well. Let’s get started!
Step 1: Measure and Plan
First, you need to accurately measure the length of the transition. Measure the width of the doorway or the area where the hardwood meets the tile. If your threshold strip has a specific profile, you might also need to account for its depth and how it will sit on each flooring type.
- Measure the distance from the edge of the hardwood to the edge of the tile.
- Consider the width of the threshold strip itself. Will it fully cover the gap and sit nicely on both surfaces?
- If you’re using a reducer, measure the height difference between the hardwood and the tile. This will help you select the correct reducer profile.
Mark your measurements clearly on the threshold strip using your pencil. Remember, it’s always better to measure twice and cut once!
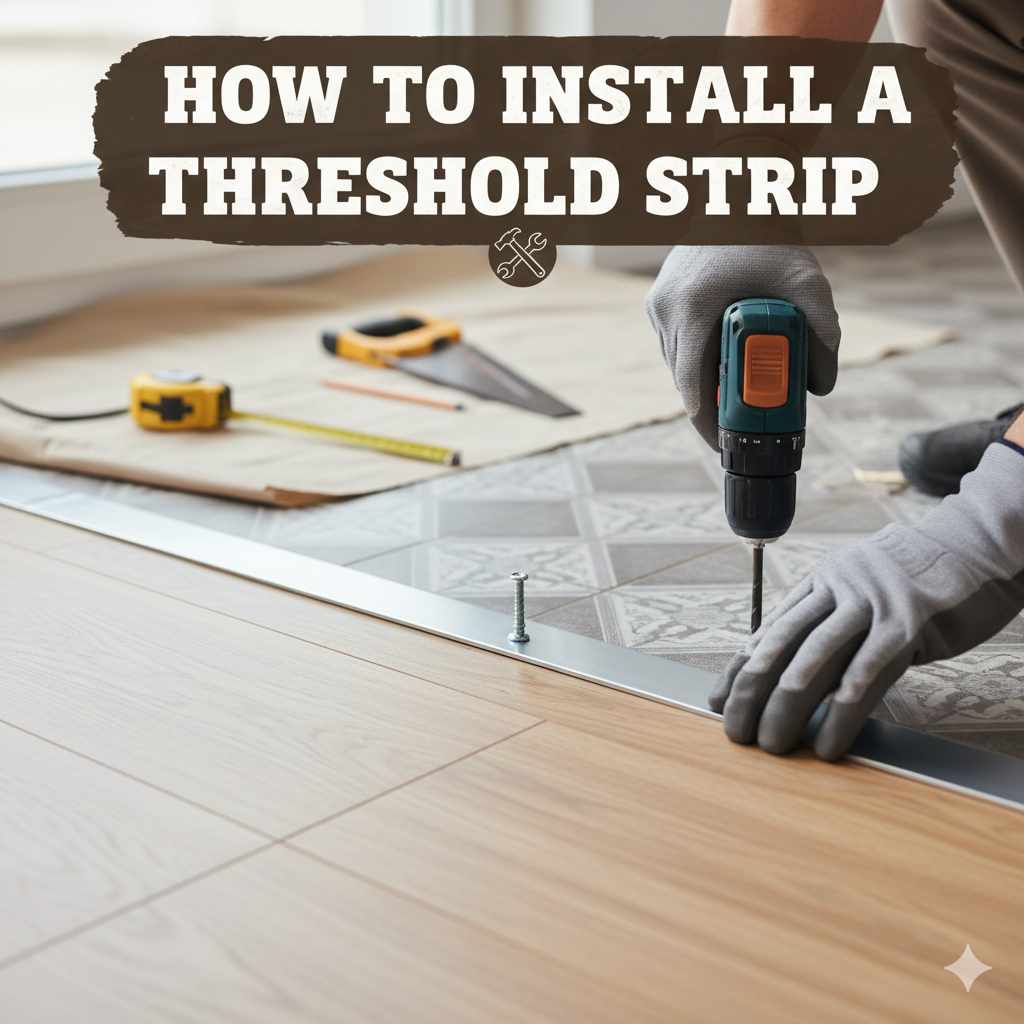
Step 2: Cut the Threshold Strip
This is where your miter saw or hand saw with a miter box comes in handy. Most transitions require a straight cut, but some doorways might have angled sides, requiring angled cuts (miters) on the threshold strip to fit snugly against the wall or jamb.
For a straight cut:
- Place the threshold strip on your miter saw or against your miter box.
- Align your pencil mark with the saw blade.
- Set the saw to 0 degrees for a straight cut.
- Carefully make the cut.
For angled cuts (if needed):
- Determine the angle required for your doorway.
- Set your miter saw to the appropriate angle (e.g., 45 degrees).
- Cut the strip, ensuring the angle will allow it to meet the adjacent surface cleanly.
Always make cuts in a well-ventilated area and wear your safety glasses. If you’re unsure about cutting angles, start with a simple straight cut and consult resources on how to make precise miter cuts if needed.
Step 3: Dry Fit the Strip
Before any permanent fixing, place the cut threshold strip into position. This is your “dry fit.”
- Lay the strip down to see how it fits.
- Check if it sits evenly on both the hardwood and the tile.
- Ensure there are no large gaps or awkward angles.
- Does it feel stable? Does it sit flush?
If you notice any issues, this is the time to make minor adjustments. You might need to trim a tiny bit off an edge or sand it down for a better fit. For example, if the hardwood is slightly higher than the tile, you might need a reducer strip. If the strip rocks or wobbles, check your subfloor or the edges of your flooring.
Step 4: Mark for Fasteners
Once you’re happy with the fit, it’s time to mark where you’ll place your screws (or nails, depending on your chosen method). The number and placement of fasteners will depend on the length of the strip and the material. Aim for fasteners every 12-18 inches, and ensure they are placed to go into the subfloor.
- With the strip still in place, use your pencil to mark the center of each fastener location.
- Consider where the underlying joists are if possible, for the most secure fastening.
- Mark near the edges and in the middle for even support.
For a clean look, you’ll want to countersink your screws. This means the screw head will sit slightly below the surface of the threshold strip, allowing you to fill the hole later.
Step 5: Prepare for Fastening
Now, you’ll drill pilot holes and, if you plan to countersink, create the countersink divots.
- Remove the threshold strip.
- At each marked spot, drill a pilot hole through the threshold strip. The pilot hole should be slightly smaller than the screw’s diameter.
- If you are countersinking, use a countersink bit to widen the top of the pilot hole. This creates a small cone shape for the screw head to sit in.
- Important for Wood/Composite: You might also want to drill pilot holes into your subfloor where the fasteners will go. This prevents the wood from splitting and makes driving screws easier. Ensure these holes are slightly smaller than your screws.
- For Metal Strips: You may need to use a metal drill bit and potentially a center punch to start the hole accurately.
A good resource for understanding subflooring and fasteners can be found on the Building Science Information website, which offers in-depth knowledge on building materials.
Step 6: Secure the Threshold Strip
It’s time to permanently attach your threshold strip!
- Place the threshold strip back into its final position.
- Align the pre-drilled holes in the strip with the pilot holes in the subfloor.
- If using wood glue, apply a thin bead along the bottom edge of the strip that will contact the subfloor or flooring.
- Begin driving your screws through the pilot holes. Use your drill/driver for this.
- Drive the screws until they are snug and the screw heads are flush with or slightly below the surface of the strip, thanks to your countersinking.
- Ensure the strip is firmly attached and doesn’t move.
If you’re using nails instead of screws, tap them in gently with a hammer, being careful not to dent the threshold strip. Ensure the nails are long enough to go through the strip and securely into the subfloor.
Step 7: Finishing Touches
With the strip securely in place, you can add some finishing touches to make it look even better.
- Fill Screw Holes: If you want a seamless look, fill the countersunk screw holes with wood filler or putty that matches your threshold strip material. Let it dry completely, then sand it smooth.
- Clean Up: Vacuum up any dust and debris from the installation.
- Caulk (Optional): For a very clean seal, you can apply a thin bead of caulk along the edges where the threshold strip meets the hardwood and tile. Choose a caulk color that blends in or matches your flooring.
- Final Inspection: Run your hand over the strip to ensure there are no rough edges or protruding fasteners.
Congratulations! You’ve successfully installed your threshold strip. It’s a small change that makes a big difference in the look and feel of your home.
Alternative Installation Methods
While screws are a very secure and common method, other options exist, especially for certain materials or situations.
Adhesive Installation
Some threshold strips, particularly lighter ones or those made of vinyl or certain metals, can be installed using a strong construction adhesive. This is a good option if you prefer not to drill into your subfloor or if your subfloor is difficult to drill into.
- Ensure both surfaces (subfloor and bottom of the threshold) are clean and dry.
- Apply a bead of construction adhesive along the bottom of the threshold strip.
- Press the strip firmly into place.
- You may need to weigh down the strip with heavy objects (like books or sandbags) while the adhesive cures, following the manufacturer’s instructions.
- This method is often less permanent than screwing.
Nail-Down Installation
For wooden threshold strips, especially those matching hardwood flooring, finishing nails can be used. This method often requires a nail gun for best results, but can be done with a hammer and finishing nails.
- Use finishing nails that are long enough to go through the threshold and into the subfloor.
- Pre-drill pilot holes to prevent splitting the wood.
- Drive the nails using a hammer or nail gun.
- Use a nail set to sink the nail heads slightly below the surface for filling with wood putty.
Always refer to the manufacturer’s recommendations for your specific threshold strip, as they often provide the best guidance on installation methods.
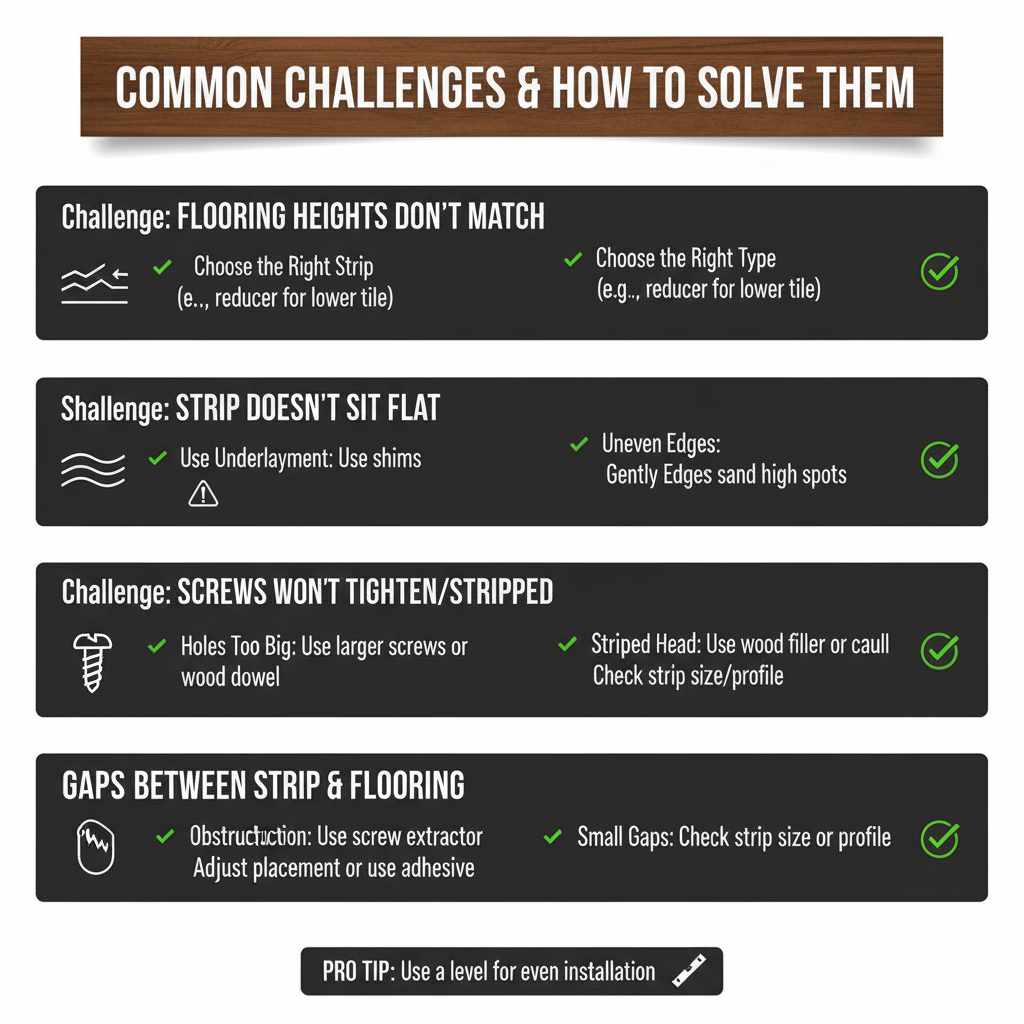
Common Challenges and How to Solve Them
Even with the best intentions, DIY projects can sometimes present little hurdles. Here are a few common challenges when installing threshold strips and how to overcome them:
Challenge: Flooring Heights Don’t Match Perfectly
Solution: This is where selecting the right type of threshold strip is crucial. If your tile is lower than your hardwood, you’ll need a reducer or overlap reducer. If the hardwood is slightly higher, a bullnose or a specially designed transition might be needed. Measure the height difference carefully before purchasing your strip. Sometimes, a thin piece of underlayment can be used to slightly raise a lower floor, but this should be done with caution to avoid creating a new tripping hazard.
Challenge: The Strip Doesn’t Sit Flat
Solution: This usually means the subfloor beneath is uneven, or the edges of your flooring are not perfectly flush.
- Uneven Subfloor: You might need to add a thin shim (a tapered piece of wood or composite) under the low side of the threshold strip to make it sit flat. Ensure the shim is securely fastened.
- Uneven Flooring Edges: Gently sand down any high spots on the edges of the flooring where the strip meets it. Be very careful not to damage your flooring.
Challenge: Screws Won’t Tighten or Are Stripped
Solution:
- Pilot Holes Too Big: If the pilot hole was too large, the screw won’t grip the subfloor. You can try using a slightly larger screw or filling the hole with wood glue and a wooden dowel, then re-drilling a pilot hole into the dowel.
- Stripped Screw Head: If the screw head is stripped, use a screw extractor tool, or carefully try to grip the head with locking pliers to remove it.
- Hitting Obstructions: If you can’t drill pilot holes, you might be hitting a metal plate or other obstruction. You may need to adjust your fastener placement or use a construction adhesive.
Challenge: Gaps Between the Strip and Flooring
Solution: Small gaps can often be addressed with wood filler or caulk after installation. For larger gaps, it might indicate that the strip isn’t the right size or profile for the transition, or that the flooring itself has gaps that need addressing. Always aim for the tightest fit possible during installation.
Consulting resources like The National Association of Home Builders (NAHB) can offer insights into standard building practices and material applications.
Frequently Asked Questions (FAQ)
Q1: How do I know what type of threshold strip to buy for my hardwood and tile floor?
A: The best threshold strip depends on the height difference between your hardwood and tile. If they are the same height, a square edge strip works. If the tile is lower than the hardwood, you’ll likely need a reducer or ramp strip. Measure the height difference to choose the correct profile.
Q2: Can I install a threshold strip without drilling holes into my subfloor?
A: Yes, for some lighter materials, you can use a strong construction adhesive. Ensure the surfaces are clean and dry, apply the adhesive according to the product’s instructions, and weigh down the strip until it cures. However, screwing provides a more secure and durable installation.
Q3: How far apart should I place my screws when installing a threshold strip?
A: For a secure installation, aim to place screws approximately every 12 to 18 inches along the length of the threshold strip. Ensure each screw goes through the strip and securely into the subfloor for maximum stability.
Q4: What if my threshold strip is too long?
A: You will need to shorten it. Use a miter saw or a hand saw with a miter box to make a clean, straight cut to the correct length. Measure carefully before cutting, as it’s easier to trim more than to add length back.
Q5: Can I paint or stain a wooden threshold strip?
A: Absolutely! If you’ve chosen an unfinished wood threshold, you can stain or paint it to perfectly match your existing flooring or decor. Ensure you use appropriate primers and finishes for durability, especially in high-traffic areas.
Q6: What’s the difference between a threshold strip and a transition strip?
A: These terms are often used interchangeably. A threshold strip typically refers to the strip at a doorway, while a transition strip is a more general term for any strip used to bridge different flooring types, heights, or finishes anywhere in a room.
Conclusion
Installing a threshold strip might seem like a small detail, but as we’ve seen, it plays a vital role in the functionality, safety, and overall aesthetic of your home. By following these proven steps, you can confidently tackle this project yourself, achieving a professional-looking finish that bridges your hardwood and tile floors beautifully. Remember to choose the right strip for your needs, gather your tools, measure carefully, and take your time with each step. Whether you’re securing it with screws or using adhesive, the satisfaction of completing this essential home improvement task yourself is immense. You’ve gained a valuable skill that not only enhances your home’s appearance but also adds to its comfort and longevity. Keep up the great DIY work!