How to Fill a Door Knob Hole: 4 Methods for Every Door Type
A door knob hole is filled by gluing a wood dowel into the standard 2-1/8-inch bore on solid wood doors — hollow-core doors need expanding foam backing instead, since a dowel has nothing solid to grip. Skipping backing on a hollow door leaves the patch soft and prone to cracking within months. This guide covers the dowel and Bondo methods for wood, foam patching for hollow-core, epoxy for metal and fiberglass, and a no-fill cover-plate alternative.
Why You Might Need to Fill a Door Knob Hole
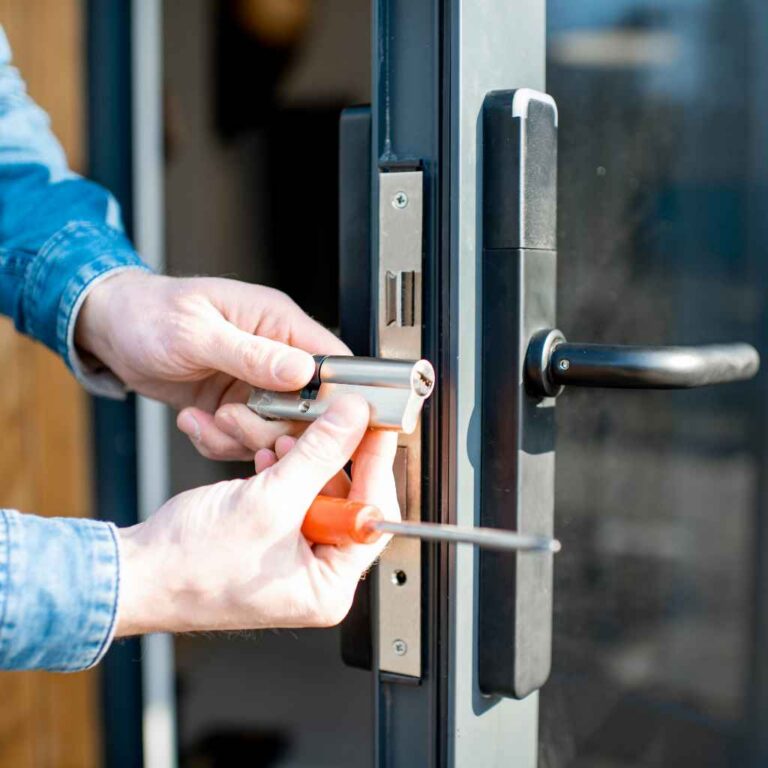
Doors often have holes from old knobs, locks, or deadbolts that don’t match new hardware. Swapping a knob for a lever sometimes leaves a 2-1/8-inch gap the new lock doesn’t cover, and removing a lock entirely — like converting a bedroom door into a closet or pantry door — leaves an open bore with nothing behind it.
Filling the hole keeps the door structurally sound and weatherproof on exterior doors, and it costs a fraction of a replacement door, which typically runs $150–$300 or more at a home center. It’s also a satisfying weekend project. Here’s what you need to get started.
Understanding Door Knob Holes and Door Types
Before patching, confirm what you’re working with. Most door knob holes are standard: 2-1/8 inches for the lock bore and 1 inch for the latch. Some doors also have a smaller deadbolt hole above or below the knob. Measure with a tape measure to confirm before buying materials — don’t assume.
📊 The 2-1/8-inch bore and 2-3/8″/2-3/4″ backset are the two dimensions nearly every residential door lock in North America is built to. — Source: Traditional Building Magazine, “Measurements for New Door Hardware”
Doors come in different materials, and this affects how you fill the hole:
- Solid wood: The easiest to patch — wood filler and a glued dowel bond directly to solid material.
- Hollow-core: Common for interior doors. These need backing (foam or a solid insert) since there’s no wood behind the hole for a dowel to grip.
- Metal: Exterior doors often have foam insulation inside a steel skin. These need a two-part epoxy filler rated for metal, not wood filler.
- Fiberglass: Similar to metal — use an epoxy filler designed to bond to the fiberglass skin rather than a wood-only product.
Knowing your door type and hole size upfront means you buy the right filler once instead of returning to the store mid-project.
Tools and Materials You’ll Need
Having the right materials on hand before you start prevents a mid-project store run. Here’s the full list:
- Wood filler: For solid wood doors or small patches (roughly $6–$10 for a 16 oz tub).
- Epoxy filler: For metal or fiberglass doors (roughly $6–$19 for a two-part kit).
- Wood dowel: To plug large holes in solid wood — needs to match your bore diameter, usually 2-1/8 inches.
- Expanding foam: For hollow-core doors, roughly $7–$14 a can. Use a minimal-expanding formula so it doesn’t bow the door skin.
- Sandpaper: Medium (120-grit) and fine (220-grit) for smoothing.
- Putty knife: To apply and smooth filler.
- Utility knife: To trim foam or dowels flush.
- Drill and bits: For cutting dowels to length or cleaning up the hole edge.
- Saw: To cut a dowel plug to the door’s exact thickness.
- Measuring tape and pencil: To mark and confirm hole dimensions.
- Safety glasses and gloves: Dust, foam, and epoxy all irritate skin and eyes.
- Primer and paint: To finish the door — a quart of matching paint runs about $10.
- Optional: Backing material: Cardboard or mesh to support foam or epoxy in hollow and metal doors.
Total cost is typically $25–$45 depending on door type, well under the cost of a replacement door.
Preparing Your Door for the Fix
Skipping prep is the fastest way to get filler on the floor, the hinges, and your hands. Prep the door properly first:
- Remove the door: Pop the hinge pins with a screwdriver and lay the door flat on sawhorses — filler and foam self-level poorly on a vertical surface.
- Clean the hole: Remove old hardware, screws, and debris. Scrape the edges smooth with a utility knife.
- Sand the area: Lightly sand around the hole with 120-grit so filler has a surface to grip.
- Measure the hole: Confirm the size (usually 2-1/8 inches) before buying a dowel or foam.
- Protect the door: Tape around the hole with painter’s tape to keep filler off the finish.
This step takes about 15 minutes and makes the actual patching faster and far less messy.
Method 1: Filling a Hole in a Solid Wood Door
This is the strongest and most common repair — a glued dowel plug backed by wood filler.
- Cut a dowel: Measure the door’s thickness (typically 1-3/8 to 1-3/4 inches) and cut a matching-diameter dowel to that length with a hand saw.
- Test the fit: Slide the dowel into the hole. Trim slightly with a utility knife for a snug, not forced, fit.
- Apply wood glue: Coat the dowel and the hole’s inner edges with glue.
- Insert the dowel: Push it into the hole until flush, tapping gently with a hammer to seat it.
- Fill gaps: Apply wood filler over any cracks around the dowel with a putty knife.
- Let it dry: Wait a full 24 hours for the glue and filler to cure before sanding.
- Sand it smooth: Sand with 120-grit, then 220-grit sandpaper until flush with the surrounding surface.
- Prime and paint: Apply primer, then two coats of matching paint for a seamless finish.
“Letting the glue and filler cure the full 24 hours before sanding is what separates a patch you can feel with your fingertips from one that’s truly invisible — sanding early just smears soft filler instead of leveling it.”
Total time is about 2 hours of work plus drying time, and a properly glued dowel patch is as strong as the surrounding wood.
Method 2: Filling a Hole in a Hollow-Core Door
Hollow-core doors are mostly air inside a thin veneer skin, so a dowel has nothing to grip. Foam backing solves that:
- Add backing: Tape cardboard or mesh inside the door, behind the hole, to catch the foam as it expands.
- Fill with foam: Spray a minimal-expanding foam into the hole slowly, in stages, to avoid overflow or bowing the door skin.
- Trim the foam: After about 4 hours, cut excess flush with a utility knife.
- Apply wood filler: Spread filler over the trimmed foam in two thin layers, letting each dry about 2 hours.
- Sand it smooth: Sand carefully with 120-grit then 220-grit — foam dents easily under heavy pressure.
- Prime and paint: Apply primer, then two to three thin coats of paint to fully hide the patch.
Plan on about 3 hours of active work plus drying time. The patch won’t match solid wood for strength, but it holds up fine for interior closet, pantry, and bedroom doors.
Method 3: Filling a Hole in a Metal or Fiberglass Door
Metal and fiberglass doors need an epoxy rated for that surface — wood filler won’t bond properly to either.
- Clean the hole: Sand inside the hole to remove rust, paint, or loose material.
- Add backing: Tape scrap aluminum mesh or cardboard inside the door to support the epoxy while it sets.
- Mix epoxy filler: Combine a two-part epoxy exactly per the package ratio — uneven mixing is the most common reason epoxy fails to cure hard.
- Fill the hole: Spread epoxy in thin layers with a putty knife, letting each layer set about an hour.
- Sand it smooth: Sand with 120-grit, then 220-grit, until it matches the surrounding texture.
- Prime and paint: Use a metal-safe primer, then spray paint for an even factory-like finish.
Budget about 2.5 hours of work plus drying time. A properly mixed epoxy patch is tough enough to blend seamlessly with the rest of a metal door.
Don’t Want to Permanently Fill It? Use a Door Hole Cover Plate
A door hole cover plate is a metal disc that bolts through the existing bore from both sides, hiding the hole without sanding, filling, or repainting. It’s the right call on rental doors, barn doors, or any door where you might reinstall hardware later — unlike a glued dowel or epoxy patch, a cover plate is fully reversible.
Most cover plates have a 2-5/8-inch outside diameter and cover holes up to 2-1/8 inches — the standard door knob bore — with two screws holding the front and back plates together through the door. Installation takes about 5 minutes with a screwdriver, no sanding or drying time required.
Best Door Hole Cover Plate Pick
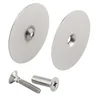
Prime-Line Steel Door Hole Cover Plate – $6.98
Covers the standard 2-1/8-inch bore this guide measures in the “Understanding Door Knob Holes” section — no sanding, filling, or drying time like the dowel and epoxy methods above.
- Best for: Rental doors, barn doors, or holes you may need to reopen later
- Why we picked it: Reversible install, no cure time, works on any door material
- Main drawback: Visible plate on both faces — not a seamless, paint-over patch
Compare more door hole repair options
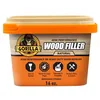 Method 1 Pick Gorilla Wood Filler 16oz – $9.39
|
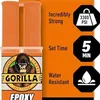 Method 3 Pick Gorilla 2-Part Epoxy – $5.97
|
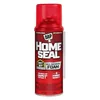 Method 2 Pick DAP Minimum Expanding Foam – $14.09
|
As an Amazon Associate we earn from qualifying purchases.
Cover plates work on any door material — wood, hollow-core, metal, or fiberglass — since they mount through the existing hole rather than bonding to the surface.
Can You Use Bondo to Fill a Door Knob Hole?
Yes — Bondo (an auto-body filler) works on wood doors, and it’s a common choice when a hole is too large or damaged for wood filler alone to bridge. Pack the hole about half to three-quarters full, let it set roughly 45 minutes, then build up the rest in a second pass once the first layer has hardened. Bondo cures harder and faster than standard wood filler, which makes it useful for oversized or splintered holes, but it’s also harder to sand — work it close to flush before it fully cures.
What if the New Hardware Doesn’t Match the Old Hole Size?
If a hole was drilled too big, or new hardware needs a smaller bore than what’s already there, don’t try to force a standard dowel into an oversized hole — it won’t seat evenly and the patch will crack later. Instead, cut a custom plug: use a hole saw one size larger than the existing hole to cut a fresh wood disc from a matching scrap board, then glue that oversized plug in and re-drill it to the new hardware’s exact bore once the glue cures. For a hole that’s only slightly oversized, a door hole cover plate (above) is usually faster than re-plugging, since plates cover openings up to 2-1/8 inches regardless of how ragged the edges are.
Troubleshooting Common Problems
A few things commonly go wrong mid-project. Here’s how to fix them:
- Filler cracks: Apply a second thin layer rather than one thick one — thick fills shrink unevenly as they cure.
- Foam overflows: Trim excess with a utility knife once it’s fully cured, not while still tacky.
- The patch isn’t smooth: Sand more, or build up with additional thin filler layers instead of one heavy pass.
- Paint doesn’t match: Use multiple thin coats — patched areas often need one more coat than the rest of the door to blend in under raking light.
None of these are fatal to the repair — they just mean one more thin layer and a bit more drying time.
Comparing Methods for Filling Door Knob Holes
Use this table to pick the right method for your door type:
| Method | Best For | Cost | Time Needed | Reversible? | Difficulty |
|---|---|---|---|---|---|
| Wood dowel + filler | Solid wood doors | $15–$20 | 2 hrs | No | Easy |
| Bondo | Oversized/damaged wood holes | $10–$15 | 1.5–2 hrs | No | Easy |
| Expanding foam + filler | Hollow-core interior doors | $10–$15 | 3 hrs | No | Medium |
| Two-part epoxy | Metal/fiberglass exterior doors | $15–$25 | 2.5 hrs | No | Medium |
| Cover plate | Any door, especially rentals | $5–$10 | 5 min | Yes | Easy |
The dowel method is the strongest permanent fix on wood; the cover plate is the fastest and only reversible option.
Finishing and Painting Your Door
A good finish is what makes the patch disappear.
- Prime the patch: Apply a thin, even coat of spray primer.
- Sand lightly: After the primer dries, sand with 220-grit to smooth it.
- Paint it: Apply two to three thin coats, matching the door’s existing color and finish sheen.
- Seal exterior doors: Add a clear polyurethane coat for weatherproofing.
- Clean up: Remove painter’s tape and wipe the door down with a damp cloth.
Budget 1–2 hours here, plus drying time between coats.
Maintaining Your Patched Door
A little upkeep keeps a good patch invisible for years.
- Check the patch yearly: Look for cracks or peeling paint, especially on exterior doors.
- Repaint as needed: Touch up every few years, or sooner on doors that get direct sun.
- Clean gently: A damp cloth only — harsh cleaners can strip the finish around the patch.
- Reseal exterior doors annually: Reapply polyurethane each spring to keep the patch weatherproof.
Safety Tips for Filling a Door Knob Hole
Fillers, foam, and epoxy all carry some risk if handled carelessly.
- Wear safety glasses: Sanding dust and foam overspray both irritate eyes.
- Use gloves: Epoxy and expanding foam are difficult to remove from skin once cured.
- Work in a ventilated area: Fillers, foam, and paint all off-gas fumes — open a window or work in a garage with the door up.
- Secure the door: Prop it on sawhorses or a stable workbench so it can’t shift while you work.
Creative Ideas for Your Patched Door
Once the hole is invisible, it’s a good excuse to update the door further:
- Add new hardware: A modern lever or matte-black knob refreshes the whole entry.
- Paint it bold: A closet or pantry door is a low-risk place to try a saturated color.
- Hang a mirror: A small mirror on a converted pantry or closet door adds function.
- Use decals: Removable vinyl decals dress up a plain patched door without commitment.
Conclusion
Filling a door knob hole comes down to matching the method to the door: a glued dowel for solid wood, foam backing for hollow-core, epoxy for metal or fiberglass, Bondo for oversized wood holes, or a cover plate if you’d rather skip filling altogether. Each method costs well under the price of a replacement door and can be finished in an afternoon, including drying time. Pick the method that matches your door material, work through the prep steps first, and the hole will be effectively invisible once painted.
Frequently Asked Questions
How long does it take to fill a door knob hole?
It takes about 2 hours of active work for a solid wood door, 3 hours for a hollow-core door, and 2.5 hours for a metal door, not counting drying time between layers. A cover plate takes about 5 minutes since nothing needs to cure.
Can I fill a door knob hole without removing the door?
Yes, but it’s harder to keep filler from dripping or sagging on a vertical surface. Removing the door and laying it flat on sawhorses makes the filler self-level and speeds up the whole repair.
Will the patch be as strong as the original door?
On solid wood doors, yes — a properly glued dowel patch is as strong as the surrounding wood. Hollow-core foam patches are weaker but hold up fine for interior doors that don’t take daily impact.
What if I don’t have a dowel for a wooden door?
Use wood filler alone for smaller holes, such as a 1-inch latch hole. For the full 2-1/8-inch bore, Bondo or a cut wood plug both work as dowel substitutes.
Can I install a new lock after filling the hole?
Yes. Once the filler or dowel patch has fully cured (24 hours), you can drill a new hole for updated hardware through the patched area without it cracking.
Can you use Bondo to fill a door knob hole?
Yes. Pack Bondo about half to three-quarters full, let it set roughly 45 minutes, then finish filling in a second pass. It cures harder than standard wood filler, which helps on oversized or damaged holes.
How do you cover a door knob hole without permanently filling it?
Install a door hole cover plate — a metal disc that bolts through the existing bore from both sides with two screws. It hides holes up to 2-1/8 inches in about 5 minutes and can be removed later if you reinstall hardware.
Related Door Hardware Guides
If you’re working on door hardware beyond patching, see our full door hardware and locks guide hub. Drilling a fresh hole instead of filling one? Check how to drill a door knob hole and how to make a perfect hole for door knobs for the reverse process, or how to cut a door handle hole for lever-style hardware.
Sponsored / affiliate links. As an Amazon Associate I earn from qualifying purchases. I may earn additional commission from eligible campaigns.