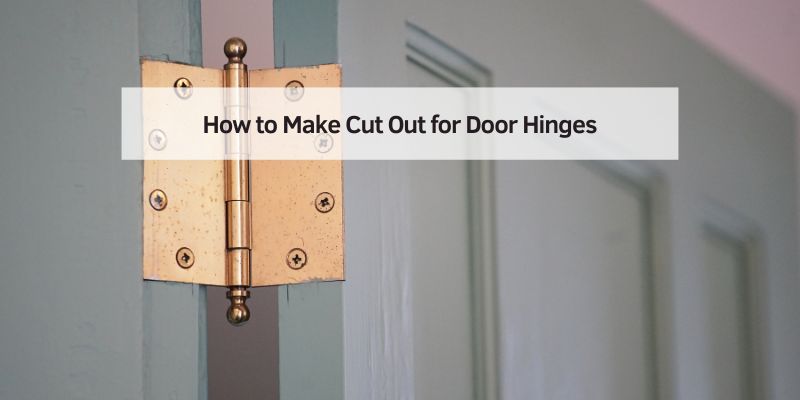
How to Make Cut Out for Door Hinges
Hey there! If you’re looking to hang a new door or replace an old one, you’ve probably realized that getting those hinges to sit just right is a big deal. I’ve been there, staring at a door slab, wondering how to carve out those perfect slots for the hinges. It’s not as tricky as it seems, and I’m excited to walk you through the process of making cutouts for door hinges. I’ve done this a few times myself, and with the right tools and a bit of patience, you’ll have a door that swings smoothly and looks professional. Let’s dive into this step-by-step guide to create clean, precise hinge cutouts that’ll make your home improvement project shine.
Why Hinge Cutouts Matter
When I first started working on doors, I didn’t realize how important hinge cutouts were. They’re not just about making the hinge fit—they’re about ensuring your door hangs straight, swings easily, and stays secure for years. A poorly cut hinge mortise (that’s the fancy term for the cutout) can make your door wobble, stick, or even sag over time. Trust me, I learned this the hard way when my first door didn’t close properly because the hinges weren’t flush. A good cutout lets the hinge sit flat against the door and frame, creating a seamless connection. It’s like laying a strong foundation for a house—get it right, and everything else falls into place.
Tools You’ll Need
Before we get started, let’s talk about the tools. I always gather everything I need upfront so I’m not scrambling mid-project. Here’s what I use to make hinge cutouts:
- Chisel: A sharp ¾-inch or 1-inch chisel works best for carving out the wood.
- Utility knife: This helps score the outline for clean edges.
- Hammer: A lightweight one for tapping the chisel.
- Hinge template or jig: This makes marking and cutting way easier, especially if you’re new to this.
- Tape measure and pencil: For precise measurements.
- Screwdriver or drill: To secure the hinges after cutting.
- Router with a straight bit (optional): If you want to speed things up, a router is a game-changer.
- Safety gear: Safety glasses and gloves to keep you protected.
If you don’t have a hinge template, don’t worry—you can still do this with careful measurements. I’ve done it both ways, and while a template saves time, a steady hand works just fine.
| Tool | Purpose | Optional or Essential |
|---|---|---|
| Chisel | Carves out the hinge mortise | Essential |
| Utility Knife | Scores the outline for clean cuts | Essential |
| Hammer | Drives the chisel | Essential |
| Hinge Template/Jig | Guides precise cuts | Optional |
| Tape Measure | Measures hinge placement | Essential |
| Pencil | Marks the outline | Essential |
| Screwdriver/Drill | Secures hinges | Essential |
| Router | Speeds up mortise cutting | Optional |
| Safety Glasses/Gloves | Protects during cutting | Essential |
Measuring and Marking the Hinge Locations
The first thing I do is figure out where the hinges go. Standard doors usually have three hinges: one near the top, one near the bottom, and one in the middle. For a standard 80-inch interior door, I place the top hinge about 7 inches from the top, the bottom hinge about 11 inches from the bottom, and the middle hinge roughly halfway between them. Exterior doors might need slightly different placements, so check the manufacturer’s guidelines if you’re working with one.
I grab my tape measure and pencil to mark these spots on the door’s edge. If you’re replacing a door, check the old door or frame for reference—it’s a great way to avoid guesswork. Once I’ve marked the spots, I hold the hinge against the door and trace its outline with a pencil. Precision is key here. A wobbly line can lead to a sloppy cut, and nobody wants that. If you’re using a hinge template, attach it to the door with clamps and trace the slots it provides. I’ve found templates make this step foolproof, especially for beginners.
Scoring the Outline
Once the hinge locations are marked, I use a utility knife to score along the pencil lines. This step might seem small, but it’s a lifesaver. Scoring creates a clean edge and prevents the wood from splintering when you start chiseling. I press firmly but carefully, going over the lines a couple of times to make a shallow groove. If you’re working with a hardwood door, like oak, you might need to score a bit deeper. I learned this trick after my first attempt left jagged edges—scoring makes all the difference.
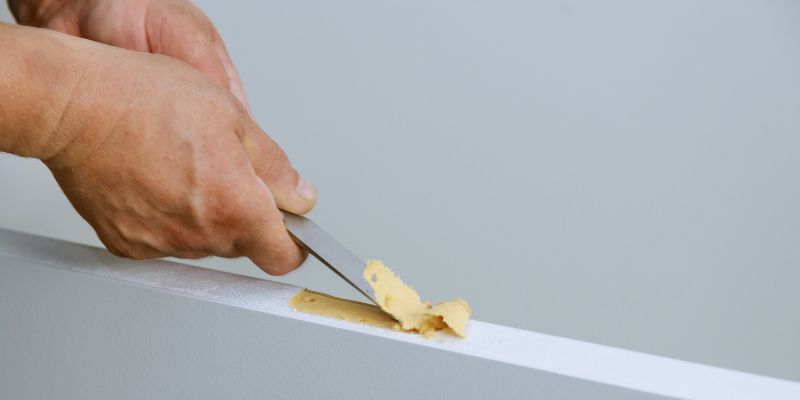
Cutting the Hinge Mortise
Now comes the fun part: cutting the mortise. This is where the hinge will sit, so it needs to be the right depth and size. The goal is to make the hinge sit flush with the door’s surface. Most hinges are about 1/16 to 1/8 inch thick, so the cutout needs to match that depth.
I start by setting my chisel along the scored outline, with the beveled side facing down. I tap the chisel gently with a hammer to create a shallow cut along the edges. Then, I work inward, removing thin layers of wood. It’s tempting to dig in deep, but I’ve learned that slow and steady wins the race. If you go too deep, you’ll have to shim the hinge later, which is a hassle.
If you’re using a router, set the depth to match the hinge thickness and carefully follow the template or outline. I’ve used a router for bigger projects, and it’s faster, but a chisel gives you more control for small jobs. Either way, check the depth frequently by placing the hinge in the cutout. It should sit flush without rocking.
Checking the Fit
After cutting the mortise, I always test the hinge fit. I place the hinge in the cutout and make sure it’s flush with the door’s edge. If it sticks out, I chisel a bit more. If it’s too deep, I use a thin piece of cardboard or a shim to raise it slightly. This step is crucial because even a tiny misalignment can throw off the door’s swing. I’ve had to redo a cutout once because I rushed this part, and let me tell you, it’s not fun starting over.
Securing the Hinges
Once the cutouts are perfect, it’s time to attach the hinges. I place the hinge in the mortise and mark the screw holes with a pencil. Then, I use a drill or screwdriver to drive the screws in. If the door is hardwood, I pre-drill small pilot holes to prevent splitting. Make sure the screws are snug but not overtightened—stripping the holes is a rookie mistake I made early on. After securing the hinges, I double-check that they’re flush and don’t wobble.
Cutting Hinge Mortises on the Door Frame
Don’t forget the door frame! The hinges need matching cutouts on the frame for the door to hang properly. I transfer the hinge measurements from the door to the frame, using the same process: mark, score, cut, and check. The frame is often trickier because you’re working vertically, and the wood might be different. I take extra care to keep my chisel steady and check the fit often. If the frame’s mortises are off, the door won’t close right, and you’ll be back to square one.
Tips for a Professional Finish
Over the years, I’ve picked up a few tricks to make hinge cutouts look pro-level:
- Keep your chisel sharp: A dull chisel tears the wood instead of cutting cleanly. I sharpen mine before every project.
- Work in good lighting: You need to see those scored lines clearly to avoid mistakes.
- Use a square: Check that your cutouts are perfectly rectangular. A crooked mortise can mess up the hinge alignment.
- Sand lightly: If the cutout has rough edges, a quick sanding smooths things out.
- Practice on scrap wood: If you’re new to this, try cutting a mortise on a piece of scrap before tackling the door.
These little details make a big difference. I once skipped sanding, thinking it wasn’t a big deal, and ended up with a slightly uneven hinge that bugged me every time I opened the door.
Common Mistakes to Avoid
I’ve made my fair share of mistakes, and I want you to avoid them. Here are some common pitfalls:
- Cutting too deep: This weakens the door and makes the hinge sit too low. Go slow and check the depth often.
- Misaligned measurements: Double-check your hinge placements before cutting. A tape measure is your best friend.
- Skipping the scoring step: Without scoring, the wood can splinter, leaving ugly edges.
- Using the wrong tools: A dull chisel or a flimsy utility knife will make the job harder than it needs to be.
- Rushing the process: Patience is key. Rushing leads to sloppy cuts and a door that doesn’t hang right.
Why I Love This Project
There’s something so satisfying about hanging a door that fits perfectly. Every time I walk through a door I’ve installed myself, I feel a little burst of pride. It’s not just about the hinges—it’s about creating a functional, beautiful part of your home. Whether you’re upgrading an old door or installing a brand-new one, mastering hinge cutouts is a skill that’ll serve you for years. Plus, it’s a great way to save money by doing it yourself instead of hiring a pro.
Conclusion
Making cutouts for door hinges might seem intimidating at first, but I promise it’s doable with the right approach. By measuring carefully, scoring your lines, and taking your time with the chisel, you’ll create clean, professional-looking mortises that make your door hang like a dream. I’ve been through this process enough times to know that patience and precision are your best tools. Whether you’re a DIY newbie or a seasoned home improver, this project is a chance to flex your skills and make your home a little more yours. So grab your tools, put on some music, and get ready to transform your door. You’ve got this!
Frequently Asked Questions
How do I know where to place the hinges on my door?
I measure 7 inches from the top for the top hinge, 11 inches from the bottom for the bottom hinge, and place the middle hinge about halfway between them. This works for most 80-inch doors, but check your door’s specs for exact placements.
Can I make hinge cutouts without a router?
Absolutely! I’ve done it plenty of times with just a chisel and a utility knife. A router speeds things up, but a sharp chisel and steady hand will get the job done just fine.
What if my hinge cutout is too deep?
No worries—I’ve been there. You can place a thin shim, like a piece of cardboard or wood veneer, under the hinge to raise it to the right level. Just make sure it’s secure and doesn’t shift.
How do I prevent wood from splintering when cutting?
Scoring the outline with a utility knife is my go-to trick. It creates a clean edge and stops the wood from tearing. Also, use a sharp chisel and work in small, controlled cuts.
Do I need a hinge template?
You don’t need one, but it makes the job easier, especially if you’re new to this. I’ve used templates for bigger projects, and they save time by guiding your cuts perfectly.
How long does it take to cut hinge mortises?
For one door, it usually takes me about 30-45 minutes to mark, score, and cut three hinge mortises. If you’re using a router, it might be quicker. Take your time to get it right.
Can I reuse old hinges for a new door?
Yes, as long as they’re in good condition and match the new door’s size and weight. I always check that the screws are secure and the hinges aren’t bent before reusing them.