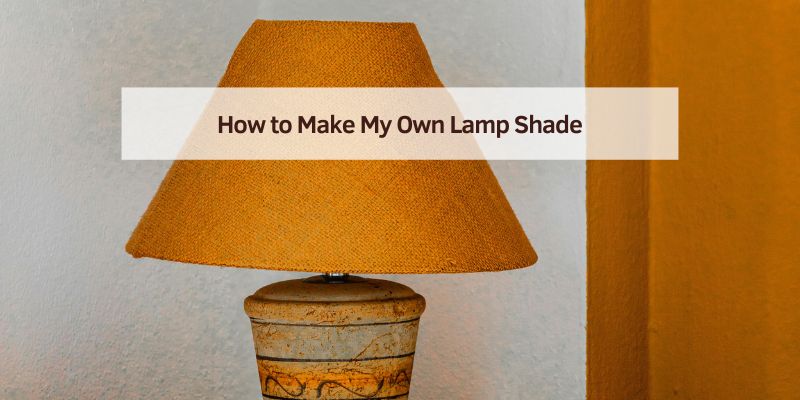
How to Make My Own Lamp Shade
Hey there! Imagine we’re sitting in your garage, surrounded by car parts and tools, with a cool car project on the horizon. You’ve got the perfect lighting setup for working late nights, but the lamp shade? It’s plain, boring, or maybe even broken. That’s when I started wondering how to make my own lampshade? As someone who’s dived into this for my automotive blog and workshop, I’ve crafted custom lamp shades that add style and function to my space.
It’s a fun, creative DIY project, and I’m thrilled to share my journey with you. Whether you’re sprucing up your garage or adding flair to a car showroom, let’s make a lamp shade that shines!
Why Make Your Own Lamp Shade?
A custom lamp shade is a game-changer for any automotive space. It lets you control the light, bright for detailing cars or soft for a cozy vibe. Plus, it’s a chance to show your personality. In my garage, I made a shade with a checkered flag pattern to match my racing theme. It’s a conversation starter when friends drop by.
Store-bought shades can be pricey or generic. Making your own saves money and lets you pick materials that fit your style. It’s also surprisingly easy, even if you’re not super crafty. I had zero sewing skills when I started, but my first shade turned out great. Let’s explore why this project is worth your time.
Understanding Lamp Shades and Their Parts
Before we jump in, let’s talk about what a lampshade does. It covers the bulb, diffusing light to reduce glare and create ambiance. It also protects the bulb and adds style. A shade has a frame (usually metal), a covering (fabric, paper, or other materials), and fittings to attach it to the lamp.
Frames come in shapes like drums, cones, or bells. The fittings—called spider, clip-on, or uno—connect the shade to the lamp. I used a drum-shaped spider frame for my garage lamp because it’s sturdy and modern. Knowing these basics helps you choose the right materials for your project.
Types of Lamp Shades for Automotive Spaces
Lamp shades vary by style and function, and automotive spaces have unique needs. In a garage, you want durability and bright light for tasks like wrenching or painting. In a showroom, you might prefer a sleek, decorative shade to highlight a car’s curves. Here are some types I’ve tried:
- Fabric Shades: Soft, versatile, and easy to customize with patterns. I made a canvas shade for my garage—tough and easy to clean.
- Paper Shades: Lightweight and budget-friendly, but less durable. Great for temporary setups.
- Metal or Mesh Shades: Industrial and rugged, perfect for a mechanic’s shop. I used a mesh shade for a vintage look.
- Plastic or Acrylic Shades: Modern and durable, but can yellow over time. Good for bright, focused light.
For automotive work, I lean toward fabric or metal shades. They handle dust and grease better than paper or plastic.
Materials You’ll Need to Make a Lamp Shade
Making a lamp shade doesn’t require fancy supplies. Here’s what I gathered for my garage project:
- Lamp shade frame (buy one or repurpose an old shade’s frame)
- Fabric, paper, or other covering material
- Scissors
- Craft glue or a hot glue gun
- Spray adhesive (for smooth fabric application)
- Measuring tape
- Pencil or marker
- Decorative trim (optional, like ribbon or studs)
- Styrene (a plastic sheet for fabric shades, optional)
- Clothespins or binder clips
- Safety glasses (for cutting wire frames)
I spent about $30 on supplies, including a $10 frame from a craft store and canvas fabric I had lying around. Check your lamp’s fitting type (spider, clip-on, or uno) to ensure the frame matches.
Tools You’ll Need
You don’t need a big toolbox for this. Here’s what I used:
- Wire cutters (if resizing a frame)
- Pliers (for bending wire)
- Ruler or straight edge
- Iron (for smoothing fabric)
- Paintbrush (for applying glue)
- Drop cloth or newspaper (to keep your workspace clean)
Most of these are household items. I borrowed a hot glue gun from a friend, which made sticking fabric a breeze. Set up in a well-lit area—ironic, right?—so you can see what you’re doing.
Choosing the Right Frame for Your Lamp
The frame is the skeleton of your shade. You can buy new ones at craft stores or strip an old shade to reuse its frame. I found a drum frame at a thrift store for $2 and cleaned it up. Frames come in sizes from small (6 inches) to large (20+ inches). Measure your lamp base to pick a proportional size—big lamps need bigger shades.
For automotive spaces, I like drum or cone shapes. They’re sturdy and spread light evenly. Check the frame’s condition—rusty or bent wires can be tricky to cover. My first frame was slightly wobbly, but I fixed it with pliers.
Picking the Perfect Covering Material
The covering is where your creativity shines. Fabric is my go-to because it’s durable and customizable. I used a black canvas with a white racing stripe for my garage shade. Here are some options:
- Cotton or Canvas: Tough, easy to glue, and great for garages.
- Silk or Linen: Fancy but delicate, better for showrooms.
- Parchment Paper: Cheap and translucent but fragile.
- Metal Mesh: Industrial and open for bright light.
- Vinyl or Leather: Bold and durable, but harder to work with.
Pick a material that matches your space’s vibe and handles dust or grease. For bright light, use light-colored or thin materials. I tested my canvas with a bulb behind it to ensure it wasn’t too dark.
Measuring and Cutting Your Material
Accuracy is key here. Lay your material flat and measure it to fit the frame. For a drum frame, wrap the material around the frame and add an inch for overlap. For height, measure the frame’s side and add 1-2 inches to wrap over the top and bottom edges.
I used a ruler to mark my canvas, then cut it with sharp scissors for clean edges. If you’re using styrene (a plastic backing for fabric shades), cut it to the frame’s exact size first, then glue the fabric to it. My first cut was crooked, so I learned to go slow and double-check measurements.
Assembling the Lamp Shade
Now, let’s put it together. Here’s how I made my fabric shade:
- Iron your fabric to remove wrinkles.
- Lay the fabric face down and place the styrene (if using) or frame on it.
- Spray adhesive on the styrene or apply craft glue to the frame’s edges.
- Wrap the fabric tightly around the frame or styrene, smoothing out bubbles.
- Use clothespins to hold the fabric in place while the glue dries.
- Fold the top and bottom edges over the frame’s rings and glue them down.
- Add trim (like ribbon) to hide rough edges, if you want.
For paper or mesh, skip the styrene and glue directly to the frame. My hot glue gun made quick work of attaching canvas, but I burned my finger once—ouch! Work carefully.
Attaching the Shade to Your Lamp
Once your shade’s dry, it’s time to attach it. Spider frames sit on a harp (a U-shaped piece on the lamp) and secure with a finial (a decorative screw). Clip-on frames snap onto the bulb. Uno frames screw onto the lamp’s socket.
My shade had a spider fitting, so I slid it onto the harp and tightened the finial. Test the shade by turning on the lamp. If it’s wobbly, check the frame’s balance or tighten the fitting. My first shade tilted until I adjusted the harp’s height.
Customizing Your Lamp Shade for Automotive Flair
This is the fun part—making it your own. I added a checkered flag stencil to my shade using fabric paint. Here are some ideas for automotive spaces:
- Paint racing stripes or car logos.
- Glue on metal studs for an industrial look.
- Use fabric with car patterns (like flames or tire tracks).
- Cut out shapes (like gears) in mesh shades for cool light patterns.
I spent an hour stenciling my shade, and it transformed my garage’s vibe. Keep it simple if you’re new to crafts—small details make a big impact.
Testing and Adjusting Your Lamp Shade
Turn on your lamp to see how the shade looks. Check if the light’s bright enough for your needs. My first shade was too dark, so I swapped the bulb for a 1,000-lumen LED. If the shade’s uneven, trim excess material or re-glue loose spots.
Stand back and admire your work. I moved my lamp around the garage to find the perfect spot—over my workbench for task lighting. Adjust the shade’s position or bulb wattage until it’s just right.
Why LEDs Are Perfect for Custom Lamp Shades
I’m obsessed with LED bulbs for lamp shades. They’re bright (800-1,500 lumens for automotive work), energy-efficient (10- 15W matches a 60- 75W incandescent), and last 25,000-50,000 hours. They also stay cool, so your shade won’t overheat.
In my garage, an LED bulb makes my shade’s racing stripes pop without washing out the colors. Pick a color temperature—cool white (4000K) for tasks or warm white (2700K) for ambiance. Cool white is my go-to for wrenching.
Common Mistakes to Avoid
I’ve had my share of oops moments, so here’s what to watch out for:
- Don’t cut material too small—measure twice, cut once.
- Don’t use flammable materials near high-wattage bulbs (stick to LEDs).
- Don’t skip ironing fabric—wrinkles show in the final shade.
- Don’t overload the frame with heavy materials; it can sag.
My first shade had glue blobs because I rushed. Take your time, and your shade will look pro.
Cost of Making a Lamp Shade
This project is budget-friendly. A frame costs $5-$20 at craft stores or thrift shops. Fabric or paper runs $5-$15, depending on quality. Glue, trim, and other supplies add $5-$10. I spent $25 total on my garage shade, using leftover canvas.
If you buy a stencil or specialty fabric, costs might hit $40-$50. Compare that to a $50-$100 store-bought shade—it’s a steal for something custom. Plus, you get bragging rights for making it yourself.
Maintaining Your Custom Lamp Shade
Your shade will stay gorgeous with a little care. Dust it weekly with a microfiber cloth. For fabric shades, vacuum gently with a brush attachment. I clean my canvas shade monthly to keep grease and dust at bay.
If the shade gets stained, spot-clean with mild soap and water (test first!). My shade got a grease mark from a wrench, but a quick dab fixed it. Avoid harsh chemicals—they can ruin fabric or paint.
Troubleshooting Common Issues
If your shade looks wonky, don’t stress. If it’s uneven, check the frame’s balance—bent wires can cause tilting. Re-glue loose fabric with a hot glue gun. If the light’s too dim, swap for a higher-lumen bulb.
My first shade had a seam that peeled because I skimped on glue. A quick re-glue fixed it. If the shade doesn’t fit the lamp, double-check the fitting type. A clip-on shade won’t work on a spider harp.
Enhancing Your Automotive Space with Custom Shades
A custom lamp shade transforms your garage or showroom. In my workshop, my checkered flag shade makes every project feel like a pit stop at a race. It focuses light on my car’s engine or paint job, making work easier and more fun.
In a showroom, a sleek shade can highlight a car’s curves, drawing customers’ eyes. It’s a small touch that adds personality and function. I love how my shade makes my garage feel like my space, not just a workspace.
Here’s a table to summarize the process:
| Step | Tools/Materials Needed | Tips |
|---|---|---|
| Choose Frame | Measuring tape, frame | Match the size to the lamp base |
| Pick Material | Fabric, paper, or mesh | Test light diffusion |
| Measure and Cut | Scissors, ruler | Add extra for overlap |
| Assemble Shade | Glue, clothespins | Smooth out bubbles |
| Attach and Test | Lamp, bulb | Adjust bulb for brightness |
Conclusion: Light Up Your Automotive Passion
Wow, what a creative ride! We’ve gone from wondering how to make my own lamp shade to crafting a custom piece that lights up your automotive world. From picking a sturdy frame to adding racing stripes, you now know how to make a shade that’s functional and full of personality. This DIY project isn’t just about lighting—it’s about making your garage or showroom feel like home.
I hope you’re as excited as I was when I switched on my custom shade and saw my garage transform. Whether you’re wrenching on a classic car or showing off a new ride, your lamp shade will make every moment shine. Grab your materials, unleash your creativity, and light up your space. You’ve got this, and I can’t wait for you to see the results!
FAQs
What materials are best for a lampshade in a garage?
Fabric like canvas or cotton is durable and easy to clean, perfect for garages. Metal mesh is great for an industrial look. Avoid paper—it’s fragile and collects dust.
Do I need sewing skills to make a lampshade?
No sewing needed! Most shades use glue to attach the material to the frame. I had zero sewing skills and made a canvas shade with a hot glue gun.
How much does it cost to make a lampshade?
A frame costs $5-$20, material is $5-$15, and supplies like glue add $5-$10. My shade cost $25, but fancier materials might hit $40-$50.
Can I use any bulb with my custom lamp shade?
LED bulbs are best—they’re cool, energy-efficient, and safe. Use 800-1,500 lumens for automotive tasks. Avoid high-wattage incandescents; they can overheat the shade.
How do I attach my lampshade to the lamp?
It depends on the fitting. Spider frames sit on a harp and are secured with a finial. Clip-on frames snap onto the bulb. Uno frames screw onto the socket. Check your lamp’s type first.