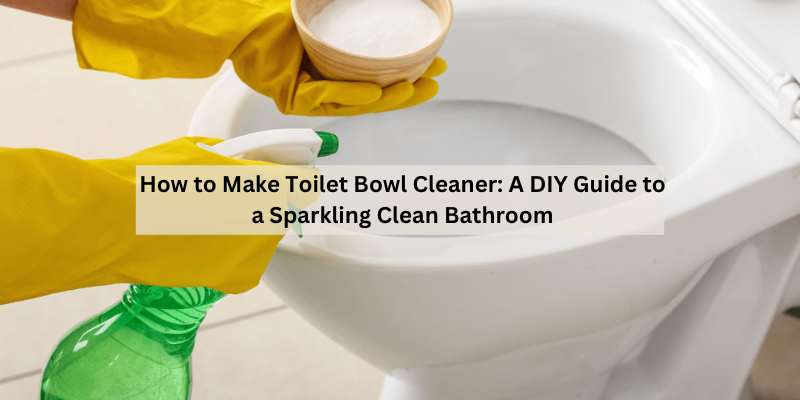
How to Make Toilet Bowl Cleaner: A DIY Guide to a Sparkling Clean Bathroom
Hey there! So, you want to know how to make your toilet bowl cleaner and keep your bathroom sparkling without breaking the bank? I get it! A few years ago, I got tired of spending money on store-bought cleaners that were full of harsh chemicals and didn’t always work. I started experimenting in my kitchen, mixing up homemade toilet bowl cleaners, and let me tell you, it’s been a game-changer. My toilet’s never been cleaner, and I feel great knowing exactly what’s in my cleaner. I’m super excited to share everything I’ve learned with you! This guide will walk you through how to make toilet bowl cleaner that’s safe, effective, and easy to whip up. Whether you’re a busy parent, a budget-conscious student, or just love DIY projects, I’ve got you covered with simple recipes for folks in the USA. Grab a mixing bowl, and let’s make your toilet shine!
Why Make Your Toilet Bowl Cleaner?
Let’s talk about why DIY toilet bowl cleaner is so awesome. When I first started, I was shocked at how much I was spending on commercial cleaners—$5 or more per bottle! Plus, the strong chemical smells gave me headaches, and I worried about my kids and pets around them. Making my cleaner saved me money and let me control the ingredients.
Homemade cleaners are often safer, using natural stuff like vinegar and baking soda. I love that they’re eco-friendly and don’t harm my plumbing. They also work just as well, if not better, at tackling stains and odors. I once had a stubborn ring in my toilet that store-bought cleaners couldn’t budge, but my DIY mix zapped it in minutes. Plus, it’s fun to mix up your cleaning potions—it’s like being a bathroom chemist!
Understanding Toilet Bowl Cleaning Needs
Before we dive into recipes, let’s figure out what your toilet needs. I learned this after using the wrong cleaner and wasting time. Toilets get dirty from hard water stains, mineral buildup, bacteria, and odors. I noticed my toilet had brownish rings from hard water and a funky smell after a hot summer.
Different cleaners tackle different problems. Vinegar is great for dissolving minerals, while baking soda scrubs stains. Essential oils add a fresh scent and kill germs. I always check my toilet’s condition first—stains, smells, or both—to choose the right mix. Knowing your toilet’s issues helps you make a cleaner that works like magic.
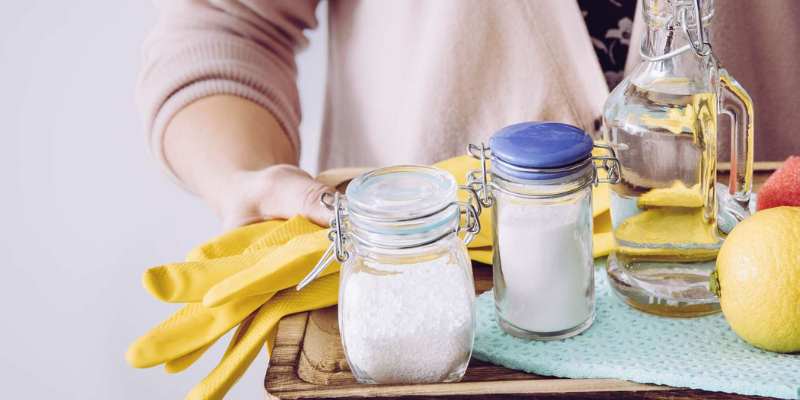
Ingredients for DIY Toilet Bowl Cleaner
The best part about homemade cleaners is that you probably have most of the ingredients at home. I raided my pantry and found everything I needed. Here’s what I use:
- White vinegar: Dissolves hard water stains and kills germs. I buy a gallon for $3 at the grocery store.
- Baking soda: Scrubs stains and deodorizes. A box costs about $1.
- Dish soap: Cuts grease and adds cleaning power. I use a $2 bottle of eco-friendly soap.
- Essential oils: Tea tree, lemon, or lavender oils add scent and antibacterial properties. A small bottle is $5-$10.
- Hydrogen peroxide: Bleaches stains and disinfects. I got a bottle for $1.
- Citric acid: Boosts stain removal. I found a bag online for $5.
- Water: Dilutes the mix for easier use. Tap water works fine.
- Optional: Castile soap: For extra cleaning power. I use it for fizzing tablets ($8 per bottle).
I spent about $15 on supplies, and they lasted for months. You can mix and match based on what you have or what your toilet needs.
Tools You’ll Need
You don’t need fancy equipment to make the toilet bowl cleaner. I learned this after trying to mix with a fork—not ideal! Here’s what I use:
- Mixing bowl: A medium-sized bowl for combining ingredients. I use an old one from my kitchen.
- Measuring cups and spoons: To get the amounts right. I already had these.
- Spoon or whisk: For stirring. A $1 thrift store spoon works great.
- Spray bottle: For liquid cleaners. I reused a $2 bottle from a dollar store.
- Mold or ice tray: For making fizzing tablets. I used a $5 silicone mold.
- Gloves: To protect your hands. I use $1 rubber gloves.
- Funnel: To pour into bottles without spilling. I had one from my kitchen.
- Labels: To mark your cleaner. I use sticky notes and tape.
My total cost for tools was about $10, and most are reusable. Grab what you have at home to keep it cheap.
Recipe 1: Liquid Toilet Bowl Cleaner
This is my go-to cleaner for everyday use. It’s quick to make and tackles stains and odors. Here’s how I whip it up:
- Ingredients: 1 cup white vinegar, ½ cup baking soda, 1 tablespoon dish soap, 10 drops tea tree essential oil, ½ cup water.
- Mix it: In a bowl, combine vinegar and water. Slowly add baking soda—it’ll fizz! Stir in dish soap and essential oil. I mix gently to avoid a volcano effect.
- Store it: Use a funnel to pour into a spray bottle. I label mine “Toilet Cleaner” with a sticky note.
- Use it: Spray inside the toilet bowl, focusing on stains. Let it sit for 10 minutes, then scrub with a toilet brush. Flush to rinse. My toilet sparkles after this!
- Yield: About 2 cups, enough for 10-15 cleanings.
This took me 5 minutes to make and costs pennies per batch. I use it weekly, and it keeps my toilet fresh and clean.
Recipe 2: Fizzing Toilet Bowl Tablets
These tablets are so fun to use—they fizz like bath bombs! I made them for tough stains. Here’s my recipe:
- Ingredients: 1 cup baking soda, ½ cup citric acid, 1 tablespoon hydrogen peroxide, 15 drops lemon essential oil, 1 tablespoon castile soap.
- Mix it: In a bowl, combine baking soda and citric acid. Add hydrogen peroxide and castile soap slowly—it’ll get clumpy. Stir in essential oil. I wear gloves to keep my hands dry.
- Shape it: Press the mix into a silicone mold or ice tray. I pack it tightly for solid tablets. Let them dry for 24 hours.
- Store it: Pop out the tablets and store them in a jar. I keep mine in a mason jar under the sink.
- Use it: Drop one tablet in the toilet bowl. It fizzes and releases cleaner. Let it sit for 15 minutes, scrub, and flush. My hard water stains vanished!
- Yield: About 12 tablets, good for a month of weekly cleaning.
This took 10 minutes to prep (plus drying time) and costs about $0.20 per tablet. It’s perfect for deep cleaning.
Recipe 3: Heavy-Duty Stain Remover Paste
For stubborn stains, this paste is my secret weapon. I used it on a toilet in my old rental that hadn’t been cleaned in years. Here’s how I make it:
- Ingredients: ½ cup baking soda, ¼ cup white vinegar, 1 tablespoon hydrogen peroxide, 5 drops lavender essential oil.
- Mix it: In a small bowl, mix baking soda and hydrogen peroxide into a paste. Add vinegar slowly—it fizzes! Stir in essential oil for a nice scent.
- Use it: Apply the paste to stains with a sponge or gloved hand. I spread it thickly on a brown ring. Let it sit for 20 minutes, then scrub hard with a brush. Flush to rinse.
- Store it: This is a single-use mix, so I make it fresh each time. It’s too fizzy to store.
- Yield: Enough for one deep clean.
This took 5 minutes to mix and worked miracles on tough stains. It’s my go-to when the toilet needs extra love.
How to Use Your DIY Toilet Bowl Cleaner
Using your cleaner right makes all the difference. I learned this after splashing cleaner everywhere my first time. Here’s how I do it:
- Prep the toilet: Flush to wet the bowl. I turn off the water valve behind the toilet for deep cleaning to keep the water low.
- Apply cleaner: Spray liquid cleaner, drop a tablet, or spread paste on stains. I focus on the rim and under the waterline where gunk hides.
- Let it sit: Wait 10-20 minutes for the cleaner to work. I set a timer and do other chores while it soaks.
- Scrub: Use a toilet brush to scrub stains and the bowl. I scrub hard for tough spots and lightly for regular cleaning.
- Flush: Turn the water back on if you shut it off, then flush. I check for leftover stains and reapply if needed.
- Clean the brush: Rinse the brush in clean water or spray with cleaner. I store mine in a holder to dry.
This takes 15-20 minutes weekly and keeps my toilet spotless. It’s like giving your bathroom a mini spa day!
Troubleshooting Common Issues
Sometimes, things don’t go perfectly. Here’s how I fix problems I’ve run into:
- Cleaner doesn’t fizz: If your mix is flat, your baking soda or citric acid might be old. I test mine by mixing a pinch with vinegar—if it fizzes, it’s good.
- Stains won’t budge: For stubborn stains, let the cleaner sit longer or use the paste. I left paste on overnight once, and the stain was gone.
- Strong vinegar smell: If the smell’s too much, add more essential oil. I upped my lemon oil to mask it.
- Tablets crumble: If tablets fall apart, pack the mold tighter or add a bit more liquid. I remade a batch with extra peroxide, and they held together.
These fixes are quick and keep your cleaner working great. Don’t worry if you hit a snag—it’s all part of the DIY fun!
Comparing DIY Toilet Bowl Cleaner Recipes
To help you choose the best recipe, here’s a table based on my experiences:
| Recipe | Best For | Cost per Batch | Time to Make | Ingredients Needed | Difficulty |
|---|---|---|---|---|---|
| Liquid Cleaner | Baking soda, vinegar, peroxide, and essential oil | $0.50 | 5 min | Vinegar, baking soda, dish soap, essential oil | Easy |
| Fizzing Tablets | Deep cleaning, tough stains | $2.50 (12 tablets) | 10 min + drying | Baking soda, citric acid, peroxide, castile soap | Medium |
| Stain Remover Paste | Stubborn stains, one-time use | $0.30 | 5 min | Baking soda, vinegar, peroxide, essential oil | Easy |
I love the liquid cleaner for quick cleanups, but tablets are fun for deep cleans. Pick what fits your needs and time.
Storing and Maintaining Your Cleaner
Proper storage keeps your cleaner fresh and ready. Here’s what I do:
- Store liquid cleaner: Keep it in a labeled spray bottle in a cool, dry place. I store mine under the sink for easy access.
- Store tablets: Use an airtight jar to prevent moisture. My mason jar keeps tablets fizzy for months.
- Check freshness: Liquid cleaner lasts about a month; tablets last 3-6 months. I sniff mine—if it smells off, I make a new batch.
- Shake before use: The Liquid cleaner can separate, so I shake the bottle to mix it up.
These steps ensure your cleaner is always ready to go. It’s like keeping your favorite snacks fresh—store it right, and it’s perfect!
Safety Tips for Making and Using Cleaners
Safety is key when mixing cleaners. Here’s what I keep in mind:
- Wear gloves: Protect your hands from vinegar or peroxide. I got a rash once without gloves.
- Ventilate the area: Open a window to avoid strong smells. I do this in my bathroom to stay comfortable.
- Don’t mix with bleach: Never combine vinegar with bleach—it makes toxic gas. I stick to my recipes to stay safe.
- Keep away from kids and pets: Store cleaners out of reach. I put mine on a high shelf.
These tips make DIY cleaning safe and fun. No one wants a cleaning mishap!
Adding a Personal Touch
Your cleaner can reflect your style! I love customizing mine:
- Scent it up: I use lavender for a calming vibe or lemon for a fresh kick.
- Color it: Add a drop of food coloring to the liquid cleaner for fun. I made a blue cleaner for my kids’ bathroom.
- Cute labels: I print fun labels like “Toilet Tamer” to make cleaning less boring.
These touches make cleaning feel like a craft project. It’s like decorating your bathroom with cleaning power!
Why I Love This Project
Making my toilet bowl cleaner has been one of my favorite DIY adventures. Every time I flush and see a sparkling bowl, I feel like a cleaning superstar. It’s not just about saving money—though I’ve saved $50 a year—it’s about creating a safer, greener home. This project is easy, fun, and lets you take charge of your bathroom’s cleanliness. Whether you’re spraying, fizzing, or scrubbing, you’ll love the results and the pride of doing it yourself.
Conclusion
There you have it—a complete guide to making your toilet bowl cleaner! I’ve been through the experiments and messes, and I’m so excited to share these recipes with you. From liquid sprays to fizzing tablets, you’ve got everything you need to keep your toilet sparkling clean without harsh chemicals. This is a simple, budget-friendly project that anyone can tackle with pantry staples and a little time. So, grab that vinegar, mix up a batch, and watch your bathroom shine. You’ll save money, help the planet, and feel like a DIY hero. Happy cleaning!
Frequently Asked Questions
Is homemade toilet bowl cleaner safe for septic systems?
Yes, my recipes use natural ingredients like vinegar and baking soda that won’t harm septic systems. I’ve used them for years with no issues.
How often should I clean my toilet with DIY cleaner?
I clean mine weekly with liquid cleaner and use tablets monthly for deep cleaning. It keeps stains and odors away.
Can I use these cleaners on other bathroom surfaces?
The liquid cleaner works on sinks and tubs, but test it first. I avoid the paste on delicate surfaces since it’s abrasive.
What if my DIY cleaner doesn’t remove stains?
Let it sit longer or try the paste. I left paste on a tough stain overnight, and it worked like a charm.
Do I need essential oils in my cleaner?
No, they’re optional for scent and extra germ-killing. I skip them sometimes to save money, and the cleaner still works great.