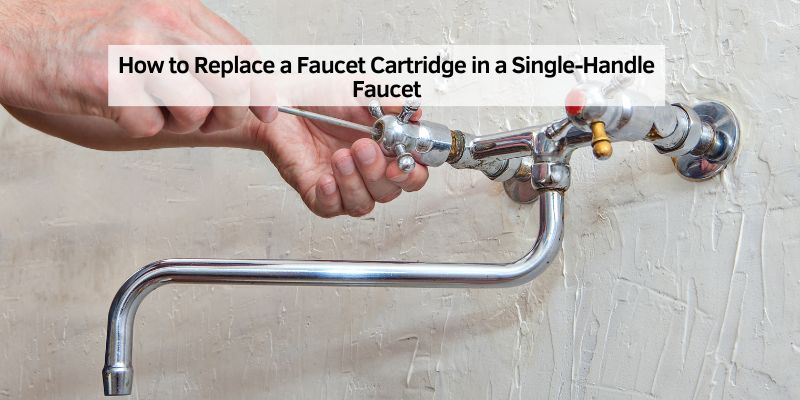
How to Replace a Faucet Cartridge (Single-Handle, 30-45 Min)
A worn faucet cartridge causes drips, a stiff handle, or water that won’t get properly hot or cold – a faucet dripping once per second wastes over 3,000 gallons a year. Replacing it yourself takes about 30-45 minutes with basic tools, versus a plumber visit for the same fix. This guide covers removing the old cartridge, installing the new one, and troubleshooting if it still leaks afterward. See our full bathroom fixtures hub for more.
Why Replacing a Faucet Cartridge Matters
📊 A faucet dripping once per second wastes more than 3,000 gallons of water per year — Source: EPA WaterSense, leak statistics
A faucet cartridge is the heart of your single-handle faucet. It’s a small piece that controls water flow and temperature. When it wears out, you might notice leaks, a stiff handle, or water that’s too hot or too cold. I remember the first time I ignored a dripping faucet, thinking it was no big deal. My water bill told a different story! Fixing it yourself not only stops the drip but also saves water and keeps your sink area dry. Plus, it’s satisfying to know you can handle a plumbing task without shelling out for a professional.
Cartridges can wear out over time due to mineral buildup, constant use, or just age. In my experience, a leaky faucet is usually a sign the cartridge needs replacing. It’s a common issue in homes across the USA, especially in areas with hard water. By swapping out the cartridge, you’re giving your faucet a new lease on life without replacing the whole thing.
Tools and Materials You’ll Need
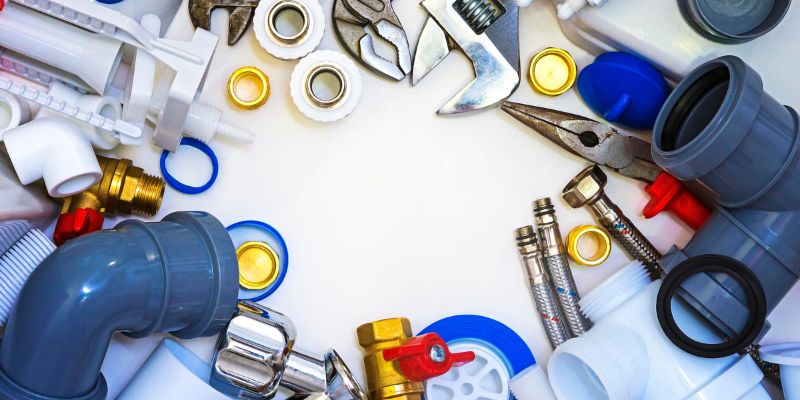
Before you start, gather your tools and materials. I learned the hard way that having everything ready saves a lot of frustration. Here’s what you’ll need:
| Item | Purpose |
|---|---|
| Replacement cartridge | Matches your faucet brand and model (check manufacturer’s details) |
| Adjustable wrench | To loosen and tighten nuts |
| Screwdriver (Phillips/flathead) | To remove screws holding the handle or cartridge |
| Allen wrench | For set screws on some faucet handles |
| Pliers | To grip and remove small parts |
| Cleaning rags | To wipe up water and keep your workspace clean |
| White vinegar | To clean mineral buildup |
| Plumber’s grease | To lubricate O-rings and cartridge for smooth operation |
| Small bowl or container | To hold screws and small parts |
| Flashlight | To see under the sink if it’s dark |
I always keep a small bowl handy to avoid losing tiny screws. Trust me, those things love to roll away! Also, make sure you have the right cartridge. Faucet brands like Moen, Delta, or Kohler have specific cartridges, so check your faucet’s manual or model number. If you’re unsure, take the old cartridge to a hardware store to match it.
Preparing Your Workspace
Let’s set you up for success. First, turn off the water supply to your faucet. Look under the sink for shut-off valves—one for hot water and one for cold. Turn them clockwise until they’re tight. If you don’t have shut-off valves, you’ll need to turn off the main water supply to your house. I had to do this once, and it felt like a big deal, but it’s just a quick twist of a valve.
Next, open the faucet to drain any remaining water. This prevents a surprise splash when you start working. Place a towel or rag under the sink to catch any drips. Clear out any cleaning supplies or clutter under the sink so you have room to move. I like to keep a flashlight nearby because it can get dark down there. Finally, plug the sink drain to avoid losing small parts down the pipe. I learned that trick after fishing a screw out of the drain with a magnet!
Removing the Faucet Handle
Now, let’s get to the fun part—taking the faucet apart. Start by removing the handle. Most single-handle faucets have a small set screw holding the handle in place. Look for it on the side or base of the handle. It might be hidden under a decorative cap. In my case, I had to pop off a little plastic cover with a flathead screwdriver to find the screw.
Use an Allen wrench or screwdriver to loosen the set screw. Be gentle so you don’t strip it. Once it’s loose, wiggle the handle off. Sometimes it’s stuck, so you might need to apply a bit of pressure. I’ve found that twisting while pulling works best. Set the handle and screw in your small bowl so they don’t get lost. With the handle off, you’ll see the cartridge or a retaining nut holding it in place.
Removing the Old Cartridge
With the handle out of the way, you’re ready to remove the old cartridge. This part can vary depending on your faucet brand. Some faucets, like Moen, have a retaining clip or pin that holds the cartridge in place. Others, like Delta, might have a retaining nut you need to unscrew.
For a retaining clip, use pliers to gently pull it out. If there’s a nut, use your adjustable wrench to loosen it counterclockwise. Go slow to avoid damaging the faucet. Once the clip or nut is removed, the cartridge should lift out. Sometimes it’s stuck due to mineral buildup. I had this issue in my kitchen faucet, and soaking the area with white vinegar for 10 minutes loosened it up. Wiggle the cartridge gently with pliers if it’s stubborn, but don’t force it.
Before you pull the cartridge out completely, take a quick photo or note its orientation. Some cartridges need to be installed in a specific way to control hot and cold water correctly. Trust me, it’s easy to forget which way it was facing!
Best Faucet Cartridge Replacement Pick
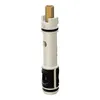
Moen 1225 Magnum Genuine Cartridge Replacement Kit
Genuine OEM brass cartridge – this guide’s own tip to match your old cartridge exactly matters most for Moen faucets.
- Best for: Moen single-handle faucets specifically
- Why we picked it: genuine Moen OEM part, brass construction
- Main drawback: only fits Moen 1225/1225B pattern faucets, check yours first
Compare more faucet repair essentials
 Option 1 Danco Silicone Faucet Grease
|
 Option 2 Cartridge Puller Removal Tool
|
 Option 3 10-Inch Adjustable Wrench
|
As an Amazon Associate we earn from qualifying purchases.
Cleaning the Faucet Assembly
While the cartridge is out, take a moment to clean the faucet assembly. Over time, mineral deposits and gunk can build up, making it harder for the new cartridge to work smoothly. I use a rag soaked in white vinegar to wipe down the inside of the faucet housing. If the buildup is stubborn, let the vinegar sit for a few minutes before scrubbing with an old toothbrush.
Check any O-rings or rubber seals in the assembly. If they look worn or cracked, replace them. Most hardware stores sell O-ring kits, and it’s worth swapping them out to prevent future leaks. I made the mistake of skipping this step once, and my “fixed” faucet started leaking again a week later. Apply a thin layer of plumber’s grease to the O-rings to keep them flexible and ensure a tight seal.
Installing the New Cartridge
Now it’s time to put in the new cartridge. Before you start, compare the new cartridge to the old one to make sure they match. Check the alignment marks or notches—some cartridges have a tab or slot that needs to line up with the faucet body. I’ve found that applying a tiny bit of plumber’s grease to the cartridge’s O-rings makes it easier to slide in.
Insert the new cartridge in the same orientation as the old one. If you took a photo earlier, this is where it comes in handy. Push it down firmly but don’t force it. If it doesn’t sit right, double-check the alignment. Once it’s in place, reattach the retaining clip or nut. For a clip, slide it back into its slot until it clicks. For a nut, tighten it with your wrench, but don’t overtighten—it can damage the cartridge or faucet.
Reassembling the Faucet
With the new cartridge in place, it’s time to put everything back together. Reattach the faucet handle by sliding it onto the cartridge stem. Tighten the set screw with your Allen wrench or screwdriver. Make sure it’s snug but not so tight that you strip the screw. Pop any decorative caps back on.
Before turning the water back on, double-check that all parts are secure. I’ve rushed this step before and ended up with a loose handle that wobbled every time I used the faucet. Take a moment to ensure everything feels solid.
Testing the Faucet
Here’s the moment of truth! Turn the water supply back on by opening the shut-off valves under the sink or the main water valve. Go slow to avoid sudden pressure surges. Open the faucet handle to check for leaks and test the water flow. Move the handle side to side to make sure the temperature adjusts smoothly.
If you notice a leak, turn the water off and check the cartridge alignment or tighten the retaining nut. In my experience, most post-repair leaks come from a loose nut or a misaligned cartridge. If the hot and cold water seem reversed, you might have installed the cartridge upside down. Remove it and rotate it 180 degrees.
Troubleshooting Common Issues
Sometimes, things don’t go perfectly, and that’s okay. Here are a few issues I’ve run into and how to fix them:
- Leak around the base: This usually means the O-rings need replacing or more plumber’s grease.
- Stiff handle: Check for debris in the faucet housing or ensure the cartridge is properly aligned.
- No water flow: Make sure the water supply is fully on and the cartridge is seated correctly.
- Hot/cold reversed: Rotate the cartridge 180 degrees to correct the orientation.
If the problem persists, double-check that you have the right cartridge for your faucet model. I once bought a generic cartridge that didn’t quite fit, and it caused all sorts of issues.
Maintaining Your Faucet for Longevity
To keep your faucet working smoothly, a little maintenance goes a long way. Clean the aerator (the little screen at the end of the faucet) every few months to remove mineral buildup. I soak mine in vinegar overnight to keep the water flow strong. If you live in an area with hard water, consider installing a water softener to reduce wear on your faucet parts.
Also, avoid forcing the handle when turning the faucet on or off. Gentle pressure is all it takes. I’ve found that teaching everyone in the house to treat the faucet kindly extends its life.
“The first time I replaced a cartridge, I rushed through and forgot to clean the faucet housing. It leaked again – taking the time to do it right makes all the difference.”
Conclusion
Shut off the water, match the replacement cartridge to your faucet brand exactly, and clean the housing before reinstalling – skipping that last step is a real reason a “fixed” faucet can leak again, as this guide’s own first attempt found out.
Frequently Asked Questions
How do I know if my faucet cartridge needs replacing?
If your faucet is leaking, the handle is hard to move, or the water temperature is inconsistent, the cartridge is likely worn out. I’ve noticed drips at the base or spout are a dead giveaway. Check for these signs, and if they’re present, it’s time to replace the cartridge.
Can I use any cartridge for my faucet?
No, you need a cartridge specific to your faucet’s brand and model. I made the mistake of buying a universal cartridge once, and it didn’t fit right. Check your faucet’s manual or take the old cartridge to the store to match it.
How long does it take to replace a faucet cartridge?
It usually takes about 30-45 minutes if you have all the tools and the right cartridge. My first time took closer to an hour because I was figuring it out, but now I can do it faster. Take your time to avoid mistakes.
Do I need to turn off the water supply?
Yes, always turn off the water before starting. I forgot this once, and let’s just say my kitchen got a surprise shower! Use the shut-off valves under the sink or the main water supply to stay safe.
What if my faucet still leaks after replacing the cartridge?
Check the cartridge alignment, tighten the retaining nut, or inspect the O-rings for wear. In my case, a loose nut was the culprit. If it still leaks, you might have the wrong cartridge or a deeper issue with the faucet body.
Sponsored / affiliate links. As an Amazon Associate I earn from qualifying purchases. I may earn additional commission from eligible campaigns.