How To Pick The Right Drill Bit For Wall Anchors
Figuring out which drill bit to use for wall anchors can be tricky, especially when you’re just starting out. It seems simple, but picking the wrong size or type can lead to wobbly shelves or holes that are too big. Don’t worry, though!
We’re going to make learning How to Choose the Right Drill Bit for Wall Anchors super easy. We’ll walk you through it step by step.
Understanding Drill Bit Types for Wall Anchors
This section explains why different anchors need different drill bits. It covers how the anchor’s size directly relates to the drill bit’s diameter and how the anchor’s design, like expansion or toggle types, affects the hole you need to make. You’ll learn to match the anchor’s specifications to the right drill bit for a secure fit.
Masonry Drill Bits
Masonry drill bits are your go-to for drilling into hard materials like concrete, brick, and stone. They have a special carbide tip that is much harder than regular steel. This tip is designed to chip away at tough surfaces instead of just grinding them down.
Without a masonry bit, you’ll likely just spin your regular drill bit and make little progress, possibly even damaging your drill. These bits are often fluted, meaning they have spiral grooves that help clear dust and debris from the hole as you drill. This is important because a clear hole allows the anchor to seat properly.
When selecting a masonry drill bit, look for one that is specifically labeled for use with hammer drills. Hammer drills provide a pounding action along with the rotation, which is very effective for breaking through dense materials. The carbide tip on these bits is usually brazed onto the steel shank, ensuring it stays attached under the stress of drilling into hard surfaces.
The diameter of the bit is critical, as it must match the size recommended for the wall anchor you are using.
Key Features of Masonry Drill Bits
- Carbide Tip: The hardened tip is designed to penetrate tough materials like concrete and brick. It’s much more durable than standard steel bits.
- Fluted Design: The spiral grooves, or flutes, help to remove dust and debris from the drilled hole. This keeps the hole clear for the anchor to be inserted.
- Hammer Drill Compatibility: Many masonry bits are designed to be used with hammer drills, which provide an extra pounding action for efficient drilling.
Wood Drill Bits
Wood drill bits are designed for making clean holes in wood. They typically have a sharp point at the tip, which helps to center the bit and prevent it from wandering. The cutting edges on the sides of the bit are also very sharp to slice through wood fibers efficiently.
For general wood drilling, standard twist bits are common. However, when you need a very clean, flat-bottomed hole, spade bits or auger bits might be better choices. For wall anchors, you’ll often be drilling into wooden studs or drywall with a wooden backing.
The size of the wood drill bit is determined by the size of the screw or bolt that will go through the anchor. You want to drill a hole that is large enough for the anchor itself to fit snugly, but not so large that the anchor becomes loose. Wood anchor screws are usually self-tapping or require a pilot hole of a specific size.
Always check the anchor’s packaging for the recommended drill bit size.
When to Use Wood Drill Bits
- Drilling into wooden studs for a secure mount.
- Creating pilot holes for screws that go through wooden elements.
- Working with anchors that rely on friction and wood expansion.
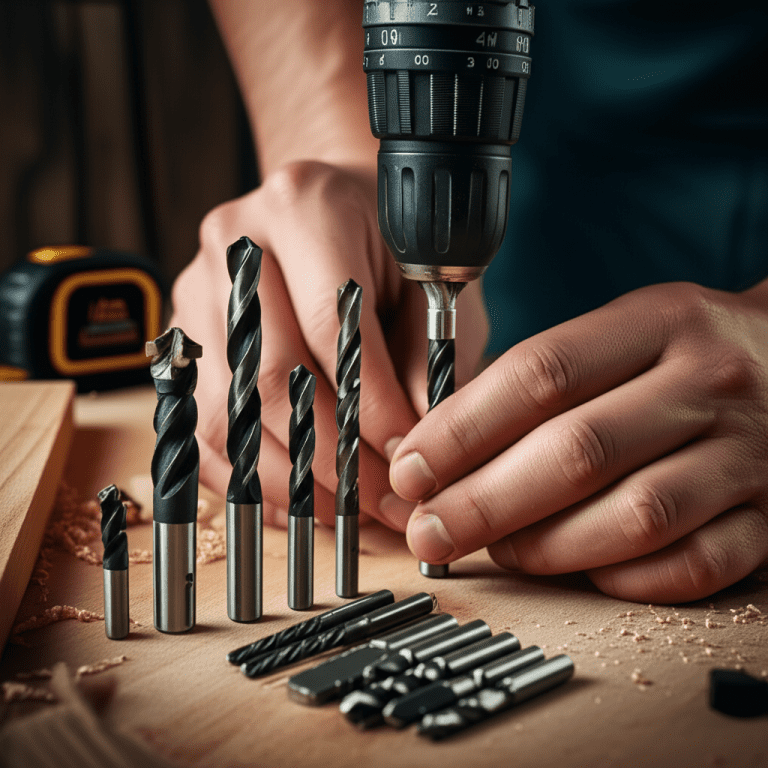
Twist Drill Bits (General Purpose)
Twist drill bits are the most common type of drill bit and are made of hardened steel. They are versatile and can be used for drilling into various materials, including wood, metal, and plastic, though they are not ideal for very hard materials like concrete. The helical grooves (twists) are designed to pull the chips out of the hole as you drill, which helps to keep the hole clean and prevents the bit from overheating.
For wall anchors, you might use a standard twist bit for drilling into drywall or softer wood materials when a masonry bit is not necessary.
The size of a twist drill bit is measured by its diameter. When choosing a twist bit for a wall anchor, it’s crucial to match the bit’s diameter to the anchor’s specifications. A bit that is too small won’t create a large enough hole for the anchor to fit.
A bit that is too large will result in a hole that is too loose, preventing the anchor from gripping the wall material effectively. Always consult the anchor’s packaging for the exact drill bit size recommendation.
Applications for Twist Drill Bits
- General drilling in softer materials like drywall and wood.
- Creating pilot holes for screws when a specialized bit isn’t required.
- Versatile use for various DIY tasks around the home.
Specialty Bits (e.g., Spade Bits, Forstner Bits)
While not as commonly used for standard wall anchors, specialty drill bits like spade bits and Forstner bits create larger, cleaner holes. Spade bits have a flat, paddle-like shape and are good for quickly drilling larger diameter holes in wood. Forstner bits create flat-bottomed holes and are often used for hinge installations.
For most wall anchor applications, these are overkill, but they are good to know about for other projects. The key takeaway for wall anchors is that the hole needs to be the correct diameter and depth for the anchor to work properly.
When you encounter a project that requires a precise hole size or a specific type of hole, like a clean, flat bottom, these bits excel. For instance, if you were installing a toggle bolt that requires a larger, clean hole to pass through, a spade bit might be used. However, for the vast majority of common wall anchors like plastic anchors, molly bolts, or drywall anchors, standard twist or masonry bits in the correct diameter are sufficient.
The main goal is always a snug fit for the anchor.
Situations for Specialty Bits
- Creating oversized holes in wood for specific hardware.
- When a clean, flat-bottomed hole is essential for the fixture.
- Projects requiring precise hole dimensions beyond standard needs.
Matching Drill Bit Size to Anchor Requirements
The size of your drill bit is the most critical factor when installing wall anchors. Using the wrong size can lead to an anchor that is too loose, pulling out easily, or too tight, making it difficult to insert and potentially damaging the wall. Fortunately, most anchor packaging clearly states the recommended drill bit size needed for installation.
This is usually given as a diameter in millimeters or inches.
When you buy a wall anchor, look for information like “Drill bit size: 6mm” or “Use with a 1/4 inch drill bit.” This is your direct instruction. If the anchor is a plastic plug, the diameter of the bit should be the same as the widest part of the plug that goes into the wall. For screw-in anchors or expansion anchors, the bit size is chosen to create a hole that allows the anchor to expand or grip effectively.
Always double-check this information before you start drilling to ensure a secure and stable mounting.
Understanding Anchor Packaging Information
Anchor packaging is your best friend when it comes to selecting the right drill bit. Manufacturers provide this information so you can achieve a successful installation. You’ll typically find the recommended drill bit diameter printed on the back or front of the package.
Sometimes it’s listed as a specific size like “1/4 inch” or “6mm.” Other times, it might be given as a range, such as “Use with a 5-6mm drill bit.” Always try to use a bit within the specified range.
This information is not just a suggestion; it’s often a requirement for the anchor to function as intended. For example, a plastic expansion anchor relies on a precise hole size to expand properly when the screw is inserted. If the hole is too big, the anchor won’t expand enough to grip the wall.
If it’s too small, you might not be able to insert the anchor or screw at all, or you could split the material. Always prioritize what the anchor manufacturer recommends.
What to Look For on Anchor Packaging
- Drill Bit Diameter: This is the most important measurement, usually in millimeters (mm) or inches (“).
- Anchor Type: Understanding if it’s an expansion anchor, toggle bolt, self-drilling anchor, etc., helps.
- Material Compatibility: Sometimes it specifies if it’s for drywall, plaster, concrete, or wood.
Drill Bit Diameter vs. Anchor Diameter
The diameter of the drill bit you use must closely match the diameter of the wall anchor that will be inserted into the wall. For plastic expansion anchors, the recommended drill bit size is usually the same as the diameter of the anchor’s body, the part that goes into the wall. This creates a snug fit.
When the screw is driven in, the anchor expands outwards, pressing against the wall material for support.
For other types of anchors, like screw-in anchors, the drill bit size might be slightly smaller than the threads of the anchor. This allows the threads to bite into the wall material. Toggle bolts often require a larger, clean hole so the toggle mechanism can pass through.
Always refer to the anchor’s instructions. A common mistake is using a drill bit that is too large, which leads to a loose anchor that cannot bear weight. Conversely, a bit that is too small can make insertion difficult and may damage the anchor or wall.
Matching Drill Bits and Anchors
- Plastic Anchors: Bit diameter typically matches anchor body diameter.
- Screw-in Anchors: Bit diameter might be slightly smaller than the anchor’s widest threads.
- Toggle Bolts: Require a larger hole to allow the toggle to pass through.
Drill Bit Length Considerations
While diameter is usually the primary concern, drill bit length can also be important, especially when drilling into thicker materials like concrete or when using longer anchors. You need a drill bit that is long enough to drill a hole that is at least as deep as the anchor you are installing. If the hole is too shallow, the anchor won’t be fully seated, and the item you’re hanging could fall.
For most common wall anchors used in drywall or plaster, standard drill bit lengths are usually sufficient. However, if you’re using a long toggle bolt that needs to reach behind the wall surface, ensure your drill bit can create a hole of adequate depth. It’s a good practice to mark the required depth on your drill bit using a piece of tape.
This helps you avoid drilling too deep or not deep enough. A hole that is slightly deeper than the anchor is usually acceptable and can sometimes help with debris clearance.
When Drill Bit Length Matters
- Installing long anchors or bolts that extend behind the wall.
- Drilling into thick materials where depth is crucial for support.
- Ensuring the anchor is fully seated for maximum holding power.
Drilling Techniques for Anchor Installation
Proper drilling technique is as important as choosing the right bit. Even with the correct bit, poor drilling can compromise the anchor’s effectiveness. This includes how you hold the drill, how much pressure you apply, and how you manage dust.
Learning these techniques will ensure your anchors are installed securely and safely, so whatever you hang stays put.
Using a Hammer Drill vs. A Standard Drill
A standard drill provides rotational force to turn the drill bit. This is suitable for softer materials like drywall, plaster, and wood. However, when you encounter harder materials such as concrete, brick, or stone, a standard drill will struggle.
This is where a hammer drill becomes essential. A hammer drill adds a percussive, hammering action to the rotation, effectively chipping away at hard surfaces.
If you’re installing anchors in a concrete wall, using a standard drill with a masonry bit might not even make a dent. The hammering action of a hammer drill, combined with the carbide tip of a masonry bit, is what allows you to penetrate these tough materials efficiently. Always ensure you are using the correct bit for the material and the appropriate drill mode (drill-only or hammer-drill mode).
Using the wrong drill for the job can damage your drill, the bit, and the wall.
Drill Types and Their Uses
- Standard Drill: Best for wood, drywall, and light tasks. Provides rotational power.
- Hammer Drill: Essential for concrete, brick, and stone. Adds percussive force.
Applying the Right Pressure
Applying the correct amount of pressure when drilling is key to a clean hole and effective anchor installation. With a standard drill in wood or drywall, you generally need moderate, steady pressure. Let the drill bit do the work.
Pushing too hard can cause the bit to bind, overheat, or break. It can also enlarge the hole more than intended, leading to a loose anchor.
When using a hammer drill on concrete or brick, you can often apply more consistent, firm pressure. The hammer action helps break through the material. However, avoid excessive force, which can lead to uneven holes or damage to the drill.
For all materials, it’s important to maintain a straight line. Drilling at an angle will create an off-center hole, making it harder to insert the anchor and potentially weakening the mount. A good rule of thumb is to let the tool and the bit do most of the work.
Pressure Tips for Drilling
- Moderate, steady pressure for wood and drywall.
- Firm, consistent pressure for masonry with a hammer drill.
- Avoid excessive force; let the bit and tool work.
- Maintain a straight drilling angle for a clean hole.
Clearing Dust and Debris
Drilling creates dust and debris. For materials like wood and drywall, the flutes of the drill bit are designed to carry this material out. However, in denser materials like concrete or brick, dust can accumulate quickly and impede drilling.
This accumulation can cause the drill bit to overheat and wear out faster, and it can lead to a hole that isn’t fully formed, making anchor insertion difficult.
Periodically withdrawing the drill bit from the hole while drilling can help clear out accumulated dust. For very dusty jobs, especially with masonry, a shop vacuum can be used to suck up dust as you drill. Some drill bits and drills have dust collection features.
A clean hole ensures that the anchor can be fully inserted and that it will have maximum contact with the surrounding material for a strong hold. This is crucial for the long-term stability of whatever you are hanging.
Managing Drilling Dust
- Periodically withdraw the bit to clear dust from the hole.
- Use a vacuum cleaner to remove dust during drilling.
- Ensure the hole is clean for proper anchor seating.
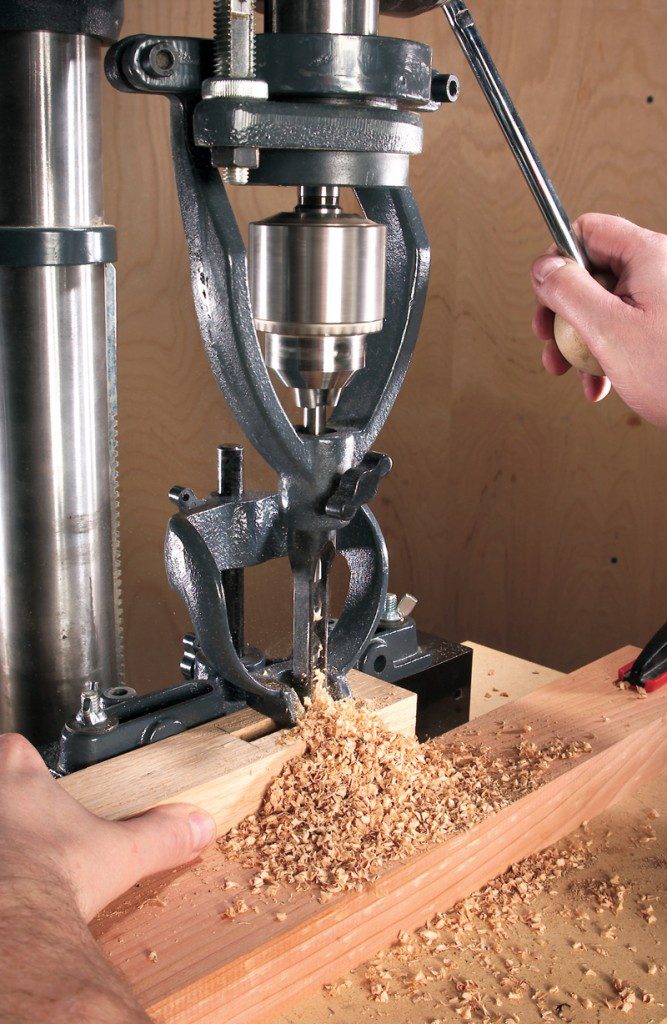
Creating the Correct Hole Depth
The depth of the hole you drill is just as important as its diameter. The hole needs to be deep enough to accommodate the entire length of the wall anchor that will be inserted into the wall. If the anchor is not fully seated, it cannot provide its full holding power, and whatever you hang on it is at risk of falling.
For longer anchors, like toggle bolts, the hole needs to be deep enough for the mechanism to deploy behind the wall.
A simple way to ensure you drill to the correct depth is to measure the anchor and mark the required depth on your drill bit with a piece of masking tape. Once the tape reaches the surface of the wall, you know you have drilled to the correct depth. For anchors that require a specific depth for optimal expansion or grip, always follow the manufacturer’s instructions.
A hole that is slightly deeper than required is usually fine, but a hole that is too shallow is a common cause of anchor failure.
Ensuring Proper Hole Depth
- Measure the anchor and mark the drill bit with tape.
- Drill until the tape reaches the wall surface.
- Consult anchor instructions for specific depth requirements.
Common Mistakes to Avoid
Even with the right tools, beginner DIYers often make common mistakes that can lead to frustration and weak mountings. Understanding these pitfalls beforehand can save you a lot of trouble and ensure your projects are secure.
Using the Wrong Drill Bit Material
One of the most frequent errors is using a standard steel twist bit on hard materials like concrete or brick. These bits are simply not hard enough. They will dull very quickly, overheat, and you’ll spend a lot of time struggling without making much progress.
Always use a masonry bit with a carbide tip for concrete, brick, and stone. For wood and drywall, a standard twist bit is usually fine.
Ignoring Anchor Packaging Instructions
Manufacturers spend time and resources testing their anchors to determine the best installation method. Their packaging includes vital information about the recommended drill bit size and depth. Ignoring this advice is a recipe for disaster.
A recommendation for a 6mm bit means you should use a 6mm bit, not guess or use a bit that looks about right. This instruction is key to the anchor performing as designed.
Consequences of Ignoring Instructions
- Anchor will not hold weight effectively.
- Anchor may pull out or spin freely.
- Damage to the wall or the anchor itself.
Drilling Too Large or Too Small Holes
This is a direct result of not using the correct drill bit size or not measuring carefully. If the hole is too large, the anchor won’t have enough material to grip onto. Plastic anchors will simply spin, and even expansion anchors won’t expand sufficiently.
If the hole is too small, you might not be able to get the anchor into the wall at all, or you could split wood or damage drywall trying to force it.
Always measure your drill bit’s diameter and compare it to the anchor’s recommended size. If you’re unsure, it’s often better to err on the side of slightly too small and carefully try to insert the anchor. If it’s too tight, you can always widen the hole slightly.
If the hole is too big from the start, you’ll likely need to patch the wall and start over.
Hole Size Issues
- Too Large: Anchor loses grip, spins freely, or pulls out.
- Too Small: Difficulty inserting anchor, potential for damage to wall or anchor.
Not Drilling Deep Enough
As mentioned before, a shallow hole means a poorly seated anchor. For standard plastic anchors, the entire body should be flush with the wall. For toggle bolts or other anchors that deploy behind the wall, the hole needs to be deep enough for the mechanism to function.
If you are hanging something heavy, an incompletely seated anchor is a major safety hazard.
Always use your tape-marking trick or a depth stop on your drill to ensure you reach the required depth. It’s better to drill a hole that is slightly deeper than necessary rather than one that is too shallow. A slightly deeper hole usually won’t compromise the anchor’s strength, especially if it’s a standard drywall or masonry anchor.
Why Depth Matters
- Ensures full anchor expansion or deployment.
- Maximizes the anchor’s holding capacity.
- Prevents items from falling due to insufficient anchor seating.
Choosing Drill Bits for Specific Wall Types
Different wall materials require different approaches and specific drill bits to ensure a secure mounting. Understanding your wall type is the first step in choosing the right drill bit and anchor combination.
Drywall
Drywall itself is not a load-bearing material. When you drill into drywall, you are drilling into a thin layer of gypsum board and paper. The real strength comes from attaching to something behind it, like a wooden stud, or by using specialized drywall anchors that spread the load over a larger area of the drywall.
For attaching to studs, you’ll use a wood drill bit sized for the screw.
If you’re not hitting a stud, you’ll need a drywall anchor. Many drywall anchors, especially plastic ones, require a specific drill bit size to create a hole that’s just right for them to expand into. Screw-in drywall anchors often have a self-drilling tip and may not even require a pilot hole, but if one is recommended, use the specified size.
The key is to create a hole that allows the anchor to grip the back of the drywall or expand properly.
Drilling in Drywall
- Use wood bits for studs.
- Use specified bit sizes for drywall anchors.
- Screw-in anchors may not need pilot holes.
Plaster and Lath
Plaster walls are often older and can be trickier to work with than drywall. They consist of a layer of plaster applied over a base of wooden lath (thin strips of wood) or sometimes metal lath. Drilling into plaster can cause it to crumble if you’re not careful.
If you hit the lath, you’ll need a bit suitable for wood.
When drilling into plaster, it’s often recommended to use a sharp bit and apply steady, firm pressure. Some people pre-drill a small pilot hole in the plaster to prevent cracking. For plaster and lath walls, using a masonry bit can be effective for the plaster layer, but you must be prepared to switch to a wood bit if you plan to anchor into the lath.
For anchors designed for plaster, follow the manufacturer’s drill bit recommendations precisely, as they are formulated for this specific material.
Working with Plaster
- Use sharp bits with steady pressure.
- Masonry bits can work for plaster; wood bits for lath.
- Follow anchor-specific instructions carefully.
Concrete and Brick
Concrete and brick are considered masonry and require specialized tools and techniques. You will absolutely need a hammer drill and masonry drill bits for these materials. Standard drills and bits will not penetrate effectively and can be damaged.
The drill bit must be made of hardened steel with a carbide tip, designed to grind away at the hard surface.
When drilling into concrete or brick, it’s crucial to use the exact drill bit diameter recommended for the anchor. For example, concrete anchors often require a precise hole size for the anchor to expand correctly and create a solid grip. Dust management is also very important here; periodically withdrawing the bit to clear dust will make drilling easier and prevent overheating.
Make sure your drill bit is long enough to create the required depth for the anchor.
Masonry Drilling Essentials
- Hammer drill is mandatory.
- Use carbide-tipped masonry drill bits.
- Exact bit diameter is critical for anchor performance.
- Manage dust by clearing the hole periodically.
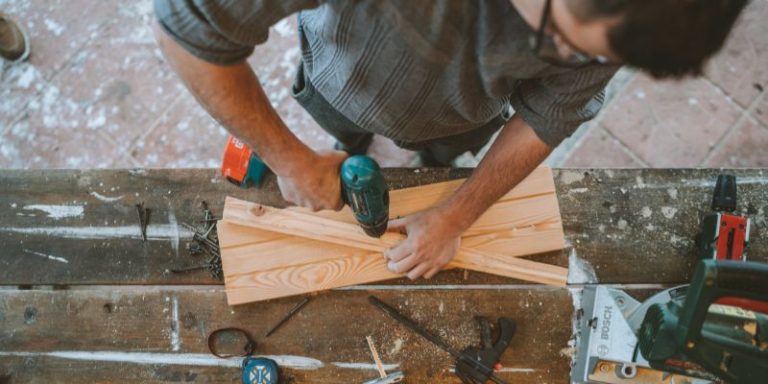
Wood Studs
Attaching items directly to wood studs is the most secure way to hang things on a wall. When you locate a stud, you’ll be drilling into solid wood. For this, a standard wood drill bit or a general-purpose twist drill bit is usually appropriate.
The key is to select a bit that matches the size recommended for the screw you are using.
Often, you’ll drill a pilot hole slightly smaller than the screw’s diameter. This prevents the wood from splitting, especially near edges, and makes it easier to drive the screw in straight. The size of the pilot hole depends on the type of wood and the screw size.
Always check the anchor or screw manufacturer’s recommendations. If you are using a screw-in anchor specifically designed for wood, it may have a self-drilling tip.
Mounting to Wood Studs
- Use wood drill bits or general twist bits.
- Drill a pilot hole sized for the screw.
- Prevents wood splitting and eases screw insertion.
Advanced Tips for Secure Mounting
Going the extra mile can ensure your mounted items are truly secure and long-lasting. These tips focus on maximizing the effectiveness of your chosen drill bit and anchor.
Using a Drill Depth Stop
A drill depth stop is a small collar that attaches to the drill bit. It prevents the bit from going deeper than a pre-set limit. This accessory is invaluable for ensuring consistent hole depth, especially when drilling multiple holes or when precise depth is critical for anchor performance.
Most hammer drills and standard drills come with one, or they can be purchased separately.
By setting the depth stop according to the anchor manufacturer’s recommendations, you eliminate guesswork. You can drill with confidence, knowing that each hole will be the correct depth, which is essential for anchors that rely on expansion or require specific seating. This simple tool significantly improves the accuracy and reliability of your drilling, leading to more secure mountings.
Benefits of Depth Stops
- Ensures consistent hole depth.
- Prevents over-drilling or under-drilling.
- Crucial for anchors requiring precise depth.
Testing Anchor Holding Power
Before hanging your final item, it’s a good practice to test the anchor’s holding power. Once the anchor is installed and the screw or bolt is tightened, give it a firm tug. If it feels loose or wobbly, it’s better to find out now than later.
This might mean removing the anchor, patching the hole, and trying again with a different anchor or a properly sized drill bit.
For heavier items, you might even consider using a simple weight test. Hang a temporary weight slightly heavier than what you intend to support and leave it for a while to see if there’s any movement or loosening. This extra step provides peace of mind and can prevent accidents caused by a failing mount.
Testing Your Mounts
- Give the installed anchor a firm tug.
- For heavy items, perform a temporary weight test.
- Identify and fix issues before final installation.
Using Multiple Anchors for Heavy Items
When hanging heavy or large items, relying on a single anchor is often insufficient and unsafe. Distributing the weight across multiple anchors is a far more effective and secure strategy. This not only increases the total weight capacity but also provides redundancy; if one anchor were to fail, the others would still support the item.
When planning to use multiple anchors, ensure they are spaced appropriately. For shelves, placing anchors near the ends and in the middle is a good approach. Always calculate the total weight of the item plus anything that will be placed on it.
Ensure the combined weight capacity of your chosen anchors and drill bit selection can safely support this total load. Consult anchor specifications for their individual weight ratings in various wall materials.
Distributing Weight Safely
- Use multiple anchors for heavy or large items.
- Space anchors appropriately for even weight distribution.
- Calculate total load and ensure combined anchor capacity is sufficient.
Frequently Asked Questions
Question: What is the most common mistake people make when choosing drill bits for wall anchors?
Answer: The most common mistake is not checking the anchor’s packaging for the recommended drill bit size. People often guess or use a bit that looks about right, leading to holes that are too big or too small for the anchor to grip properly.
Question: Can I use a regular drill bit for concrete?
Answer: No, you should not use a regular drill bit for concrete. You need a masonry drill bit with a carbide tip, and ideally, you should use a hammer drill for effective drilling into concrete or brick.
Question: How do I know if my anchor is installed securely?
Answer: After installation, give the anchor a firm tug. It should feel solid and not move at all. If it feels loose or wobbly, it’s not secure, and you should reconsider the installation.
Question: What happens if I drill a hole that is too large for the anchor?
Answer: If the hole is too large, the anchor will not be able to grip the wall material effectively. Plastic anchors will likely spin freely, and expansion anchors won’t expand enough to hold securely. The item you are hanging could fall.
Question: Should I always use a pilot hole?
Answer: For wood studs, a pilot hole is highly recommended to prevent splitting and make screw insertion easier. For drywall anchors, the anchor’s packaging will specify if a pilot hole is needed and what size drill bit to use. For concrete, a pilot hole is the start of the actual hole.
Summary
Learning how to choose the right drill bit for wall anchors is simple when you follow a few key steps. Always check your anchor’s packaging for the correct drill bit size and type. Match the bit diameter to the anchor’s needs, use the right bit material for your wall type (masonry for concrete, wood for studs), and ensure the hole depth is sufficient.
With the right bit and a little care in drilling, your wall anchors will hold strong.