How To Plug In Christmas Lights: Essential Guide
Quick Summary:
Plugging in Christmas lights is simple and safe when you follow basic steps. Ensure your lights are suitable for indoor or outdoor use, check for damage, use GFCI outlets for outdoor connections, and avoid overloading circuits. This guide provides easy instructions for a dazzling, worry-free display.
Hello there! Md Meraj here, ready to help you tackle another home project with confidence. When those festive holidays roll around, one of the most exciting parts is decorating with lights. But sometimes, figuring out exactly how to plug them in, especially if you’re not sure about outdoor outlets or dealing with different types of lights, can feel a bit puzzling. Don’t worry! It’s easier than you think, and I’m going to walk you through every step, making sure your home sparkles safely and beautifully this season. We’ll cover everything from checking your lights to making those crucial connections, ensuring you can create a magical display without any headaches.
Getting Started: What You Need to Know Before You Plug In
Before we even think about plugging anything in, let’s make sure we’re starting on the right foot. Safety and preparedness are key to a beautiful and stress-free holiday light display. Think of this as gathering your tools and doing a quick check of your materials before starting any good woodworking project – it saves time and prevents problems down the road!
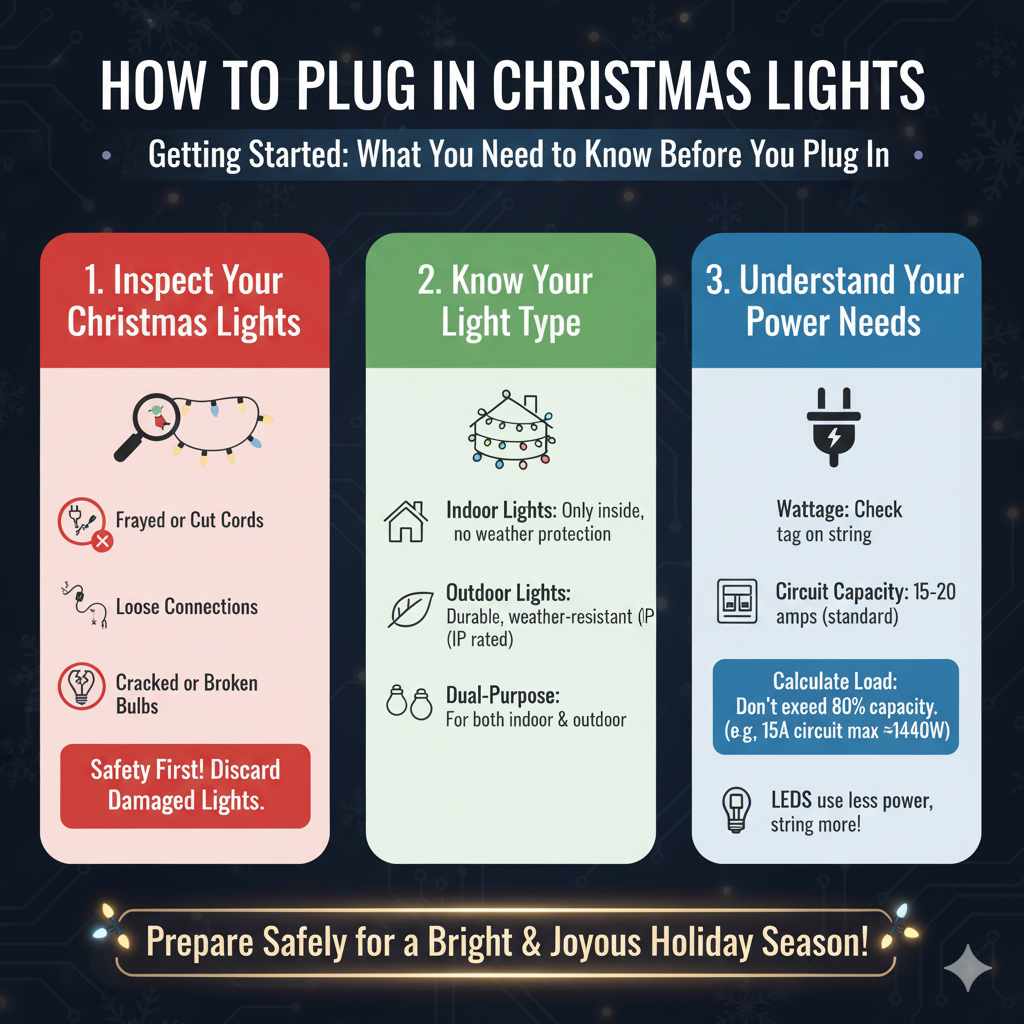
1. Inspect Your Christmas Lights
This is probably the most important step. Just like you wouldn’t use a cracked piece of wood for a project, you shouldn’t use damaged lights. Take a few minutes to carefully look at your light strands. Here’s what to check for:
- Frayed or Cut Cords: If you see any exposed wires, those lights are a no-go. This is a serious safety hazard.
- Loose Connections: Make sure the bulbs are securely in their sockets. Loose bulbs can cause the whole string to flicker or not work at all.
- Cracked or Broken Bulbs: While a few cracked bulbs might still work, it’s best to replace them to avoid potential issues and ensure a uniform glow.
- Damaged Plugs: Check the plug itself for any cracks or bent prongs.
If you find any damage, it’s best to discard the damaged section or the entire string. Your safety is always the top priority!
2. Know Your Light Type: Indoor vs. Outdoor
This is crucial, especially when you’re thinking about how to plug in Christmas lights without an outdoor outlet or using them in different locations. Lights are specifically designed for either indoor or outdoor use. Using indoor lights outside can be dangerous because they aren’t built to withstand moisture, temperature changes, or rougher handling.
- Indoor Lights: These are for use only inside your home. They are not protected against weather elements.
- Outdoor Lights: These are designed to be more durable and are often labeled with an IP (Ingress Protection) rating, indicating their resistance to dust and water. Look for labels that specifically state “for outdoor use.”
- Dual-Purpose Lights: Some lights are marked “for indoor and outdoor use.” These are the most versatile and can be used in either setting.
Always check the packaging or the tag on the light string itself to confirm its intended use.
3. Understand Your Power Needs
Christmas lights, especially older incandescent types, can draw a surprising amount of power. Overloading an electrical circuit is a common cause of tripped breakers or, in worst-case scenarios, electrical fires. Here’s a simple breakdown:
- Wattage: Each light string will have a wattage rating, usually found on the plug or a tag.
- Circuit Capacity: A standard household circuit is typically rated for 15 or 20 amps. You can find out more about electrical circuit basics from resources like Energy.gov’s lighting section.
- Calculating Load: To avoid overloading, don’t connect too many light strings to a single outlet or circuit. A good rule of thumb is to stay below 80% of the circuit’s capacity. For a 15-amp circuit, this means not exceeding 1,440 watts (15 amps x 120 volts x 0.80). For a 20-amp circuit, it’s 1,920 watts.
LED lights use significantly less energy than incandescent bulbs, allowing you to string many more together before reaching capacity. This is a great way to save energy and reduce the risk of overloading.
Step-by-Step: How to Plug In Your Christmas Lights Safely
Now that we’ve covered the essential checks, let’s get to the actual plugging in. I’ll break this down into easy steps so you can follow along with confidence.
Step 1: Plan Your Layout
Before you start uncoiling lights, decide where you want them to go. Measure the areas you want to decorate and how many feet of lights you’ll need. This helps you figure out how many strands you can connect end-to-end (if they are designed for it) and where your power source will be.
Step 2: Uncoil and Test Lights (Optional but Recommended)
Gently uncoil your light strands. For indoor lights, you can plug them into an indoor outlet briefly to ensure they all light up. For outdoor lights, it’s a good idea to test them before you climb a ladder or place them in hard-to-reach spots. If a section doesn’t light up, you can troubleshoot it now rather than later.
Step 3: Connecting Light Strands (If Applicable)
Many modern Christmas light sets are designed to be connected end-to-end. Look for male and female plugs on the ends of the strands.
- Ensure Compatibility: Make sure the strands you are connecting are from the same set or are explicitly stated as compatible. Connecting incompatible strands can damage them or cause electrical issues.
- Secure Connection: Push the male plug firmly into the female socket. Ensure there are no gaps. Some sets come with a small screw-on cover for the connection point to provide extra security and weather resistance for outdoor lights.
- Don’t Exceed the Limit: Always check the packaging for the maximum number of strands you can safely connect end-to-end. This is usually printed on the box or the light string’s tag. Overconnecting is a major fire hazard.
Step 4: Plugging into the Power Source
This is where we need to be extra careful, especially with outdoor connections.
Indoor Plug-Ins:
For lights used entirely indoors, you can plug them into standard wall outlets.
- Avoid Overloaded Outlets: Don’t plug too many high-wattage devices into the same outlet or power strip.
- Use Power Strips Wisely: If using a power strip, ensure it’s rated for the total wattage you’re connecting and that it’s not overloaded itself.
- Keep Away from Flammables: Ensure lights and cords are not near curtains, decorations, or other materials that could easily catch fire.
Outdoor Plug-Ins (Including: How to Plug In Christmas Lights Without Outdoor Outlet):
This is where many homeowners run into questions. If you don’t have an outdoor outlet readily available, you have a few safe options:
Option 1: Using an Indoor Outlet with a Window/Door Protector
This is a common solution for how to plug in Christmas lights without an outdoor outlet. You can run the cord from an indoor outlet through a slightly open window or door. However, to do this safely and effectively, you’ll need a special cord protector or a flat-profile extension cord designed to be run through gaps without damaging the cord or creating a tripping hazard.
- Get a Window/Door Cord Protector: These are typically flat, durable strips that seal the gap around the cord, preventing drafts and protecting the cord from being pinched or damaged by the window/door frame. You can find these at most hardware or home improvement stores.
- Ensure the Window/Door is Only Slightly Ajar: Don’t leave it wide open. Just enough to let the cord pass through.
- Secure the Cord: Make sure the cord isn’t dangling where it could be a tripping hazard inside your home.
Option 2: Using a Heavy-Duty Outdoor Extension Cord
If you need to reach an outdoor outlet that’s a distance away, or if you’re using an indoor outlet and need to run a cord outside, a proper outdoor extension cord is essential.
- Choose the Right Gauge: For Christmas lights, a 14-gauge or 12-gauge extension cord is recommended, especially for longer runs, as it can handle more power with less voltage drop.
- Look for “Outdoor Rated”: Ensure the cord is specifically rated for outdoor use. These are built to withstand moisture, UV rays, and temperature fluctuations.
- Keep it Elevated or Secured: Whenever possible, avoid running extension cords across walkways where people might trip. If you must, use cord covers or tape them down securely. For more permanent installations, consider running them through conduit.
- Plug into a GFCI Outlet: This is NON-NEGOTIABLE for any outdoor electrical connection.
Option 3: Installing an Outdoor Outlet (For the Ambitious DIYer or Professional Help)
If you find yourself frequently needing outdoor power for lights, decorations, or tools, consider having a dedicated outdoor outlet installed. This is a more involved project and may require an electrician, especially if you’re not comfortable with electrical wiring. However, it’s the safest and most convenient long-term solution. Resources like This Old House offer guides, but always prioritize safety and consider professional help.
Step 5: The GFCI Outlet – Your Best Friend for Outdoor Safety
This is perhaps the most critical safety feature for any outdoor electrical setup. GFCI stands for Ground Fault Circuit Interrupter. These outlets are designed to quickly shut off electricity if they detect an imbalance in the current, which can happen if electricity is flowing through water or a person. It’s a vital safety device that can prevent electrocution.
- How to Identify a GFCI Outlet: They typically have “Test” and “Reset” buttons on them. Standard outdoor outlets should be GFCI protected, either as a built-in GFCI outlet or protected by a GFCI breaker in your electrical panel.
- How to Use: Plug your outdoor extension cord or lights directly into the GFCI outlet. If the power doesn’t come on, press the “Reset” button. If it trips again, there might be an issue with the lights or the cord, or the GFCI itself may need to be replaced.
- Testing Your GFCI: It’s a good practice to test your GFCI outlets regularly (at least once a month) by pressing the “Test” button. The power should cut off. Then, press “Reset” to restore power.
If your outdoor outlets are not GFCI protected, it’s highly recommended to have them upgraded by an electrician.
Step 6: Secure Cords and Lights
Once everything is plugged in and working, take a moment to secure the cords. For outdoor lights, use plastic clips or staples designed for Christmas lights to attach them to your house or trees. This prevents them from sagging, getting tangled in wind, or becoming a tripping hazard. Ensure cords aren’t running across high-traffic areas where they could be stepped on or pulled.
Troubleshooting Common Issues
Even with the best preparation, sometimes lights don’t behave as expected. Here are a few common issues and how to fix them:
-
Lights Won’t Turn On:
- Check that the plug is securely in the outlet.
- Ensure the breaker for that circuit hasn’t tripped.
- If using multiple strands, check that they are all securely connected to each other.
- Test the outlet itself with another device to see if it’s working.
- If outdoors, ensure the GFCI outlet hasn’t tripped and is reset.
-
A Section of Lights is Out:
- This often means a single bulb in that section has burned out or come loose. For older incandescent lights, find the burnt-out bulb (it might look darker or have a broken filament) and replace it with a new one of the correct wattage.
- Ensure the replacement bulb is firmly seated.
- For LED lights, a single bulb failure usually doesn’t cause a whole section to go out, but check for loose connections between bulbs or a damaged section.
-
Lights Flicker:
- This can be due to a loose bulb, a damaged wire, or an overloaded circuit. Check all bulb connections and inspect cords for damage.
- If the flickering persists, try plugging the lights into a different outlet or circuit to rule out a power supply issue.
-
Breaker Keeps Tripping:
- You are likely overloading the circuit. Unplug some of the lights or move them to a different circuit.
- There might be a short circuit in one of your light strands or the extension cord. Unplug strands one by one to identify the faulty one.
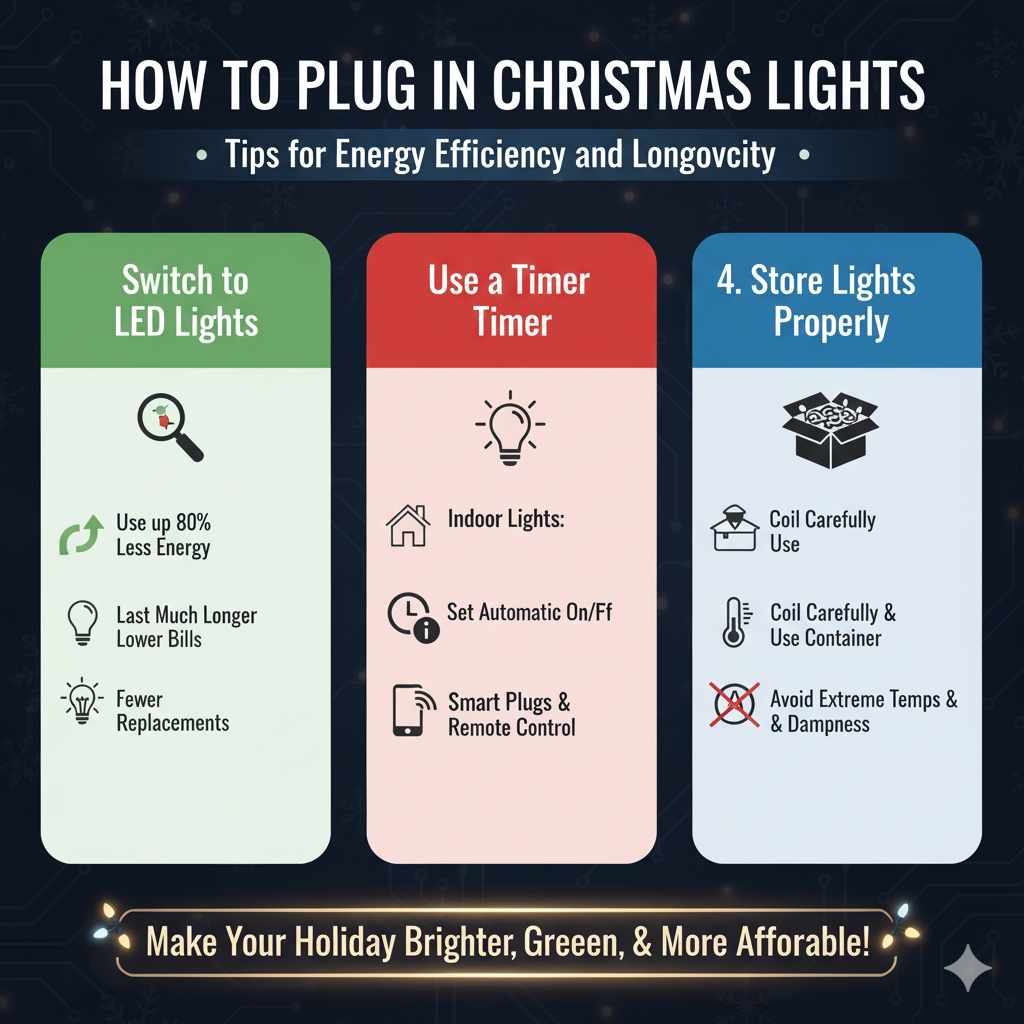
Tips for Energy Efficiency and Longevity
Want your lights to look great and save you money? Here are a few tips:
- Switch to LED Lights: LED lights use up to 80% less energy than traditional incandescent bulbs and last much longer. This means lower electricity bills and less frequent replacement.
- Use a Timer: Set your lights to turn on and off automatically. This saves energy and ensures you don’t accidentally leave them on all night. Smart plugs can also be controlled remotely via your smartphone.
- Store Lights Properly: After the holidays, carefully coil your lights and store them in a box or container to prevent tangles and damage. Avoid storing them in extreme temperatures or damp conditions.
Understanding Different Types of Outlets and Connections
Let’s quickly look at the types of connections you might encounter:
| Outlet/Connection Type | Description | Best Use Case | Safety Considerations |
|---|---|---|---|
| Standard Indoor Outlet | The typical two- or three-prong outlet found inside your home. | Indoor lights, powering indoor extension cords. | Do not overload. Keep away from water. |
| GFCI Outlet | Outlet with “Test” and “Reset” buttons. Detects ground faults and shuts off power. | Outdoor lights, lights used near water (kitchens, bathrooms), garages. Essential for any outdoor plug-in. | Test monthly. Ensure it’s functioning. |
| Outdoor Rated Extension Cord | Heavy-duty cord designed to withstand weather conditions (moisture, UV, temperature). | Connecting outdoor lights to an outlet, extending reach for outdoor decorations. | Must be in good condition, no cuts or fraying. Use appropriate gauge for load. |
| End-to-End Connectors | Plugs on light strands that allow multiple sets to be connected together. | Extending a single run of lights across a large area (e.g., roofline, fence). | Never exceed the manufacturer’s maximum connectable limit. Ensure connections are secure. |
| Window/Door Cord Protector | Flat, durable strip to safely pass cords through closed windows/doors. | Running indoor power to outdoor decorations without leaving windows/doors wide open. | Prevents cord damage and drafts. |
Frequently Asked Questions (FAQ)
Q1: Can I plug my Christmas lights into a regular extension cord outdoors?
A1: No, you should only use extension cords that are specifically rated for outdoor use. Indoor extension cords are not designed to handle moisture and temperature changes, which can be dangerous.
Q2: What happens if I plug indoor lights into an outdoor outlet?
A2: While they might work temporarily, it’s unsafe. Indoor lights lack the protective insulation and weatherproofing needed for outdoor conditions, increasing the risk of damage, electrical shorts, and fire hazards.
Q3: My lights won’t turn on. What should I check first?
A3: First, ensure the plug is fully inserted into the outlet. Then, check if the circuit breaker has tripped. If it’s an outdoor setup, verify that the GFCI outlet hasn’t tripped and try resetting it. Finally, check the light string itself for any visible damage.
Q4: How many sets of lights can I connect together?
A4: Always check the manufacturer’s instructions on the light string’s packaging or tag. Connecting too many sets end-to-end can overload the circuit and create a fire hazard. LED lights generally allow for more connections than incandescent ones.
Q5: Is it safe to run Christmas light cords under a rug indoors?
A5: It’s generally not recommended to run electrical cords under rugs. They can be damaged by foot traffic, leading to fraying or shorts, and rugs can act as an insulator, causing the cord to overheat. It also creates a tripping hazard.
Q6: What is a GFCI outlet and why is it important for Christmas lights?
A6: A GFCI (Ground Fault Circuit Interrupter) outlet is a safety device that quickly cuts off electricity if it detects a problem, like current flowing through water or a person. It’s crucial for outdoor electrical use because it significantly reduces the risk of electrocution.
Q7: Can I use a power strip outdoors?
A7: Only use power strips that are specifically designed and rated for outdoor use. Indoor power strips are not weatherproof and can be a serious safety hazard if exposed to moisture or the elements.
Conclusion
There you have it! Plugging in your Christmas lights doesn’t have to be a daunting task. By taking a few simple precautions – inspecting your lights, understanding their type, ensuring safe connections, and always using GFCI protection for outdoor setups – you can create a beautiful, festive display that’s both safe and enjoyable. Remember, a little preparation goes a long way in making your holidays bright and worry-free. So go ahead, get those lights up, and let your home shine!