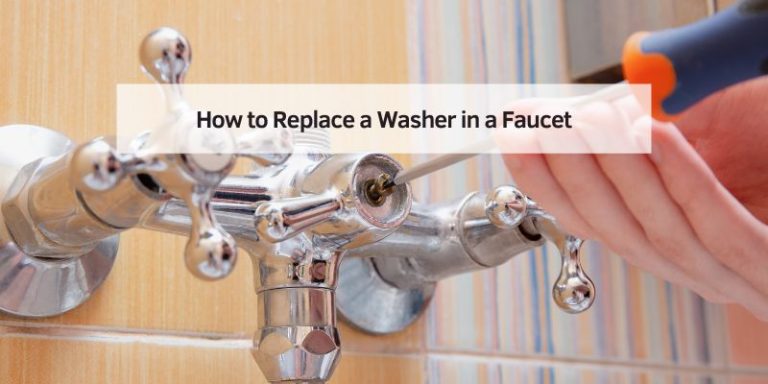
How to Remove a Drain Stopper from Sink: Easy Steps
Have you ever found yourself staring at your sink, wondering how on earth you’re going to remove that stubborn drain stopper? You’re not alone.
Many people face this challenge, and it can be frustrating when water refuses to drain properly. Maybe it’s clogged with hair or debris, or perhaps you just want to give it a good clean. Whatever the reason, removing a drain stopper might seem like a daunting task.
But here’s the good news: it’s easier than you think, and you don’t need to call a plumber to get the job done. Imagine the satisfaction of knowing you can solve this pesky problem on your own, without spending extra money or waiting for someone else to do it. By the end of this article, you’ll be equipped with simple, step-by-step instructions that empower you to tackle the issue head-on. You’ll not only save time and money but also gain the confidence to handle similar tasks in the future. So, are you ready to master the art of drain stopper removal and restore your sink to its optimal flow? Let’s dive in and discover how you can achieve this with ease.

Credit: diy.stackexchange.com
Tools Needed
To remove a drain stopper, gather some basic tools. A screwdriver is essential. You may need a pair of pliers too. A flashlight helps you see better. Keep a small bucket nearby to catch water. A towel is useful for drying your hands. Be ready with these tools before starting.
Identify Drain Stopper Type
Sink stoppers come in different types. Some common ones are pop-up and lift-and-turn. You might also find push-and-pull types. Pop-up stoppers have a lever. This lever lifts the stopper. Lift-and-turn stoppers twist open. Push-and-pull stoppers move up and down. Identifying the type is important. It helps you remove it easily. Look for a lever or knob. This tells you the type.
Use your hands to check the stopper. Try to lift, turn, or push it. These actions help you know the type. Each type has its own removal method. Using the wrong method can damage the sink. So, knowing the type is key. Look carefully and test gently. This saves time and avoids problems.
Lift-and-turn Stopper Removal
Find the set screw under the stopper cap. Use a flashlight if needed. This screw holds the stopper in place. Check for dirt and clean it. Make sure you can see it clearly.
Use a screwdriver to loosen the set screw. Turn it counter-clockwise. Be gentle to avoid damage. Sometimes, it might be tight. If stuck, wiggle a bit. Ensure the screw is fully loose.
Hold the stopper firmly. Pull it straight up. It should come out easily. If not, try wiggling. Check for any debris. Clean the area if needed. Now, the stopper is removed.

Credit: www.motherdaughterprojects.com
Push-pull Stopper Removal
First, gently pull up the stopper. It should rise easily. If it feels stuck, try again. Next, you need to twist to release. Hold the base and turn it. A small twist usually does the trick. Now, you can remove the stopper. Lift it out of the drain. Check for any debris. Clean the stopper if needed. This keeps it working well. Remember, be gentle with each step. It helps prevent damage.
Toe-touch Stopper Removal
First, press the stopper down gently. Release it so it pops up. This step makes the stopper easy to remove. The stopper should not be stuck. If it is stuck, try pressing it again. Ensure it moves freely.
Look for a cap under the stopper. Use your fingers to unscrew it. Turn the cap counterclockwise. This loosens the stopper. Once loose, pull the cap away. Be careful not to drop it.
With the cap off, lift the stopper out. Hold it firmly. Pull it straight up. The stopper should come out easily. Make sure no parts fall into the sink. Once removed, inspect the stopper for damage.
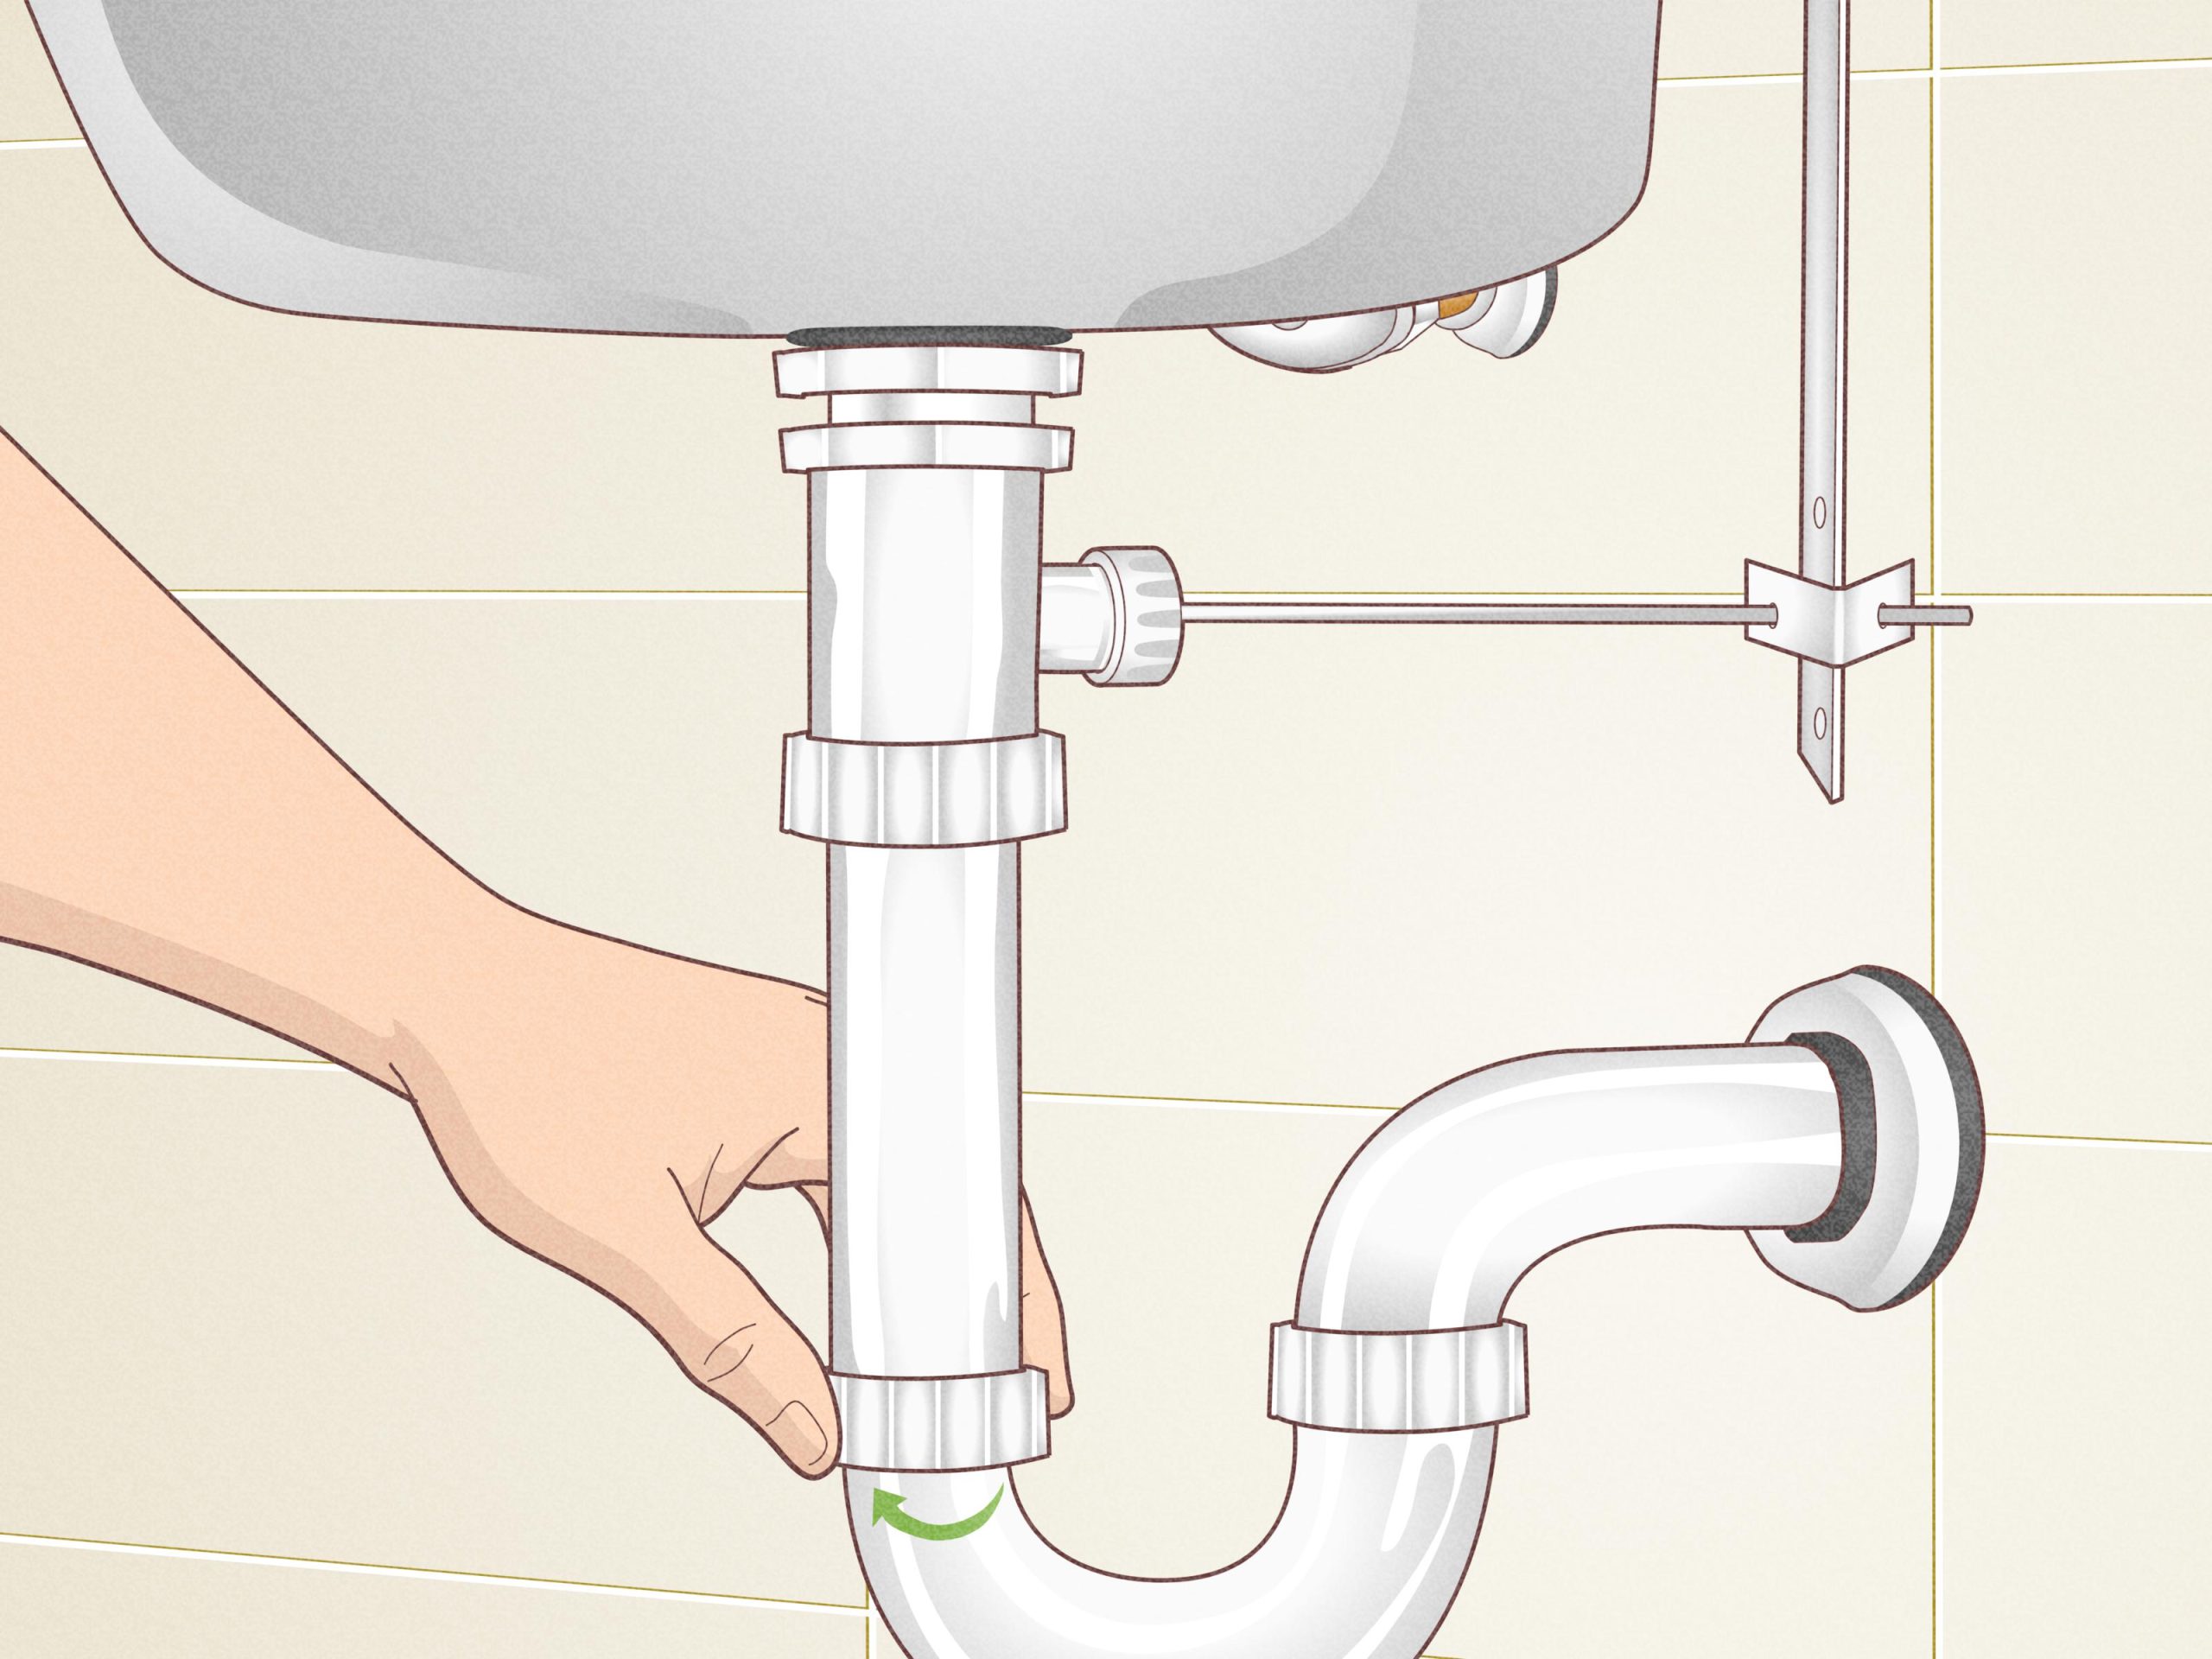
Pop-up Stopper Removal
First, find the horizontal rod under the sink. It connects to the drain pipe. Loosen the nut holding the rod. Pull the rod out gently. Be careful; it might be slippery. Disconnecting the rod frees the stopper.
Once the rod is out, you can lift the stopper. Pull it straight up. It should come out easily. If stuck, wiggle it gently. Removing the stopper clears the drain. A clear drain means no blockages.
Check the stopper and drain for debris. Hair and soap can clog drains. Cleaning them helps water flow. Use a cloth to wipe away any dirt. Regular cleaning keeps the sink working well.
Clean And Maintain
Learn how to easily remove a drain stopper from your sink to keep it clean and functional. Follow simple steps to free your sink from clogs and debris. Regular maintenance ensures smooth water flow and a fresh-smelling bathroom.
Clean The Drain
Use a cloth to wipe the drain. Remove all dirt and grime. A clean drain stops clogs. Check for any trapped hair. Use a small brush to scrub the sides. Clean drains keep water flowing smoothly.
Lubricate Moving Parts
Apply a few drops of oil to the moving parts. Make sure the oil is safe for kitchen use. This keeps the parts from sticking. Lubrication helps the stopper move easily. Always wipe away excess oil. This prevents slipping.
Reinstall The Stopper
Place the stopper back into the drain. Align it properly. Push it down gently. Test it to ensure it works. If it’s not smooth, adjust again. A well-installed stopper prevents leaks.

Credit: www.familyhandyman.com
Troubleshooting Tips
Removing a drain stopper from a sink requires a few simple tools. Start by locating the pivot rod underneath the sink. Next, loosen the screw connecting the rod to the stopper. Finally, gently pull the stopper out of the drain.
Dealing With Stuck Stoppers
Sometimes, drain stoppers get stuck. Use a flashlight to check the stopper. Look for any visible blockages. Hair and soap scum often cause problems. Pliers can help remove stubborn stoppers. Grip the stopper gently. Twist and pull. If it doesn’t move, don’t force it. For safety, wear gloves to protect your hands. Lubricating oil can be helpful. Apply it around the stopper edge. Let it sit for a few minutes. Try twisting again. If still stuck, check underneath the sink. Find the pivot rod. This rod holds the stopper in place. Disconnect it carefully. Once free, the stopper should lift easily.
Addressing Drain Blockages
Blockages cause slow draining. Baking soda and vinegar can clear small clogs. Pour baking soda down the drain. Follow with vinegar. Wait 5 minutes. Rinse with hot water. For stubborn clogs, use a plunger. Cover the drain with the plunger. Push and pull several times. This creates pressure. Pressure can dislodge blockages. If the sink remains blocked, consider a drain snake. Insert the snake into the drain. Twist and pull to remove debris. Professional plumbers can help if all else fails. They have special tools for deep cleaning.
Frequently Asked Questions
How To Take Out A Drain Stopper In A Sink?
To remove a sink drain stopper, first locate the pivot rod under the sink. Disconnect the rod by unscrewing the nut. Pull the stopper straight up from the drain. Clean thoroughly and reinstall if needed. Ensure proper alignment with the rod upon reassembly.
Why Won’t My Sink Stopper Come Out?
Your sink stopper might be stuck due to debris buildup or a faulty pivot rod. Check for clogs, clean the stopper, and ensure the pivot rod mechanism is properly aligned and functional. If the issue persists, consider consulting a professional plumber for further assistance.
How To Remove Pop-up Drain Stopper Without Rod?
Grip the stopper top and twist counterclockwise to unscrew. Pull upwards to remove. Clean and reinstall securely.
Why Won’t My Push Pull Drain Stopper Unscrew?
The drain stopper might be stuck due to corrosion or debris buildup. Use pliers or a wrench gently. Ensure proper alignment and apply lubricant if necessary. If it still doesn’t unscrew, consider consulting a plumber for professional assistance to avoid damage.
Regular maintenance can prevent future issues.
Conclusion
Removing a sink drain stopper is simple with the right steps. Follow instructions carefully. Gather necessary tools first. Disconnect the stopper mechanism. Clean and inspect the parts. Reassemble everything properly. Test the stopper to ensure it works. Regular cleaning prevents clogs.
This task saves you time and money. Always ensure safety while working. Remember, practice makes perfect. Soon, you’ll do it with ease. Enjoy a smoothly draining sink once again. Tackle this task confidently. Your sink will thank you!