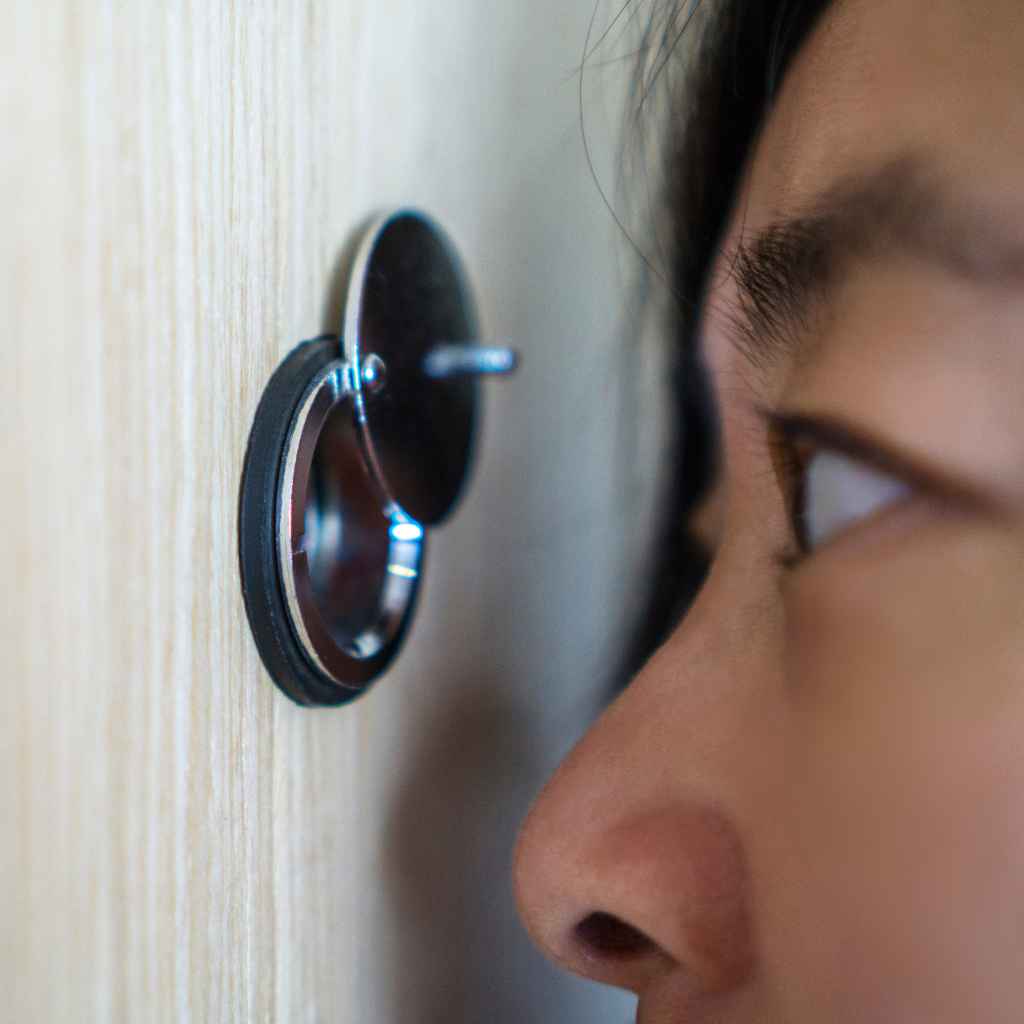
How to Remove a Peephole From a Door
Sometimes you might want to take out a peephole from your door. Maybe it’s old and cloudy, or perhaps you’re putting in a new door and don’t need it. For beginners, the idea of removing something from your door can seem a little tricky.
But don’t worry, it’s actually quite simple! We’re going to walk you through How to Remove a Peephole From a Door step-by-step. You’ll see it’s not as hard as it looks, and you’ll have your door looking just the way you want it in no time.
Why Remove a Door Peephole
There are several good reasons why someone might want to remove a peephole from their door. The most common is that the existing one is no longer clear. Over time, the lenses can get dirty on the inside or the exterior can become scratched, making it hard to see who is outside.
This can be annoying and also a security concern if you can’t clearly identify visitors. Another frequent reason is cosmetic. Some homeowners prefer a smoother, cleaner look on their doors, especially if the peephole design doesn’t match their new decor.
Replacing an old, foggy peephole with a new one is also a common task.
Sometimes, a peephole might be damaged. The housing could be loose, or the lens might be cracked, which is definitely something you’d want to fix. For those who are upgrading their door hardware or changing the overall style of their entryway, removing the old peephole is a necessary step.
It allows for a fresh start and ensures all new elements complement each other. This process is straightforward and doesn’t require specialized skills, making it a perfect DIY project for anyone looking to improve their home.
Common Reasons for Peephole Removal
One of the primary motivators for removing a peephole is its diminished functionality. Over years of use and exposure to the elements, the optical clarity of the peephole lens can degrade. Dust, moisture, or minor damage can accumulate, leading to a blurry or distorted view.
This impaired vision makes it difficult to identify visitors accurately, which is the peephole’s main job. A clear view is essential for home security and peace of mind.
Aesthetics play a significant role too. A dated or unattractive peephole can detract from a door’s overall appearance. Homeowners often wish to update their entryway to match modern design trends or their personal style.
Removing an old peephole allows for a seamless surface or the installation of a more contemporary option. If a peephole is broken, with a cracked lens or a loose housing, removal is necessary for safety and to prevent further damage to the door itself.
When a door is being
When a Peephole Needs Replacing
A peephole’s lifespan isn’t infinite, and like any component, it can wear out. When the view through your peephole starts to look like a foggy window on a cold day, it’s a clear sign it needs attention. This loss of clarity is often due to condensation forming between the lenses or dirt getting trapped inside.
It’s not just an aesthetic issue; it compromises your ability to see who’s at the door, which is a key security feature.
Physical damage is another major reason for replacement. A hard knock or accidental impact could crack the lens, making it dangerous to look through and offering a distorted view. The housing itself might also become loose or damaged, making the peephole wobbly and less secure.
If you notice any of these issues, it’s time to consider removing the old one and installing a fresh, functional peephole.
Sometimes, the issue isn’t damage but obsolescence. Older peepholes might offer a narrow field of vision, meaning you can only see a small area directly in front of the door. Modern peepholes often provide a much wider angle, giving you a better overall view of your surroundings.
If you’re looking to enhance your home security with better visibility, upgrading to a newer model is a smart choice.
How to Remove a Peephole From a Door
This section is all about the practical steps to take out a peephole from your door. It’s a fairly simple job that most people can do with common tools. We’ll cover what you need and how to approach it safely and effectively.
Following these instructions will help you complete the task without any trouble, ensuring your door remains undamaged. You’ll be surprised at how quickly you can get this done.
Tools You Will Need
Gathering the right tools makes any DIY project much smoother. For removing a peephole, you won’t need a huge toolkit. Most common household items will do the trick.
The primary tool you’ll likely need is a flathead screwdriver. This is essential for gently prying or unscrewing different parts of the peephole. Make sure you have a few different sizes on hand, as peephole designs can vary.
You might also need a pair of pliers, especially if parts of the peephole are stubborn or difficult to grip. A rag or a soft cloth is always a good idea to protect the door’s finish from any accidental scratches from your tools. Some peepholes have a small retaining ring or nut on the inside, so a small adjustable wrench or even a specific type of plier like needle-nose pliers could be helpful.
Finally, safety glasses are recommended to protect your eyes from any small pieces that might break off.
- Flathead Screwdriver: Used for unscrewing or prying apart the peephole components. Having a set with various sizes allows you to match the tool to the screw or gap.
- Pliers (Standard or Needle-Nose): Helpful for gripping and turning stubborn parts or removing small components like retaining rings.
- Soft Cloth or Rag: To place between your tool and the door surface, preventing scratches and protecting the finish.
- Adjustable Wrench (Optional): May be needed if the peephole uses a nut on the interior side that requires turning.
- Safety Glasses: To protect your eyes from dust or small fragments that might become dislodged during the removal process.
Step-by-Step Peephole Removal Process
To begin the process of removing a peephole from a door, you first need to identify how it’s installed. Most peepholes consist of two main parts: a front lens assembly and a rear barrel, often with a retaining nut or screw on the inside. Start by examining the peephole from both sides of the door.
You’ll likely see the wider, lens-covered part on the outside and a smaller, possibly threaded, section on the inside.
If your peephole has screws visible on the inside, use a flathead screwdriver that fits the screw head snugly. Carefully turn the screws counter-clockwise to loosen them. If there are no visible screws, the peephole might be held in place by friction or a threaded barrel.
In this case, try to grip the inner part of the peephole with your fingers or pliers and gently twist it counter-clockwise. It might unscrew from the outer part.
Once the internal part is loose or removed, you can often push the outer lens assembly through the hole from the outside. If it’s still stuck, use your flathead screwdriver and the soft cloth. Gently insert the screwdriver tip between the peephole housing and the door, and carefully pry outwards.
Work your way around the peephole, applying light pressure. Be patient and don’t force it, as you don’t want to damage the door. Once it’s loose enough, it should pop out.
Removing the Outer Lens
After dealing with the interior mechanism, the outer lens assembly is usually the last part to come out. Sometimes, after unscrewing the interior barrel, the outer lens will simply slide out. However, if it remains snugly in place, you’ll need to employ a gentle prying technique.
Take your flathead screwdriver and place a soft cloth over the door’s surface directly around the peephole.
Carefully . As you create more gaps, the outer lens should begin to loosen.
With enough pressure applied evenly, the outer lens assembly should start to push out from the exterior side of the door. You might be able to push it with your fingers at this point. If it’s still resistant, you can use the screwdriver to gently push it the rest of the way.
Once it’s out, you’ll have a clean hole where the peephole used to be.
Dealing with Stubborn Peepholes
Occasionally, a peephole can be quite stubborn and refuse to budge. This might happen if it’s been in place for a long time, or if it was installed with adhesive. If twisting and prying aren’t working, inspect the peephole closely for any hidden clips or locking mechanisms.
Sometimes, there are small tabs that need to be pressed or disengaged.
If the peephole seems to be painted over or sealed with caulk, you might need to carefully score around the edge with a utility knife. This breaks the seal and can make removal much easier. Be very careful not to cut too deeply into the door itself.
A small amount of WD-40 or a similar lubricant applied to the edges might also help loosen things up, but be sure to wipe away any excess to prevent it from staining the door.
In rare cases, a peephole might be permanently affixed or require a more forceful approach. If you’ve tried everything else and the peephole still won’t come out, it might be time to consider consulting a professional or looking into methods that involve cutting or drilling, but this should be a last resort to avoid damaging the door. Remember to always prioritize the condition of your door.
What to Do With the Hole After Removal
Once the peephole is successfully removed, you’ll be left with a hole in your door. What you do next depends on your plans. If you’re installing a new peephole, the process is straightforward: simply follow the instructions for the new unit.
However, if you want to leave the hole empty or cover it up, there are a few options. You can simply leave it as is if it’s not very noticeable or if it’s in an area where it won’t cause issues.
For a cleaner look, you can fill the hole. This can be done with a wooden dowel and wood glue, or with wood filler. Once filled and dried, you can sand it smooth and repaint or refinish the door to match the surrounding area.
Another option, especially for temporary solutions or if you prefer a solid appearance, is to purchase a decorative escutcheon plate or a door hardware blank designed to cover such holes. These are available at most hardware stores and can give a finished look without requiring extensive repair work.
Filling the Hole
If you’re aiming for a smooth, seamless look, filling the hole is the best approach. For wooden doors, a common method is to use a wooden dowel that is slightly larger than the hole. Apply wood glue to the dowel and the inside of the hole, then tap the dowel in.
Once the glue dries, you can trim the dowel flush with the door’s surface. For a truly flat finish, you can then use wood filler to fill any remaining gaps or imperfections.
If you don’t have a suitable dowel or prefer a simpler method, high-quality wood filler can also be used directly. Apply the filler generously, pressing it into the hole to ensure there are no air pockets. You might need to apply it in layers, allowing each layer to dry before adding the next, especially for deeper holes.
Once the filler is completely dry and hardened, sand it smooth. Start with a coarser grit sandpaper and move to a finer grit for a super smooth finish.
After sanding, the filled area should be nearly invisible. The final step is to repaint or refinish the area to perfectly match the rest of your door. If your door is painted, use a matching paint color.
If it’s stained wood, you’ll need to find a stain that closely matches the original. This filling process takes patience, but the result can be a door that looks as if the peephole was never there.
Covering the Hole
Covering the hole is a quicker alternative to filling and repainting, especially if you don’t need a perfectly smooth surface or if you plan to add new hardware. You can find decorative metal plates or discs designed specifically for this purpose at hardware stores. These are often called door hole covers or escutcheons.
They come in various finishes like brass, brushed nickel, or black to match your existing door hardware.
These covers typically adhere to the door with strong adhesive or are secured with small screws. They effectively conceal the hole and provide a more finished appearance than just leaving an empty opening. Some are designed to look like decorative elements, while others are more utilitarian.
If you’re adding a new peephole or other hardware in a different location, a cover plate can also be used to block off the old opening.
Another creative option is to use a small piece of decorative wood or metal, perhaps cut into a shape, and secure it over the hole. This can add a unique touch to your door. The key is to ensure the covering is securely attached and that it sits flush against the door’s surface to avoid snagging or looking out of place.
This method is great for a quick fix or for those who want a unique look.
When to Call a Professional
While removing a peephole is a fairly simple DIY task, there are times when calling a professional is the wiser choice. If your door is made of a very delicate material, like antique wood or a specialty composite, you might be hesitant to attempt the removal yourself for fear of causing damage. A professional locksmith or handyman has the experience and specialized tools to handle such materials safely.
If, after attempting the removal, the peephole is completely stuck and you’re finding yourself applying excessive force, it’s a good indication to stop. Forcing it could lead to cracking the door or damaging the frame. A professional can assess the situation and employ techniques that you might not be aware of.
They can also ensure the hole is properly repaired or that a new peephole is installed correctly if that’s your goal.
Another scenario is if you have a security door or a door with complex locking mechanisms where removing a component might interfere with its function. In these cases, it’s always best to consult an expert to avoid compromising the door’s integrity or security features. For peace of mind and to guarantee the job is done right, a professional is a reliable option.
Common Peephole Materials and Design
Understanding the materials and common designs of peepholes can help you anticipate the removal process. Most peepholes are made from durable materials that can withstand outdoor conditions. The lens itself is typically made of high-quality optical glass or a tough plastic like acrylic.
The housing, which holds the lens and screws into the door, is often made of brass, aluminum, stainless steel, or plastic. These materials are chosen for their longevity and resistance to rust and corrosion.
Peephole designs vary, but they generally fall into a few categories. The most common is the standard wide-angle peephole, offering a broad view. Some advanced peepholes might have multiple lens elements for enhanced clarity and magnification.
The installation method also differs. Some are threaded, screwing into place from one side, while others are held by a small nut or retaining ring on the interior of the door. Knowing these details can make the removal process much smoother.
Optical Glass vs. Acrylic Lenses
The material of the peephole lens plays a role in its clarity, durability, and how it might react during removal. Optical glass lenses are known for their superior clarity and scratch resistance. They offer a very sharp and undistorted view.
However, glass can be more brittle than plastic, meaning it could potentially crack or chip if excessive force is applied during removal, especially if it’s an older, perhaps leaded, glass.
Acrylic lenses, also known as plastic lenses, are lighter and much more impact-resistant. They are less likely to shatter if dropped or struck. While modern acrylic lenses can be very clear, they are more prone to scratching over time compared to glass.
During removal, acrylic might flex or deform slightly, which can sometimes make it easier to ease out of the door opening if it’s a tight fit. Both types are designed to be durable for outdoor use.
The choice between glass and acrylic often comes down to manufacturing cost and desired performance characteristics. For DIY removal, neither material typically presents a significant hurdle, but awareness of their properties can help you handle them with appropriate care. If a glass lens does break during removal, be very careful of sharp edges.
Threaded vs. Non-Threaded Designs
Peepholes are commonly installed using either a threaded mechanism or a press-fit/snap-in system. Threaded peepholes have a barrel that screws into the outer housing or directly into the door itself. To remove these, you typically twist the interior part counter-clockwise.
Sometimes, the entire unit can be unscrewed by gripping both the interior and exterior parts simultaneously and twisting in opposite directions.
Non-threaded designs often rely on friction or a retaining ring. In some cases, you might find a small nut on the interior side that holds the peephole in place. This nut can be unscrewed using a wrench or pliers.
Other non-threaded types might simply be pressed into the hole and held by a snug fit or small clips. For these, gentle prying with a flathead screwdriver is usually the most effective method for removal. Identifying which type you have is the first step.
Example of a Threaded Peephole
Imagine a peephole where the outside part has a wide lens, and on the inside, you see a smaller cylindrical piece. If you try to twist this inner piece counter-clockwise, and it turns, you likely have a threaded peephole. Often, the inner part is just the end of the barrel that screws into the main body of the peephole on the other side of the door.
You might be able to unscrew this entire inner barrel.
If you can’t get a good grip with your fingers, use pliers gently on the interior barrel. Twist it counter-clockwise. As you unscrew it, you’ll feel it loosen.
Once it’s completely unscrewed, the outer lens assembly should either push out easily or require a little gentle persuasion from your screwdriver. This type is quite common because it allows for a secure installation.
Example of a Non-Threaded Peephole with Retaining Nut
Consider a peephole where you see a barrel on the inside, but it doesn’t seem to twist. Instead, you might see a small nut or collar that seems to be holding the barrel in place against the door. This nut is the retaining mechanism.
You would need to use a wrench or pliers to grip this nut and turn it counter-clockwise. Once the nut is removed, the peephole should come apart easily.
Often, the exterior part of the peephole is a separate piece that pushes into the door, and the interior nut secures it. Removing this nut frees the exterior piece, allowing it to be pushed or pried out. This method ensures the peephole is firmly attached to the door without requiring threading through the entire door thickness.
Always be sure the nut is fully loosened before trying to pull the peephole out.
Typical Door Thickness Compatibility
Peepholes are designed to fit standard door thicknesses. Most residential doors are between 1 3/8 inches and 1 3/4 inches thick. Peephole manufacturers usually produce units that accommodate this range.
When you purchase a new peephole, it will typically specify the door thickness it’s designed for, often coming with an adjustable barrel or extension to fit slightly varying thicknesses within the standard range.
If you have an unusually thick or thin door, you might need to find a specialized peephole or use an extension kit. However, for the vast majority of homes, standard peepholes will work without issue. When removing an existing peephole, you can use its length as an indicator of your door’s thickness.
This can be helpful information if you plan to
Maintaining Your Door After Peephole Removal
After successfully removing a peephole, the next step is to ensure your door remains in good condition. Whether you’re leaving the hole open, filling it, or covering it, proper finishing is key. This ensures your door looks its best and is protected from the elements.
Taking a few extra moments to address the hole properly will prevent future problems and maintain the door’s aesthetic appeal.
If you’ve chosen to fill the hole, sanding and painting are crucial. A smooth, well-matched finish will make the repair virtually invisible. If you’re covering the hole, ensure the cover is securely attached and complements the door’s style.
For any exposed wood, especially on exterior doors, applying a sealant or paint is vital to prevent moisture damage and rot. Proper post-removal care is just as important as the removal itself.
Sanding and Finishing the Hole
Once you’ve filled the hole with wood filler or a dowel and it has dried completely, it’s time to sand. Start with medium-grit sandpaper (around 100-120 grit) to level the filled area with the door surface. Be gentle, and sand in the direction of the wood grain if applicable.
The goal is to create a smooth transition, removing any bumps or rough patches.
After achieving a smooth surface with the medium grit, switch to fine-grit sandpaper (around 180-220 grit). This will refine the surface, making it even smoother and ready for finishing. Wipe away all the dust with a clean cloth.
For a truly professional finish, you can apply a thin coat of primer to the sanded area. Once the primer is dry, give it another light sanding with very fine grit sandpaper.
The final step is applying your paint or stain. If it’s an exterior door, use exterior-grade paint or stain for durability. Apply multiple thin coats, allowing each to dry thoroughly before applying the next.
Feather the edges of the new paint or stain into the surrounding door surface to help blend the repair. This careful sanding and finishing process ensures the repaired area is seamless and protected.
Preparing for New Hardware
If you plan to install new hardware, such as a new peephole, lockset, or door handle, the hole left by the old peephole might need preparation. Ensure the hole is clean and free of any debris. If you’re installing a new peephole in the same spot, make sure the hole is the correct size for the new unit.
You might need to enlarge it slightly or use a filler if the new peephole is smaller.
For any new hardware that requires screw holes, it’s often a good idea to pre-drill pilot holes. This prevents the wood from splitting, especially in hardwood. If you’ve filled the old peephole hole and are installing new hardware elsewhere, make sure the filler is completely dry and sanded smooth before drilling new holes nearby.
The integrity of the door is important for secure hardware installation.
Protecting Exterior Doors
Exterior doors face the brunt of weather conditions, including rain, sun, and temperature changes. If you’ve removed a peephole from an exterior door and filled the hole, proper sealing is crucial. After sanding and painting or staining, ensure the entire door, especially the repaired area, is well-protected.
Use high-quality exterior paints or sealants that offer UV protection and water resistance.
Pay close attention to the edges of the door and any areas where the original finish might have been compromised during the removal process. These are prime spots for moisture to seep in, leading to rot or swelling. Regularly inspect your exterior doors for any signs of wear or damage and touch them up as needed.
This proactive care will significantly extend the life of your door and keep it looking great.
Frequently Asked Questions
Question: Can I remove a peephole without damaging my door?
Answer: Yes, you generally can remove a peephole without damaging your door if you are careful and use the right tools. Gentle prying and making sure not to force anything are key. Using a soft cloth to protect the door’s finish is also important.
Question: How long does it take to remove a peephole?
Answer: For most standard peepholes, the removal process takes about 15 to 30 minutes. If the peephole is particularly stubborn or if you need to fill the hole afterwards, it might take a bit longer.
Question: Do I need a special tool to remove a peephole?
Answer: Usually, a standard flathead screwdriver is all you need. Pliers might also be helpful for gripping. You don’t typically need specialized tools unless the peephole is unusually installed.
Question: What if the peephole is stuck and won’t twist?
Answer: If it won’t twist, it might be held by a nut or clips. Try to identify if there’s a retaining nut on the inside that needs unscrewing. Gentle prying with a screwdriver and cloth might also work, but avoid excessive force.
Question: Can I put a new peephole in the same spot?
Answer: Yes, if the hole is the correct size for the new peephole. Most new peepholes are designed to fit standard door thicknesses and hole sizes. You might need to check the dimensions of the new peephole.
Conclusion
Taking out a door peephole is a manageable task for most homeowners. By gathering simple tools and following the step-by-step guide, you can successfully remove the old unit. Whether you plan to fill the hole for a seamless look or cover it with new hardware, you now have the knowledge to complete the job.
Your door will look great after this simple upgrade.