How To Remove A Sheared Screw: Step-By-Step Guide
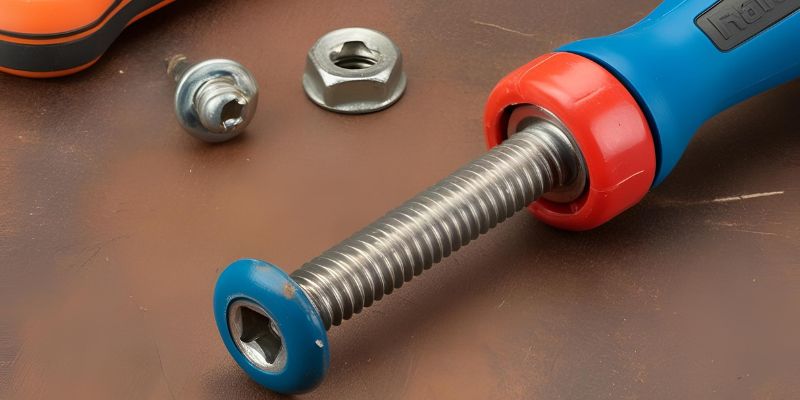
In mechanical repair and maintenance, the challenge of removing a sheared screw presents a distinct technical obstacle that often requires innovative solutions. A sheared screw occurs when the head breaks off, leaving the threaded shaft embedded in the material, which can complicate disassembly and repair processes. Various techniques, including heat application, extraction tools, and chemical adhesives, are deployed to tackle such stubborn fasteners.
Understanding the principles behind these methods is crucial for effective troubleshooting. By delving deeper into this topic, you will discover a range of practical strategies tailored for effectively addressing the removal of sheared screws.
Effective Methods On How To Remove A Sheared Screw
Dealing with a sheared screw can be a frustrating experience, but understanding the right techniques can simplify the process. This summary outlines effective methods for how to remove a sheared screw, highlighting tools and techniques that ensure a successful extraction without damaging the surrounding material. Whether utilizing specialized kits, heat, or extraction bits, knowing the proper steps can save time and effort, allowing you to resolve the issue quickly and efficiently.
Understanding Sheared Screws
Definition and causes of sheared screws. Common situations where screws become sheared.
A sheared screw is one that has broken, usually leaving part of it stuck in the material. This can happen due to excessive force, rust, or poor-quality screws. Common situations include:
- Installing screws at an angle
- Tightening screws too much
- Using the wrong type of screw for the material
Understanding these causes can help you avoid problems in the future. It’s important to choose the right screws and use them properly.
Tools Required for Removal
List of essential tools (screw extractors, drills, etc.). Tips on choosing the right tools for different scenarios.
To successfully tackle a sheared screw, having the right tools is crucial. Here’s a quick list of essential tools you will need:
- Screw extractors – These specially designed tools grip and turn out damaged screws.
- Drills – A good-quality drill helps in making holes for the extractor.
- Pliers – Use them for added grip if there’s any part of the screw sticking out.
- Heat sources – A heat gun can help loosen stubborn screws.
Choose tools based on the screw size and material. For hard metals, stronger extractors work best.
Always ensure you have a range of sizes to cover various needs.
Preparation Steps Before Removal
Assessing the situation and safety precautions. Cleaning the area around the screw for better access.
Before you start, look closely at the broken screw. Check if any pieces are left and how tightly it is stuck. Always wear safety glasses to protect your eyes.
Keep your hands clear of sharp tools. Next, clean the area around the screw. This helps you see better and makes it easier to work. Use a cloth or a brush to remove dirt and debris.
- Assess the damage carefully.
- Wear safety glasses.
- Clear the area of dirt.
- Make sure you have proper tools ready.
Method 1: Using a Screw Extractor
Detailed steps on how to use a screw extractor. Tips for success and common mistakes to avoid.
First, grab a screw extractor kit. You’ll find them at most hardware stores. Start by drilling a small hole in the middle of the broken screw.
Not too big, though! You want it just right, like Goldilocks. Next, insert the extracted tool into the hole and turn it counterclockwise. It should grip tight and twist the screw out.
Remember: If it doesn’t budge, take a break. Patience is key, or you might end up on a first-name basis with the emergency room! Here’s a quick tip table to help you:
| Tips | Common Mistakes |
|---|---|
| Use the right drill bit size | Drilling too deep |
| Apply steady pressure | Rushing the process |
| Keep the area clean | Not using lubricant |
Method 2: Drilling Out the Sheared Screw
Stepbystep guide on drilling a sheared screw. Best drill bits and techniques for effective removal.
Drilling out a sheared screw can feel like wrestling a bear, but it’s easier than you think! First, grab your drill and select the right drill bit. A cobalt or titanium bit works best.
Next, mark the center of the screw with a punch to keep your drill from slipping. Start slow, then increase speed as the bit digs in. Don’t forget to wear safety goggles—screws can fly like confetti, but not the kind you want at a party!
| Drill Bit Type | Best Use |
|---|---|
| Cobalt | For tough, hardened screws |
| Titanium | For general use |
| Carbide | When the screw won’t budge |
Once you’ve drilled deep enough, gently twist the remaining screw parts out with pliers.
If the screw resists, try some penetrating oil. It’s like magic sauce for stuck screws! And remember, patience is key—no need for screw-related tantrums!
Method 3: Alternative Techniques (e.g., Hammer Method, Prying)
Description of alternative methods to remove sheared screws. When to use these alternative techniques over direct extraction.
Sometimes, extracting a stubborn screw feels like trying to pull out a tooth from a dragon! If the screw is sheared, you might need some alternative techniques. One way is the hammer method, where you carefully tap the screw with a hammer and a punch.
This can create a groove, making it easier to twist out. Another option is prying, which means gently leveraging the screw with a tool, like a flat-head screwdriver, to pop it loose.
| Technique | Best For |
|---|---|
| Hammer Method | Creating a groove |
| Prying | Loosening tight screws |
Use these methods when a direct pull just won’t cut it. Remember, not all screws are created equal, so pick your battles wisely!
Preventative Measures to Avoid Future Issues
Tips for proper screw installation to prevent shearing. Recommendations for choosing the right screws for specific materials.
Installing screws is like baking: use the right ingredients and avoid a messy outcome! First, choose the correct screw for your material. Softwood? Go for a wood screw.
Hard metal? Use a machine screw instead. Size matters, too!
A too-small screw might not hold, while a too-large one can break.
For a smooth installation, drill a pilot hole. This helps the screw slide in without grumbling and gives it a cozy fit. Also, don’t misuse your screwdriver—treat it like a delicate dance partner!
The right pressure will keep everything in line. Happy screwing!
| Material | Recommended Screw Type |
|---|---|
| Wood | Wood Screw |
| Metal | Machine Screw |
| Plastic | Self-tapping Screw |
Additional Resources and Tools for DIY Enthusiasts
Recommended products for screw removal and prevention. Links to tutorials, videos, and forums for further learning.
For DIY enthusiasts ready to tackle a sheared screw, the right tools can make all the difference! Some must-haves include screw extractors and drill bits specifically for screw removal. Curious about how to use them?
Check out various tutorials and videos online; they’re like magic shows for tools! Plus, forums can be treasure troves of tips and tricks from fellow DIY fans.
| Tool/Product | Use | Recommended Link |
|---|---|---|
| Screw Extractor Set | Remove sheared screws | Link |
| Drill Bit Set | Drill new holes for removal | Link |
| YouTube Tutorials | Visual guidance | Link |
| DIY Forums | Advice from experts | Link |
With these resources, you’ll be turning those stubborn screws into mere memories. There’s a good chance you’ll laugh at that sheared screw in no time!
Conclusion
In conclusion, effectively removing a sheared screw requires patience and the right tools. Whether you choose to use extraction kits or alternative methods such as drilling or welding, maintaining caution is crucial to avoid further damage. By following these strategies, you can confidently tackle that stubborn screw and restore functionality to your project, ensuring a successful repair every time.
FAQs
What Are The Best Tools To Use For Removing A Sheared Screw?
The best tools for removing a sheared screw include a screw extractors kit, which is specifically designed for this purpose, and a left-handed drill bit that can often unscrew the broken piece as it drills. Pliers or vice grips can also be useful if a portion of the screw is exposed. Additionally, applying penetrating oil can help loosen any rust or debris. Finally, a extractor wrench set may be helpful for larger screws or bolts.
Can A Sheared Screw Be Removed Without Damaging The Surrounding Material?
Yes, a sheared screw can often be removed without damaging the surrounding material, but it depends on the method used. Techniques such as using an easy-out extractor, heat, or penetrating oil can help loosen the screw without harming the surrounding area. Care must be taken to avoid applying excessive force, which could cause further damage. If necessary, a professional locksmith or mechanic can offer specialized tools and expertise for safe removal.
What Techniques Can Be Applied If A Sheared Screw Is Stuck Deep Within The Material?
If a sheared screw is stuck deep within the material, techniques such as using a screw extractor can be effective; this involves drilling a hole into the screw and employing a specialized extractor to grip and remove it. Another method is to apply heat, which can expand the surrounding material and loosen the screw. Techniques like using penetrating oil can help reduce friction and facilitate removal. If these methods fail, drilling out the screw completely and using a tap to create new threads may be necessary.
Are There Any Chemical Methods Or Products That Can Help In Loosening A Sheared Screw?
Yes, chemical methods can help in loosening a sheared screw. Products like penetrating oil, specifically those containing solvents like kerosene or acetone, can be applied to the area to help break down rust or corrosion that may be binding the screw. Additionally, products such as WD-40 or similar penetrating sprays can penetrate tight spaces and provide lubrication. It’s important to allow the chemical to work for some time before attempting to remove the screw.
When Should I Consider Seeking Professional Help To Remove A Sheared Screw Rather Than Attempting It Myself?
You should consider seeking professional help to remove a sheared screw if you lack the necessary tools or experience to handle the situation safely. If the screw is deeply embedded, or located in a difficult-to-reach area, a professional can more effectively assess and address the problem. Additionally, if you’re concerned about causing damage to surrounding materials or components, it’s wise to consult an expert. Finally, if your attempts have already failed or you’re feeling frustrated, getting professional assistance can save you time and effort.

