How to Remove a Spring-Loaded Door Hinge, Step by Step
A spring-loaded door hinge won’t come off safely until you release the internal coil spring with a hex key first — pulling the mounting screws before that lets the barrel snap open under load. ANSI/BHMA A156.17 requires at least two spring hinges on a fire-rated door, so removing one changes that door’s code compliance until it’s back on. This guide covers releasing tension safely, pulling the hinge pin, and telling a spring hinge apart from a standard butt hinge.
What Is a Spring-Loaded Door Hinge?
A spring-loaded door hinge is a self-closing hinge that uses an internal coil spring under tension to swing a door shut automatically, without a separate door closer arm. It only comes apart safely once the stored tension is released — skipping that step is what causes the barrel to snap open. Builders use them most often on fire-rated doors, garage entry doors, and screen doors that need to close on their own for code or safety reasons.
How Do I Know If My Hinge Is Spring-Loaded?
Look for a small hex-shaped adjustment hole in the hinge barrel — usually near the top knuckle. Spring hinges also close the door on their own from any open position without a separate closer arm mounted on the door or frame. A standard butt hinge has none of this: no adjustment hole, and the door stays wherever you leave it.
Why Remove a Spring-Loaded Hinge?
The most common reasons are a squeaky or rusted hinge, a hinge that needs replacing because it no longer closes the door reliably, or taking the whole door off to move furniture through the opening. Removing the hinge is more involved than a standard hinge because of the stored spring tension, but it’s a manageable DIY job once that tension is released first.

Tools You Need to Remove a Spring-Loaded Hinge
You don’t need specialty tools for this job. Here’s what actually gets used:
- Screwdriver: Phillips or flathead, matching your hinge screws.
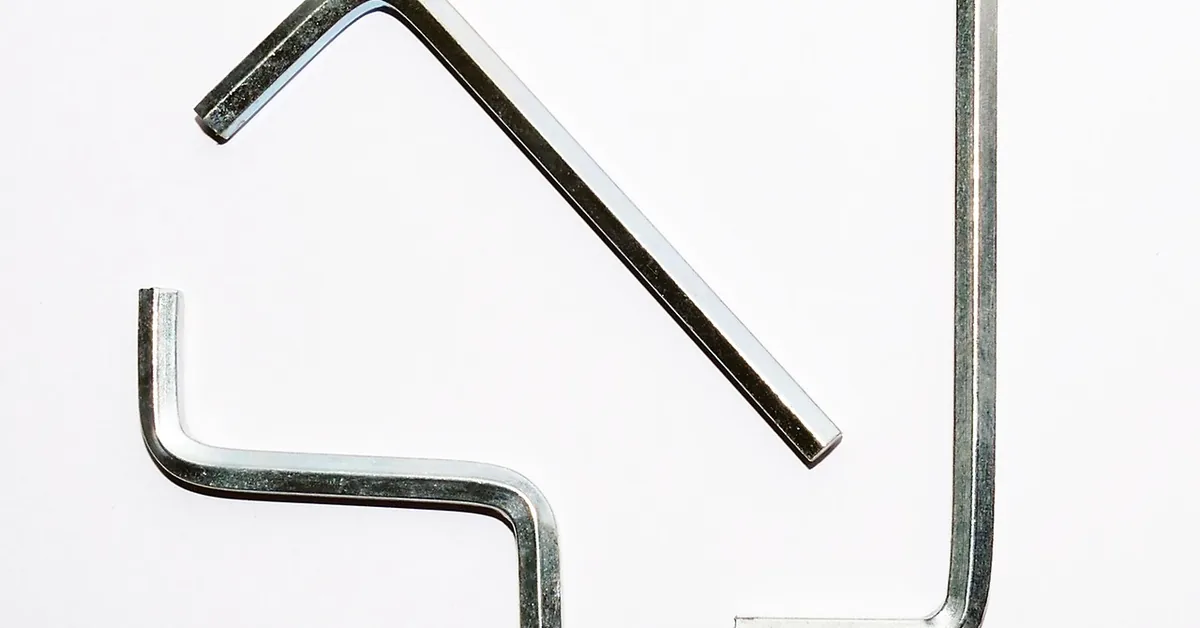
- Hex key (Allen wrench): To release the spring’s tension — typically 3/32″ or 1/8″ on residential hinges.
- Hammer and punch, or a hammerless pin removal tool: For stubborn hinge pins.
- Safety glasses and gloves: A releasing spring can snap back with real force.
- Penetrating lubricant: For pins that have rusted or painted over.
Every one of these is available at any hardware store or home center for well under $30 total, and most homeowners already have the screwdriver and hammer on hand.
Best Hinge Pin Removal Tool Pick
Spring Tools PM407 Hammerless Hinge Pin Remover – $24.94
Drives the pin out with an internal spring-loaded striker instead of a hammer — useful for the Step 4 pin removal above when you’re working in a tight doorway and can’t get a full hammer swing.
- Best for: Tight spaces where swinging a hammer is awkward
- Why we picked it: No loose hammer strikes near a spring under tension
- Main drawback: Costs more than a basic hammer-and-punch set
Compare more hinge pin removal options
 Option 1 HIT Tool Spring Punch (Steel Face) – $12.99
|
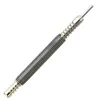 Option 2 WHLLING Hammerless Pin Tool – $9.49
|
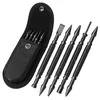 Option 3 TYRWEEY 5-Piece Punch Set – $22.99
|
As an Amazon Associate we earn from qualifying purchases.
How to Remove a Spring-Loaded Door Hinge: Step-by-Step
Follow these steps in order — releasing the spring tension before anything else is the one step that keeps this job safe.
Step 1: Stay Safe First
Put on safety glasses and gloves before touching the hinge. A spring under tension can snap back hard enough to pinch a finger or send a pin flying if it lets go unexpectedly.
Step 2: Support the Door
Prop the door open with a wedge or have someone hold it steady while you work. A heavy door can swing or fall once its hinges are no longer fully secured.
Step 3: Release the Spring Tension
Find the hex-shaped adjustment hole in the hinge barrel — usually near the top knuckle. Insert the correct size hex key and turn it counterclockwise, holding firm resistance the whole time, until the spring goes slack. Never let go of the key mid-turn; the barrel can spin back on its own if you do.
📊 ANSI/BHMA A156.17 (Grade 1) requires a minimum of two spring hinges on any fire-rated door for a code-compliant self-close — removing one from a fire door changes its compliance status until it’s reinstalled or replaced. Source: I Dig Hardware, NFPA 80 hinge requirements decode
“Place the door in the closed position, insert the tension lever in the adjustment slot, then rotate it to release tension before removing the stop pin.”
Step 4: Remove the Hinge Pin
Once the tension is released, use a hammer and punch — or a hammerless pin tool — to tap the hinge pin upward from underneath. If it’s stuck, spray penetrating lubricant and wait a few minutes before trying again. Grip the exposed end with pliers and pull it the rest of the way out.
Step 5: Unscrew the Hinge
Remove the mounting screws with a matching screwdriver, starting with the door frame side, then the door side. Keep the screws in a small container so they don’t get lost — the hinge should now come free.
Step 6: Check for Damage
Inspect the door and frame for scratches, stripped screw holes, or rust before deciding whether to reinstall the same hinge or replace it.
Tips for a cleaner removal:
- Work slowly — rushing the tension-release step is the most common cause of a snapped-back hinge.
- Keep every tool within reach before you start; you won’t want to let go of the hex key mid-release.
- Double-check the spring feels fully slack before pulling the pin.
Benefits of Removing a Spring-Loaded Hinge
Removing the hinge lets you fix a squeak, swap in new hardware, or take the whole door off for a move — all without paying a handyman for what’s usually a 20-minute job once the tension is released. It’s also the only way to inspect the frame and screw holes for wear that a squeak or a slow-closing door can be masking.
Removing vs. Adjusting: Which Should You Do?
Full removal isn’t always necessary. If the hinge itself isn’t damaged and the only problem is the door closing too hard or too slow, adjusting the tension instead solves it in a couple of minutes without taking the hinge apart.
| Action | Pros | Best For |
|---|---|---|
| Remove hinge | Fixes damage, allows door removal | Rusted, worn, or replaced hinges |
| Adjust tension only | Two-minute fix, hinge stays intact | Slamming or slow-closing doors with an undamaged hinge |
Common Mistakes to Avoid
These are the mistakes that turn a simple hinge job into a trip to urgent care:
- Skipping the tension release: Always loosen the spring fully before removing any screws.
- Using the wrong hex key size: A loose-fitting key can slip out mid-release and let the spring snap back.
- Not supporting the door: A falling door can cause real injury or damage the frame.

Cost-Saving Tips
You don’t need to buy every tool new. Borrow a hex key set or hammer from a neighbor, and check any local hardware store for penetrating lubricant — it’s a low-cost item everywhere. If the hinge needs replacing rather than reinstalling, a standard residential spring hinge typically runs well under $20 at most hardware retailers.
Frequently Asked Questions
How do you remove a spring-loaded door hinge safely?
Release the spring tension first with a hex key, turning it counterclockwise until the spring goes slack, before removing anything else. Wear safety glasses and gloves, support the door so it can’t fall, and only then tap out the hinge pin and remove the mounting screws.
What tools do I need for spring hinge removal?
A screwdriver, a hex key sized to your hinge’s adjustment hole, a hammer and punch (or hammerless pin tool), safety glasses, gloves, and penetrating lubricant for stuck pins. All of it is available at any hardware store for under $30 total.
Can I remove a spring hinge without a hex key?
No — the hex key is what safely releases the spring’s tension. Without it there’s no controlled way to de-tension the barrel, and forcing the pin out under load risks the hinge snapping back. Borrow or buy a small hex key set rather than skipping this step.
What if the hinge pin is stuck?
Spray it with a penetrating lubricant, wait a few minutes for it to work into the rust or paint, then tap it gently with a hammer and punch. Grip the exposed end with pliers to work it free rather than forcing it, which can bend the pin.
Can I reuse a spring-loaded hinge after removal?
Yes, as long as it isn’t rusted, cracked, or worn at the knuckle. Clean it, lubricate the pin, then reinstall it and re-tension the spring with the hex key. A hinge with a bent leaf or a spring that won’t hold tension should be replaced instead.
How do I know if my hinge is spring-loaded?
Look for a small hex-shaped hole in the hinge barrel near the top knuckle — that’s the tension adjustment point. Spring hinges also swing the door closed on their own from any open position, with no separate door closer arm mounted anywhere.
What if I don’t want to remove the hinge at all?
Adjust the tension instead of removing it. Turning the hex key tightens or loosens the spring, which fixes a door that slams or closes too slowly without taking the hinge apart. See our full guide to adjusting spring-loaded door hinges for the full process.
Conclusion
Removing a spring-loaded door hinge comes down to one rule: release the tension before you touch a screw. With a hex key, a screwdriver, and a punch, it’s a manageable weekend job, whether you’re fixing a squeak, swapping hardware, or taking a door off to move furniture through. If the hinge isn’t damaged, adjusting the tension instead is often the faster fix. See also: more door hardware guides and how to grease door hinges properly.
Sponsored / affiliate links. As an Amazon Associate I earn from qualifying purchases. I may earn additional commission from eligible campaigns.