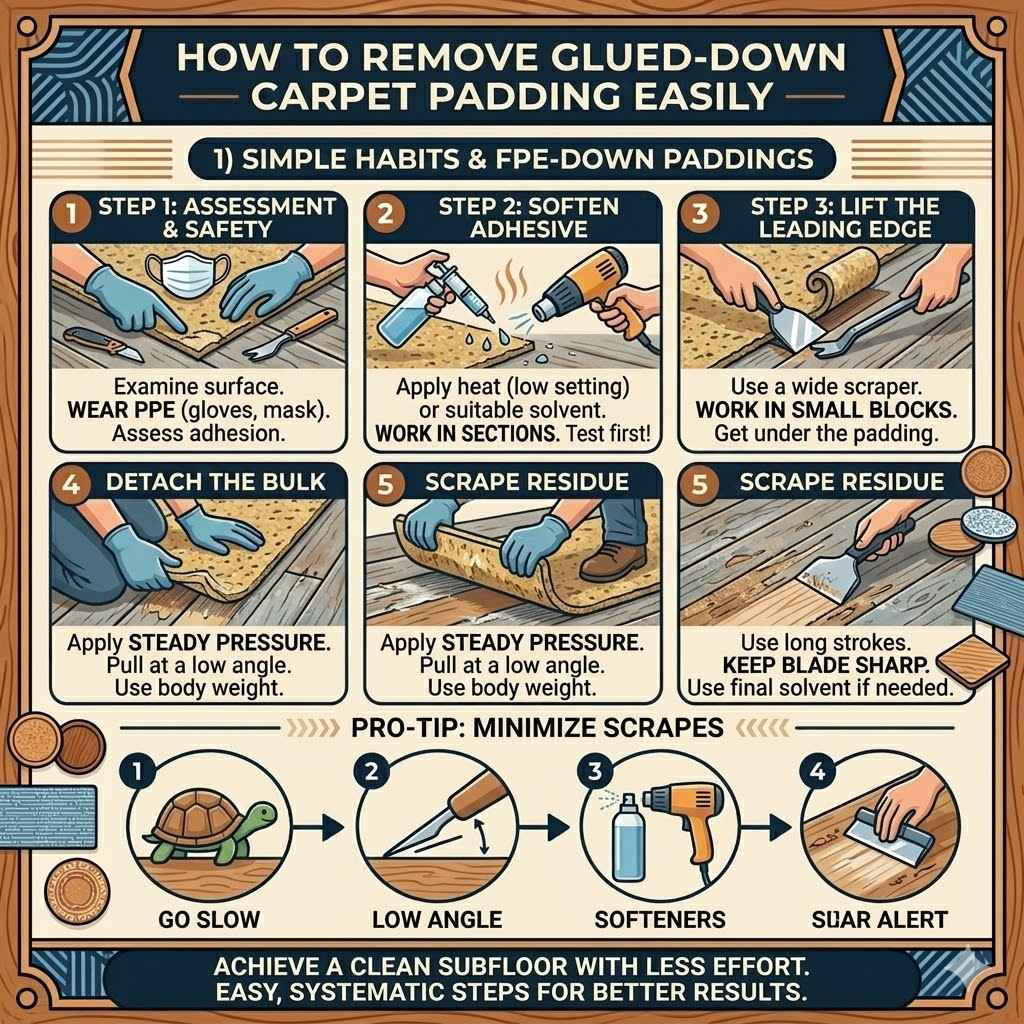
How To Remove Glued-Down Carpet Padding Easily
Getting rid of old carpet and its padding can feel like a big job, especially for beginners. You might think removing glued-down carpet padding will be super tough and messy. But don’t worry!
It’s totally doable with the right steps and tools. We’ll show you exactly how to Remove Glued-Down Carpet Padding Easily. Follow along, and you’ll have your floor prepped in no time for your next project.
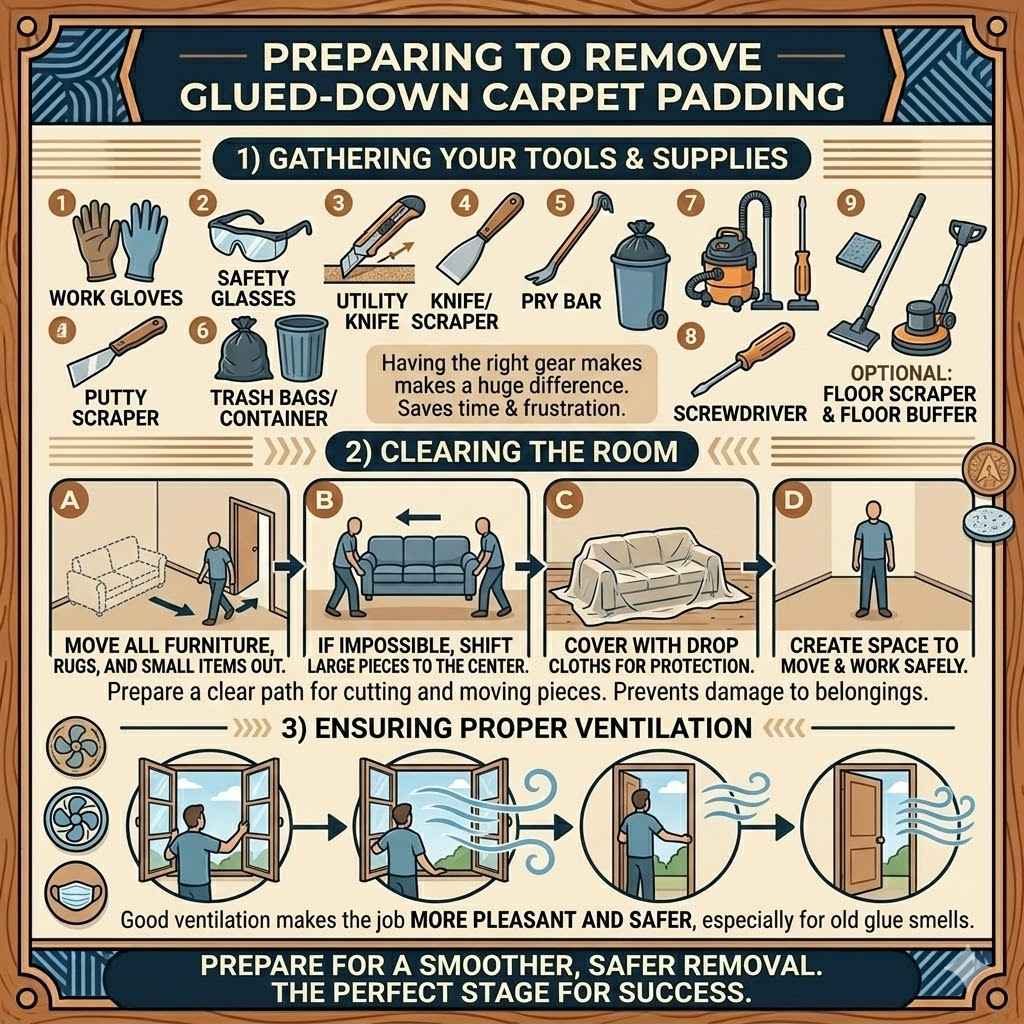
Preparing To Remove Glued-Down Carpet Padding
Before you start pulling up any carpet, taking a bit of time to get ready is super important. This part makes the whole process much smoother and safer. You’ll want to gather all your supplies and clear the area so you have plenty of space to work.
Think of this as setting the stage for success.
Gathering Your Tools and Supplies
Having the right gear makes a huge difference when you want to Remove Glued-Down Carpet Padding Easily. You don’t want to stop halfway through because you’re missing something. Make sure you have these things ready to go.
It’ll save you time and frustration.
- Work Gloves: Protect your hands from splinters, rough edges, and any sticky residue. Good gloves help you grip better too.
- Safety Glasses: When you’re cutting or prying, small bits can fly. Eye protection is a must to keep your vision safe.
- Utility Knife or Carpet Cutter: This is for cutting the carpet into smaller, more manageable strips. A sharp blade makes clean cuts.
- Putty Knife or Scraper: A flat, sturdy tool helps you get under the padding and lift it from the floor.
- Pry Bar: For stubborn areas, a pry bar gives you extra leverage to loosen the padding.
- Heavy-Duty Trash Bags or Container: You’ll have a lot of waste, so have a plan for disposal.
- Vacuum Cleaner: A shop vac is best for dust and debris, but a regular one will work too.
- Screwdriver (Flathead): Sometimes you can use this to get a starting edge under the padding.
- Floor Scraper or Floor Buffer (Optional): For really tough adhesive, these can speed things up.
Having these items ready means you can start the actual removal without delays. Imagine trying to cut carpet with dull scissors – it’s a nightmare. The right tools are your best friends here.
Clearing The Room
To Remove Glued-Down Carpet Padding Easily, you need space to move. Take out all furniture, rugs, and anything else that might be in the way. Even small items can become tripping hazards.
Move larger pieces to another room if possible. If you can’t move heavy furniture, try to shift it to the center of the room and cover it with drop cloths to protect it from dust.
Think about how much room you need to work. You’ll be cutting carpet and moving pieces, so imagine giving yourself a clear path. This also helps prevent damage to your belongings.
You don’t want to scratch a table or tear a sofa while working.
Ventilation
When you’re working with old glues and adhesives, it’s a good idea to get some fresh air circulating. Open windows and doors to air out the room. This is especially important if the old glue has a strong smell or if you’re using any cleaning products later.
Good ventilation makes the job more pleasant and safer for you.
The Process Of Removing Glued-Down Carpet Padding
Now comes the exciting part – actually removing the carpet and padding. This is where you’ll put your tools to use. We’ll break it down into simple steps to make sure you can Remove Glued-Down Carpet Padding Easily and without too much fuss.
It’s like peeling layers off an onion, but with a floor.
Cutting The Carpet Into Strips
Start by using your utility knife or carpet cutter to cut the carpet into strips. Aim for strips that are about 2-3 feet wide. This makes them much easier to handle and pull up.
Cut from one wall to the opposite wall. If you have a large room, cut it into sections. Don’t try to cut too much at once; smaller sections are more manageable.
A sharp blade will make this step much easier and prevent you from tearing the carpet unevenly. Keep your cuts as straight as possible to help with pulling.
This step is key to making the rest of the job easier. Imagine trying to lift a whole carpet – it’s heavy and awkward. Cutting it down makes it a one-person job, or at least much simpler for a team.
You want to create manageable pieces that you can roll or fold.
Peeling Back The Carpet
Once you have your strips, you can start peeling back the carpet. Get a corner started with your putty knife or pry bar. Once you have an edge, you can grab the carpet with your hands and pull it up.
Work slowly and steadily. If it’s stuck in some places, use your scraper to help loosen it. Try to pull the carpet up in large sections.
This is where having good gloves really helps with grip.
Don’t rush this part. If you pull too fast, the carpet might rip into smaller pieces, making it harder to remove. The goal is to lift as much of the carpet off the floor as possible in one go.
You’re aiming to expose the padding underneath.
Removing The Glued Padding
After the carpet is up, you’ll see the glued-down padding. This is often the trickiest part. Use your putty knife or scraper to get under the edge of the padding.
You might need to use a pry bar for areas where the glue is really strong. Work in sections, lifting and prying as you go. Try to lift the padding in as few pieces as possible.
If there are large patches of glue, you might need to scrape them off as you remove the padding.
This step requires patience. The glue can be stubborn. Sometimes, a little wiggling with your scraper is all it takes.
If you find a particularly sticky spot, try to get your tool at a lower angle to slide under the padding and break the glue bond. The aim is to lift the entire piece of padding.
Dealing With Adhesive Residue
Once the padding is up, you’ll likely have sticky adhesive residue left on your subfloor. This is normal. You can often scrape off most of this with your scraper or putty knife.
For tougher spots, you might need a specialized adhesive remover. Always test any remover in an inconspicuous area first to make sure it doesn’t damage your subfloor. Work in small sections and scrape away the loosened adhesive.
A shop vac is great for cleaning up the debris as you go.
This sticky stuff can be annoying, but it’s conquerable. You’re aiming for a clean surface for whatever comes next. It might take some elbow grease, but a clean subfloor is a happy subfloor.
Tips For Easier Removal
Even when you plan carefully, there are always little tricks that can make a big difference. These tips are designed to help you Remove Glued-Down Carpet Padding Easily and more efficiently. They address common problems and offer simple solutions that experienced DIYers use.
Use A Floor Scraper For Large Areas
If you have a large room or a lot of carpet and padding to remove, a floor scraper can be a real time-saver. These are long-handled tools with a sharp blade designed to scrape away tough materials. You can stand up and use them like a broom to scrape up the adhesive residue.
This is much less strenuous than bending over with a small scraper.
A floor scraper works by using your body weight and the tool’s leverage. You push down and pull back, and the sharp blade cuts through the sticky adhesive. It’s a much more efficient way to clear large expanses of floor.
You can find these at most hardware stores. They are often used for removing old flooring materials.
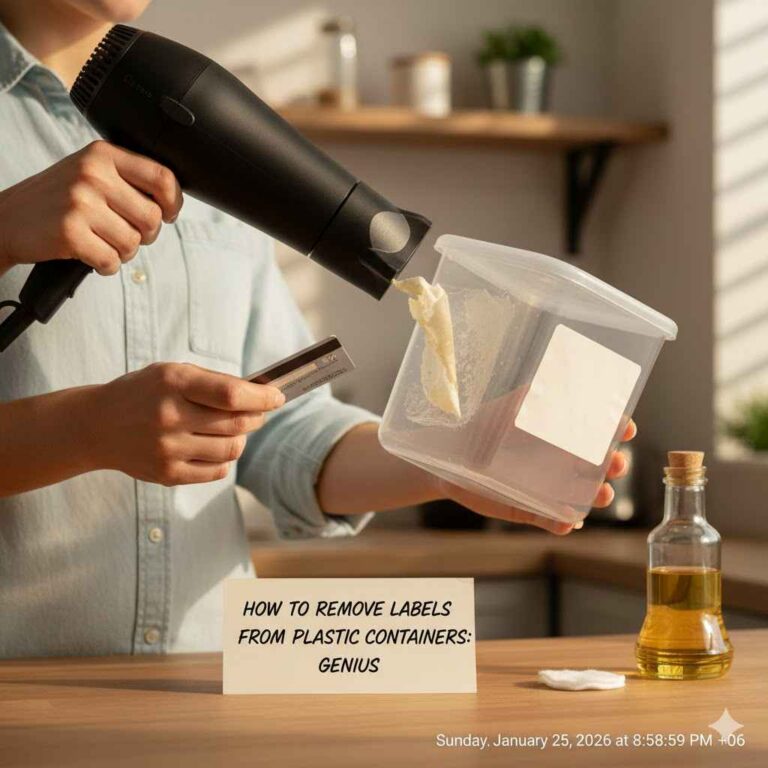
Consider A Heat Gun Or Hair Dryer
For very stubborn adhesive, gently warming it up can sometimes make it softer and easier to remove. Use a heat gun on a low setting or a powerful hair dryer. Wave it back and forth over a small section of adhesive for a minute or two.
Then, try scraping it up with your putty knife. Be careful not to overheat the adhesive or the subfloor, as this could cause damage. This method is best for smaller, stubborn spots.
Heat can break down the bond of many adhesives, making them more pliable. It’s like softening old chewing gum. Just remember to use caution and not apply too much heat in one spot.
Test a small area first to see if it helps before you go over the whole floor.
Work In Sections
As mentioned before, breaking the job into smaller, manageable sections is a golden rule. Don’t try to do the entire room at once. Focus on one corner or one wall.
Complete that section before moving to the next. This makes the task less overwhelming and allows you to see progress. It also helps you stay organized with your waste disposal.
Imagine tackling a giant puzzle; you start with the edges and work inwards. This is similar. Completing a section gives you a sense of accomplishment and momentum.
It prevents burnout and keeps the job from feeling like an endless task.
Carpet Removal Machines
For very large commercial jobs or if you plan on doing this frequently, you might consider renting or buying a carpet removal machine. These machines are designed to efficiently cut and lift carpet and padding. They can significantly speed up the process, especially for large areas.
However, for a typical home project, they might be overkill and more expensive than the job warrants.
These machines often use powered blades to cut the carpet and then a mechanism to lift it. They are built for heavy-duty use. If you’re a contractor or facing a massive renovation, they’re worth looking into.
For most homeowners, manual methods are sufficient and more cost-effective.
Safety First
Always prioritize your safety. Wear your gloves and safety glasses throughout the entire process. Be mindful of tripping hazards.
If you’re working on a staircase, take extra precautions to secure yourself and the materials you’re removing. Ensure good ventilation to avoid inhaling fumes from old adhesives.
The goal is to finish the job safely. Don’t take shortcuts that could lead to injury. If a section feels too difficult or dangerous, step back and reassess your approach.
A little extra care goes a long way in preventing accidents. You want to be able to enjoy your newly prepped floor, not recover from an injury.
Dealing With Different Types Of Adhesive
The type of glue used to attach your carpet padding can affect how easy or difficult it is to remove. Some adhesives are water-based and relatively easy to clean up, while others are more industrial and tenacious. Understanding what you’re dealing with can help you choose the best removal method.
Water-Based Adhesives
Many older carpets and padding were installed using water-based adhesives. These are generally easier to remove. Once the padding is up, you can often use a mixture of warm water and dish soap, or a mild detergent, to soften the residue.
Let it sit for a few minutes, then scrape it away with your putty knife or floor scraper.
You might need to repeat this process a couple of times. A wet/dry vacuum can be helpful to suck up the excess water and loosened glue. This type of adhesive is less likely to cause long-term staining or damage to your subfloor if cleaned properly.
Solvent-Based Or Industrial Adhesives
Some installations use stronger, solvent-based adhesives. These are much tougher to remove and can leave a very sticky residue. For these, you might need a stronger adhesive remover.
Look for products specifically designed for carpet adhesive removal. Always follow the manufacturer’s instructions and ensure good ventilation, as these solvents can have strong fumes.
These industrial glues are designed for maximum hold. You’ll likely need to apply an adhesive remover, let it dwell for the recommended time, and then scrape aggressively. Be prepared for this to be the most time-consuming part of the job.
Some people have found success with citrus-based removers, which are generally less toxic but still effective.
Tack Strip Adhesive
In some cases, carpet might be installed with tack strips around the edges, and the padding could be adhered in the center. The adhesive used for the tack strips is usually less intense than full adhesive. However, the padding in the middle might still be glued.
You’ll want to remove the padding first, then address any remaining adhesive on the subfloor.
Tack strips themselves can also be sharp and a hazard. Be sure to remove them carefully after the padding is gone. If there’s adhesive on the tack strips, you can often scrape it off.
The subfloor beneath where the tack strips were is usually cleaner, but it’s good practice to scrape any residue there too.
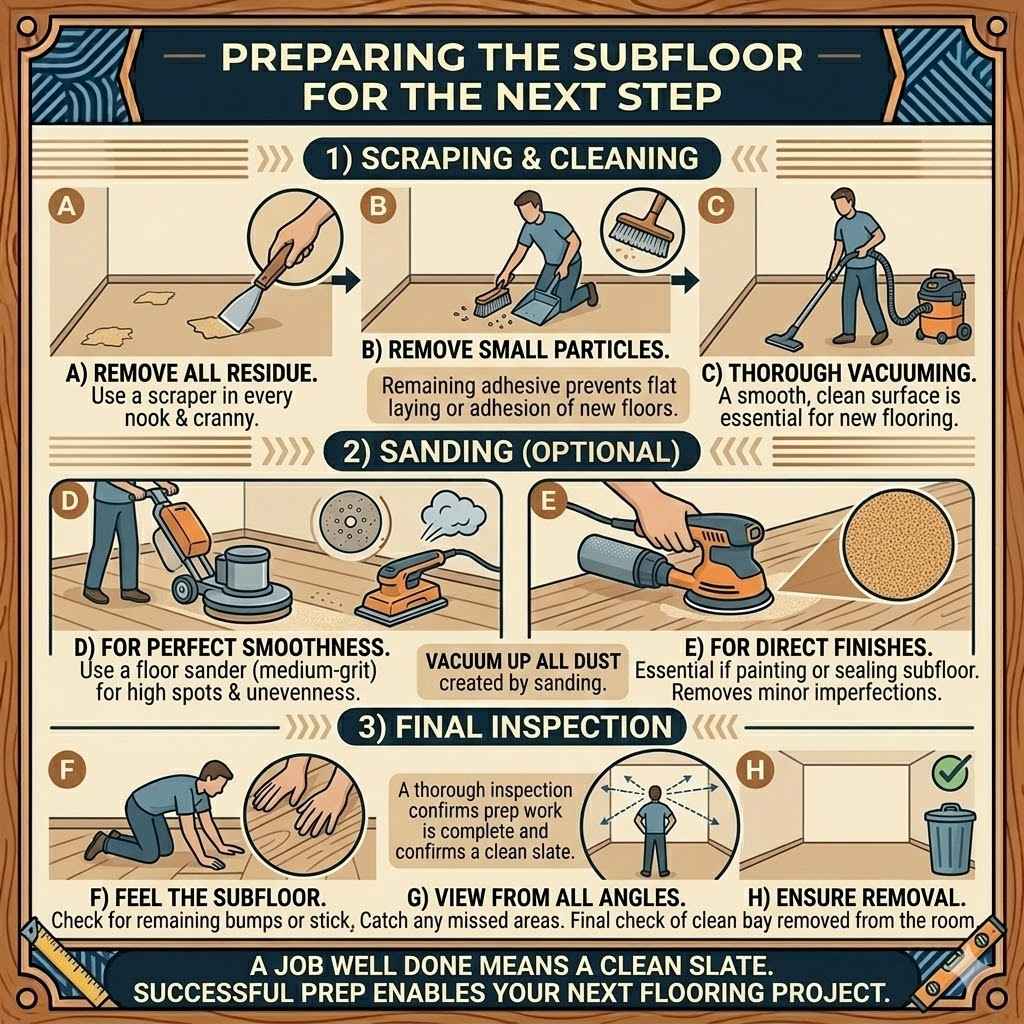
Preparing The Subfloor For The Next Step
Once all the carpet and padding are gone, and you’ve dealt with the adhesive residue, you’ll have a clean subfloor. This is the perfect canvas for whatever you plan to do next, whether it’s installing new flooring, painting, or refinishing. Getting the subfloor ready is the final, crucial step in the removal process.
Scraping And Cleaning
The primary goal here is to remove every last bit of glue and debris. Use your scraper to get into any nooks and crannies. A stiff brush can help dislodge smaller particles.
Vacuum the entire area thoroughly, paying attention to corners and edges. You want a smooth, clean surface.
A clean subfloor is essential for the successful installation of new flooring. Any remaining adhesive can cause your new floor to not lay flat or adhere properly. It can also create bumps or imperfections.
Spend a little extra time here to ensure the best results later.
Sanding (Optional)
For a perfectly smooth finish, especially if you plan to paint or apply a sealant directly to the subfloor, a light sanding might be necessary. Use a floor sander or a hand sander with medium-grit sandpaper. This will remove any minor imperfections and ensure a completely smooth surface.
Be sure to vacuum up all the dust created by sanding.
Sanding is also useful if there are any high spots or unevenness in the subfloor itself. It helps to create a level playing field for your next flooring project. If you are installing new carpet or a thick laminate, sanding might not be as critical, but it’s always a good practice for a professional finish.
Final Inspection
Before you consider the job done, do a final walk-through. Feel the subfloor with your hands to check for any remaining bumps or sticky spots. Look at the floor from different angles to catch any missed areas.
Ensure that all tools and debris have been completely removed from the room. This final check ensures you’ve successfully managed to Remove Glued-Down Carpet Padding Easily and completely.
This is your last chance to catch anything you might have missed. A thorough inspection confirms that your prep work is complete and you’re ready to move forward with your next project. A job well done means a clean slate.
Frequently Asked Questions
Question: What is the easiest way to start removing glued-down carpet padding
Answer: The easiest way to start is to find a loose corner or edge of the carpet. Use a utility knife to cut the carpet into smaller strips, then use a putty knife or pry bar to lift up a corner of the carpet and padding together.
Question: Can I just leave the old padding down
Answer: No, if the padding is glued down, it needs to be removed. Leaving it can cause issues with installing new flooring and may lead to mold or mildew if there was moisture trapped underneath.
Question: How do I get rid of the sticky glue residue
Answer: You can typically scrape off most of the residue with a putty knife or floor scraper. For stubborn glue, use an adhesive remover product designed for floors, following the manufacturer’s instructions carefully.
Question: Do I need special tools to remove glued-down carpet padding
Answer: You’ll need basic tools like a utility knife, putty knife, pry bar, and gloves. A floor scraper can make the job much easier for larger areas, but it’s not strictly essential for small jobs.
Question: Is it messy to remove glued-down carpet padding
Answer: Yes, it can be messy. You’ll encounter old glue, dust, and carpet fibers. Working in sections, using trash bags, and having good ventilation can help manage the mess.
Conclusion
Successfully completing the task of removing glued-down carpet padding is achievable. By gathering the right tools and following a step-by-step approach, you can easily tackle this job. Taking your time to prepare and work in manageable sections ensures a clean subfloor for your next home improvement project.