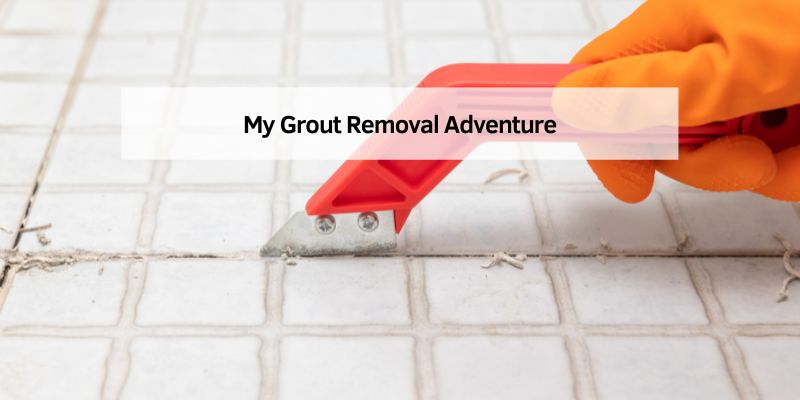
My Grout Removal Adventure
A couple of years ago, I noticed the grout in my bathtub was looking rough. It was discolored, cracked, and even had some moldy spots. I tried scrubbing, but it was beyond saving. I decided it was time to remove the old grout and replace it. I’d never done it before, so I watched videos, talked to a friend who’s a contractor, and dove in with my tools. It was messy and took some effort, but I got the hang of it. Now, my bathtub looks amazing, and I’ve helped my sister and neighbor do the same. Let me walk you through what I learned so you can tackle your grout with confidence.
Why Remove Grout from a Bathtub?
Grout is the material that fills the gaps between tiles in your bathtub. It seals out water and keeps tiles in place. But over time, grout can crack, stain, or grow mold, especially in a wet place like a bathroom. I noticed my grout was letting water seep behind the tiles, which could damage the wall. Removing old grout and replacing it fixes these issues, prevents leaks, and makes your tub look fresh. It’s also a chance to clean up mold and improve your bathroom’s health and appearance.
Tools and Supplies You’ll Need
Before you start, gather the right tools. I learned that having everything ready makes the job easier. Here’s what I used:
- Grout Saw: A handheld tool with a serrated blade for cutting grout. I got one for $10 at a hardware store.
- Rotary Tool (Optional): Like a Dremel, for faster grout removal. I borrowed one from a friend for tough spots.
- Utility Knife: To score grout lines and clean edges. A $5 knife worked fine.
- Safety Gear: Gloves, safety glasses, and a dust mask to protect against dust and debris. I spent $15 on these.
- Shop Vacuum: To suck up grout dust. My $30 vacuum was a lifesaver.
- Clean Cloths and Bucket: For wiping tiles and cleaning up.
- Grout Removal Bit: For the rotary tool, about $10.
- Scraper or Flathead Screwdriver: To chip away stubborn grout. I used a $3 screwdriver.
- White Vinegar (Optional): To soften grout or clean mold. A $3 bottle did the trick.
- Drop Cloth or Old Towels: To protect your tub and floor.
I spent about $50 total, but you might already have some of these at home.
Preparing Your Bathtub for Grout Removal
Prepping is key to a smooth job. Here’s how I got my bathtub ready:
- Clean the Area: Scrub the tiles and grout with a bathroom cleaner to remove soap scum and dirt. I used a $5 cleaner and a sponge to make the grout easier to see.
- Dry the Surface: Wipe the tub dry with a cloth. Wet grout is harder to remove. I let mine air out for an hour.
- Protect the Tub: Lay a drop cloth or towels over the tub and floor to catch dust. I used old towels to save money.
- Ventilate the Room: Open windows or run a fan to keep dust from settling. My bathroom fan helped a lot.
- Wear Safety Gear: Put on gloves, glasses, and a mask. Grout dust can irritate your eyes and lungs. I learned this after sneezing through my first attempt.
Taking 20 minutes to prep saved me time and mess later.
How to Remove Grout from a Bathtub: My Step-by-Step Process
Removing grout takes patience, but it’s doable. Here’s the process I followed:
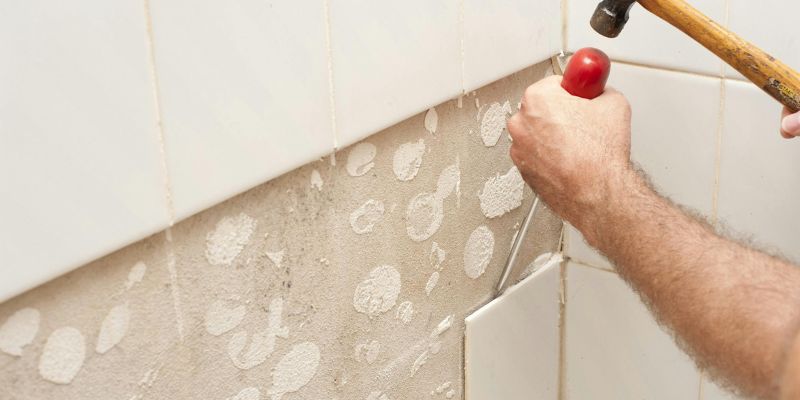
Step 1: Score the Grout Lines
Use a utility knife to score along the grout lines. This creates a guide for your grout saw and prevents tile damage. I lightly dragged the knife along each line, keeping it shallow to avoid chipping tiles.
Step 2: Use a Grout Saw
Take your grout saw and start cutting into the grout. Hold it at a 45-degree angle and move back and forth like you’re sawing wood. I worked in small sections, about 6 inches at a time, to stay in control. It’s slow, but it gets the job done. My arms got tired, so I took breaks every 15 minutes.
Step 3: Try a Rotary Tool for Tough Grout
For hard or deep grout, I switched to a rotary tool with a grout removal bit. It’s faster but creates more dust. I set the tool to a low speed to avoid damaging tiles and worked carefully along the lines. This cut my removal time in half for stubborn areas.
Step 4: Scrape Out Loose Grout
After sawing, use a scraper or flathead screwdriver to chip away loose grout. I tapped gently to pop out chunks, being careful not to scratch the tiles. This step cleaned up the gaps nicely.
Step 5: Vacuum the Dust
Use a shop vacuum to suck up grout dust and debris. I vacuumed every few minutes to keep my workspace clear and avoid breathing dust. It also helped me see where I missed spots.
Step 6: Clean the Tiles
Wipe the tiles with a damp cloth to remove leftover dust. I used a mix of water and a splash of white vinegar to clean moldy spots. Let the area dry completely before moving on.
Step 7: Check Your Work
Run your finger along the gaps to make sure all grout is gone. I found a few spots I missed and went back with the grout saw. The gaps should be clean and even, about 1/8 inch deep.
This process took me about 3 hours for a standard bathtub surround, but it depends on the size of your tub and the grout’s condition.
Dealing with Stubborn Grout
Some grout just won’t budge. I hit a few tough spots in my tub. Here’s what helped:
- Soften with Vinegar: Spray white vinegar on stubborn grout and let it sit for 10 minutes. It softens the grout slightly, making it easier to saw. I used this trick on old, hardened grout.
- Use a Rotary Tool: For cement-based or epoxy grout, a rotary tool is a must. I borrowed my friend’s Dremel and finished those spots in minutes.
- Work in Small Sections: Don’t rush. I tried to saw too much at once and chipped a tile. Slow and steady wins the race.
- Ask for Help: If it’s too tough, a pro can take over. My neighbor hired a tile guy for $200 to remove epoxy grout.
Safety Tips for Grout Removal
Grout removal can be dusty and messy. Here’s how I stayed safe:
- Wear a Dust Mask: Grout dust can irritate your lungs. I wore a $5 mask and felt much better.
- Use Safety Glasses: Flying debris can hurt your eyes. My $10 glasses saved me when a grout chunk popped up.
- Gloves Protect Your Hands: I wore work gloves to avoid cuts from sharp tools or tiles.
- Ventilate the Area: Keep air moving to reduce dust. I opened a window and used a fan.
- Take Breaks: Grout removal is tiring. I rested every 15–20 minutes to avoid mistakes.
What to Do After Removing Grout
Once the old grout is gone, you’re ready for the next steps. Here’s what I did:
- Inspect Tiles: Check for loose or damaged tiles. I found one loose tile and reattached it with tile adhesive ($10).
- Clean Thoroughly: Wipe down the entire area with vinegar and water to remove dust and mold. I scrubbed hard to make sure it was spotless.
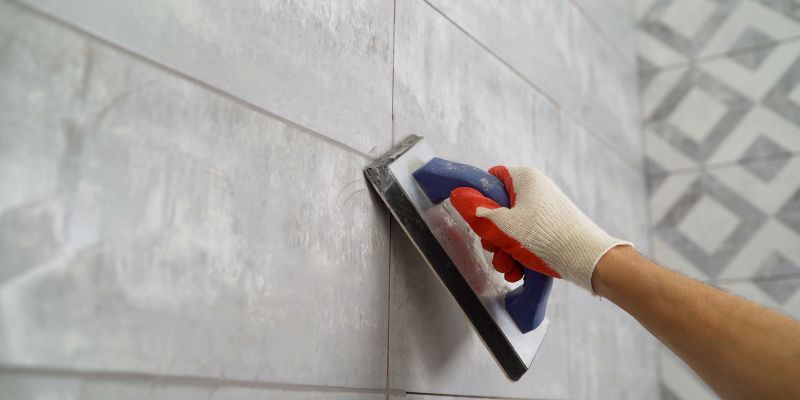
- Regrout: Apply new grout with a rubber float and grout mix ($15 for a bag). I followed the package instructions and let it cure for 24 hours.
- Seal the Grout: Use a grout sealer ($10) to protect against water and stains. I applied two coats a week after regrouting.
- Clean Up: Vacuum and wipe down the tub and floor. I used my shop vac to get every bit of dust.
Regrouting took me another 2 hours, but it made my tub look brand new.
Common Mistakes to Avoid
I made a few slip-ups my first time. Here’s what to watch out for:
- Rushing the Job: Going too fast can chip tiles. I slowed down after nicking a corner.
- Skipping Prep: Dirty tiles make removal harder. I always clean first now.
- Using the Wrong Tool: A dull grout saw is frustrating. I sharpened mine with a file for better results.
- Ignoring Dust: Dust gets everywhere. I vacuumed often to keep it under control.
- Not Wearing Safety Gear: I skipped glasses once and got dust in my eye. Never again.
Costs of Removing Grout from a Bathtub
Grout removal is budget-friendly if you DIY. Here’s what I spent:
- Grout Saw: $10
- Rotary Tool Bit: $10 (or $100 if you buy a tool)
- Utility Knife: $5
- Safety Gear: $15 (mask, glasses, gloves)
- Shop Vacuum: $30 (or borrow one)
- Vinegar and Cloths: $5
- Drop Cloth/Towels: Free (used old ones)
Total: About $75. Hiring a pro costs $200–$500, depending on the job size.
When to Call a Professional
I handled my grout removal, but some jobs need a pro:
- Epoxy Grout: It’s super tough and needs special tools. My neighbor paid $300 for professional removal.
- Large Areas: If your entire bathroom needs regrouting, a pro is faster. A friend paid $400 for a full shower.
- Damaged Tiles: If tiles are loose or cracked, a pro can replace them properly.
- Health Concerns: Dust can worsen allergies. A pro has better dust control.
I called a tile guy for a quote ($250), but did it myself to save money.
Preventing Grout Problems in the Future
After all that work, I wanted to keep my new grout looking good. Here’s what I do:
- Seal Regularly: Apply grout sealer every 6–12 months. I do mine yearly for $10.
- Clean Weekly: Scrub grout with a vinegar-water mix to prevent mold. I spend 5 minutes a week on this.
- Fix Leaks: Check caulk and seals around the tub to keep water out. I replaced my caulk for $8.
- Ventilate the Bathroom: Run a fan or open a window after showers to reduce moisture. My exhaust fan runs 20 minutes post-shower.
- Dry the Tub: Wipe down tiles after use to prevent water buildup. I keep a squeegee handy.
What Other DIYers Say
I checked out home improvement forums and Reddit to see what others experienced. Many DIYers used grout saws like I did, with good results. One person swore by a $20 oscillating tool for fast removal. Another warned about chipping tiles if you rush, which I learned firsthand. Some hired pros for epoxy grout, saying it was worth the cost. The advice? Prep well, use the right tools, and take your time.
Grout Removal in Different Bathtub Types
Not all bathtubs are the same. Here’s what I found:
- Ceramic Tile: Common in most tubs, easy to remove with a grout saw. My tub was ceramic, and it went smoothly.
- Porcelain Tile: Similar to ceramic but denser. A rotary tool helps with tough grout.
- Glass or Stone Tile: Delicate, so go slow to avoid cracks. My sister’s glass tiles needed careful sawing.
- Epoxy Grout: Rare but super hard. I’d use a pro or heavy-duty rotary tool.
Test your tools on a small area to avoid damage.
Grout Removal for Car Owners
Since this is for an automotive blog, let’s tie it to cars. Grout removal skills can help with car projects:
- Cleaning Car Interiors: The same vinegar mix I used on grout cleans car seats and dashboards. I revived my Civic’s interior for $5.
- Fixing Trim: Grout saws can cut adhesive for loose car trim. I fixed a peeling dashboard strip this way.
- Organizing Tools: The shop vac and cloths I used for grout cleanup work great for car detailing.
The patience and precision from grout removal translate to automotive DIY tasks.
My Final Thoughts
Taking on the task of removing grout from my bathtub was a challenge, but it was so worth it. That grimy, moldy grout is gone, and my bathroom looks like it got a facelift. I learned that with the right tools—a grout saw, some elbow grease, and a bit of patience—you can transform your tub without breaking the bank. Whether you’re dealing with cracked grout or just want a fresh look, my step-by-step process will guide you through.
Prep well, stay safe, and don’t rush. If the job feels too big, a pro can step in. I hope my experience inspires you to tackle your bathtub grout and enjoy a sparkling, healthy bathroom. Grab that grout saw, and let’s make your tub shine!
FAQs
How long does it take to remove grout from a bathtub?
It took me about 3 hours for a standard tub surround. Larger areas or tough grout might take 4–6 hours.
Can I remove grout without damaging tiles?
Yes, if you score lines first and work slowly with a grout saw. I chipped a tile by rushing, so take your time.
Do I need a rotary tool to remove grout?
Not always. A grout saw works for most jobs, but a rotary tool like a Dremel speeds up tough or epoxy grout.
Is grout removal dusty?
Yes, it creates a lot of dust. I used a shop vac and wore a mask to keep it under control.
Can I use vinegar to remove grout?
Vinegar softens grout slightly but won’t remove it. I sprayed it on stubborn spots before sawing.
Should I hire a professional for grout removal?
For epoxy grout, large areas, or if you’re worried about tile damage, a pro is worth it. I did mine myself to save $200–$500.