How to Remove Scratches from Wood Furniture
Scratches happen on wood furniture. It’s a common problem that many people face. You might worry that fixing them is hard, especially if you haven’t done it before.
But don’t fret! There are simple ways to make those scratches disappear. We’ll walk you through exactly how to remove scratches from wood furniture, step by step.
You’ll learn easy tricks to make your furniture look great again.
Making Wood Furniture Look New Again
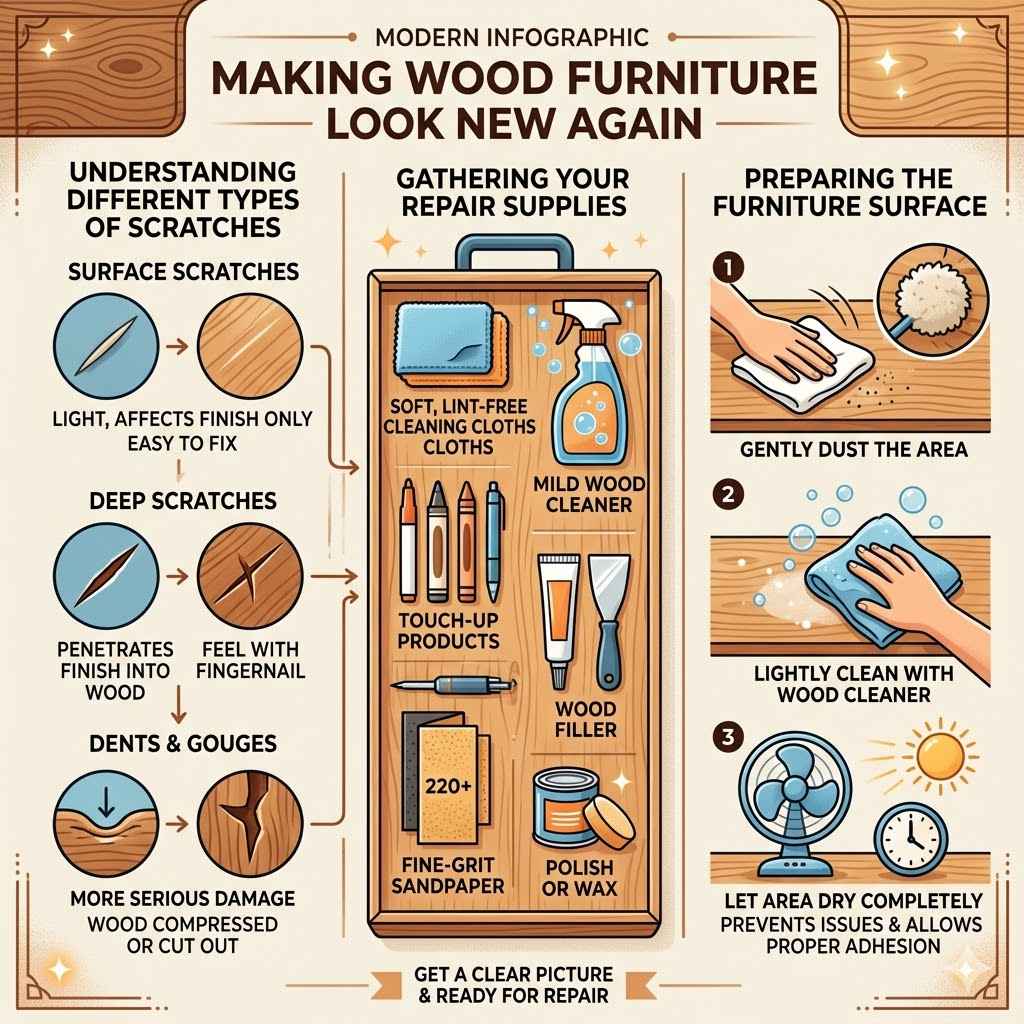
This section will guide you through the initial steps of identifying scratch types and preparing your furniture for repair. It’s about getting a clear picture of the damage and making sure the surface is ready for whatever fix you choose. We’ll cover what you need to look for and how to clean the area properly so your repairs work best.
Understanding Different Types of Scratches
Not all scratches are the same. Knowing the difference helps you pick the right repair method. Surface scratches are usually light and only affect the finish, like a dull line.
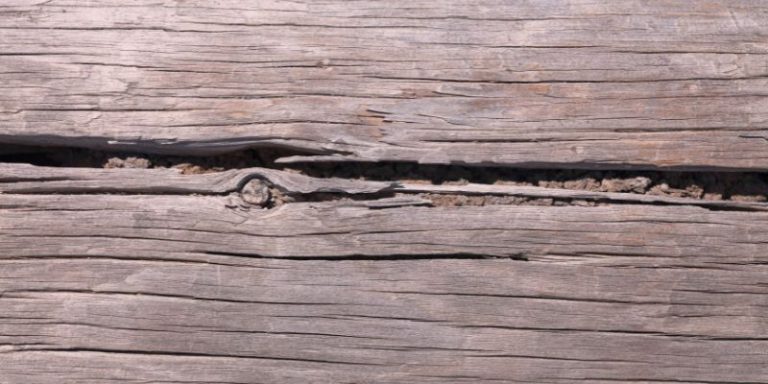
Deeper scratches go into the wood itself, and you can feel them with your fingernail. Sometimes, scratches might have some color missing or be a different shade than the surrounding wood. The depth and appearance of a scratch tell us how far down the wood it has gone.
Light scratches are the easiest to fix. They often just need a little buffing or a touch-up product that matches the wood’s color. These are usually found on the top coat of the finish.
You might see them when light hits the surface just right.
Deeper scratches go through the finish and into the wood. You can feel these with your finger. They might look darker or lighter than the wood around them.
Fixing these takes a bit more effort, often involving filling the scratch.
There are also dents and gouges. Dents are areas where the wood has been compressed. Gouges are more like cuts or deep marks.
These are more serious damage and might need different methods than simple scratches.
Gathering Your Repair Supplies
Before you start fixing, you need the right tools. Having everything ready means you can work smoothly. You won’t have to stop and search for something mid-repair.
It makes the whole process faster and less frustrating.
- Cleaning Cloths: Soft, lint-free cloths are essential. You’ll use them for cleaning and buffing. Microfiber cloths work very well because they don’t leave fuzz behind.
- Wood Cleaner: A mild wood cleaner helps remove dirt and grime. This prepares the surface for repair. Avoid harsh chemicals that could damage the finish.
- Touch-Up Products: These can include wood markers, crayons, or repair pens. They come in many wood colors to match your furniture.
- Wood Filler: For deeper scratches, wood filler is needed. It fills the gap and can be sanded smooth. Choose a color that matches your wood or one you can paint or stain.
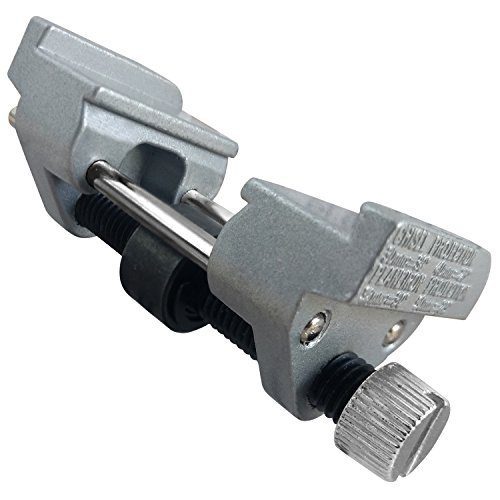
- Fine-Grit Sandpaper: If you use wood filler, you’ll need very fine sandpaper to smooth it out. Start with a grit around 220 or higher.
- Polish or Wax: After repairs, a good polish or wax can restore shine and protect the area.
Having these items on hand ensures you’re prepared for most common furniture scratches. It’s like having a small toolbox just for wood touch-ups.
Preparing the Furniture Surface
A clean surface is key for any repair. Dirt or grease can get in the way and mess up your fix. It can make the repair look worse.
So, take your time with this step.
First, gently dust the area around the scratch. Use a soft cloth to remove any loose particles. Then, lightly dampen another soft cloth with your wood cleaner.
Wipe the scratch and the surrounding area to remove any buildup.
Make sure the area is completely dry before you do anything else. You don’t want water left on the wood, as it can cause more problems. A dry surface lets the repair products stick properly and work as intended.
Easy DIY Methods for Minor Scratches
This part focuses on simple, effective ways to fix light scratches. These are common issues that most people can handle with basic household items or inexpensive kits. We’ll explore techniques that work on the finish of the wood without needing major skills.
Using Household Items for Surface Scratches
Sometimes, you can fix light scratches using things you already have at home. These methods are great for minor damage and can often give surprisingly good results. They work by filling in the scratch or slightly altering the finish to blend it in.
Walnut or Pecan Method
This is a classic trick for light scratches on darker woods. The natural oils in the nut can help to fill and darken the scratch.
- Take a walnut or pecan and gently rub the meat of the nut over the scratch.
- Press firmly but don’t break the nut.
- Rub back and forth along the scratch.
- Let the oils soak into the wood for a few minutes.
- Gently buff the area with a soft, clean cloth.
This method works best on scratches where the wood is just slightly lighter. It’s a quick fix that requires no special products. The nut’s natural oils can also add a bit of shine.
Mayonnaise or Petroleum Jelly
For very light scratches or scuffs on a finished surface, mayonnaise or petroleum jelly can sometimes help. The oils in these products can help to moisturize and blend the scratch into the surrounding finish.
- Apply a small amount of mayonnaise or petroleum jelly directly to the scratch.
- Let it sit for at least an hour, or even overnight for tougher marks.
- Wipe away the excess with a clean, soft cloth.
- Buff the area to a shine.
This is a very gentle approach. It’s best for scratches that haven’t gone deep into the wood. It’s often used as a first attempt for subtle damage.
Toothpaste (Non-Gel White Paste)
Mild abrasive toothpastes can help buff out very fine, superficial scratches on some finishes. It’s crucial to use a non-gel, white paste. Gel toothpastes or those with harsh crystals can cause more damage.
- Apply a tiny amount of white, non-gel toothpaste to a soft cloth.
- Gently rub the toothpaste over the scratch in a circular motion.
- Do this for only a few seconds.
- Wipe the area clean with a damp cloth.
- Dry and buff with a clean cloth.
This method is a bit more active and requires caution. It’s only for the most minor surface abrasions. The slight abrasion in the toothpaste can help to level the finish around the scratch.
Using Wood Repair Markers and Crayons
These are designed specifically for furniture touch-ups. They are one of the most popular solutions for mild to moderate scratches. They are easy to use and come in a wide range of colors.
Wood markers are like felt-tip pens filled with stain. Wood crayons are waxy sticks that fill in the scratch. Both are great for blending color and filling minor surface imperfections.
- Choose a marker or crayon that closely matches your wood’s color. It’s often better to go slightly lighter and build up color.
- Clean the scratched area thoroughly and let it dry.
- If using a marker, lightly color over the scratch following the grain of the wood. Apply thin layers.
- If using a crayon, press it into the scratch, filling the void. Then, gently rub it into the scratch with your finger.
- Let it set for a few minutes.
- Gently buff the area with a soft cloth to remove excess color and blend.
These products are fantastic for covering up small nicks and scratches on tabletops, chair legs, and trim. They help to camouflage the damage effectively.
The Iron and Damp Cloth Trick
This method is for dents where the wood fibers are compressed but not broken. The steam from the iron can cause the wood to swell back up. It’s a clever way to fix those accidental dents.
- Place a damp cloth (not soaking wet) over the dent.
- Set an iron to a medium-low heat setting with no steam.
- Briefly press the iron onto the cloth over the dent for about 5-10 seconds.
- Lift the iron and cloth. Check if the dent has risen.
- You may need to repeat this a few times, letting the wood cool slightly in between.
This method is very effective for minor dents on solid wood furniture. Be careful not to hold the iron on for too long, as this can damage the wood finish.
Advanced Techniques for Deeper Scratches and Damage
When scratches go beyond the surface finish, you need more robust solutions. This section covers methods for deeper damage, including using wood filler and understanding how to repair more significant imperfections. These techniques offer lasting solutions for furniture that has seen more wear.
How to Use Wood Filler Correctly
Wood filler is your best friend for scratches that have gone deep into the wood. It’s a putty-like substance that fills the gap, dries hard, and can be sanded smooth to match the surrounding surface.
Using wood filler requires a bit of patience, but the results are usually excellent. It’s a common technique for furniture restoration.
- Ensure the scratch is clean and dry. If there are any loose splinters, trim them away carefully with a craft knife.
- Apply the wood filler to the scratch using a putty knife. Press it firmly into the scratch to ensure there are no air pockets.
- Overfill the scratch slightly. The filler will shrink a little as it dries.
- Let the wood filler dry completely according to the product instructions. This can take several hours.
- Once dry, gently sand the filled area smooth using fine-grit sandpaper (around 220 grit). Sand in the direction of the wood grain.
- Wipe away the dust with a clean cloth.
- If the color doesn’t match perfectly, you can use a wood stain or touch-up pen over the dried filler to blend it in.
Wood filler comes in many colors, and some can be stained. This allows for a good match with your existing wood. Always use a filler that is designed for furniture or woodworking.
Repairing Gouges and Deep Dents
Gouges and deep dents are more challenging than scratches. They involve missing material or significant compression of the wood. For these, you often need a combination of filling and color matching.
Sometimes, for very large gouges, you might need a two-part wood filler or an epoxy wood filler. These are stronger and more durable. They can withstand more pressure and wear.
- Clean the area thoroughly. Remove any loose wood or debris.
- If the dent is deep, you might be able to use the iron and damp cloth method first to raise the wood fibers.
- For gouges, carefully apply wood filler. For very deep ones, you might need to apply it in thin layers, allowing each layer to partially dry.
- Ensure the filler is packed tightly into the damaged area.
- Let the filler cure completely. This is crucial for a strong repair.
- Sand the dried filler level with the surrounding wood.
- Apply stain or a matching furniture polish to blend the repaired area. You might need to experiment with colors to get a good match.
For significant damage, sometimes professional help is the best option. But for most common issues, these DIY methods can make a big difference.
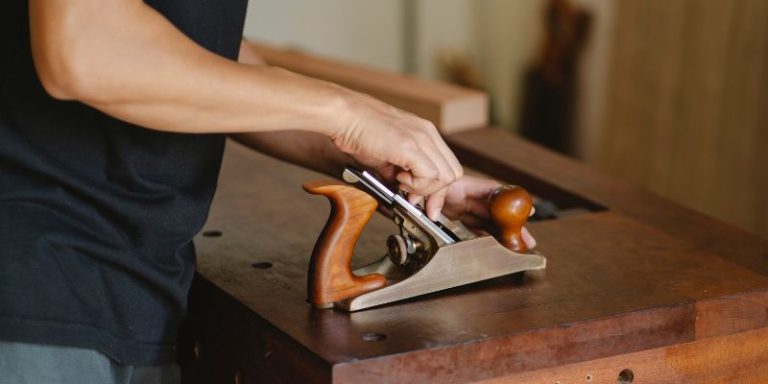
Sanding and Refinishing Small Areas
When you’ve used wood filler or if a scratch is particularly stubborn, you might need to do some light sanding. This helps to create a smooth surface for your repair.
It’s important to use very fine grit sandpaper. Anything too coarse can create new scratches. The goal is to blend the repaired area seamlessly with the rest of the furniture.
- After the wood filler is dry and hardened, gently sand the area with 220-grit sandpaper or higher.
- Always sand in the direction of the wood grain.
- Feather the edges of the sanded area so it blends into the surrounding finish. This means gently sanding the area just around the repair.
- Wipe away all sanding dust with a tack cloth or a slightly damp cloth.
- Apply a matching furniture polish or a thin coat of stain if needed to match the color.
- Once dry, you can apply a coat of furniture wax for protection and shine.
This process helps to make the repair nearly invisible. It brings back the smooth texture and uniform appearance of your wood furniture.
Protecting Your Wood Furniture From Future Scratches
Once you’ve fixed your furniture, you’ll want to keep it looking good. This part of the guide focuses on preventing new scratches. It’s all about making smart choices and using protective measures.
Choosing the Right Furniture Polish and Wax
Regular polishing and waxing are great for maintaining the finish of your wood furniture. They add a protective layer and can help to fill in very minor imperfections.
Furniture polish adds shine and helps to repel dust. Furniture wax provides a harder, more durable protective coating. Both help to keep the wood looking its best and can offer some defense against minor abrasions.
- Polish: Use a good quality furniture polish designed for wood. Apply it with a soft cloth, moving in the direction of the wood grain. Buff gently to a shine.
- Wax: Paste wax is often recommended for a durable finish. Apply a thin layer and let it haze over before buffing it to a high sheen with a clean cloth.
Using these products regularly can make your furniture more resistant to everyday wear and tear. It also keeps the wood looking healthy and vibrant.
Using Coasters and Placemats
This is one of the simplest and most effective ways to prevent scratches. Coasters protect tabletops from drink rings and minor abrasions. Placemats shield dining tables from cutlery and plate movement.
Make it a habit for everyone in the household to use them. Keep a stylish set of coasters visible and within easy reach. This gentle reminder can save your furniture a lot of grief.
- Coasters: For drinks, always use coasters. They prevent water rings and scratches from the bottom of glasses or mugs.
- Placemats: When eating, use placemats. They act as a buffer between plates, cutlery, and the table surface.
- Trivets: For hot dishes, always use trivets. They protect the wood from heat damage which can also cause visible marks.
These small accessories are a big help in preventing surface damage. They are a crucial part of the how to remove scratches from wood furniture preventative strategy.
Strategic Furniture Placement and Use
Where you put your furniture and how you use it makes a difference. Avoid placing furniture where it will constantly be bumped or rubbed against.
For example, don’t place a desk where a chair will scrape against it all day. Also, be mindful of pets and children. They can accidentally cause scratches.
Consider furniture pads for the bottom of chair legs and tables.
- Avoid High-Traffic Areas: Place valuable or delicate pieces away from busy walkways in your home.
- Pet Protection: If you have pets, consider covers or mats in areas where they frequently scratch or play.
- Child-Friendly Zones: Designate play areas for children that might be less damaging to furniture surfaces.
- Furniture Pads: Add felt or rubber pads to the bottom of table and chair legs. This stops them from scratching floors and helps if furniture is moved.
Thinking about these factors can go a long way in keeping your wood furniture in pristine condition. It’s about being aware of the daily interactions your furniture has.
When to Call a Professional
While many scratches can be fixed at home, some damage is too extensive for DIY methods. Knowing when to seek expert help is important. Professionals have specialized tools and knowledge.
If your furniture is antique, very valuable, or has extremely deep damage, a professional restorer is often the best choice. They can assess the damage and provide the most appropriate and least intrusive repair.
- Deep Wood Damage: If the wood is deeply splintered, cracked, or missing large sections.
- Complex Finishes: Antique furniture often has intricate finishes that are difficult to match.
- High Value Items: If the piece is a valuable antique or heirloom, professional restoration is recommended to preserve its value.
- Uncertainty: If you are unsure about the type of wood or finish, or how to proceed, it’s better to ask an expert.
A professional can bring back the beauty of your furniture without risking further damage. They have the skills to make repairs almost invisible.
Frequently Asked Questions
Question: Can all scratches on wood furniture be removed?
Answer: Most minor to moderate scratches can be removed or significantly lightened with the right techniques and products. Very deep gouges or damage to antique finishes might require professional help or might not be completely invisible after repair.
Question: How long does it take for wood filler to dry?
Answer: Drying times for wood filler vary by product and thickness. Most fillers need at least a few hours to dry completely, but some may require overnight drying before sanding and finishing.
Question: What is the best way to match the color of a wood repair?
Answer: Using wood markers, crayons, or stains in shades that closely match your furniture’s color is key. It’s often best to start with a lighter shade and build up the color gradually. Testing on an inconspicuous area first is also a good idea.
Question: Can I use regular sandpaper to fix scratches?
Answer: It’s best to use fine-grit sandpaper, typically 220-grit or higher, for smoothing wood filler or blending repaired areas. Coarser sandpaper can create new scratches and damage the surrounding finish.
Question: How often should I polish or wax my wood furniture?
Answer: For most furniture, polishing can be done every 1-3 months, depending on use and environmental conditions. Waxing is typically done every 6-12 months to maintain a protective layer.
Conclusion
You now have a clear guide on how to remove scratches from wood furniture. From simple home remedies to using wood filler, these methods offer practical solutions. Protecting your furniture with care and preventative measures is also key.
With these steps, you can restore the beauty of your wood pieces. Your furniture will look better for years to come.