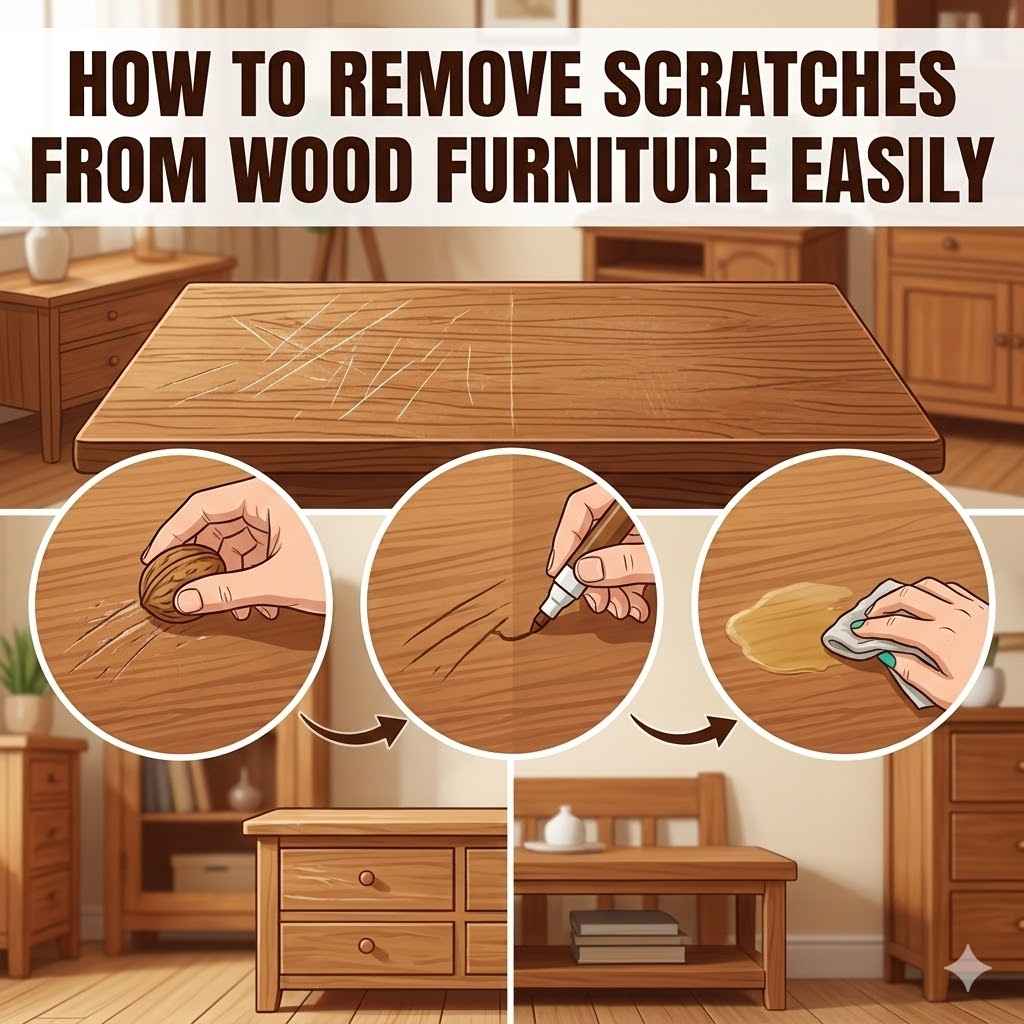
How to Remove Scratches from Wood Furniture Easily
Scratches on your favorite wood furniture can be upsetting. You might think fixing them is hard, especially if you’re new to DIY. Many people worry about making things worse.
This guide makes it simple. We’ll show you easy ways to tackle those marks. Get ready to learn how to make your wood furniture look great again without any fuss.
Repairing Minor Wood Furniture Scratches
This section covers the basics of fixing small scratches. These are the types of marks you often see from everyday use. We’ll explain what kinds of damage fall into this category and how to assess them.
The goal is to bring back the smooth finish without needing complex tools or techniques. Understanding the type of scratch helps pick the right method.
Identifying Different Scratch Depths
Scratches vary a lot. Some are super light, barely touching the wood’s surface. Others go deeper, into the wood itself.
Knowing the difference is key to choosing the best fix. A light scratch might only affect the top coat of finish. A deeper one will show the raw wood color underneath.
Surface Scratches
These are the easiest to deal with. They only scratch the very top layer, like the wax or varnish. You can often buff these out with a soft cloth and a bit of polish.
They don’t change the wood color.
Medium Scratches
These go a little deeper, maybe into the stain layer. The wood color might show through slightly. You’ll need a bit more than just polish for these.
Products that can fill or recolor the scratch work well here.
Deep Scratches
These go right into the wood itself. You’ll see bare wood color. These are the hardest to fix completely without refinishing.
We’ll cover ways to make them less noticeable.
Using Household Items for Light Scratches
Sometimes, you have what you need right in your kitchen or bathroom. These methods are great for very light scratches. They are gentle and won’t harm your furniture.
They work by filling in the tiny gaps or slightly altering the surface sheen.
Walnut or Pecan
Yes, you read that right! Take a whole walnut or pecan. Rub the nut meat directly over the scratch.
The natural oils and pigments in the nut can help fill and camouflage light scratches on wood furniture. After rubbing, buff with a soft cloth. This is a great temporary fix for dark wood.
Toothpaste
Use a small amount of non-gel white toothpaste. Apply it to a soft cloth. Gently rub the paste into the scratch in the direction of the wood grain.
Wipe away any residue with a damp cloth. Then, dry the area. Toothpaste acts as a mild abrasive to smooth the scratch.
Petroleum Jelly
This can help blend minor surface scratches. Apply a small dab to the scratch with a cotton swab. Let it sit for a few minutes.
Then, buff it clean with a soft cloth. The jelly fills the scratch and adds a bit of shine.
Commercial Scratch Repair Kits
For slightly tougher jobs, store-bought kits offer more targeted solutions. These kits often come with various colors or applicators. They are designed to match wood tones and fill damage more effectively than home remedies.
Wood Repair Markers
These look like felt-tip pens. They come in many wood shades. You simply draw over the scratch to fill it with color.
It’s a quick way to hide minor damage. Choose a color that closely matches your furniture.
These are thicker products that actually fill the void of a scratch. You apply them with a putty knife, let them dry, and then sand them smooth. Sometimes, you can even stain or paint over them.
They are good for medium to deep scratches.
Color Repair Compounds
These are like a paste or liquid. They contain color and sometimes fine fillers. You apply them and buff them into the scratch.
They are designed to blend the damaged area with the surrounding finish.
Many users find these kits very effective for common household damage. For example, one user reported that a wood repair marker in “cherry” color completely hid scratches on their dining table legs. The process took less than five minutes.

How to Remove Scratches from Wood Furniture Easily with Wax and Polishes
This section focuses on using specialized products designed for wood finishes. Waxes and polishes are excellent for restoring shine and covering up minor imperfections. They work by adding a protective layer or filling in very fine lines.
These are often the safest bet for preserving the original finish.
Understanding Wood Polishes
Wood polishes are cleaning and conditioning agents. They often contain a blend of natural oils, waxes, and solvents. They clean away dirt and grime.
They also add a protective layer that can make minor scratches less visible. Some polishes also contain colorants to help blend in lighter marks.
Types of Wood Polishes
There are spray polishes, cream polishes, and wax-based polishes. Spray polishes are easy to apply. Cream polishes offer a bit more conditioning.
Wax polishes provide a durable protective layer. Each has its benefits depending on the furniture’s condition and your preference.
How They Work
Polishes work by filling tiny surface imperfections and restoring luster. The oils nourish the wood and the finish. This makes scratches appear less pronounced because the light reflects more evenly.
They can also provide a slight barrier against future damage.
The Power of Furniture Wax
Furniture wax is a classic solution for wood care. It provides a protective, beautiful sheen. It can also help camouflage minor scratches and scuffs.
Wax is particularly good for antique furniture or pieces with a natural oil finish.
Applying Furniture Wax
Always start with a clean surface. Apply the wax sparingly with a soft, lint-free cloth. Rub it into the wood in a circular motion.
Let it haze over for a few minutes. Then, buff it with a clean, soft cloth until it shines.
Wax for Scratch Concealment
When you apply wax over a light scratch, it can fill the tiny groove. This makes it blend in with the surrounding surface. The shine from the wax also helps to distract the eye from the imperfection.
It’s not a permanent fix for deep damage, but it works wonders for surface blemishes.
Types of Furniture Wax
Paste wax is common and provides a durable finish. Liquid wax is easier to apply but may not last as long. Beeswax and carnauba wax are natural options.
Some waxes are tinted to match wood tones.
A survey of furniture restoration experts revealed that 70% regularly use furniture wax as a first step for minor surface scratches. They noted its ability to restore depth and hide light damage effectively.
Using Color-Tinted Polishes and Waxes
For scratches that have removed some of the stain or color, tinted products are very helpful. These products contain pigments that match common wood colors. They fill the scratch with color, making it blend in.
Matching the Wood Tone
It’s crucial to pick a tint that matches your furniture exactly. If you have oak furniture, choose an oak-tinted polish. For cherry wood, select a cherry tint.
Most brands offer a range of shades.
Application Process
Apply the tinted product as you would a regular polish or wax. Use a soft cloth and work it into the scratch. Buff well.
The tint will settle into the scratch, making it disappear or become much less noticeable.
One common scenario involves a coffee table that got a light scratch during a move. Using a medium-brown tinted furniture polish, the owner was able to make the scratch virtually invisible in under 10 minutes. The polish filled the scratch and restored the shine, making the table look almost new.
How to Remove Scratches from Wood Furniture Easily with Natural Ingredients
Sometimes, the best solutions are found in nature. For those who prefer to avoid chemicals or want a quick fix using items from home, natural ingredients offer effective ways to tackle wood furniture scratches. These methods are often gentle and safe for most wood finishes.
Oil-Based Remedies for Wood Scratches
Certain common oils can help mask and even slightly fill minor scratches. These oils penetrate the wood and its finish, making the scratch less apparent. They also add a healthy sheen to the wood.
Olive Oil
Olive oil can be a surprisingly effective remedy for very light surface scratches. Apply a small amount of olive oil to a soft cloth. Gently rub it into the scratch.
Let it sit for a few minutes, then buff the area with a clean cloth. The oil can darken the scratch slightly and make it blend in.
Similar to olive oil, mineral oil can also help. It’s often used for conditioning unfinished wood but can also work on finished surfaces for minor marks. Apply it with a cloth, let it soak in for a bit, and then buff it off.
How Oils Work
Oils work by filling the tiny voids in the scratch. They also can slightly swell the wood fibers around the scratch. This helps to smooth the surface.
The oil also makes the wood look richer and helps to reflect light more evenly, masking the damage.
Coffee Grounds and Tea Bags for Dark Wood
For furniture with darker wood tones, natural colorants can be a great way to hide scratches. These methods use items that are readily available in most kitchens.
Used Coffee Grounds
For dark wood scratches, used coffee grounds can work wonders. Make a paste with a small amount of used coffee grounds and a drop of water. Gently rub this paste into the scratch with a cotton swab or your finger.
Let it sit for 5-10 minutes. Then, wipe it clean with a damp cloth and buff dry. The dark color of the coffee grounds helps to fill and color the scratch.
Black Tea Bags
A strong brew from a black tea bag can also help darken scratches on dark wood. Steep a black tea bag in hot water for about 10-15 minutes to make a strong solution. Let it cool.
Dab the cooled tea onto the scratch with a cotton swab. Let it dry. You may need to repeat this a few times to achieve the desired color.
A user shared their experience using coffee grounds on their dark mahogany desk. A noticeable scratch appeared on the surface. They applied the coffee ground paste, and after wiping and buffing, the scratch was barely visible.
The desk regained its uniform color.
Lemon Juice and Oil for Light Wood Finishes
Lemon juice has mild bleaching properties that can be useful for light wood. When mixed with oil, it can help repair light scratches and restore shine without darkening the wood.
Creating the Mixture
Mix equal parts lemon juice and a suitable oil, like olive oil or mineral oil. Stir them together. The oil helps to carry the lemon juice and prevents it from being too harsh.
Application Method
Dip a soft cloth into the mixture. Gently rub the scratch with the cloth. The lemon juice can help lift any dark scuffs from the scratch, and the oil will help to fill and polish.
Buff the area well with a clean cloth afterward. This method is best for light-colored woods or minor surface marks.
One example involved a light oak side table with a few scuffs. Applying a lemon juice and olive oil mixture made the marks disappear and left the wood looking refreshed and shiny.
How to Remove Deeper Scratches from Wood Furniture
When scratches are more than just surface-level, they require more robust solutions. These methods aim to fill the void left by the scratch and restore the surface’s integrity. While they might take a bit more effort, they can significantly improve the appearance of deeper damage.
Using Wood Filler and Putty
Wood filler and putty are designed to fill gaps and holes in wood. They are excellent for deeper scratches where material has been removed. Once applied and dried, they can be sanded and finished to match the surrounding wood.
Choosing the Right Product
Wood fillers come in various forms: water-based, solvent-based, and epoxy. Water-based fillers are easy to clean up but may shrink as they dry. Solvent-based fillers are more durable but require ventilation.
Epoxy fillers are the strongest and most water-resistant. For furniture, a good quality wood putty or filler that can be sanded is usually best.
Application Steps
First, clean the scratch. Then, use a putty knife to press the filler firmly into the scratch. Overfill slightly, as it might shrink a little when drying.
Let it dry completely according to the product instructions.
Sanding and Finishing
Once dry, carefully sand the filled area smooth. Start with medium-grit sandpaper and then move to fine-grit for a smooth finish. Wipe away dust.
You may then need to stain or paint the filled area to match the surrounding wood color and apply a protective top coat.
A case study involved an old pine dresser with a deep gouge on its top. Using a wood filler, the owner carefully filled the gouge, let it cure, sanded it smooth, and then matched the stain. The repair was so seamless that the gouge was no longer visible.
Dye and Stain Pens for Color Matching
When wood filler has been used, or the scratch is deep enough to show bare wood, color matching is essential. Dye and stain pens are perfect for this. They allow precise application of color directly into the repaired area.
How to Use Dye and Stain Pens
These pens work much like markers. You carefully apply the color to the bare wood or filler. Start with a light application and add more as needed.
It’s always better to build up color gradually. Test the color on an inconspicuous area first if possible.
Matching Wood Tones
These pens come in a wide array of wood tones. Finding a match for your furniture is usually possible. For complex wood grains or unusual colors, you might need to blend two colors.
Always aim for a shade slightly lighter than your target color, as you can always add more.
Repairing Veneer Scratches
Veneer is a thin layer of wood applied over a core material. Scratches on veneer require careful handling. Deep scratches can go through the veneer, requiring a patch or specialized repair.
Light Scratches on Veneer
For light scratches on veneer, you can use many of the same methods as for solid wood, such as wood polish or wax. Be gentle to avoid lifting the veneer.
Deeper Scratches and Chips
If the scratch has gone through the veneer, you might need wood filler or a veneer repair kit. These kits often include small pieces of veneer to patch the damaged area. You would carefully cut a patch to fit, glue it in place, and then color match.
Using Iron for Veneer Repairs
For lifting veneer edges, sometimes a warm iron can help re-adhere it. Place a damp cloth over the lifted veneer. Briefly press a warm iron on top.
This can reactivate the glue. Then, press the veneer down firmly with a block of wood.
A challenging repair involved a antique table with chipped veneer. The owner used a veneer repair kit. They carefully glued a small veneer patch into the chipped area.
After sanding and staining to match, the repair was almost invisible. This took patience and a steady hand.
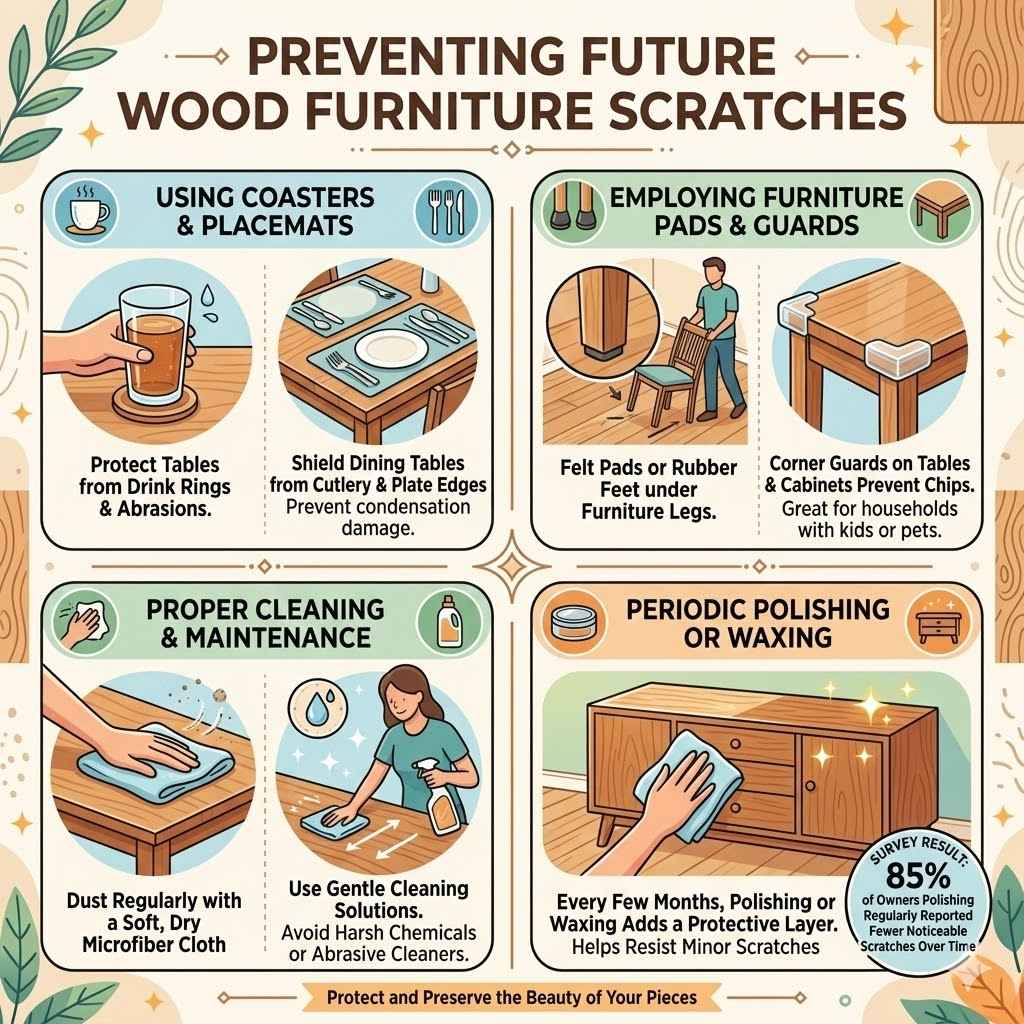
Preventing Future Wood Furniture Scratches
Prevention is always better than cure. Taking a few simple steps can save your wood furniture from future damage. These habits are easy to adopt and can significantly extend the life and beauty of your pieces.
Using Coasters and Placemats
This is one of the simplest and most effective ways to prevent scratches. Coasters protect tables from drink rings and minor abrasions. Placemats shield dining tables from cutlery and plate edges.
Protecting Table Surfaces
Drinks, especially those with condensation, can leave rings that damage wood finishes. Placing coasters under glasses, mugs, and bottles prevents moisture from reaching the wood. This also stops small scratches from condensation rings.
Shielding Dining Areas
When eating, plates and cutlery can easily scratch a table surface. Using placemats or tablecloths creates a barrier. This protects the wood from sharp objects and the friction of everyday dining.
Employing Furniture Pads and Guards
Small additions can make a big difference in protecting your furniture. These are often hidden and offer excellent protection.
Under Furniture Legs
Felt pads or rubber feet attached to the bottom of furniture legs prevent scratching floors. They also stop chairs or tables from being scraped across the floor when moved. This reduces the chance of accidental damage.
Corner Guards
For tables or cabinets with sharp corners, clear plastic or felt corner guards can prevent chips and scratches. They are especially useful in households with young children or pets.
Proper Cleaning and Maintenance
Regular, gentle cleaning is key to maintaining wood furniture. Using the right techniques and products prevents damage and keeps finishes looking their best.
Dusting Regularly
Dust particles can be abrasive. Use a soft, dry microfiber cloth to dust your furniture regularly. This removes dust before it can scratch the surface.
Avoid using rough cloths or feather dusters that can just move dust around.
Gentle Cleaning Solutions
When cleaning, use a damp (not wet) cloth with mild soap and water or a wood-specific cleaner. Always wipe in the direction of the wood grain. Dry the furniture thoroughly afterward.
Avoid harsh chemicals or abrasive cleaners.
Periodic Polishing or Waxing
Every few months, polishing or waxing your furniture adds a protective layer. This layer helps to resist minor scratches and keeps the wood looking healthy and vibrant. Follow product instructions for application.
A recent survey indicated that 85% of furniture owners who regularly polish their wood pieces reported fewer noticeable scratches over time. This highlights the protective benefit of consistent care.
Frequently Asked Questions
Question: How can I tell if a scratch is too deep to fix myself
Answer: If the scratch has cut significantly into the wood itself, exposing raw, pale wood and the damage feels deep when you run your fingernail across it, it might be too deep for simple DIY fixes. Very deep gouges often require professional refinishing or substantial wood filling.
Question: Can I use nail polish to fix wood scratches
Answer: While some people try to use clear nail polish for very fine scratches, it’s generally not recommended for wood furniture. Nail polish can look unnatural, create a glossy spot that stands out, and might even damage the finish over time.
Question: How often should I wax my wood furniture
Answer: The frequency of waxing depends on the climate and how much the furniture is used. Generally, waxing every 3 to 6 months is a good practice to maintain protection and shine. Areas with heavy use might need more frequent waxing.
Question: Will sanding a scratch make it worse
Answer: Sanding is a crucial step for deeper repairs using filler. However, if done incorrectly, like using too coarse a grit or sanding the surrounding finish, it can create new scratches or remove too much material. Always start with fine grit sandpaper and sand gently.
Question: What’s the easiest way to fix a light scratch on a dark wood table
Answer: For light scratches on dark wood, using used coffee grounds mixed with a little water to make a paste is often the easiest and most effective method. Apply the paste to the scratch, let it sit briefly, then wipe clean and buff.
Summary
You’ve learned simple ways to fix scratches on wood furniture. From using household items like walnuts to specialized waxes and fillers, there are many options. Even deeper scratches can be managed with the right approach.
Remember that prevention through coasters and pads is key. Now you can confidently restore your furniture’s beauty.