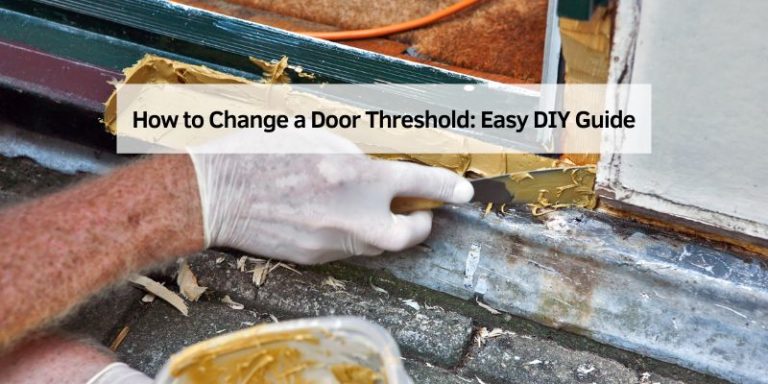
How to Repair a Door Threshold Like a Pro
Fixing a damaged door threshold can seem tricky, especially if you’re new to home repairs. Many people find themselves staring at a splintered or loose threshold, wondering where to begin. It might look like a big job, but with the right guidance, you can tackle it easily.
This guide will walk you through how to repair a door threshold like a pro. We’ll break down each step so you can get your doorway looking great again without any fuss. Get ready to learn a simple, step-by-step method that anyone can follow to make this common home repair a breeze.
Understanding Door Thresholds and Common Issues
A door threshold, also known as a door sill or door saddle, is the strip that sits on the floor between two rooms or between the inside and outside of a building. Its main purpose is to bridge the gap between floor surfaces, preventing drafts, dust, and insects from entering. Thresholds also help support the door frame and can add a finished look to an entryway.
When we talk about repairing a door threshold, we’re usually dealing with common problems that arise from daily wear and tear. These can include warping, cracking, splintering, or the threshold becoming loose. Water damage is another frequent culprit, especially for exterior thresholds, leading to rot or mold. The material of the threshold itself also plays a role; solid wood thresholds are prone to rot and insect damage, while metal thresholds might get dented or corroded. Understanding these common issues is the first step to fixing them effectively.
Why Door Thresholds Get Damaged
Door thresholds face a lot of traffic and stress. People walk over them constantly, often with shoes that carry dirt and moisture. This repeated impact and exposure to elements can wear down the material over time.
Weather is a big factor, particularly for outside doors. Rain, snow, and temperature changes can cause wood to swell and shrink, leading to cracks and warping. If a threshold isn’t properly sealed or maintained, water can seep into the wood, causing rot and making it unstable.
Pets can also contribute to damage. Dogs might scratch at doors, and their claws can goude the threshold. Sometimes, heavy furniture being moved can chip or break the threshold. Even improper installation can lead to premature failure, as a threshold that isn’t secured well might loosen and shift, creating a tripping hazard and allowing drafts.
Signs Your Door Threshold Needs Repair
You’ll usually notice a few clear signs when your door threshold is in trouble. One of the most common is a noticeable gap between the bottom of the door and the threshold when the door is closed. This gap lets in drafts, which makes your home less energy-efficient and can be quite uncomfortable.
Another sign is physical damage to the threshold itself. You might see cracks, splinters, or pieces of the material breaking off. If the threshold feels soft or spongy when you press on it, it’s a strong indicator of rot, often due to water damage.
You might also hear creaking or squeaking sounds when you walk over the threshold, which often means it has become loose from the floor. A threshold that wobbles or shifts underfoot is a tripping hazard and needs immediate attention. Finally, if you see mold or mildew growing on or around the threshold, it’s a sign of moisture issues that need to be addressed to prevent further damage.

Gathering Your Tools and Materials
Before you start any repair, having the right tools and materials on hand makes the job much smoother. For most common threshold repairs, you won’t need highly specialized equipment. A good set of basic tools will likely suffice.
Think about what you’ll be doing. Are you just tightening a loose threshold, or do you need to replace a damaged section? The tools you choose will depend on the specific problem. Having everything ready beforehand means you won’t have to stop midway to search for something, which can interrupt your workflow and lead to mistakes.
Essential Tools for Threshold Repair
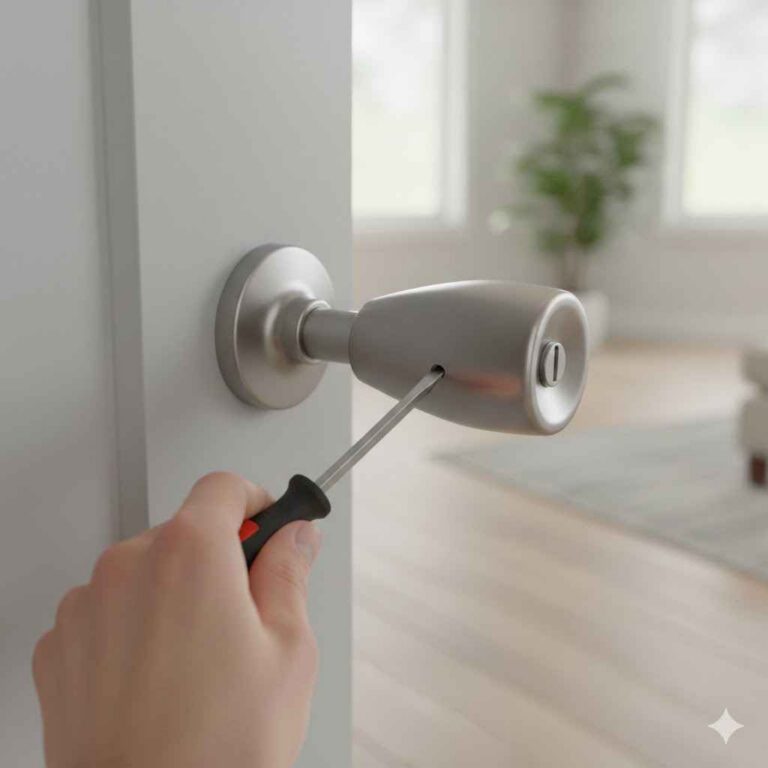
To successfully repair a door threshold, you’ll want a few key tools. First, a pry bar is very useful for gently lifting a loose threshold or removing damaged sections without causing further harm to the surrounding floor or door frame. You’ll also need a hammer and a set of screwdrivers, both Phillips head and flathead, as these are standard for removing screws and tapping pieces into place.
A utility knife or a chisel can help clean out old caulk or remove stubborn bits of wood. For measuring and cutting, a tape measure and a handsaw or a power miter saw are essential if you need to trim or replace parts of the threshold. Safety glasses are a must to protect your eyes from flying debris, and work gloves will keep your hands safe.
For filling small cracks or gaps, wood putty or a good quality wood filler will be needed. If you’re dealing with a wooden threshold and need to replace a section, you’ll also need sandpaper in various grits for smoothing.
Choosing the Right Materials for the Job
The materials you use will depend on what your threshold is made of and the type of damage. For wooden thresholds, you might need a piece of matching hardwood or softwood lumber if you’re replacing a section. It’s important to choose a wood that is durable and can withstand foot traffic.
If the damage is minor, like small cracks or gouges, wood filler or epoxy putty designed for wood can work wonders. These are easy to apply and can be sanded and painted to match the original threshold. For sealing the threshold against moisture, a high-quality exterior caulk or sealant is essential, especially for exterior doors.
If your threshold is metal, you might need a metal primer and paint to cover rust spots or scratches. For a more robust repair on a damaged wooden threshold, consider using a two-part wood epoxy. This product is very strong and can effectively bond broken pieces or fill large voids, creating a surface that’s as strong as new wood.
Step-by-Step Guide to Repairing Your Door Threshold
Now let’s get to the practical part. Repairing a door threshold might sound complicated, but by following these steps, you can achieve a professional finish. We’ll cover everything from assessing the damage to the final touches.
Step 1 Assessing the Damage and Preparing the Area
The very first thing you need to do is figure out exactly what’s wrong with your threshold. Is it loose, cracked, rotten, or all of the above? Gently push on the threshold to see if it moves or feels soft. Look for any visible cracks, splinters, or broken pieces.
Once you know the extent of the problem, it’s time to clear the area. Move any rugs or mats that are on or near the threshold. You’ll also want to protect your floor from dust and debris. Lay down a drop cloth or some old newspapers around the threshold.
If the threshold is loose, you might need to gently tap it down with a hammer to get a better look underneath, but be careful not to damage it further. For loose screws, note their location. If it’s water damage, you’ll need to ensure the area is dry before proceeding with any repairs.
Step 2 Addressing Loose Thresholds
If your threshold is loose, it’s often because the screws holding it in place have worked their way out or the subfloor underneath has deteriorated. The simplest fix is often to re-secure it with new, longer screws.
Locate where the original screws were. If the holes are stripped, you might need to fill them first. A common trick is to insert a few wooden toothpicks or matchsticks into the stripped hole, break them off flush with the surface, and then drive the screw in. This gives the screw something to grip.
If the threshold is still wobbly, you may need to lift it slightly with a pry bar. Clean out any debris from under it and apply a bead of strong construction adhesive along the bottom edge. Then, carefully press the threshold back down and drive new screws through it into the subfloor. Make sure to pre-drill pilot holes to prevent splitting the wood.
Step 3 Repairing Cracks and Splinters
For thresholds with cracks or splinters, the repair method depends on the severity. For small surface cracks, wood filler or wood putty is your best friend.
Choose a filler that matches the color of your threshold if possible, or one that can be stained or painted. Apply the filler generously into the crack with a putty knife, pressing it in firmly to ensure it fills the void completely. Smooth the excess filler so it’s flush with the surface.
Let the filler dry completely according to the manufacturer’s instructions. This can take anywhere from a few minutes to several hours. Once dry, lightly sand the filled area with fine-grit sandpaper until it’s smooth and blends in with the rest of the threshold.
For larger cracks or significant splintering, you might need a stronger solution like a two-part wood epoxy. This is more durable and can bond broken pieces back together. Clean the area thoroughly before applying the epoxy.
Step 4 Dealing with Rot and Water Damage
Rotten wood in a threshold is a more serious issue. If the rot is extensive, it’s often best to replace the damaged section or the entire threshold. However, if the rot is localized and not too deep, you might be able to repair it.
First, you need to remove all the rotten material. Use a chisel or a utility knife to carefully scrape away the soft, crumbly wood until you reach solid wood. This might involve creating a slightly larger cavity than the original rot.
Once the area is clean and dry, you can use a wood hardener. This product soaks into the remaining wood fibers and helps to strengthen them. After the hardener dries, you can fill the void with a strong wood epoxy. Build up the epoxy in layers if the cavity is deep, allowing each layer to cure partially before applying the next.
Once the epoxy has fully cured, you can sand it smooth to match the surrounding threshold. If the repaired area is significant, you might need to shape it carefully to match the original profile.
Step 5 Replacing a Damaged Section of Threshold
If a part of your threshold is beyond repair, you’ll need to replace it. This involves carefully cutting out the damaged piece and fitting a new one.
First, measure the damaged section precisely. Then, purchase a piece of lumber that matches the type and dimensions of your existing threshold. If your threshold has a specific profile, you might need to get a matching piece from a specialty lumber yard or mill your own.
Use a handsaw or a miter saw to cut the new piece to size. If the threshold is longer than a single piece, you’ll need to cut both the old and new sections at an angle (a scarf joint) so they overlap and create a strong bond. This makes the transition less noticeable and more durable.
Carefully remove the damaged section using a pry bar and chisel. Clean out the area where the old piece was. Apply wood glue or construction adhesive to the edges of the existing threshold and the new piece. Fit the new piece into place, ensuring a tight seal. Secure it with screws or finishing nails, countersinking them so they can be filled.
Step 6 Finishing and Sealing
After all repairs are made and any filler or epoxy has dried, it’s time for the finishing touches. This is where you make the repair blend in seamlessly.
Start by sanding the entire threshold. Use medium-grit sandpaper to smooth out any rough spots or uneven areas, then switch to fine-grit sandpaper for a smooth finish. If you replaced a section, sand it down to match the surrounding wood.
If your threshold is painted or stained, apply primer and paint or stain to the repaired areas to match the rest of the threshold. You might need multiple coats. Allow each coat to dry thoroughly.
Finally, seal the threshold to protect it from moisture. Use a good quality caulk or sealant to fill any small gaps between the threshold and the door frame or floor. For exterior thresholds, use a weather-resistant sealant. Apply a bead of sealant along the edges and smooth it with a wet finger or a caulking tool for a clean finish. This step is crucial for preventing future water damage and keeping out drafts.
Real-Life Examples and Scenarios
Let’s look at a couple of situations to see how these repair steps apply in practice. These examples can help you visualize the process and understand how to adapt it to your specific needs.
Example 1: The Loose Exterior Threshold
Sarah noticed a draft coming from her front door, especially on windy days. When she inspected it, she found that the wooden threshold felt loose and wobbly when she stepped on it. She also saw a small gap forming between the bottom of the door and the threshold.
She decided to tackle the repair herself. First, she cleared the entryway and laid down an old towel. She identified two screws that seemed to be holding the threshold, but they looked a bit short. She gently lifted the edge of the threshold with a putty knife.
She then found longer, sturdier screws and pre-drilled pilot holes into the subfloor. After applying a bead of construction adhesive under the threshold, she screwed it back down firmly into the subfloor. She then used exterior caulk to seal the small gap between the threshold and the door frame. The draft was gone, and the threshold felt solid again.
Example 2: The Cracked Interior Threshold
Mark’s interior threshold between his living room and hallway had developed a long, noticeable crack from years of foot traffic. It was starting to look unsightly, and he was worried about it worsening.
He decided to repair it using wood filler. He first cleaned the crack thoroughly with a brush to remove any dust or debris. He then used a putty knife to press a generous amount of wood filler deep into the crack. He smoothed the excess filler so it was flush with the threshold’s surface.
After the filler dried completely, he lightly sanded the area with fine-grit sandpaper until it was smooth. Since the threshold was stained wood, he carefully applied a matching stain to the filled area. The repair was almost invisible, and his threshold looked good as new.
Sample Scenario: Preparing for a Severe Weather Season
Imagine you live in an area prone to heavy rain and snow. Your exterior door threshold has held up well, but you want to be proactive to prevent future damage.
Your plan involves a thorough inspection of the threshold for any minor wear and tear. You’ll check for any small gaps around the edges that might let water seep in. If you find any, you’ll plan to re-caulk them with a high-quality exterior sealant. You’ll also check the condition of any protective finish on the threshold. If it looks worn, you’ll plan to reapply a sealant or protective coating. This preventative maintenance helps to ensure your threshold can withstand the harsh weather ahead.
Maintaining Your Repaired Threshold
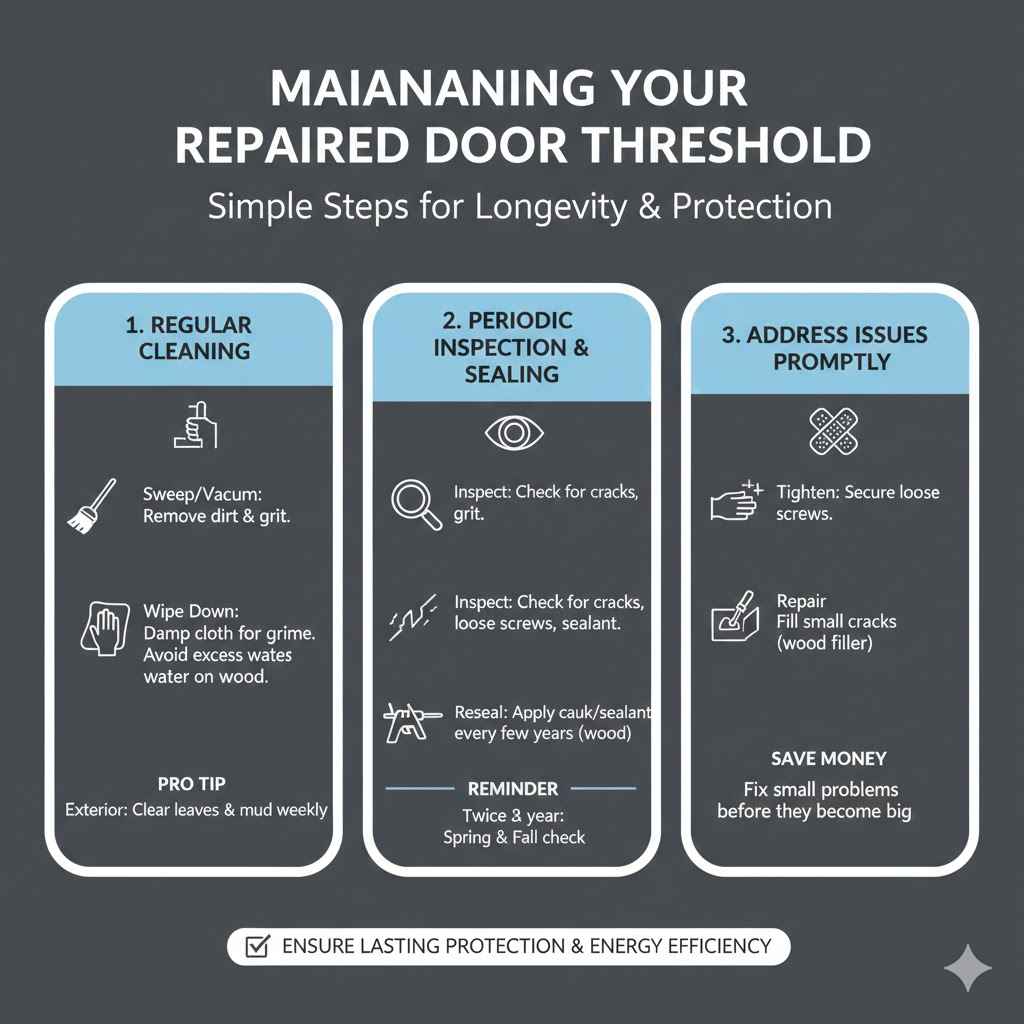
Once you’ve successfully repaired your door threshold, taking steps to maintain it will ensure its longevity. Regular upkeep is key to preventing future damage and keeping your entryway looking its best.
Regular Cleaning Practices
Keeping your threshold clean is one of the simplest but most effective ways to maintain it. Regularly sweep or vacuum the area to remove dirt, dust, and grit that can scratch and wear down the material over time. If your threshold is made of wood, avoid excessive mopping, as standing water can lead to rot and damage.
Wipe down wooden thresholds with a slightly damp cloth occasionally to remove grime. For exterior thresholds, pay special attention to removing leaves, mud, and debris that can accumulate and hold moisture against the material.
Periodic Inspection and Sealing
Make it a habit to inspect your threshold at least twice a year, perhaps in the spring and fall. Look for any new cracks, loose screws, or signs of wear. Check the sealant around the edges to ensure it’s intact and not pulling away.
If you notice any small gaps, reapply caulk or sealant promptly. For wooden thresholds, periodically reapply a protective coating or sealant every few years, especially for exterior doors. This adds an extra layer of defense against moisture and UV damage, extending the life of the threshold.
Addressing Issues Promptly
The most important aspect of maintenance is addressing any problems as soon as you spot them. A small crack can quickly turn into a large one if left unrepaired. A loose screw can lead to a wobbly threshold that becomes a tripping hazard.
Don’t wait for minor issues to become major repairs. If you notice a small chip, fill it with wood filler. If a screw feels loose, tighten it or replace it. Prompt attention to small problems will save you time, effort, and money in the long run, ensuring your door threshold remains functional and looks good for years to come.
Frequently Asked Questions
Question: How long does a typical door threshold repair take
Answer: A simple repair like tightening a loose threshold might take less than an hour. More involved repairs, such as replacing a section or extensive filling of rot, could take a few hours to a full day, depending on drying times for fillers and sealants.
Question: Can I repair a metal door threshold
Answer: Yes, metal thresholds can often be repaired. Dents can sometimes be hammered out, and rust spots can be treated with a rust remover, followed by priming and painting. Corroded or severely damaged sections may need replacement.
Question: What kind of wood is best for replacing a door threshold
Answer: For exterior thresholds, hardwoods like oak or mahogany are very durable. For interior thresholds, pine, oak, or maple are common choices. It’s best to match the type of wood to your existing threshold if possible for consistency.
Question: Do I need to remove the door to repair the threshold
Answer: In most cases, you do not need to remove the door to repair the threshold. Repairs can typically be done with the door in place, though you may want to prop it open or closed depending on the specific repair and access needed.
Question: How can I ensure my repair blends in with the rest of the threshold
Answer: Proper sanding and finishing are key. If painting, match the color precisely. If staining, use a stain that closely matches the original wood tone.
Wood fillers and epoxies can also be tinted to achieve a better color match.
Summary
Fixing a door threshold is a manageable DIY project. You’ve learned how to identify common issues like looseness, cracks, and rot. With the right tools and materials, you can effectively address these problems. Remember to prepare the area, tackle loose parts, fill cracks, deal with rot, and finish with proper sealing. Regular maintenance will keep your threshold in good shape. You now have the knowledge to handle this repair like a pro.