Cast Iron Repair Without Welding: Fix Cracks and Rust
Cast iron cracks, chips, and rust spots repair with epoxy filler, not welding, in almost every DIY case. Ignore a hairline crack in a skillet or radiator section and it spreads under heat, turning a $10 repair into a full replacement. This guide covers cleaning, rust removal, epoxy application, sanding, and re-seasoning so the fix holds for years. You can also restore wrought iron pieces using related techniques.
Preparing For The Repair
Discover effective methods for repairing cast iron with this comprehensive guide. From assessing damage to choosing the right tools and techniques, you’ll be well-prepared to tackle any cast iron repair project. Boost the lifespan of your cast iron items with these expert tips.
When it comes to repairing cast iron, proper preparation is key to achieving a successful outcome. Before diving into the repair process, you need to follow a few crucial steps to ensure you are ready to tackle the task at hand. In this section, we will guide you through the necessary steps of cleaning the cast iron and assessing the damage.
Cleaning the Cast Iron
To effectively repair cast iron, you first need to clean the surface thoroughly. This will not only remove any dirt, grime, or rust but also create an optimal surface for the repair materials to adhere to. In order to clean your cast iron, follow these simple steps:
1. Remove any loose debris: Start by using a stiff brush or wire brush to scrape off any loose bits of rust or dirt sticking to the surface. Be sure to cover your hands with protective gloves to avoid any injuries.
2. Wash with warm soapy water: Once the loose debris is removed, wash the cast iron with warm soapy water using a sponge or cloth. This will further remove any remaining dirt or grease.
3. Rinse with water: After washing, rinse the cast iron thoroughly with plain water to ensure that all traces of soap are removed. Soap residue can affect the repair process, so ensure that the surface is clean and free from any cleaning agents.
Assessing the Damage
After cleaning the cast iron, the next step is to assess the extent of the damage. This will help you determine the appropriate repair method and materials needed. Follow these steps to assess the damage:
1. Inspect for cracks or chips: Carefully examine the cast iron for any visible cracks, chips, or holes. Use a magnifying glass if needed to get a closer look. These imperfections can affect the integrity of the repair and may require additional measures.
2. Measure the depth and size of the damage: Using a ruler or measuring tape, measure the depth and size of the damaged area. This will give you a clear idea of the scope of the repair and help you choose the right repair materials.
3. Note any surrounding damage: While assessing the main damage, take note of any additional surrounding damage that may impact the repair. This could include corrosion or pitting in the adjacent areas, the same issue that shows up on outdoor wrought iron fencing.
By following these steps of cleaning the cast iron and assessing the damage, you will be well-prepared for the repair process. Ensuring a clean surface and understanding the extent of the damage is essential for achieving a successful repair. In the next section, we will explore various methods and materials used to repair cast iron, allowing you to choose the most suitable approach for your specific repair needs.
Repair Techniques
When it comes to repairing cast iron, it’s essential to know the right techniques to ensure a successful outcome. This section will discuss three important repair techniques: removing rust, filling cracks and holes, and re-seasoning the cast iron. By following these steps, you can bring your cast iron back to its former glory and extend its lifespan.
Removing Rust
Rust is a common issue with cast iron, but it can be easily remedied. To remove rust from your cast iron, you will need the following:
- A stiff brush or steel wool
- Vinegar or a commercial rust remover
- Warm water and mild soap
- A cloth or sponge
To begin, use the brush or steel wool to scrub away any loose rust. For stubborn rust, soak the cast iron in a mixture of vinegar and water or apply a rust remover product according to the manufacturer’s instructions. After removing the rust, clean the cast iron with warm water and mild soap. Make sure to dry it thoroughly to prevent further rusting.
Filling Cracks And Holes
If you notice any cracks or holes in your cast iron, it’s important to address them promptly to prevent further damage. Here’s how you can fill cracks and holes in your cast iron:
- Clean the damaged area by removing any loose debris or rust.
- Apply a high-temperature epoxy or cast iron filler to the crack or hole.
- Smooth the filler with a putty knife and ensure it is level with the surface of the cast iron.
- Allow the filler to dry completely according to the manufacturer’s instructions.
- Sand the filled area gently to achieve a smooth finish.
By following these steps, you can effectively repair minor cracks and holes in your cast iron.
Re-seasoning The Cast Iron
After repairing your cast iron, it’s crucial to re-season it to restore its non-stick properties and ensure its longevity. Here’s a step-by-step guide to re-seasoning your cast iron:
- Preheat your oven to 350°F.
- Apply a thin layer of vegetable oil or flaxseed oil to the entire surface of the cast iron.
- Place the cast iron upside-down on the oven rack, with a baking sheet or aluminum foil placed on the lower rack to catch any drips.
- Bake the cast iron for one hour.
- Allow the cast iron to cool completely before removing it from the oven.
- Wipe off any excess oil, and your cast iron is ready to use.
Re-seasoning your cast iron regularly will help maintain its non-stick surface and prevent rust.
Best Cast Iron Repair Pick
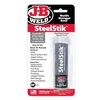
J-B Weld SteelStik Epoxy Putty Stick, 2 oz – $5.70
The high-temperature epoxy filler this guide has you knead, press into the crack or hole, and smooth level with a putty knife instead of firing up a welder.
- Best for: cracks, chips, and small holes in skillets, pipe, or hardware
- Why we picked it: steel-reinforced epoxy formula cures rock-hard and is safe up to 300F, no welding rod needed
- Main drawback: a 2 oz stick only covers small to mid-size repairs
Compare more cast iron repair & care options
 Option 1 Lodge Rust Eraser Cleaning Block – $9.88
|
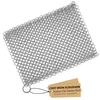 Option 2 TOPULORS Chainmail Scrubber, 8×6 in – $6.39
|
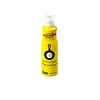 Option 3 Lodge Seasoning Spray, 8 oz – $9.93
|
As an Amazon Associate we earn from qualifying purchases.
Advanced Repair Methods
When it comes to repairing cast iron, there are advanced methods that can be used to restore damaged parts to their original condition. These methods involve more specialized techniques such as welding cast iron and machining the surface. In this article, we will explore these advanced repair methods in detail and provide step-by-step instructions for each process.
Welding Cast Iron
To repair cast iron using welding, you will need:
- A cast iron welding rod: Choose a rod specifically designed for cast iron repairs, as it will have the necessary properties to bond effectively with the material.
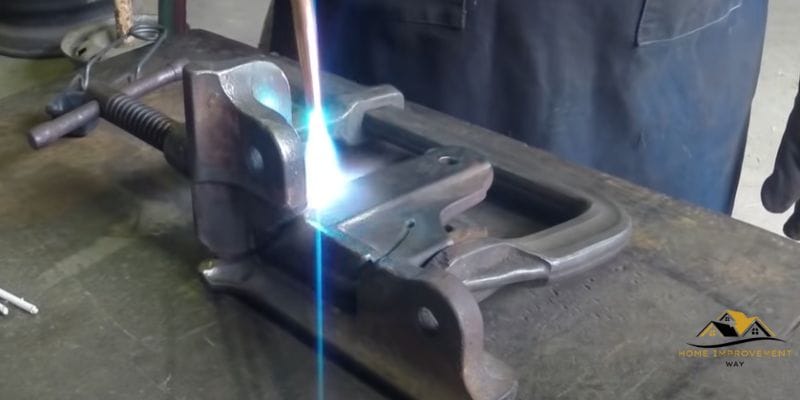
- A welding machine: An electric arc welding machine or an oxyacetylene torch can be used for this process. Ensure that you have the appropriate safety equipment, such as gloves and a welding helmet, as welding can produce intense heat and bright light.
- A wire brush: Use a wire brush to clean the damaged area of the cast iron and remove any rust or debris. This will ensure a clean surface for the welding process.
Follow these steps to weld cast iron:
- Preheat the cast iron: Gradually heat the cast iron using a torch or welding machine to avoid cracking. This preheating process is crucial as it helps to reduce stress on the material.
- Clean the damaged area: Use a wire brush to clean the damaged area of the cast iron. Ensure that all rust, paint, and debris are removed to achieve a strong bond during welding.
- Start the welding process: Position the welding rod at a slightly steeper angle (approximately 70 degrees) and start the welding process by making a tack weld. Continue welding in a zigzag pattern, slowly moving from one end to the other.
- Control the heat: Keep the heat as low as possible during the welding process to prevent further damage to the cast iron. If the temperature rises too high, it can cause the cast iron to crack.
- Post-welding: After completing the welding process, allow the cast iron to cool slowly. Avoid sudden cooling as it can lead to cracking. Once cooled, clean the repaired area with a wire brush to remove any slag or imperfections.

Machining The Surface
Machining the surface of cast iron is another advanced repair method that can be used to restore damaged sections. This process involves removing material from the surface to achieve the desired shape or finish.
Here are the steps for machining the surface:
- Secure the cast iron: Use clamps or a vise to firmly secure the cast iron in place before beginning the machining process. This will prevent any movement or vibrations that could result in inaccuracies.
- Select the appropriate cutting tool: Choose a cutting tool suitable for machining cast iron. Carbide or high-speed steel tools are commonly used for this purpose as they are durable and can withstand the hardness of the material.
- Set the cutting speed and feed rate: Adjust the cutting speed and feed rate according to the specifications recommended for machining cast iron. This will ensure optimal results without causing excessive wear on the cutting tool.
- Start the machining process: Begin by making light cuts on the surface of the cast iron. Gradually increase the depth of each pass until the desired shape or finish is achieved. Take care to remove any chips or debris that may accumulate during the process.
- Inspect and measure: Once the machining process is complete, carefully inspect the repaired surface for any imperfections or rough spots. Use measuring tools, such as calipers or micrometers, to ensure the dimensions meet the required specifications.
By following these advanced repair methods, you can effectively repair cast iron and restore it to its original condition. Whether you choose welding or machining, each method requires precision and attention to detail. Take your time, follow the instructions, and you will be able to successfully repair and extend the lifespan of your cast iron parts.
Conclusion
In this blog post, we covered the essential steps required to repair cast iron effectively. By following these guidelines, you can restore the durability and functionality of your cast iron items, from kitchen cookware to outdoor wrought iron furniture. Remember to clean, patch, and season your cast iron properly to prolong its lifespan.
With a little care and attention, you can enjoy the benefits of your cast iron cookware for years to come. So, get ready to cook up a storm with your renewed cast iron treasures!
Sponsored / affiliate links. As an Amazon Associate I earn from qualifying purchases. I may earn additional commission from eligible campaigns.