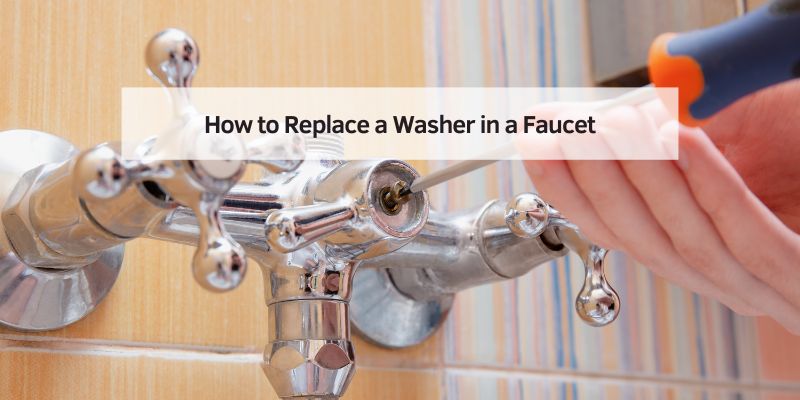
How to Replace a Washer in a Faucet
Hey there! So, you’ve got a faucet that’s dripping like it’s trying to tell you a secret, and you’re ready to fix it. I’ve been there, staring at that annoying drip, wondering why it won’t stop. Replacing a washer in a faucet is one of those home improvement tasks that sounds tricky but is totally doable, even if you’re not a pro. I’ve tackled this job a few times in my own home, and I’m excited to share everything I’ve learned with you. This guide will walk you through each step, so you can stop that leak and feel like a DIY champ. Let’s dive in and get that faucet back in shape!
Why a Leaky Faucet Needs Your Attention
A dripping faucet isn’t just annoying—it can waste a surprising amount of water. I remember the first time I ignored a leak, thinking it was no big deal. Then I saw my water bill! A single drip every second can waste over 3,000 gallons a year. That’s like leaving your garden hose running for hours. Plus, that constant drip can stain your sink or damage the faucet over time. Replacing the washer is usually the fix for most leaks, as it’s the part that wears out and lets water sneak through. It’s a small piece, but it plays a big role in keeping your faucet working smoothly.
Gathering Your Tools and Supplies
Before you start, you’ll need a few things. I learned the hard way that having everything ready saves a lot of frustration. One time, I was halfway through the job and realized I didn’t have the right wrench. Here’s what you’ll need:
| Item | Purpose |
|---|---|
| Adjustable wrench | To loosen and tighten nuts on the faucet. |
| Screwdriver (flathead or Phillips) | To remove screws holding the faucet handle. |
| Replacement washer | Matches the size and type of the old washer (more on this later). |
| O-rings (optional) | Sometimes these wear out too, so grab a few sizes just in case. |
| Plumber’s grease | To lubricate the new washer and O-ring for a smooth fit. |
| Clean cloth or rag | For wiping down parts and keeping things tidy. |
| Small bowl or container | To hold tiny screws and parts so they don’t get lost. |
| Pipe wrench (optional) | For stubborn nuts that an adjustable wrench can’t handle. |
| Replacement cartridge (optional) | Some modern faucets use cartridges instead of washers. |
I always keep a small toolbox with these basics in my garage. If you don’t have them, your local hardware store will have everything. Pro tip: Take the old washer with you to the store to match the size exactly. Trust me, it’s a lifesaver!
Turning Off the Water Supply
Safety first! Before you touch that faucet, you need to shut off the water. I made the mistake of skipping this once, and let’s just say my kitchen turned into a mini waterpark. Look under your sink for two shut-off valves—one for hot water and one for cold. Turn them clockwise to close them. If you don’t see valves, you’ll need to shut off the main water supply to your house. This is usually outside or in the basement. Once the water’s off, turn on the faucet to drain any leftover water. This step keeps things dry and stress-free while you work.
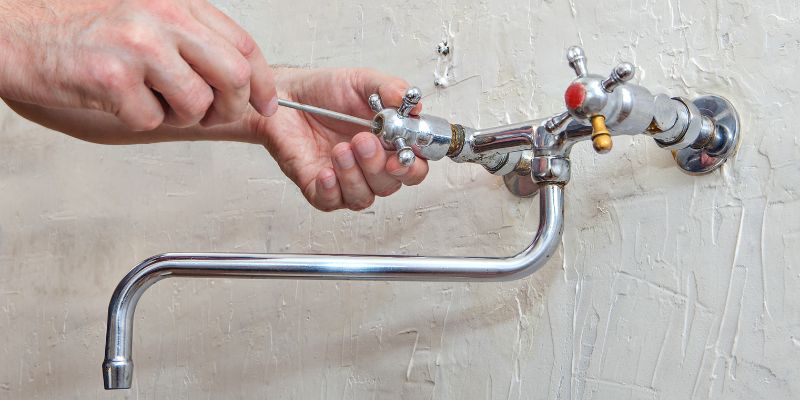
Removing the Faucet Handle
Now it’s time to take the faucet apart. This part always feels like solving a puzzle. Most faucet handles are held in place by a screw, which is often hidden under a decorative cap. On my kitchen faucet, I had to pop off a little plastic cover on top of the handle to find the screw. Use your screwdriver to remove it. If the cap is tricky, a flathead screwdriver can gently pry it off. Once the screw is out, wiggle the handle until it comes off. Some handles are stubborn, so be patient. If it’s stuck, a gentle tap with the handle of your screwdriver can help loosen it.
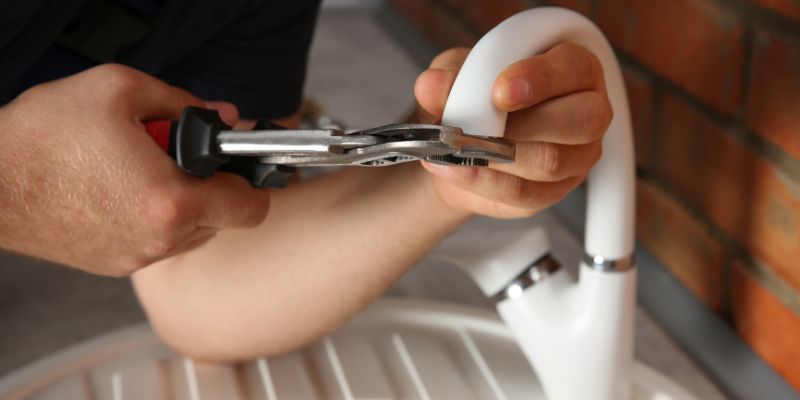
Taking Out the Old Washer
With the handle off, you’ll see the faucet’s inner parts. This is where things get interesting. You’ll likely find a stem or cartridge, which houses the washer. Use your adjustable wrench to loosen the nut holding the stem in place. I remember my first time doing this—I was nervous I’d break something, but a steady hand and slow turns did the trick. Pull out the stem, and at the bottom, you’ll see the washer, usually held in place by a small screw. Unscrew it and pop out the old washer. Take a good look at it. Is it worn, cracked, or flattened? That’s probably why your faucet was leaking.
Choosing the Right Replacement Washer
Picking the right washer is key. I learned this after buying the wrong size and having to make a second trip to the hardware store. Washers come in different sizes and materials, like rubber, ceramic, or fiber. Rubber is common for older faucets, while ceramic is used in newer ones. Check the size of your old washer—usually measured in fractions of an inch, like 1/4″ or 3/8″. If you’re unsure, take the old washer to the store and compare it to the new ones. Some faucets use a cartridge instead of a washer, so if you don’t see a washer, you might need a replacement cartridge. If you’re replacing an O-ring too, make sure it matches the stem’s size.
Installing the New Washer
Now comes the fun part—putting in the new washer. Place it where the old one was and secure it with the screw. I like to add a tiny bit of plumber’s grease to the washer first. It helps it slide into place and creates a better seal. If you’re replacing an O-ring, slide it onto the stem and apply a thin layer of grease lipstick. Then, carefully put the stem back into the faucet and tighten the nut with your wrench. Don’t overtighten—snug is good enough. This step always feels satisfying, like you’re putting the puzzle back together.
Reassembling the Faucet
With the new washer in place, it’s time to put everything back. Reattach the handle and screw it on tightly. If you had a decorative cap, pop it back on. I always double-check that everything’s secure but not too tight. Overtightening can strip screws or crack plastic parts. Once it’s all back together, turn the water supply back on and test the faucet. Open it slowly to check for leaks. If it’s dripping, you might need to tighten something or check the washer’s fit. When I did this the first time, I was thrilled to see no drips—it’s such a win!
Cleaning Up and Testing
Give the faucet a quick wipe-down with a cloth to remove any water spots or grease. I like to polish the handle to make it shine—it’s the little things that make it feel brand-new. Test the faucet again, running both hot and cold water to make sure everything’s working. If you notice a small drip, double-check the washer and O-ring. Sometimes they need a slight adjustment. If it’s allmodo you see any drips, don’t panic. Just tighten everything a bit more and test again.
Maintenance Tips for Your Faucet
To keep your faucet in top shape, check it every few months for leaks or drips. A quick inspection can catch small issues before they become big ones. I learned this after ignoring a drip for too long, and it cost me more than it should have. Clean the faucet regularly with vinegar to remove mineral buildup, and lubricate moving parts with plumber’s grease yearly. If you notice a change in water pressure, check the aerator for clogs. These simple steps can extend the life of your faucet and save you from future repairs.
Troubleshooting Common Issues
Sometimes, things don’t go as planned. If your faucet still leaks after replacing the washer, check the O-ring or cartridge for wear. I once spent an hour wondering why my faucet was still dripping, only to realize I’d missed a worn O-ring. If the handle is loose, tighten the screw or replace it if it’s stripped. If water flow is weak, the aerator might be clogged with sediment—unscrew it and clean it out. These small fixes can save you from calling a plumber.
When to Call a Professional
If you’ve tried everything and the faucet still leaks, it might be time to call a plumber. I had to do this once when my faucet’s cartridge was too damaged to fix with a washer alone. Look for signs like persistent leaks, low pressure despite cleaning, or unusual noises. A professional can diagnose complex issues like a faulty valve or internal corrosion. Choose a licensed plumber with good reviews, and don’t be afraid to ask for an estimate upfront.
Conclusion
Fixing a leaky faucet by replacing a washer is a rewarding DIY project. I still remember the first time I did it—standing back and watching a drip-free faucet felt like a victory. It’s not just about saving water; it’s about taking control of your home and learning a new skill. With a few tools, some patience, and this guide, you can tackle the job and enjoy the peace of a quiet sink. Plus, you’ll save money on your water bill and maybe even impress your family or roommates with your handy skills. So, grab your tools, roll up your sleeves, and give it a try—you’ve got this!
Frequently Asked Questions
Why does my faucet keep leaking after I replaced the washer?
If the leak persists, you might have a worn O-ring or a damaged cartridge. Check the O-ring for cracks or wear and replace it if needed. If the problem continues, the faucet’s valve seat might be corroded, requiring a professional repair.
How do I know what size washer to buy?
Take the old washer to a hardware store to match its size and type. Washers are measured in fractions of an inch, like 1/4″ or 3/8″. If you’re unsure, ask a store employee for help or consult your faucet’s manual if you have it.
Can I replace a washer without turning off the water?
No, always turn off the water supply first. I learned this the hard way when I got soaked mid-repair. Shutting off the water prevents messes and makes the job safer and easier.
How often should I replace my faucet washer?
It depends on usage and water quality, but check your faucet every 6–12 months for drips or weak flow. I replace washers every couple of years in my home to stay ahead of leaks. Hard water can wear them out faster.
What if my faucet doesn’t have a washer?
Some modern faucets use cartridges instead of washers. If you don’t see a washer when you open the faucet, you likely need a replacement cartridge. Take the old one to the store to find an exact match.