How to Replace Garage Door Hinges: A Step-by-Step Guide
Hey there! If you’re reading this, chances are your garage door is making some weird noises or not moving as smoothly as it used to. I’ve been there, trust me. A few years ago, my own garage door started creaking like an old pirate ship, and I quickly learned that worn-out hinges were the culprit. Replacing garage door hinges might sound intimidating, but it’s a project most homeowners can tackle with a bit of patience and the right tools.
I’ve done this a few times now, and I’m excited to share everything I’ve learned to help you get your garage door back in tip-top shape. Let’s dive into this detailed guide on how to replace garage door hinges, written just for folks like you who want a clear, no-nonsense approach to fixing their garage door.
Why Garage Door Hinges Matter
Garage door hinges are small but mighty. They connect the panels of your garage door, allowing it to bend and move smoothly as it opens and closes. Over time, these hinges can wear out, rust, or even break, especially if you live in a place with harsh weather like I do in the Midwest. When hinges fail, your door might start to wobble, make grinding noises, or worse, get stuck. I ignored a squeaky hinge for too long once, and it ended up causing a panel to misalign, which was a bigger headache to fix.
Replacing hinges isn’t just about fixing a problem—it’s about preventing bigger ones. New hinges ensure your door operates safely and efficiently. Plus, it’s a relatively inexpensive fix compared to replacing an entire door or calling in a professional. If you’re noticing any issues with your garage door’s movement, it’s worth checking those hinges first.
Tools and Materials You’ll Need
Before we get started, let’s talk about what you’ll need. I learned the hard way that having everything ready makes the job so much easier. Here’s a list of tools and materials I used when I replaced my garage door hinges last summer:
| Item | Purpose |
|---|---|
| Replacement hinges | Match the size and type of your existing hinges (check manufacturer specs). |
| Screwdriver (Phillips/Flat) | For removing and securing screws. |
| Socket wrench set | To loosen and tighten bolts (usually 7/16” or 9/16” for garage door hinges). |
| Pliers | For gripping or bending if needed. |
| Lubricant (WD-40 or similar) | To loosen rusted screws and lubricate new hinges. |
| Step ladder | To reach higher hinges safely. |
| Safety glasses | To protect your eyes from debris. |
| Gloves | To keep your hands safe from sharp edges. |
| Helper (optional) | To hold the door or pass tools—makes life easier! |
Pro tip: Double-check your hinge size before buying replacements. Most garage doors use #1, #2, or #3 hinges, depending on their position. I once bought the wrong size and had to make an extra trip to the hardware store—not fun!
Safety First: Preparing for the Job
I can’t stress this enough: safety is key when working on a garage door. These doors are heavy, and the springs that help lift them are under a lot of tension. One wrong move, and you could get hurt. Here’s how I prep to stay safe:
First, disconnect the power to your garage door opener. I just unplugged it from the outlet to make sure the door doesn’t move unexpectedly. Next, lower the door completely and secure it in place. You can use clamps or locking pliers on the tracks to keep it from moving. I also wear safety glasses and gloves because rust and metal shavings are no joke.
If your door has torsion springs (those big coiled things above the door), do not touch them. Hinge replacement doesn’t usually involve the springs, but it’s good to know where they are to avoid accidents. If you’re unsure about anything, call a professional. I had a friend who tried to mess with the springs and ended up with a costly repair.
Step-by-Step Guide to Replacing Garage Door Hinges
Now, let’s get to the fun part—actually replacing those hinges! I’ll walk you through the process I follow, step by step, based on my own experience. It usually takes me about an hour to replace a few hinges, but your time might vary depending on your door and skill level.
Step 1: Inspect and Identify the Problem Hinges
Before you start unscrewing anything, take a close look at your garage door. Open and close it manually (with the opener disconnected) to spot any hinges that are rusted, bent, or making noise. I usually mark the bad ones with a piece of chalk so I don’t forget which ones need replacing. If you’re not sure, check the hinges in the middle of the door first—those get the most wear.
Step 2: Gather Your Replacement Hinges
Once you know which hinges need replacing, make sure you have the right ones. Most garage doors use numbered hinges (#1, #2, etc.) based on their position. The numbers are usually stamped on the hinge itself. I made the mistake of assuming all my hinges were the same and ended up with a mismatched set. If you’re replacing multiple hinges, buy a few extras just in case. You can find them at hardware stores or online, usually for $5-$10 each.
Step 3: Secure the Door
Lower the garage door all the way and clamp it to the tracks. This keeps the door stable while you work. I use a couple of C-clamps on the tracks just above the bottom rollers. If you have a helper, ask them to hold the door steady while you work on the hinges—it’s a big help.
Step 4: Remove the Old Hinge
Start with one hinge at a time to keep the door aligned. Use your socket wrench or screwdriver to remove the bolts or screws holding the hinge in place. If the screws are rusted, spray them with WD-40 and let it sit for a few minutes. I had to use pliers to grip some stubborn screws on my old door. Be gentle to avoid stripping the screws or damaging the door panels.
Once the screws are out, carefully remove the hinge. The door might shift slightly, so keep an eye on it. If the panels feel loose, have your helper hold them in place or prop them up with a piece of wood.
Step 5: Install the New Hinge
Line up the new hinge exactly where the old one was. The holes should match up perfectly. If they don’t, double-check that you have the right hinge number. Secure the hinge with the new screws or bolts that came with it. I tighten them by hand first to make sure everything’s aligned, then go back with the wrench for a final snug fit. Don’t overtighten—you don’t want to strip the holes or warp the hinge.
Step 6: Repeat for Other Hinges
Work your way through the remaining hinges, one at a time. I like to start from the bottom and move up, but you can do whatever feels comfortable. Just make sure each hinge is secure before moving to the next. If your door has rollers attached to the hinges, make sure they’re properly seated in the tracks.
Step 7: Test the Door
Once all the hinges are replaced, remove the clamps and manually lift the door a few times to check its movement. It should feel smooth and quiet. If it’s still jerky or noisy, double-check your hinges for loose screws or misalignment. I had to tweak a couple of hinges the first time I did this to get it just right.
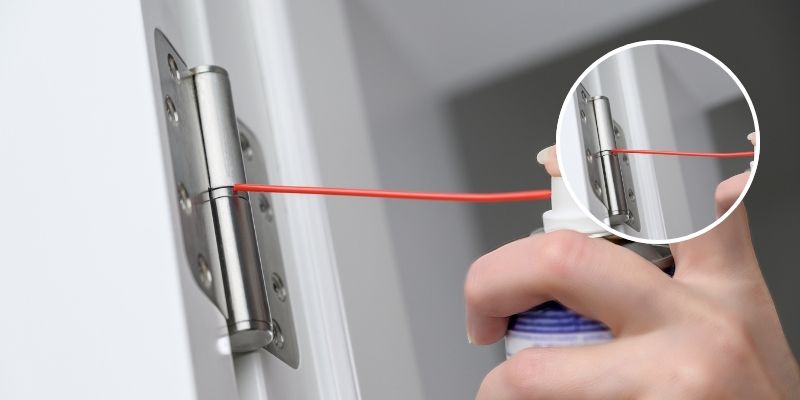
Step 8: Lubricate and Clean Up
To keep your new hinges in great shape, spray them with a garage door lubricant (not regular WD-40—it’s not meant for long-term use). I also wipe down the door tracks and rollers to remove any dirt or grime. Reconnect the garage door opener and test it with the remote. You’re all set!
Common Mistakes to Avoid
I’ve made my fair share of mistakes while replacing garage door hinges, so let me save you some trouble. First, don’t rush the job. Taking your time ensures you don’t damage the door or injure yourself. Second, don’t use the wrong hinge size or type—it’ll cause more problems than it solves. Third, avoid working alone if you can. Having a helper makes the job safer and faster. Finally, don’t skip the lubrication step. It’s tempting to call it a day, but a little lubricant goes a long way in keeping your door running smoothly.
When to Call a Professional
Sometimes, the job is bigger than you expect. If your door is severely misaligned, the hinges are damaged beyond a simple replacement, or you’re dealing with broken springs, it’s time to call in a pro. I tried to fix a misaligned door myself once and ended up making it worse. A professional garage door technician can handle complex issues and ensure everything’s up to code. It’s worth the cost for peace of mind.
Maintenance Tips to Extend Hinge Life
Now that your hinges are replaced, you’ll want to keep them in good shape. I check my garage door every six months or so, looking for rust or loose screws. A quick spray of lubricant on the hinges and rollers every few months keeps everything moving smoothly. If you live in a humid or salty area, like near the coast, consider using galvanized hinges to resist rust. Also, keep an eye on your door’s alignment—catching small issues early can save you from bigger repairs down the road.
Conclusion
Replacing garage door hinges might seem like a daunting task, but it’s one of those home projects that feels incredibly rewarding once it’s done. I remember the first time I fixed my garage door—it was creaking so badly it woke the neighbors! After replacing the hinges, it was like having a brand-new door. With the right tools, a little patience, and the steps I’ve shared, you can tackle this job and save some money in the process. Your garage door will thank you with smooth, quiet operation for years to come. So, grab your tools, take it one hinge at a time, and enjoy the satisfaction of a job well done. Happy fixing!
Frequently Asked Questions
What tools do I need to replace garage door hinges?
You’ll need a screwdriver, socket wrench, pliers, a step ladder, safety glasses, gloves, and a lubricant like WD-40. A helper is also handy, but optional.
How do I know if my garage door hinges need replacing?
Look for signs like creaking noises, rust, bent hinges, or a door that doesn’t move smoothly. If the door wobbles or gets stuck, check the hinges first.
Can I replace garage door hinges by myself?
Yes, if you’re comfortable with basic tools and follow safety precautions. It’s a manageable DIY job, but don’t hesitate to call a pro if you’re unsure.
How long does it take to replace garage door hinges?
It usually takes about an hour for a few hinges, depending on your experience and the condition of your door. Take your time to do it right.
Where can I buy replacement garage door hinges?
You can find them at hardware stores like Home Depot or Lowe’s, or online at places like Amazon or garage door supply websites. Make sure to match the hinge number.
Do I need to replace all the hinges at once?
Not necessarily. You can replace just the damaged ones. But if several are worn out, it’s often easier to do them all at once to avoid future issues.
How often should I lubricate my garage door hinges?
Every six months is a good rule of thumb. Use a garage door-specific lubricant to keep the hinges and rollers moving smoothly.