How to Adjust a Self-Closing Door Hinge (Which Way to Turn)
Adjusting a self-closing door hinge means turning the tension pin or hex screw a quarter turn at a time – clockwise to close harder, counterclockwise to loosen – but which direction is “clockwise” flips depending on whether the hex faces up or down on your specific hinge. Rushing to full tension in one turn is the most common mistake, since over-tightening causes slamming and premature spring failure. This guide covers spring, hydraulic, and concealed hinge types, plus the ADA force limits that apply if you’re adjusting a commercial or fire-rated door.
Quick Answer
Find the tension pin or hex screw on the hinge, turn it a quarter turn at a time – one direction tightens the spring (closes harder), the other loosens it (closes softer) – testing the door between each turn. Hydraulic hinges have two separate valves: one for closing speed, one for the final latching snap.
What Are Self-Closing Door Hinges and Why Do They Matter?
Self-closing door hinges are a game-changer for anyone who wants a door to close automatically without slamming. I first noticed them in my home when I realized the kitchen door always swung shut behind me, saving me the hassle of closing it manually. These hinges have a built-in spring mechanism that pulls the door closed after you open it. They’re common in homes, especially on exterior doors, garage entries, or even fire-rated doors for safety.
Why do they matter? Well, they’re all about convenience and security. A self-closing hinge ensures your door shuts tightly every time, keeping out drafts, bugs, or unwanted visitors. Plus, they’re great for energy efficiency, especially in climates like those in the USA where weather can be extreme. But when they’re not adjusted right, you might end up with a door that slams too hard, doesn’t close fully, or squeaks like it’s auditioning for a horror movie. That’s where knowing how to adjust them comes in handy.
Tools You’ll Need to Adjust a Self-Closing Door Hinge
Before we get started, let’s talk about the tools you’ll need. I learned the hard way that having the right tools makes this job so much easier. Here’s what I keep in my toolbox for hinge adjustments:
- Screwdriver (Phillips or flathead): Most hinges use Phillips screws, but check your hinge to be sure.
- Hex wrench (Allen key): Some hinges have hex screws for tension adjustment.
- Pliers: Handy for holding small parts or removing hinge pins.
- Lubricant (like WD-40): To fix any squeaks or sticky hinges.
- Level: To check if your door is aligned properly.
- Tape measure: For measuring gaps or alignment.
- Safety glasses: Just in case something pops loose (better safe than sorry!).
You probably have most of these lying around your garage or toolbox. If not, they’re easy to find at any hardware store in the USA, like Home Depot or Lowe’s.

Common Problems with Self-Closing Door Hinges
When I first tackled my door hinge issues, I noticed a few common culprits. Understanding what’s wrong is half the battle, so let’s break down the problems you might face:
- Door slams too hard: The spring tension is too tight, making the door close with a bang.
- Door doesn’t close fully: The tension might be too loose, or the hinge is misaligned.
- Squeaky hinges: Lack of lubrication or dirt buildup can cause annoying noises.
- Door sticks or rubs: Misalignment in the hinge or door frame could be the issue.
- Uneven closing speed: The hinge might need fine-tuning to balance the closing speed.
Each of these issues has a fix, and I’ll walk you through how to address them step by step.
Step-by-Step Guide to Adjusting a Self-Closing Door Hinge
Now, let’s get to the good stuff—actually adjusting the hinge! I’ve done this a few times, and I’ve found that following a clear process makes it straightforward. Here’s how I do it:
Step 1: Inspect the Hinge and Door
First, I always start by checking the hinge itself. Open and close the door slowly to see what’s happening. Does it slam? Does it stop short of closing? Is it squeaking? I also look at the hinge to see if it’s loose, rusted, or damaged. Sometimes, a quick visual check can tell you a lot. If the screws are loose, I grab my screwdriver and tighten them right away. This alone can fix some issues.
Step 2: Lubricate the Hinge
If the hinge is squeaky or sticky, lubrication is your best friend. I use a can of WD-40 with a straw nozzle to spray a little into the hinge’s moving parts. After spraying, I open and close the door a few times to work the lubricant in. Then, I wipe away any excess with a cloth to avoid a mess. This step is super simple but can make a big difference in how smoothly the door moves.
Step 3: Adjust the Spring Tension
This is the heart of adjusting a self-closing hinge. Most self-closing hinges have a spring inside that controls how fast or slow the door closes. To adjust it, you’ll need to locate the tension pin or screw. On my hinges, there’s usually a small hole or slot where I insert a hex wrench or a tension pin (sometimes it comes with the hinge).
Here’s how I do it:
- Increase tension: If the door isn’t closing fully, I turn the hex wrench clockwise to tighten the spring. I usually go a quarter turn at a time, then test the door.
- Decrease tension: If the door slams too hard, I turn the wrench counterclockwise to loosen the spring. Again, small adjustments are key.
I always test the door after each tweak. It might take a few tries to get the tension just right, but patience pays off.
Step 4: Check Door Alignment
Sometimes, the hinge isn’t the only problem. If the door is rubbing against the frame or not closing evenly, it might be misaligned. I use a level to check if the door is hanging straight. If it’s off, I loosen the hinge screws slightly and shift the door up, down, or sideways to get it aligned. Then, I tighten the screws back up and test the door again.
Step 5: Test and Fine-Tune
Once I’ve made my adjustments, I open and close the door several times to see how it behaves. I pay attention to the speed, sound, and whether it closes fully. If it’s still not perfect, I go back and tweak the tension or alignment a bit more. It’s like tuning a guitar—you want to hit that sweet spot.
Best Self-Closing Hinge Pick
3-Pack Adjustable Tension Self-Closing Hinges
If your current hinge’s socket is stripped or the spring is worn out beyond adjustment, replacing it outright is often faster than repairing it.
- Best for: replacing a hinge that won’t hold tension anymore
- Why we picked it: built-in adjustable tension screw, 3-pack covers a full door with hinges to spare
- Main drawback: standard 4-inch size – measure your existing hinge first
Compare more self-closing hinge options
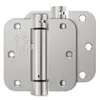
 Option 1 4-Inch Hinge 2-Pack
|
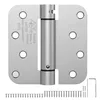
 Option 2 3.5-Inch Hinge 2-Pack
|
 Option 3 Budget Single Hinge
|
As an Amazon Associate we earn from qualifying purchases.
Types of Self-Closing Hinges and Their Adjustments
Not all self-closing hinges are the same, and I’ve learned that different types need slightly different approaches. Here’s a quick rundown of the most common ones I’ve encountered:
| Hinge Type | Description | Adjustment Method |
|---|---|---|
| Spring Hinges | Have a built-in spring for automatic closing. Common in homes. | Adjust tension with a hex wrench or tension pin. |
| Hydraulic Hinges | Use fluid to control closing speed. Often found on commercial doors. | Adjust screws for speed and force (usually two screws). |
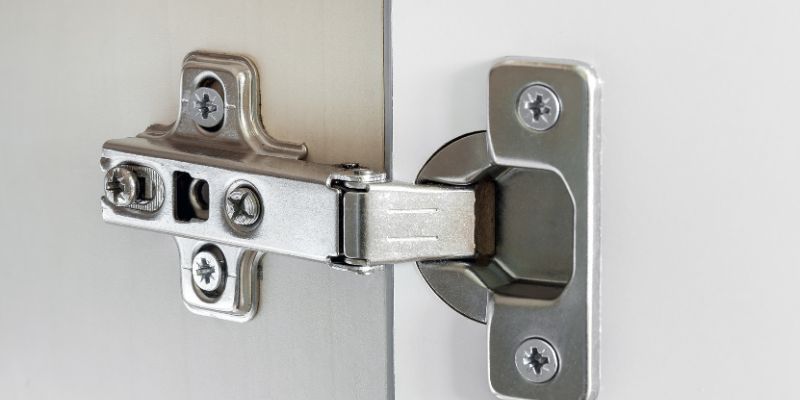
| Concealed Hinges | Hidden inside the door or frame for a sleek look. | Use a screwdriver or hex wrench to adjust tension and alignment. |
| Adjustable Tension Hinges | Allow fine-tuning of spring tension. | Turn adjustment screw or pin to increase or decrease tension. |
If you’re not sure what type you have, check the manufacturer’s label or look up the model number online. I once spent an hour trying to adjust a hydraulic hinge with the wrong tool before realizing my mistake!
Adjusting Hydraulic Hinges: Speed vs. Latch Valves
Hydraulic door closers and hydraulic hinges use fluid to control the swing, and most have two separate adjustment valves rather than one spring tension pin: a speed valve that controls how fast the door swings through most of its arc, and a latch valve that controls the final few degrees where the door snaps shut and latches. Turning the wrong valve is a common mix-up – if the door closes at a good pace but doesn’t latch, adjust the latch valve, not the speed valve.
One accuracy note that trips people up: whether clockwise tightens or loosens the spring depends on which way the hex adjustment faces on your specific hinge – some models have it facing up, others down, which flips the direction. Always test with a small quarter-turn first and check the result before committing to a full adjustment.
📊 ADA accessibility standards cap door opening force at 5 lbs for interior doors and 8.5 lbs for exterior doors – a tension adjustment that makes a commercial door too hard to push open can be a code violation, not just an inconvenience. Fire-rated doors have an added requirement: the hinge must still close and latch fully under fire conditions per UL 10C and NFPA 80. Source: National Lock Supply
“Adjust in quarter-turn increments with the hex key, testing the door through several full open-close cycles after each turn. Rushing to full tension in one go is the common mistake – over-tensioning causes slamming, excessive opening force, and premature spring fatigue. Forcing the wrong hex key size can also strip the socket and make the hinge non-adjustable.”
— National Lock Supply, professional spring hinge adjustment guide
Tips for Maintaining Self-Closing Door Hinges
Once you’ve got your hinges adjusted, you’ll want to keep them working smoothly. Here are some tips I’ve picked up over the years:
- Lubricate regularly: I spray my hinges with WD-40 every six months or so to prevent squeaks.
- Check screws: Loose screws can throw off the alignment, so I tighten them every few months.
- Clean the hinges: Dirt and grime can build up, so I wipe them down with a damp cloth occasionally.
- Inspect for wear: If the hinge is old or damaged, it might need replacing. I replaced a worn-out spring hinge last year, and it was like getting a brand-new door.
- Test periodically: I open and close my doors every few weeks to make sure they’re still behaving.
When to Call a Professional
I love DIY projects, but sometimes a door hinge issue is beyond a quick fix. If the door is heavily misaligned, the frame is damaged, or the hinge is broken, it might be time to call in a pro. I had to do this once when my garage door hinge was so rusted it wouldn’t budge, even after lubrication. A local handyman in my area (I’m in the USA, by the way) fixed it in no time. If you’re not sure, it’s worth getting a quote from a professional to save you time and frustration.
Why Adjusting Your Hinges Is Worth the Effort
Adjusting a self-closing door hinge might seem like a small task, but it can make a big difference in your home. A properly adjusted door saves energy, improves security, and just feels right when you walk through it. I remember how satisfying it was the first time I got my front door to close smoothly without slamming—it was like solving a puzzle! Plus, it’s a budget-friendly fix that doesn’t require expensive tools or materials.
Conclusion
There you go! Adjusting a self-closing door hinge doesn’t have to be intimidating. With a few tools, a little patience, and the steps I’ve shared, you can get your door swinging perfectly in no time. I’ve been through the trial and error myself, and I can tell you it’s worth the effort to get it right. Whether it’s fixing a slamming door, silencing a squeak, or ensuring a tight close, these small tweaks can make your home more comfortable and efficient. So grab your screwdriver, give it a try, and enjoy the satisfaction of a job well done. Your doors (and your family) will thank you!
Frequently Asked Questions
How Many Self-Closing Hinges Does A Door Need?
Most interior doors use 2 self-closing hinges, but heavier exterior or fire-rated doors often need 3 for proper support and code compliance. Check your door’s weight and thickness before deciding.
Why does my self-closing door hinge slam shut?
Your door might be slamming because the spring tension is too tight. I’ve had this happen before, and it’s usually a quick fix. Use a hex wrench or tension pin to loosen the spring by turning it counterclockwise. Make small adjustments and test the door until it closes smoothly.
How often should I lubricate my door hinges?
I lubricate my hinges about every six months to keep them quiet and smooth. If you live in a dusty area or near the coast where salt air can cause rust, you might want to do it every three months. A quick spray of WD-40 does the trick.
Can I adjust a self-closing hinge without tools?
It’s tough to adjust a self-closing hinge without tools. You’ll usually need at least a screwdriver or hex wrench to tweak the tension or alignment. I tried doing it by hand once, and it just didn’t work. Grab the right tools, and it’ll be much easier.
What if my door still doesn’t close properly after adjusting?
If you’ve adjusted the tension and alignment and the door still isn’t right, there might be a bigger issue. Check if the door frame is warped or if the hinge is damaged. I had a door like this once, and I ended up needing a new hinge. If it’s too much, a professional can help.
Are self-closing hinges worth installing?
Absolutely! I love my self-closing hinges because they’re convenient and keep my home secure. They’re especially great for exterior doors or busy areas like the kitchen. Just make sure to adjust them properly so they don’t slam or stick.
Sponsored / affiliate links. As an Amazon Associate I earn from qualifying purchases. I may earn additional commission from eligible campaigns.