Which Side of Hinge Goes on Door: Hinge vs Stop Side Guide
The moving leaf (with the pin) goes on the door itself; the fixed leaf goes on the frame – and that hinge-side edge is also how door “handing” (left-hand vs right-hand) is determined. The opposite edge, where the door stop molding sits, is the “stop side” – not the same as the “strike side,” where the lock is. This guide covers hinge placement, the hinge-vs-stop-vs-strike-side distinction, and full install steps.
I’ve hung a few doors now – from my front entry to a closet – and guessing wrong on the hinge leaf was my first real mistake.
Why Hinge Placement Matters
Let’s start with why getting the hinge placement right is so important. When I hung my first door, I didn’t think much about which side of the hinge went where. Big mistake! The door wobbled and didn’t close properly, and I had to redo it. Hinges are what make your door swing smoothly and stay secure. If you put them on the wrong side, the door might not align, could sag over time, or even come loose.
Proper hinge placement also affects how your door looks and functions. A well-hung door closes tightly, keeps out drafts, and looks professional. I learned that taking a few minutes to understand hinges saves hours of frustration later. Plus, it’s super satisfying to open and close a door you installed perfectly. Let’s figure out how to get it right.
Understanding Door Hinges
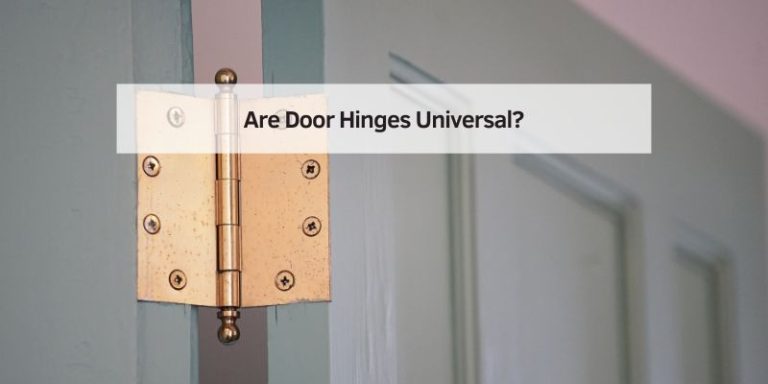
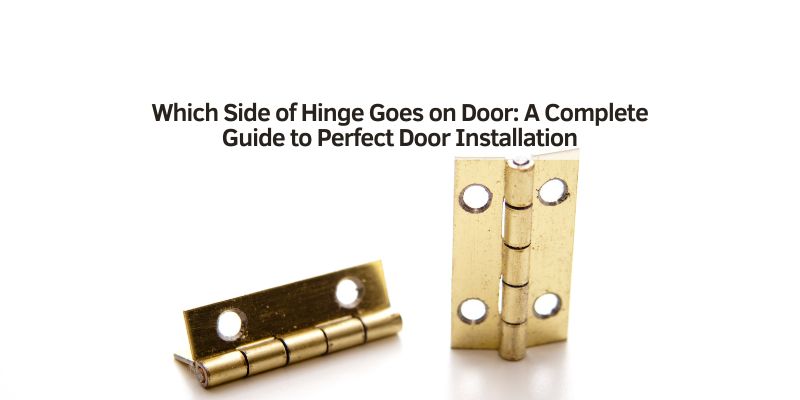
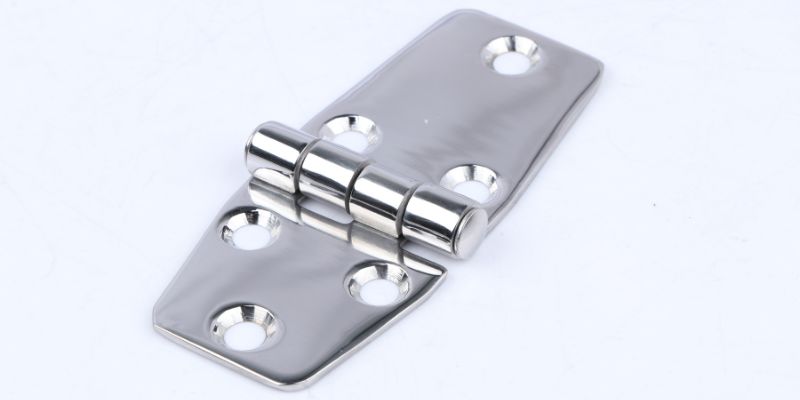
Before we talk about which side goes where, let’s break down what a hinge is. I was clueless about hinges at first, but they’re pretty simple once you get the hang of them. A standard door hinge has two parts, called leaves, connected by a pin. One leaf attaches to the door, and the other to the door frame. The pin lets the door swing open and closed.
Hinges come in different types, like butt hinges (the most common for home doors), continuous hinges, or even fancy concealed hinges. I used standard 3.5-inch butt hinges for my front door, which are perfect for most interior and exterior doors. The key is knowing which leaf goes on the door and which goes on the frame. Let’s explore that next.
Which Side of the Hinge Goes on the Door?
Here’s the golden question: which side of the hinge goes on the door? When I first tackled this, I held the hinge up and tried to guess. Spoiler: guessing didn’t work! Here’s what I learned:
- The moving leaf goes on the door: When you hold a hinge, one leaf stays still (attached to the frame), and the other swings with the door. The leaf that moves with the pin is the one you attach to the door.
- The fixed leaf goes on the frame: The leaf that stays stationary, usually with the pin facing outward, attaches to the door frame.
- Check the hinge design: Most hinges are symmetrical, but some have a “top” and “bottom.” I always hold the hinge as it would look when installed—pin vertical, one leaf flat against the door edge.
For example, with my butt hinges, I attached the leaf that swings (the one with the pin’s knuckles) to the door’s edge. The other leaf went on the frame’s jamb. This setup lets the door swing smoothly without binding. If you’re still confused, picture the hinge opening like a book—the “page” that moves is the door side.
Hinge Side vs. Stop Side vs. Strike Side
“Stand outside the door. From this position, the door will open away from you. Now notice where the hinges are. If they’re on the left, you will need a left hand lever. If the hinges are on the right, you will need a right hand lever.”
These three terms get mixed up constantly. The hinge side is the frame edge where the hinges are mounted. The stop side is the opposite edge – where the door stop molding is applied, so the door doesn’t swing too far and strain the hinges. The strike side is a third, separate term for the edge with the doorknob and strike plate – it’s often confused with the stop side, but it’s not the same thing. The stop side and strike side are usually the same physical edge, just named for different hardware on it.
The hinge side is also how a door’s “handing” (left-hand vs. right-hand) is determined – which matters when ordering a lever handle, since levers (unlike most round knobs) are handing-specific. Stand on the secure side of the door (the side you’d stand on to lock it), facing the door as it swings away from you: hinges on your left mean a left-hand door, hinges on your right mean a right-hand door. For an out-swing door, this flips – hinges on the left make it a right-hand out-swing.
Types of Hinges and Their Placement
Not all hinges are the same, and I’ve learned that different types need slightly different approaches. Here’s what I’ve used and how I placed them – for more on locks, strikes, and other hardware, see our full door hardware and locks guide.
- Butt Hinges: These are the classic hinges I used on my front door. One leaf screws into the door’s edge, and the other into the frame’s jamb. I made sure the pin faced outward so the door could swing into the room.
- Flush Hinges: I used these for a lightweight closet door. They’re similar to butt hinges but sit flush when closed. The moving leaf still goes on the door, but they’re easier to install since they don’t need mortising (cutting a recess).
- Concealed Hinges: For a modern look, I tried these on a cabinet door. They’re trickier, but the door-side leaf fits into a drilled hole in the door’s edge. I followed the manufacturer’s template to get it right.
- Continuous Hinges: I used one on a heavy shed door. The long, single-piece hinge runs the full length of the door. The moving side still attaches to the door, but you need more screws for stability.
Each type follows the same rule: the leaf that swings with the door goes on the door itself. I always double-check by holding the hinge in place before screwing it in.
📊 Hinge size should scale with door weight: 3.5-inch hinges handle standard interior hollow-core doors, while heavier solid-core or exterior doors need 4-inch or 4.5-inch hinges. Add a third hinge once a door passes about 80-90 lbs or 80 inches tall – two hinges alone can let a heavy door sag over time. Source: Doors For Pros, hinge sizing guide
Tools and Materials You’ll Need
Having the right tools makes this job so much easier. I learned this after trying to install a hinge with a dull screwdriver—never again! Here’s what I use:
- Hinges: I bought 3.5-inch butt hinges for $5 each at a hardware store.
- Screwdriver or drill: A Phillips screwdriver or drill with a Phillips bit works. I use a cordless drill to save time.
- Chisel: For mortising, a ¾-inch chisel is perfect. I got one for $10.
- Measuring tape and pencil: To mark where the hinges go. I already had these.
- Level: To ensure the door hangs straight. My $5 bubble level does the trick.
- Screws: Most hinges come with screws, but I keep extras in case they strip.
- Optional: Hinge template: This helps mark mortises accurately. I borrowed one from a friend.
My total cost was about $20 since I already owned some tools. Check your hinges to make sure they match your door’s weight and size.
What I Actually Used for This Hinge Install
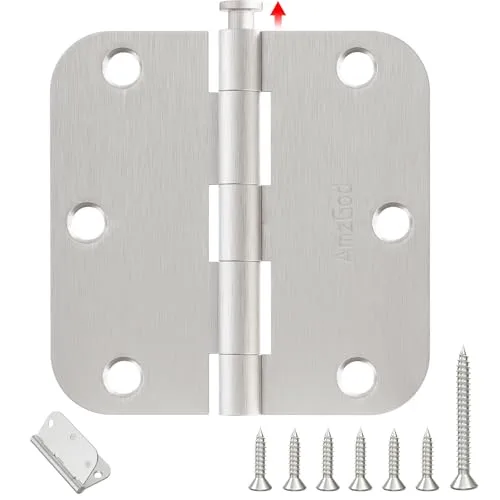
AmzGod 3.5 Inch Door Hinges, Satin Nickel, 12-Pack
$18.89
Check Price on Amazon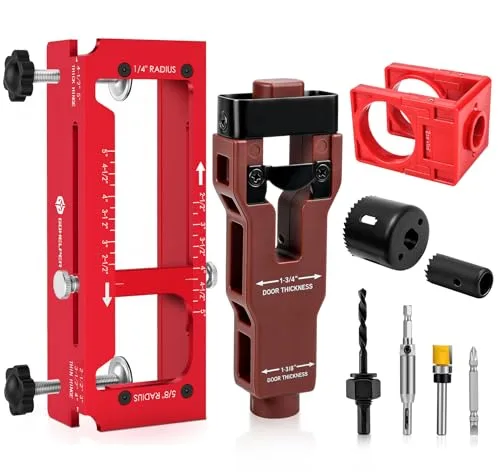
Aluminum Door Hinge Mortise Jig Kit for Router
$52.69
Check Price on Amazon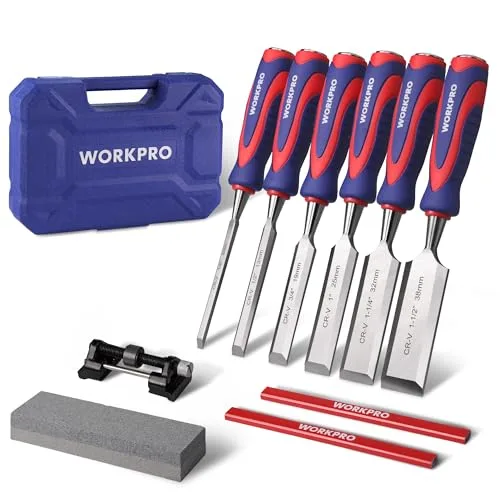
As an Amazon Associate I earn from qualifying purchases.
Step-by-Step Guide to Installing Hinges
Now, let’s walk through how I install hinges to get the placement right. This is the process I used for my front door, and it’s worked every time since:
- Measure and mark hinge locations: I place hinges 7 inches from the top and 11 inches from the bottom of the door. For a third hinge, I put it halfway between the two. I marked these spots with a pencil.
- Hold the hinge in place: I held the hinge against the door’s edge, with the moving leaf flat against it. The pin should face outward, toward the frame. I traced around the leaf with a pencil.
- Mortise the door (if needed): Butt hinges need a shallow recess (mortise) so they sit flush. I used a chisel to carve out a 1/8-inch deep recess within my pencil outline. This took some practice, but made the door look clean.
- Screw the hinge to the door: I drilled pilot holes for the screws to prevent splitting. Then, I screwed the moving leaf to the door’s edge, making sure it was flush.
- Attach the door to the frame: I propped the door in the frame, aligning the hinges with the jamb. I marked the frame where the fixed leaf would go, then mortised and screwed it in place.
- Test the door: I opened and closed the door to check for smooth swinging. Mine was a bit tight, so I adjusted the screws slightly.
This took me about an hour for two hinges. The first time was slower, but now I’m much faster. It’s all about taking it step by step.
Installing Hinges for In-Swing vs. Out-Swing Doors
The way your door swings affects hinge placement, and I learned this when I hung an out-swing door for my shed. Here’s the difference:
- In-Swing Doors: Most interior doors swing into the room. I placed the hinge pins on the inside, with the moving leaf on the door’s edge and the fixed leaf on the frame’s jamb. This is how I did my front door.
- Out-Swing Doors: Exterior doors, like my shed door, often swing outward. The hinge pins go on the outside, so the moving leaf still attaches to the door, but the fixed leaf goes on the outer frame. This keeps the pins secure from tampering.
I always check which way the door needs to swing before starting. It’s a small detail that makes a big difference in function and security.
Common Mistakes and How to Avoid Them
I’ve made my fair share of mistakes hanging doors. Here’s what I’ve learned to avoid:
- Wrong leaf placement: I once put the fixed leaf on the door, and it wouldn’t swing right. Always double-check that the moving leaf goes on the door.
- Uneven hinges: If hinges aren’t aligned, the door sags. I use a level to make sure each hinge is straight.
- Skipping the mortise: I tried skipping the mortise once, and the door stuck out awkwardly. Take the time to chisel a shallow recess for a flush fit.
- Loose screws: If screws aren’t tight, the door wobbles. I drill pilot holes and tighten screws firmly but not so hard they strip.
These tips saved me from redoing my work. A little patience goes a long way!
Comparing Hinge Types for Doors
To help you choose the right hinge, here’s a table based on my experiences:
| Hinge Type | Best For | Cost | Installation Time | Tools Needed | Difficulty |
|---|---|---|---|---|---|
| Butt Hinge | Most doors, interior/exterior | $5-$10 | 1 hour | Chisel, screwdriver, drill | Medium |
| Flush Hinge | Lightweight doors, closets | $3-$8 | 30 min | Screwdriver, drill | Easy |
| Concealed Hinge | Modern, hidden look | $10-$20 | 1.5 hours | Drill, template, screwdriver | Hard |
| Continuous Hinge | Heavy doors, sheds | $15-$30 | 1 hour | Drill, screwdriver, level | Medium |
I love butt hinges for their versatility, but flush hinges are great for quick projects. Pick based on your door and skill level.
Adjusting Hinges for a Perfect Fit
Sometimes, the door doesn’t swing perfectly after installation. I had this issue with my closet door—it rubbed against the frame. Here’s how I fix it:
- Tighten screws: If the door sags, I tighten all screws. Sometimes, one loose screw is the culprit.
- Shim the hinges: If the door rubs, I place a thin cardboard shim behind the hinge leaf on the frame. This pushes the door slightly out – see our guide on adjusting spring-loaded hinges for a similar fix on self-closing doors.
- Adjust the mortise: If the door sticks, I deepen the mortise slightly with a chisel. This gives the hinge more room to sit flush.
- Check alignment: I use a level to ensure the door is plumb. My closet door was off by a hair, so I adjusted the top hinge.
These tweaks take just a few minutes and make the door swing like a dream.
Maintaining Your Door Hinges
Once your hinges are installed, a little care keeps them working smoothly. Here’s what I do:
- Lubricate annually: I spray WD-40 or silicone lubricant on the hinge pins every year. It prevents squeaking.
- Tighten screws: I check screws every 6 months to make sure they’re snug.
- Clean the hinges: A damp rag removes dust and grime. I wipe mine down during spring cleaning.
- Replace worn hinges: If a hinge is rusty or bent, I replace it. I swapped one out after a year in my humid garage.
These steps keep my doors swinging smoothly and looking good.
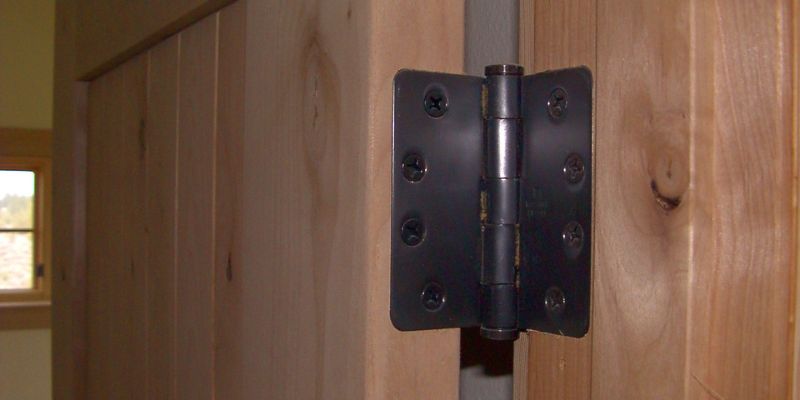
Adding Style with Hinges
Hinges can be more than functional—they can add flair! I had fun picking hinges that matched my home’s vibe. Here are some ideas:
- Brushed nickel hinges: I used these for a modern look on my front door.
- Oil-rubbed bronze: These gave my guest room door a vintage feel.
- Decorative hinges: For my shed, I chose hinges with a wrought-iron design for extra charm.
Choose hinges that match your door hardware or home style. It’s a small touch that makes a big difference.
Why I Love This Project
Hanging a door and getting the hinges right is one of those projects that feels so rewarding. Every time I open my front door, I smile, knowing I did it myself. It’s not just about saving money—though I saved about $200 by not hiring a pro—it’s about making my home work better. A well-hung door feels solid, looks great, and keeps my space cozy. I’ve learned so much from this process, and I’m excited for you to try it too.
Conclusion
There you have it—a complete guide to figuring out which side of the hinge goes on the door! I’ve been through the confusion and mistakes, and I’m thrilled to share these tips with you. From choosing the right hinge to installing it perfectly, you’ve got everything you need to hang a door like a pro. It’s a simple project that makes a huge difference in how your home feels and functions. Grab your tools, take it one step at a time, and enjoy the satisfaction of a smoothly swinging door. Your home is about to get a little more awesome. Happy hanging!
Frequently Asked Questions
What Is the Stop Side of a Door?
The stop side is the frame edge opposite the hinges, where the door stop molding is applied to keep the door from swinging too far and straining the hinges. It’s often confused with the “strike side” (where the lock and strike plate are), which is usually the same physical edge but named for different hardware.
How Do I Know If My Door Is Left-Hand or Right-Hand?
Stand on the secure side of the door, facing it as it swings away from you. If the hinges are on your left, it’s a left-hand door; on your right, it’s a right-hand door. This matters most for lever handles, since levers are handing-specific while most round knobs are reversible.
Which side of the hinge goes on the door for an exterior door?
The moving leaf with the pin goes on the door’s edge. For out-swing exterior doors, the pin faces outside; for in-swing, it’s inside. I used in-swing hinges for my front door.
Do all hinges need mortising?
Not always. Butt hinges need a mortise for a flush fit, but flush hinges don’t. I skipped mortising for my closet door’s flush hinges, and it was super easy.
How many hinges do I need for a door?
Most doors need two or three hinges. I used two for my lightweight closet door and three for my heavier front door to keep it stable.
What if my door doesn’t close properly after installing hinges?
Check for loose screws or misalignment. I fixed a rubbing door by shimming the hinge and tightening screws. A-level helps too.
Can I use the same hinges for interior and exterior doors?
Yes, but exterior hinges should be rust-resistant, like stainless steel. I used regular butt hinges indoors but switched to coated ones for my shed.
Sponsored / affiliate links. As an Amazon Associate I earn from qualifying purchases. I may earn additional commission from eligible campaigns.