How to Reprogram Ceiling Fan Remote: Genius Fix
Quick Summary:
Reprogramming your ceiling fan remote is usually a simple fix for lost connections. Most often, it involves resetting the fan and remote by turning off the power, then re-syncing them by pressing a specific button. This guide will walk you through common methods to get your fan working perfectly again without needing a professional.
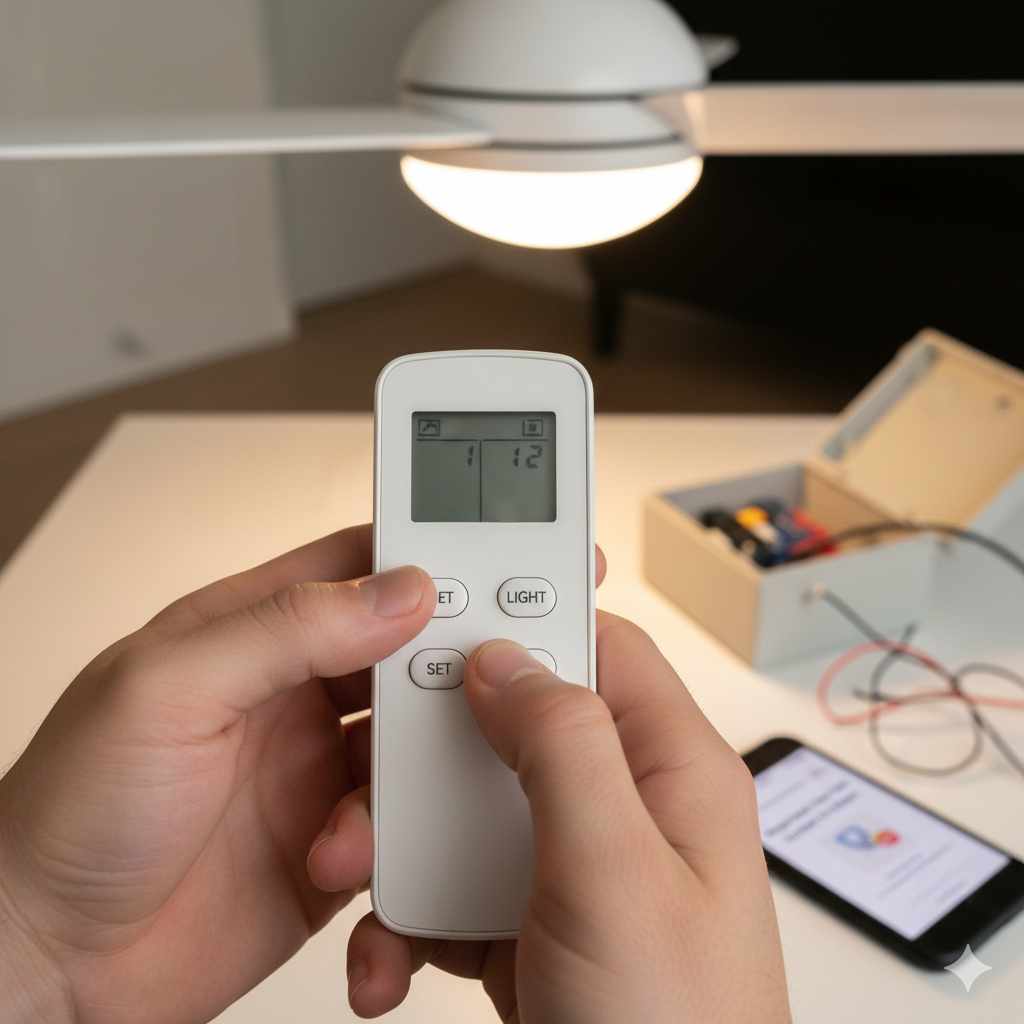
Is your ceiling fan remote acting up? Maybe it’s not responding, or the lights and fan speeds are all mixed up. It can be frustrating when a simple convenience suddenly stops working. Don’t worry, most of the time, this isn’t a sign of a broken fan; it’s just a communication issue between the remote and the fan’s receiver. The good news is that learning how to reprogram a ceiling fan remote is often a straightforward DIY fix that can save you time and money. We’ll guide you through the most common and effective methods to get your fan back under your control.
Many homeowners experience this at some point. Remotes rely on radio frequencies, and sometimes these signals can get interrupted or lost. This can happen after a power outage, a battery change, or even just due to environmental interference. Fortunately, most ceiling fan manufacturers design their remotes with a simple re-syncing or reprogramming process. You don’t need to be an electrician or a tech wizard to tackle this. With a few easy steps, you can likely restore full functionality to your ceiling fan.
This guide is designed to be beginner-friendly, breaking down the process into manageable steps. We’ll cover everything from identifying your remote type to performing the actual reprogramming sequence. By the end, you’ll feel confident in your ability to troubleshoot and fix your ceiling fan remote issues. Let’s get your fan working like new again!
Why Does a Ceiling Fan Remote Need Reprogramming?
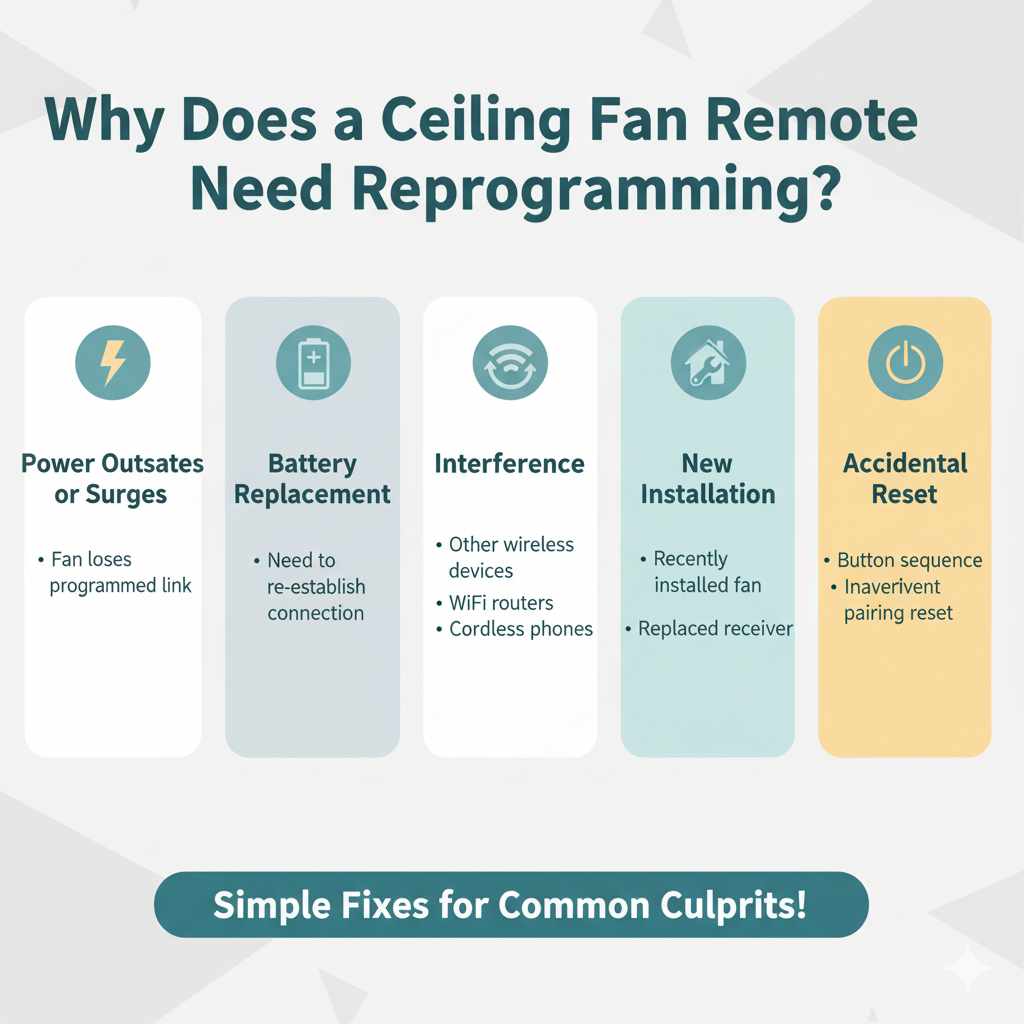
Ceiling fan remotes communicate with the fan’s motor and light kit using radio frequencies (RF). Think of it like a tiny, private radio channel. Over time, this connection can sometimes become unsynchronized. Here are the most common reasons why your remote might stop working correctly and require reprogramming:
- Power Outages or Surges: When the power goes out and comes back on, the receiver in the fan might lose its programmed link to the remote.
- Battery Replacement: Sometimes, after replacing the batteries in your remote, the fan and remote need to re-establish their connection.
- Interference: Other wireless devices in your home, like Wi-Fi routers, cordless phones, or even other remote-controlled devices, can sometimes interfere with the signal.
- New Installation: If you’ve recently installed a new ceiling fan or replaced the receiver, you’ll need to sync the remote to it.
- Accidental Reset: In rare cases, a button might be pressed in a sequence that inadvertently resets the pairing.
Understanding these common culprits helps us know why a simple fix might be all that’s needed. It’s usually not a sign of a major electrical problem, which is great news for DIYers!
Before You Start: What You’ll Need
Before diving into the reprogramming steps, gather a few simple items. You likely have most of these around the house already:
- Your Ceiling Fan Remote: Make sure you have the remote you’re trying to fix.
- Fresh Batteries: If you suspect the batteries are low, replace them with new ones before you begin.
- A Step Ladder or Stool: You’ll need to safely reach the fan to access the receiver or wall switch.
- A Screwdriver (Possibly): Some fan models might require you to remove a light globe or a cover to access a dip switch or a pairing button.
- Pen and Paper (Optional): If your fan has dip switches, you might want to note the original settings before changing them.
- Your Fan’s Manual (If Available): The best resource is always your fan’s specific instruction manual. If you don’t have it, don’t worry; we’ll cover general methods. You can often find digital copies on the manufacturer’s website by searching for your fan’s model number.
Having these items ready will make the process smoother and less interrupted. Safety first, so ensure your ladder is stable!
Step-by-Step Guide: How to Reprogram Your Ceiling Fan Remote
The process for reprogramming a ceiling fan remote can vary slightly depending on the brand and model of your fan. However, most methods fall into a few common categories. We’ll cover the most popular ones here.
Method 1: The Power Cycle & Sync Method (Most Common)
This is the go-to method for many modern ceiling fans, especially those that use a receiver module tucked inside the fan canopy or the downrod. It focuses on resetting the fan’s receiver and then allowing it to pair with the remote.
- Turn Off Power to the Fan: Locate the circuit breaker that controls your ceiling fan and switch it OFF. If you don’t have a breaker or aren’t sure which one it is, turn off the wall switch that controls the fan. Wait about 30 seconds. This ensures the fan’s receiver is completely reset.
- Restore Power: Turn the power back ON at the circuit breaker or wall switch.
-
Immediate Syncing: Within a short window (usually 30-60 seconds) after restoring power, you need to tell the fan to look for the remote. The most common way to do this is by pressing and holding a specific button on your remote. Often, this is the ‘
OFF‘ button, the ‘HI‘ speed button, or a dedicated ‘PAIR‘ or ‘SYNC‘ button. Some remotes might require you to press a combination of buttons. - Listen for Confirmation: If successful, you should hear a beep from the fan’s receiver, or the fan might briefly spin or the light might flash. This indicates the remote has been paired.
- Test the Remote: Try using the remote to change fan speeds, turn the light on/off, or dim the lights.
Tip: If the first attempt doesn’t work, try it again. Sometimes, the timing needs to be just right. If you have a manual, check it for the exact button and timing instructions. For example, some Hunter fans recommend pressing the ‘HI‘ button for 5 seconds within 90 seconds of restoring power.
Method 2: The Dip Switch Method
Older ceiling fans, or some budget-friendly models, might use dip switches for pairing. These are small, often red or white, switches located inside the remote control and sometimes on the receiver unit in the fan.
- Turn Off Power: As with the first method, turn off the power to the fan at the circuit breaker or wall switch.
- Access Remote Dip Switches: Open the battery compartment of your remote control. You should see a row of small switches (usually 4 or 8) labeled with numbers (1-4 or 1-8) and having ‘ON’ and ‘OFF’ positions.
- Access Receiver Dip Switches (If Applicable): If your fan has dip switches on the receiver, you’ll need to access it. This usually involves carefully lowering the fan canopy (the part that covers the ceiling electrical box) or removing a light fixture cover. You might need a screwdriver for this. Be gentle!
-
Set the Codes:
- Option A (Matching Sets): If both the remote and receiver have dip switches, set the switches in the remote to match the pattern of the switches on the receiver.
- Option B (New Code): If only the remote has dip switches, or you want to set a new code, set the switches in the remote to any unique pattern (e.g., all ON, or alternating ON/OFF). Then, you’ll use the power cycle method (Method 1, steps 2-4) to sync the fan to this new code.
- Reassemble and Restore Power: Close the battery compartment, reassemble any parts you removed from the fan, and then restore power to the fan.
- Test the Remote: Check if the remote now controls the fan and lights.
Important Note: If you change the dip switches on the receiver, make sure you have the fan’s canopy or cover securely back in place before restoring power. Also, if you have multiple fans in close proximity, using different dip switch settings can prevent them from interfering with each other. You can find more information on dip switch pairing from resources like Energy.gov regarding efficient home technologies, though they don’t specifically detail fan remotes.
Method 3: The Reset Button Method
Some fan receivers have a small, physical reset button directly on the unit. This is common in newer models that don’t use dip switches.
- Turn Off Power: Turn off the power to the fan at the circuit breaker or wall switch.
- Access the Receiver: You’ll need to locate the receiver unit. This is typically housed in the fan’s canopy, above the motor housing. You might need to carefully lower the canopy by removing a few screws.
-
Press the Reset Button: Look for a small button, often labeled ‘
RESET‘, ‘PAIR‘, or ‘SET‘. Press and hold this button for about 5-10 seconds. - Restore Power: Turn the power back ON at the circuit breaker or wall switch.
-
Sync with Remote: Immediately after restoring power, press and hold the ‘
OFF‘ button (or a designated sync button) on your remote for about 5 seconds. - Listen for Confirmation: The fan should beep or the light might flash to confirm pairing.
- Test: Verify the remote functions correctly.
Caution: Be very careful when working inside the fan canopy. Ensure the power is OFF at the breaker. If you’re uncomfortable with this step, it might be time to call for help.
Troubleshooting Common Issues
Even after following the reprogramming steps, you might encounter a few snags. Here’s how to tackle them:
Remote Still Not Working
- Check Batteries Again: Ensure the batteries are inserted correctly and are fresh. Sometimes, even new batteries can be faulty.
- Verify Power: Make sure the fan is receiving power. Check the wall switch and the circuit breaker.
- Range Issues: Try using the remote closer to the fan. Obstructions like walls or large furniture can weaken the signal.
- Correct Method: Double-check that you are using the correct reprogramming method for your specific fan model. Consult your manual or the manufacturer’s website.
- Receiver Failure: In rare cases, the receiver unit in the fan might have failed. This is a more complex repair and might require replacement.
Fan Speeds or Light are Incorrect
- Re-sync: Sometimes the sync process doesn’t fully complete. Try the power cycle and sync method again, paying close attention to the timing.
- Check Remote Buttons: Ensure you aren’t accidentally pressing multiple buttons at once.
- Receiver Programming: Some advanced receivers have specific programming sequences for different functions. Refer to your fan’s manual.
Multiple Fans Interfering
If you have more than one remote-controlled ceiling fan in close proximity, they might interfere with each other. Here’s how to fix it:
- Use Dip Switches: If your fans have dip switches, set each fan and its corresponding remote to a unique dip switch pattern.
- Reprogram One at a Time: Turn off the power to all fans except the one you are currently reprogramming. This ensures you are only pairing the remote to the intended fan.
- Check Manufacturer’s Instructions: Some manufacturers offer multi-fan remote kits or specific pairing procedures for multiple units.
Understanding Your Ceiling Fan Remote Types
Ceiling fan remotes generally fall into a few categories, and knowing yours can help you pinpoint the right reprogramming method:
| Remote Type | Common Features | Reprogramming Method | Typical Use Cases |
|---|---|---|---|
| Dip Switch Remotes | Small switches inside the battery compartment and sometimes on the receiver. Limited functions (e.g., 3 speeds, light on/off). | Setting matching dip switch patterns on remote and receiver, or using power cycle with new dip switch settings. | Older fans, budget models, fans installed before modern pairing tech. |
| Learning Code Remotes | No visible switches. Usually has dedicated buttons for pairing or sync. | Power cycle the fan and press a specific button (e.g., ‘OFF‘, ‘HI‘, ‘PAIR‘) on the remote within a time window. Often confirmed by a beep or light flash. |
Most modern fans from major brands (Hunter, Harbor Breeze, Westinghouse, etc.). |
| Smart/Wi-Fi Remotes | Often controlled via smartphone apps, voice commands, and have a physical remote. | Usually involves resetting the receiver and re-establishing connection via the app or a specific reset sequence on the remote. May require re-connecting to Wi-Fi. | Smart home integrated fans, advanced models with extensive features (dimming, reverse, scheduling). |
If you’re unsure which type you have, check your fan’s manual. If you don’t have it, look for markings on the remote or receiver unit. Manufacturers like the U.S. Consumer Product Safety Commission (CPSC) often issue recalls or safety information that might help identify specific models or common issues.
When to Call a Professional
While most remote issues are DIY-friendly, there are times when it’s best to get expert help. You should consider calling an electrician or a qualified fan installer if:
- You’re Uncomfortable with Electrical Work: If you’re not comfortable accessing the fan canopy, dealing with wiring, or working on a ladder, it’s safer to let a pro handle it.
- The Fan Still Doesn’t Work After Trying All Methods: If you’ve exhausted all reprogramming options and the fan remains unresponsive, there might be a more significant electrical issue with the fan motor, receiver, or wiring.
- You Suspect Damaged Wiring: If you notice any frayed wires, burn marks, or smell an electrical burning odor, turn off the power immediately and call a professional.
- The Fan is Very Old or Complex: Extremely old fans or those with intricate control systems might require specialized knowledge.
Remember, safety is always the top priority. It’s better to invest in professional help than to risk injury or further damage to your home.

Frequently Asked Questions (FAQ)
Q1: How do I find my ceiling fan’s model number?
A1: Look for a sticker or label on the fan’s motor housing, the canopy, or the downrod. If you still have the original packaging or manual, the model number will be there. You can also often find it on your purchase receipt.
Q2: Can I use a universal ceiling fan remote?
A2: Yes, universal remotes are available. However, you’ll need to ensure it’s compatible with your fan’s receiver type (e.g., dip switch or learning code). Follow the universal remote’s specific pairing instructions carefully.
Q3: My remote has a dimming function, but it stopped working. What should I do?
A3: First, try reprogramming the remote using the methods described. If dimming still doesn’t work, ensure you have the correct type of light bulbs installed (incandescent or dimmable LEDs). Non-dimmable bulbs or incompatible LEDs won’t work with the dimming feature.
Q4: How often should I replace the batteries in my remote?
A4: It depends on usage and battery quality. A good rule of thumb is to replace them once a year, or whenever you notice the remote becoming less responsive. Low batteries are a common cause of remote issues.
Q5: I lost my remote. Can I buy a new one?
A5: Yes, you can often purchase a replacement remote directly from the fan manufacturer or from third-party retailers. Make sure to get the exact model or a compatible replacement. If your fan uses a receiver, you might need to purchase a remote-receiver kit.
Q6: What if the fan makes a buzzing noise after reprogramming?
A6: A slight buzzing can sometimes occur if the fan is not receiving enough power or if the receiver is malfunctioning. Ensure all connections are secure (if you accessed the receiver) and that the circuit breaker is providing adequate power. If the buzzing persists, it might indicate a faulty receiver or motor, and professional inspection is recommended.
Conclusion
Learning how to reprogram your ceiling fan remote is a valuable DIY skill that can quickly resolve common household annoyances. By understanding the different types of remotes and the common reprogramming methods – the power cycle and sync, dip switch adjustments, or the reset button procedure – you’re well-equipped to tackle most issues yourself. Remember to always prioritize safety, especially when working with electricity or at heights. Gather your tools, follow the steps carefully, and don’t hesitate to consult your fan’s manual or the manufacturer’s website for model-specific guidance. With a little patience, you can restore full control of your ceiling fan and enjoy its comfort once again, all without needing to call for costly professional help. Happy troubleshooting!