Harbor Breeze Remote Not Working? How to Reset It (Step-by-Step)
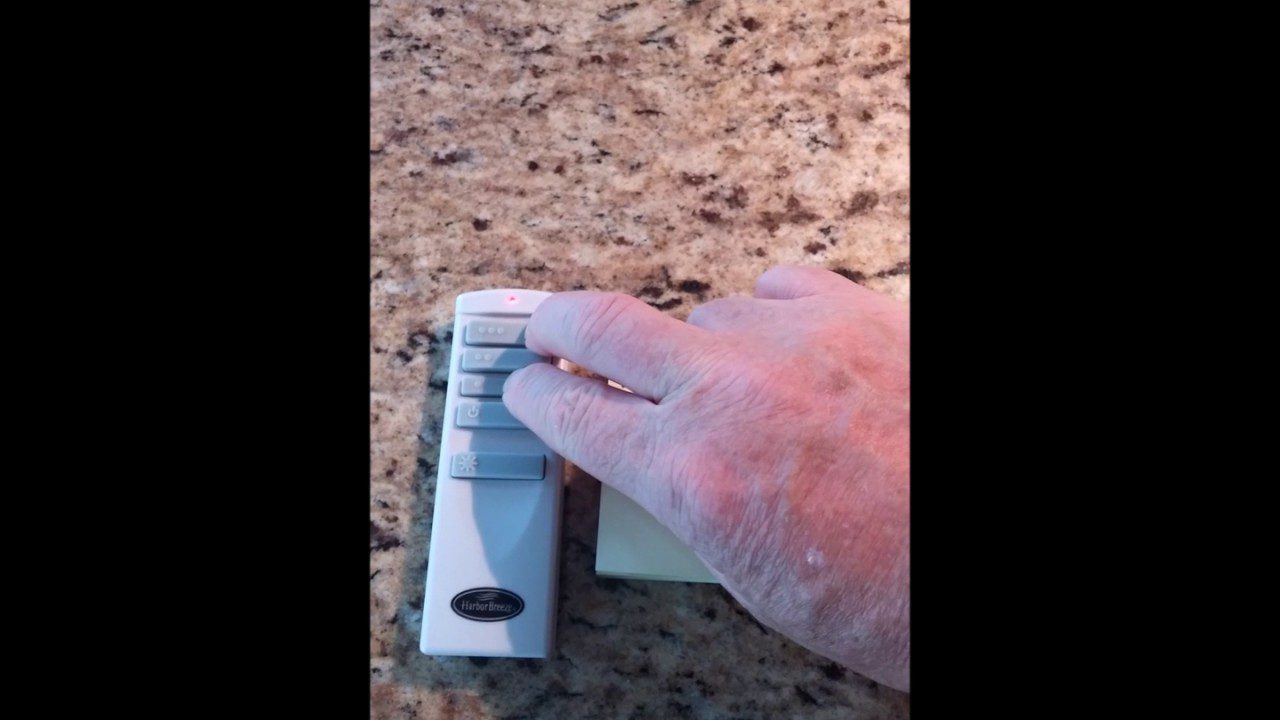
A Harbor Breeze remote that stops working almost always fixes itself with a reset: replace the CR2032 battery, then hold the reset or learn button for 5–15 seconds while the receiver is powered on. Skipping the battery swap is the most common reason resets fail. This guide covers locating the reset button, telling DIP-switch remotes from learn-button remotes, and what to try if a reset alone doesn’t work.
Disclosure: This article contains Amazon affiliate links. We may earn a commission from qualifying purchases at no extra cost to you.
Quick Answer
Replace the remote’s battery first, then hold the small reset (or “learn”) button inside the battery compartment for 5–15 seconds with the fan powered on. Older remotes use tiny DIP switches instead of a reset button — those just need to match the switches inside the fan’s receiver, no button-holding required.
Identifying Harbor Breeze Remote Problems
Common symptoms include the remote not responding at all, controlling the wrong function (light instead of fan speed), or working intermittently. Dead or weak batteries cause most of these issues — check them before assuming the remote itself is broken.
Other warning signs: the fan beeps or the light blinks when you press a button but the fan doesn’t actually respond, fan speed changes on its own, or the remote only works when held a few inches from the fan’s receiver. Any of these point to a pairing or interference problem that a reset usually resolves.
Before You Reset: Tools and Safety Prep
Gather a fresh CR2032 battery (the type most Harbor Breeze remotes use), a small screwdriver for the battery cover, and the fan’s user manual if you still have it — the model number on it helps you confirm whether your remote uses DIP switches or a learn button.
You do not need to cut power to the fan at the breaker to reset the remote itself, but if you’re also checking the receiver inside the fan canopy, turn off the wall switch first and let the fan come to a complete stop before opening anything.
DIP-Switch vs. Learn-Button Remotes: Which Do You Have?
Harbor Breeze has used two different pairing systems over the years, and knowing which one you have changes the reset process. Open the battery compartment on your remote and look inside.
- DIP-switch remotes (older models): You’ll see a small row of tiny numbered switches. These must be set to match an identical row of switches inside the fan’s receiver — there’s no button to hold, you simply flip both sets to the same pattern.
- Learn-button remotes (newer models, roughly 2015 onward): Instead of switches, there’s a small “Learn,” “Set,” or “Reset” button. You put the receiver into pairing mode, then press this button on the remote so the two lock onto the same frequency automatically.
- Model numbers to check: If your remote or receiver is labeled KUJCE9103, KUJCE9603, or similar, it typically uses the DIP-switch system. FAN-53T, FAN-25, and most remotes sold as standalone replacements after 2018 use the learn-button system.
Best Replacement Remote Pick
FAN-53T Replacement Remote for Harbor Breeze – $14.37
If a reset doesn’t bring a dead remote back, this is a direct learn-button style replacement — pairs the same way described in the steps below, no receiver swap needed.
- Best for: A remote that’s physically damaged, lost, or won’t hold a reset at all
- Why we picked it: Lowest price of the options here and uses the same learn-button pairing steps this guide covers
- Main drawback: Button layout is slightly different from the original, so labels won’t match exactly
Compare more replacement remote options
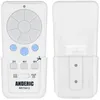 Option 2 Anderic RRTX012 Remote – $29.90
|
 Option 3 TR214D Replacement Remote – $31.63
|
 Option 4 A25-TX015 Replacement Remote – $36.99
|
As an Amazon Associate we earn from qualifying purchases.
Step-by-Step: Performing the Reset
Once you know which system your remote uses, follow the matching steps below. For learn-button remotes:
- Cut power at the wall switch: Turn off the switch that controls the fan and wait at least 30 seconds for the receiver to fully discharge.
- Replace the remote’s battery: Install a fresh CR2032, since a weak battery is the single most common reason a reset appears to fail.
- Restore power to the fan: Flip the wall switch back on. Most receivers stay in pairing mode for about 30 seconds after power is restored.
- Press and hold the learn or reset button: Hold the small button inside the remote’s battery compartment for 5–15 seconds, until the fan light blinks or the fan beeps.
- Test each function: Try fan speed, power, and light controls separately to confirm the remote fully re-paired, not just partially.
For DIP-switch remotes, there’s no button to hold: open the battery compartment on both the remote and the receiver (inside the fan’s canopy, with power off), and set both rows of switches to the exact same up/down pattern. Any matching pattern works, as long as remote and receiver match each other.
“Each transmitter of this remote control carries a unique ID code to facilitate communication between paired devices.”
This is exactly why a reset works: the remote and receiver have to agree on the same ID code (or DIP-switch pattern) to talk to each other. Anything that breaks that agreement — a battery change, a power outage, a nearby fan on the same frequency — can make a perfectly good remote suddenly stop responding until it’s re-paired.
📊 Most Harbor Breeze remotes run on a single 3V CR2032 battery, per the manufacturer’s own remote control manual — not the AA or AAA batteries used in older universal remotes, so keep a spare on hand before you assume the remote itself has failed. — Source: Harbor Breeze remote control manual (ManualsLib)
Troubleshooting: Remote Still Not Working After a Reset
If the remote still doesn’t respond, aim it directly at the receiver and remove anything metal between them — metal light fixtures or ductwork can block the signal. Confirm the fan is actually getting power at the wall switch, since a “dead” remote is sometimes just a fan with no power at all.
If the light responds but the fan doesn’t (or vice versa), the two functions may be on different frequencies internally — repeat the full reset sequence rather than just re-pressing buttons. If nothing changes after two full reset attempts with a fresh battery, the receiver inside the fan canopy has likely failed and needs replacement, which is a bigger job than resetting the remote.
When to Call a Professional
Call an electrician if the fan makes grinding or humming noises, wobbles noticeably, or you notice a burning smell or smoke — these point to a motor or wiring problem a remote reset cannot fix, and continuing to run the fan could be a fire risk.
Also call a professional if the receiver inside the fan canopy needs replacing, since that job involves working inside live household wiring. A licensed electrician can also confirm whether flickering at the fan’s light kit is a wiring issue rather than a remote problem.
Setting Up a Brand-New Remote Instead?
This guide covers resetting a remote that used to work and stopped. If you just bought a new fan or a replacement remote and need to pair it for the first time, the steps are similar but not identical — see our full guide to programming a Harbor Breeze remote for first-time setup. Other brands follow the same basic logic — our Hampton Bay fan reset guide covers the equivalent process for that brand.
You can also browse more ceiling fan and lighting guides if the issue turns out to be with the fixture itself rather than the remote.
Frequently Asked Questions
How do I reset my Harbor Breeze remote?
Remove the battery, wait 10 seconds, then reinsert a fresh CR2032. Cut power to the fan at the wall switch, restore it, then press and hold the “Reset” or “Learn” button inside the battery compartment for 5–15 seconds until the fan beeps or the light blinks. Test each button afterward to confirm the reset worked.
Why is my Harbor Breeze remote not working?
The most common causes are a dead or weak battery, the remote and receiver losing their pairing after a power outage, or physical interference like metal blocking the signal. Check the battery first, then perform a full reset before assuming the remote itself is defective.
Can a Harbor Breeze fan operate without a remote?
Yes. Most Harbor Breeze fans keep a manual pull chain for fan speed and light control as a backup. If your remote is lost, broken, or won’t reset, the pull chain still works independently while you troubleshoot or replace the remote.
How do I sync a Harbor Breeze fan with its remote?
Turn off power to the fan, remove and reinsert the remote’s battery, then restore power. Within about 30 seconds, press and hold the “Learn” or “Pair” button on the remote until the fan responds. This re-establishes the same ID-code pairing between remote and receiver that a factory-new remote ships with.
What if my Harbor Breeze remote is frozen or won’t respond at all?
First replace the battery; a dying CR2032 is the most common cause of a remote that seems “frozen.” If a fresh battery doesn’t help, press and hold every button briefly to drain any residual charge in the circuit, then perform the full power-cycle reset described above. If it still won’t respond, the remote’s internal circuit board has likely failed.
What if my fan and light are on the same wall switch?
The reset process is the same, but cutting power at that single wall switch also cuts power to both the fan and light circuits at once, which is exactly what you want for a reset. If the remote still can’t control one function afterward, that function’s receiver channel may need to be re-paired separately — repeat the learn-button step while testing only that one function.
Conclusion
Most Harbor Breeze remote problems come down to a weak battery or a lost pairing, and both are fixed by the same reset sequence: fresh CR2032, power-cycle the fan, then hold the reset or learn button for 5–15 seconds. If your remote uses older DIP switches instead, match the switch pattern on both remote and receiver. When two full reset attempts don’t help, the remote or receiver hardware has likely failed and it’s time to consider a replacement remote or a professional check.
Sponsored / affiliate links. As an Amazon Associate I earn from qualifying purchases. I may earn additional commission from eligible campaigns.