How to Set Up a Tarp for Camping: My Easy Guide
I’ll never forget my first camping trip when I fumbled with a tarp in the rain. It was a soggy mess, but I learned fast! This guide shows you how to set up a tarp for camping, perfect for beginners, enthusiasts, and pros. You’ll get simple steps, fun tips, and tricks to stay dry and cozy, no matter the weather.
What Is a Camping Tarp and Why Use One?
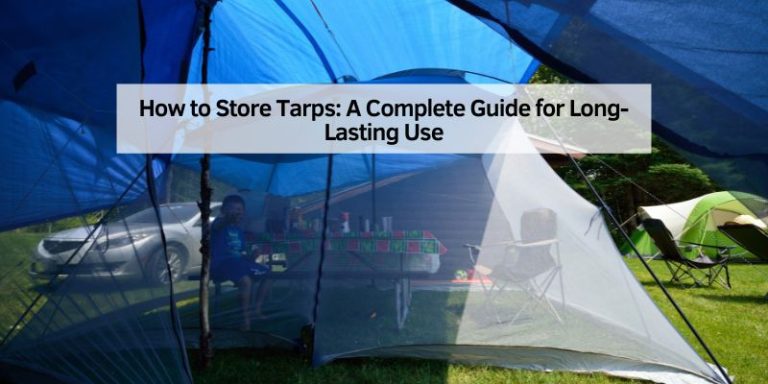
A camping tarp is a lightweight sheet, usually made of waterproof nylon or polyester, that you hang to create shelter. It’s like a magic blanket for your campsite! Tarps keep you dry in rain, shady in sun, and warm at night. They’re lighter than tents and super versatile. I love them because they pack small and set up fast.
Why Tarps Are Awesome for Camping
- Lightweight: A 9×9-foot tarp weighs about 1 pound, perfect for backpacking.
- Versatile: Use it as a roof, windbreak, or groundsheet.
- Budget-Friendly: Basic tarps cost $10-$20 at hardware stores.
But tarps have drawbacks. They don’t have floors, so you might need a groundsheet. Bugs can sneak in without a tent’s walls. Still, with practice, tarps are a camper’s best friend.
Tools and Materials You’ll Need
You don’t need much to set up a tarp. Here’s what I use:
- Tarp: A 10×10-foot waterproof tarp with grommets (metal holes) works great.
- Rope: 50 feet of paracord for ridgelines and guylines.
- Stakes: 4-6 heavy-duty tent stakes.
- Trekking Poles or Sticks: For setups without trees.
- Optional: Clips or prusik knots for easy adjustments.
Pro tip: Buy a silnylon tarp for ultralight camping. It’s pricier ($50-$100) but packs tiny. Check REI or Amazon for deals.
Step-by-Step Guide to Set Up a Tarp
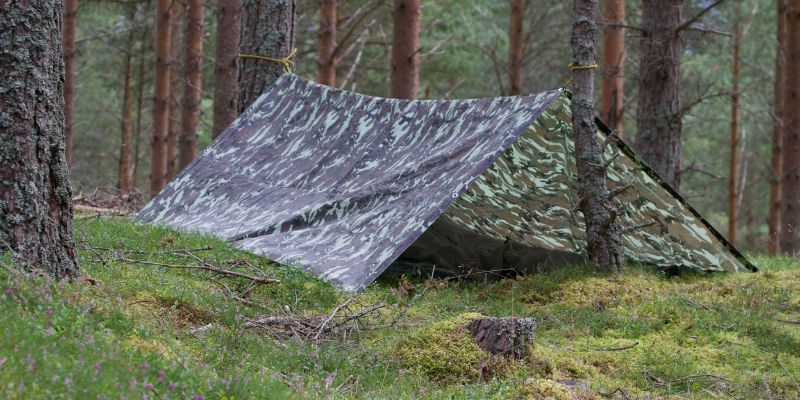
Here’s my go-to method for a classic A-frame tarp setup. It’s easy and works in most spots.
Step 1: Pick Your Spot
Find a flat area with two trees about 12 feet apart. Avoid low spots where water pools. Face the tarp’s opening away from the wind. I once pitched in a dip and woke up in a puddle—don’t do that!
Step 2: Set Up the Ridgeline
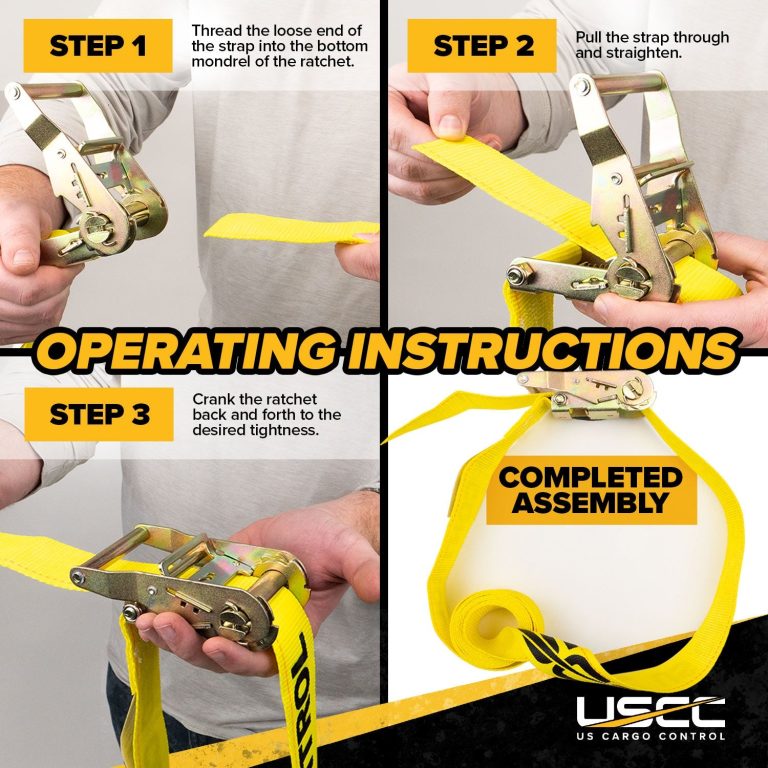
Tie a rope between two trees at chest height. Use a bowline knot on one end and a taut-line hitch on the other for easy tightening. Pull it tight like a guitar string. This is your tarp’s backbone.
Step 3: Drape the Tarp
Throw the tarp over the rope so it’s centered. Secure the tarp’s middle grommets to the rope with small cords or clips. I use prusik knots because they slide easily for adjustments.
Step 4: Stake It Down
Pull the tarp’s corners tight and stake them to the ground. Angle stakes at 45 degrees for a strong hold. If it’s windy, add guylines to side grommets for extra support.
Step 5: Adjust and Test
Walk around and tug the tarp. Make sure it’s taut, not sagging. Slope one side lower so rain runs off. My first tarp sagged like a hammock—tightness is key!
Visual Idea: A simple diagram showing the A-frame setup with labeled parts (ridgeline, stakes, guylines) would help beginners visualize.
Other Cool Tarp Setups
The A-frame is great, but try these for fun:
- Lean-To: Peg one side to the ground, lift the other with poles. Perfect for wind protection.
- Plough Point: Use one pole and three stakes for a quick, low shelter.
- Diamond: Tie one corner to a tree, stake the opposite corner, and peg the sides. Great for hammocks.
Visual Idea: A sketch comparing A-frame, lean-to, and diamond setups with arrows showing wind and rain protection.
Comparing Tarp Materials
| Material | Weight | Cost | Pros | Cons |
|---|---|---|---|---|
| Polyethylene | 12 oz | $10-$20 | Cheap, widely available | Heavy, bulky |
| Silnylon | 8 oz | $50-$100 | Lightweight, packs small | More expensive |
| Dyneema | 5 oz | $200-$600 | Ultralight, super strong | Very pricey |
Table 1: Common tarp materials for camping. Silnylon is my favorite for balance.
Tips from My Camping Adventures
- Practice at Home: Set up your tarp in your backyard. It’s a piece of cake once you know your knots!
- Avoid Sagging: A loose tarp flaps like a sail. Tighten ropes and stakes to keep it snug.
- Bring Extra Cord: I always carry 20 extra feet of paracord. You never know when you’ll need it.
- Check the Weather: Pitch lower in windy conditions to avoid a kite-like disaster.
Once, I forgot to slope my tarp, and rainwater pooled like a kiddie pool. Lesson learned: always angle it!
Common Mistakes to Avoid
- Wrong Site: Don’t pitch under dead branches or in flood-prone dips.
- Loose Knots: Practice bowline and trucker’s hitch knots. Loose ropes ruin shelters.
- Skipping Groundsheet: Without one, you’ll get wet from below. A $5 plastic sheet works.
Visual Idea: A checklist graphic with “Do” and “Don’t” columns for tarp setup mistakes.
Cost-Saving Ideas
- DIY Stakes: Use sturdy sticks instead of buying stakes. Sharpen them with a knife.
- Budget Tarps: Get a $10 polyethylene tarp from Walmart for starters.
- Reuse Gear: Old tent poles or ropes work fine. No need to splurge.
Safety Tips for Tarp Camping
- Fire Safety: Keep tarps away from campfires. Embers can burn holes. I learned this when a spark melted my first tarp!
- Wind Check: Secure extra guylines in gusty weather to prevent collapse.
- Bug Protection: Pair your tarp with a bivy sack for bug-free sleep.
Comparing Tarp vs. Tent
| Feature | Tarp | Tent |
|---|---|---|
| Weight | 1-2 lbs | 3-6 lbs |
| Setup Time | 5-10 mins | 10-20 mins |
| Cost | $10-$200 | $50-$500 |
| Weather Protection | Good (with skill) | Excellent |
Table 2: Tarp vs. tent for camping. Tarps win for weight and cost!
My Favorite Tarp Camping Memory
Last summer, I camped in Oregon’s forests with just a tarp and hammock. The stars sparkled above, and the breeze felt amazing. My A-frame tarp kept me dry during a surprise shower. It was like sleeping in nature’s living room! Try it—you’ll love the freedom.
For more tarp tips, check out REI’s guide (https://www.rei.com/learn/expert-advice/tarp-shelter.html) or Alpkit’s setup ideas (https://us.alpkit.com/blogs/news/how-to-set-up-a-camping-tarp). The Camping and Hiking subreddit (https://www.reddit.com/r/campingandhiking/) is great for community advice.

Conclusion
Setting up a tarp for camping is easy with practice. Pick a spot, tie a tight ridgeline, and stake it down. Try an A-frame or lean-to for fun. Tarps are light, cheap, and let you feel closer to nature. Grab a tarp, hit the woods, and share your setup pics with friends! What’s your favorite camping trick? Let me know!
Frequently Asked Questions
What’s the Easiest Tarp Setup for Beginners?
The A-frame is the easiest. Tie a rope between two trees, drape the tarp over, and stake the corners. It’s quick and keeps you dry.
Can I Use a Tarp Without Trees?
Yes! Use trekking poles or sticks to prop up the tarp. A plough point setup needs just one pole and three stakes.
How Do I Keep Rain From Pooling on My Tarp?
Slope one side lower so water runs off. Tighten the tarp to avoid sagging. Dig a small ditch around the edges if needed.
What Size Tarp Is Best for Camping?
A 10×10-foot tarp is versatile for one or two people. Bigger tarps (12×16) work for groups but weigh more.
How Do I Protect Against Bugs Under a Tarp?
Use a bivy sack or bug net with your sleeping bag. Pitch the tarp low to block gaps.
Can I Cook Under a Tarp?
Yes, but keep it away from flames. Use a stove in a well-ventilated spot to avoid smoke or fire risks.
What Knots Should I Learn for Tarp Camping?
Learn the bowline for securing ropes to trees and the trucker’s hitch for tightening guylines. They’re simple and strong.