How To Stain Kitchen Cabinets No Sand
Many folks dream of giving their kitchen cabinets a fresh, new look. Sometimes, the idea of sanding can stop people from starting. Sanding is often seen as tough work, especially for beginners.
You might worry about dust everywhere or messing up the cabinet finish. But what if there was an easier way? This guide will show you exactly How to Stain Kitchen Cabinets Without Sanding.
We’ll walk you through a simple, step-by-step process that makes updating your kitchen achievable. Get ready to transform your cabinets with less effort than you thought possible.
Revitalize Cabinets Without Sanding
Giving your kitchen cabinets a facelift is a popular home improvement project. Many people want a new color or a richer wood tone. The biggest hurdle for DIYers is often the extensive sanding required for traditional staining.
Sanding can be time-consuming, messy, and requires specific tools and skills. It’s easy to get discouraged by the thought of dust covering your kitchen or the risk of damaging your cabinets. This section explores why staining without sanding is a great option and what makes it accessible to everyone.
It’s about achieving beautiful results without the typical hassle.
The Appeal of No-Sand Staining
The main draw of staining without sanding is the time and effort saved. Traditional methods often involve sanding down to bare wood to ensure the stain adheres properly. This can take hours, even days, depending on the number of cabinets.
It also creates a lot of dust that gets everywhere. Staining without sanding uses special liquid deglossers or bonding primers. These products etch the surface or create a surface the new stain can grip onto.
This significantly cuts down on prep work.
It’s also a much cleaner process. You avoid the cloud of dust that comes with sanding. This means less time spent cleaning up afterward.
For renters or those with limited workspace, this is a huge advantage. You can often complete the project in a weekend without needing a dedicated workshop or extensive ventilation.
Beginners often find this method less intimidating. Sanding requires a certain technique to avoid creating divots or uneven surfaces. With no-sand methods, the primary focus is on cleaning and applying the product correctly.
This lowers the barrier to entry for anyone wanting to tackle a cabinet makeover.
When No-Sand Staining Works Best
This method is ideal for cabinets that are already in good condition but just need a color update. If your cabinets have a lot of deep scratches, dents, or are made of very soft wood, sanding might still be necessary for a perfect finish. However, for cabinets with intact finishes, this approach is excellent.
The existing finish should be relatively smooth and free of major damage. If the cabinets have a glossy or semi-gloss finish, a liquid deglosser or a good bonding primer is key. These products are designed to help new finishes adhere to slick surfaces.
This makes them perfect for updating old cabinets without disturbing the original coating.
It’s also a good choice if you are working on a budget. Sanding tools and sandpaper can add up. The products for no-sand staining are often more affordable.
This allows you to update your kitchen’s look without breaking the bank.
Preparing for a Smooth Finish
Even without sanding, proper preparation is vital for a lasting, beautiful finish. The surface must be impeccably clean. Any grease, grime, or residue will prevent the stain from adhering correctly and can lead to peeling or an uneven look.
Think of it like preparing skin for makeup – a clean canvas is essential.
You’ll need to gather a few key supplies. A good quality degreaser or TSP substitute is a must. You’ll also need clean cloths or sponges for cleaning, and possibly tack cloths for removing dust.
For application, you’ll likely use foam brushes, high-quality paint brushes, or small rollers depending on the product.
Taking the cabinet doors and drawers off their hinges is also part of this preparation. This allows you to work on a flat surface and get into all the nooks and crannies. Labeling each door and drawer front with tape will help you put everything back correctly.
Essential Materials and Tools
To successfully stain your kitchen cabinets without sanding, having the right materials and tools is half the battle. These items ensure the process goes smoothly and the final result looks professional. We will cover everything from cleaning supplies to the actual staining products.
Having a checklist helps avoid last-minute trips to the store.
Cleaning and Degreasing Supplies
Before any new finish can be applied, the cabinets must be spotless. Grease, food splatters, and general kitchen grime can prevent stain and primer from adhering. This is why a thorough cleaning is non-negotiable.
You need products that can cut through tough grease without damaging the cabinet surface.
A good quality degreaser is essential. Trisodium Phosphate (TSP) is a powerful cleaner, but it can be harsh. Many DIYers opt for TSP substitutes, which are less caustic but still effective.
These substitutes usually contain strong alkaline ingredients that break down grease and oil. Always follow the product instructions for mixing and application.
You will also need plenty of clean cloths or sponges. Microfiber cloths are excellent for wiping away residue without leaving lint behind. Have a bucket of your cleaning solution and another bucket of clean water for rinsing.
Rinsing is crucial to remove any cleaner residue that could interfere with the staining process.
Bonding Primer or Liquid Deglosser
Since you are skipping the sanding step, you need a product that will help the new stain stick to the existing finish. This is where a good bonding primer or a liquid deglosser comes into play. These products create a surface that the stain can adhere to.
A bonding primer is specifically formulated to stick to slick surfaces like laminate, varnish, or glossy paint. It creates a stable base for your new stain. Look for primers labeled for difficult surfaces.
These are typically water-based or oil-based and provide excellent adhesion.
A liquid deglosser works a bit differently. It’s a chemical solution that slightly etches or softens the existing finish. This creates a duller, more porous surface that the stain can grip.
You apply it with a cloth, and it dries quickly. It’s important to note that deglossers are not for all finishes, so always test in an inconspicuous area first.
A typical deglosser contains solvents that can break down a thin layer of the original coating. This makes the surface ready for the new stain without physical abrasion. For example, many contain mild acids or alcohols that slightly roughen the surface at a microscopic level.
This microscopic texture allows the new stain to bond much better than it would to a perfectly smooth, glossy surface.
When choosing between a bonding primer and a deglosser, consider the condition of your cabinets and the type of stain you plan to use. For older cabinets or those with a very slick finish, a bonding primer often provides a more durable foundation. If you are using a gel stain or a paint-like stain, a deglosser might be sufficient and quicker to use.
Stain and Sealant
The actual stain is what gives your cabinets their new color. There are several types suitable for a no-sand method. Gel stains are popular because they are thicker and less prone to dripping.
They offer excellent coverage and can transform the look of cabinets quickly.
Water-based or oil-based interior stains can also work, but you must use them with a good bonding primer. The primer is critical here. For beginners, a pre-mixed cabinet refinishing kit can be a great option as it often includes compatible products.
After staining, you will need a sealant or topcoat to protect the new finish. A water-based polyurethane or polycrylic is a good choice. It dries clear and is durable, offering good protection against moisture and wear.
Apply thin, even coats for the best results.
Application Tools
For applying the primer and stain, you’ll need a variety of brushes and applicators. High-quality synthetic brushes are good for water-based products, while natural bristle brushes are better for oil-based stains. Foam brushes are also useful for smooth application, especially on flat surfaces.
Small foam rollers can be used for large, flat cabinet doors. They help achieve a smooth, even coat without brush strokes. For detail work on cabinet frames or door edges, you’ll want smaller, high-quality brushes.
A good set of brushes in different sizes will make a big difference in the final appearance.
Clean brushes thoroughly immediately after use. This will keep them in good condition for future projects. Disposable applicators can be convenient if you don’t want to worry about cleaning.
Miscellaneous Supplies
Don’t forget other helpful items. Painter’s tape is essential for protecting areas you don’t want to stain, like cabinet interiors or nearby walls. Drop cloths are a must to protect your floors and countertops from spills and drips.
You’ll also need rags for wiping up excess stain or drips, and gloves to protect your hands.
A screwdriver set is needed to remove cabinet doors and drawer fronts. Small buckets or containers are useful for holding primer, stain, or cleaning solutions. Lastly, good lighting is important to see what you are doing and ensure an even application.
Step-by-Step Guide to No-Sand Cabinet Staining
This comprehensive guide walks you through each step of transforming your kitchen cabinets without the need for sanding. Follow these instructions carefully for a beautiful, durable finish. We’ll cover everything from the initial cleanup to the final protective coat.
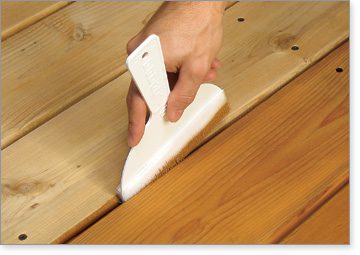
Step 1 Cleaning and Degreasing
This is arguably the most critical step. Any dirt, grease, or residue on your cabinets will prevent the new finish from adhering properly. Start by removing cabinet doors and drawer fronts.
Take clear pictures or label them so you know where each piece goes.
Mix your degreaser according to the manufacturer’s instructions. Use a sponge or cloth to apply the solution to the cabinets. Work in small sections, scrubbing gently.
Pay attention to areas around knobs and handles, which often collect more grime. You may need to scrub harder in these spots.
Rinse each section thoroughly with clean water and a clean cloth. Ensure no degreaser residue remains. Let the cabinets air dry completely.
You can speed this up with a fan or by wiping them down with a dry cloth. Make sure every surface is bone dry before moving on. This prevents moisture from affecting the primer or stain.
For very stubborn spots, you might need to repeat the cleaning process. This thorough cleaning ensures the cabinets are ready for the next step, providing a clean canvas for the new finish.
Step 2 Applying the Bonding Primer or Deglosser
Once the cabinets are clean and completely dry, it’s time to apply your bonding primer or liquid deglosser. If using a deglosser, apply it according to the product’s instructions. Typically, you wipe it on with a cloth, let it sit for a short period, and then wipe off any residue.
It subtly etches the surface, creating a better grip for the stain. Be sure to work in a well-ventilated area when using deglossers, as they can have strong fumes.
If using a bonding primer, stir it well. Apply a thin, even coat to the cabinet surfaces using a high-quality brush or a small foam roller. Avoid applying too much, as this can lead to drips and an uneven finish.
Ensure you cover all areas you intend to stain.
Let the primer dry completely according to the manufacturer’s recommendations. This usually takes a few hours. Some products may recommend a second coat for better adhesion, especially on very slick surfaces or if you are planning a drastic color change.
Check the product label for specific instructions.
The primer acts as a bridge between the old finish and the new stain. It ensures that the stain adheres well without the need for sanding. This step is crucial for the longevity of your cabinet’s new look.
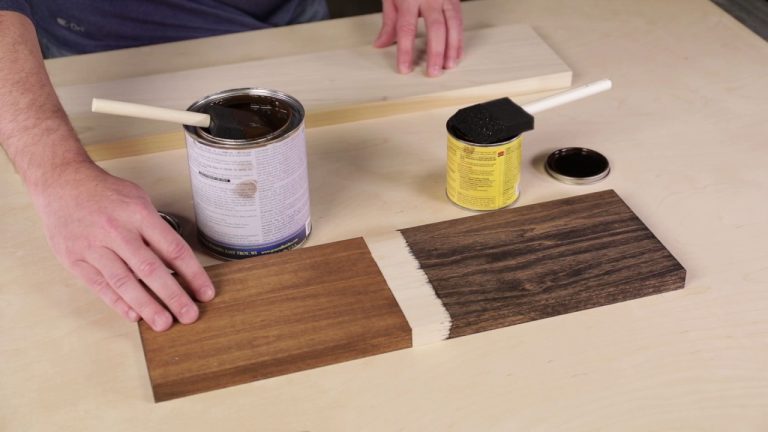
Step 3 Staining the Cabinets
With the primer dry, you can now apply the stain. If you are using a gel stain, stir it well but do not shake it, as this can create bubbles. Apply the stain in thin, even coats using a brush or foam applicator.
Work in the direction of the wood grain, if applicable.
For most stains, you’ll want to apply and then wipe off the excess with a clean rag. The longer you leave the stain on before wiping, the darker the color will be. Wipe off the excess stain in the direction of the wood grain.
This technique helps achieve a natural, rich color. Test on an inconspicuous area first to get the desired shade.
Allow the first coat of stain to dry completely. Drying times can vary depending on the humidity and the type of stain used. Most stains require at least 4-24 hours to dry.
If you want a darker color, apply a second coat of stain after the first has dried.
Remember, you can always add more stain to deepen the color, but it’s hard to remove it. Patience here will pay off with a more even and beautiful final result. Don’t rush this process.
The staining process is where the visual transformation really happens. You’re essentially adding a new layer of color over the existing finish, which has been prepared by the primer. This is why the primer step is so important; it gives the stain something to grab onto.
When applying the stain, try to maintain a wet edge. This means overlapping slightly with the previously stained area while it’s still wet. This helps prevent visible lines or lap marks from appearing in the finished product.
Work methodically, section by section, to ensure a continuous, uniform application.
If you are using a stain that is not a gel stain, you might find it beneficial to use a rag for the initial application and then a brush to smooth it out and remove excess. Experiment with different application methods on scrap wood if you have it, to see what works best for the specific stain you are using and the look you are trying to achieve. The goal is a smooth, even color distribution.
Step 4 Applying the Protective Topcoat
Once the stain is completely dry, it’s time to apply a protective topcoat. This layer is crucial for durability and preventing the stain from wearing off. Polyurethane or polycrylic are common choices for cabinet finishes.
Water-based polycrylic is often preferred because it dries clear and does not yellow over time, especially over lighter stains.
Apply the topcoat in thin, even layers using a high-quality brush or a foam roller. Avoid applying too thickly, as this can lead to a gummy finish or drips. Brush strokes should be in the direction of the wood grain.
Allow each coat to dry completely according to the manufacturer’s instructions.
Most projects will require 2-3 coats of the topcoat for adequate protection. Lightly sand with very fine-grit sandpaper (220 grit or higher) between coats. This helps to smooth out any imperfections and provides better adhesion for the next layer.
Wipe away any dust with a tack cloth after sanding.
The topcoat is the guardian of your cabinet’s new look. It shields the stain from moisture, heat, and the daily wear and tear of a busy kitchen. A well-applied topcoat will ensure your cabinets look great for years to come.
Step 5 Reassembling the Cabinets
After the final coat of sealant has dried and cured, you can reassemble your cabinets. Carefully reattach the doors and drawer fronts to their respective locations. Use your labels or photos to ensure everything goes back in the right place.
Reinstall your cabinet hardware, such as knobs and pulls. Make sure they are aligned properly. Step back and admire your newly transformed kitchen cabinets!
The process, though detailed, results in a beautiful, fresh look without the heavy labor of sanding.
This final step brings the entire project to a close. It’s satisfying to see the cabinets back in place, looking completely different. The smooth finish and rich color are a testament to your hard work and the effectiveness of the no-sand method.
Tips for Success and Common Pitfalls
Even with a simplified process, there are common mistakes that can lead to less than ideal results. Knowing these pitfalls beforehand can help you avoid them and ensure a professional-looking finish on your cabinets. This section offers practical advice and insights gathered from experience.
Ventilation and Safety
Always work in a well-ventilated area, especially when using deglossers, primers, or stains. Open windows and doors, and consider using fans to circulate air. Wear a respirator mask to protect yourself from fumes and fine dust particles, even if you aren’t sanding.
Gloves are essential to protect your skin from chemicals and stains.
Read all product labels carefully for specific safety instructions and recommended personal protective equipment (PPE). Ensure you have adequate lighting to see clearly and avoid mistakes. Good ventilation is also key for the drying process, as it helps solvents evaporate more quickly.
Testing Products First
Before applying any product to your entire kitchen cabinets, always test it on an inconspicuous area. This could be the inside of a cabinet door or a spare piece of wood with a similar finish. This test run allows you to check how the deglosser affects the existing finish, how the primer adheres, and how the stain color looks.
Testing helps you confirm that the products are compatible with your cabinet material and existing finish. It also gives you a chance to practice your application technique. This small step can save you from costly mistakes and ensure you achieve the desired look.
You can see how the colors layer and how the products interact.
The test area should ideally mimic the conditions of your cabinet surfaces. This means applying it to a section that has been cleaned and degreased, just as you would the rest of the cabinets. This ensures that your findings are relevant to the overall project.
If the stain looks patchy or the primer doesn’t adhere well during your test, you’ll know to reconsider your product choices or your preparation methods.
Applying Thin Coats
One of the biggest mistakes people make is applying product too thickly. Whether it’s primer, stain, or topcoat, thin, even coats are always better. Thick coats are more prone to dripping, bubbling, and uneven drying.
They also take much longer to cure.
Apply your product in thin layers, ensuring complete coverage but avoiding excess. If you notice a drip, address it immediately while the product is still wet. For stains, wiping off excess evenly is key to a uniform color.
For primers and topcoats, smooth, overlapping strokes with a good brush or roller are essential.
The beauty of thin coats is that you can always add more. Two thin coats are usually much better than one thick, gloppy coat. This principle applies across all stages of the staining process, from the initial primer to the final protective layer.
It helps ensure a smooth, professional finish that lasts.
For instance, if you apply a thick coat of stain, it might not dry properly underneath, leading to a sticky surface for days. Or, if you apply a thick layer of polyurethane, you might see visible brush marks or an orange-peel texture. Thin, multiple applications allow each layer to dry and cure properly, building a smooth, durable finish.
Patience During Drying Times
Drying times are not just suggestions; they are critical for a successful finish. Rushing the drying process by applying subsequent coats too soon is a common pitfall. This can lead to premature peeling, bubbling, or a gummy finish that never truly hardens.
Always adhere to the manufacturer’s recommended drying and recoating times. These times can vary based on humidity and temperature, so it’s good to be patient. If a product feels tacky after the recommended drying time, wait longer.
It’s better to wait an extra day than to ruin your hard work.
Proper drying allows the solvents in the finish to evaporate, which is essential for the coating to harden and achieve its full durability. This is especially true for oil-based products. Water-based products also need adequate time to cure properly.
Consider using fans to improve air circulation, which can help speed up drying without compromising the integrity of the finish. However, avoid placing fans directly on wet surfaces, as this can cause uneven drying or surface imperfections. Indirect airflow is generally best.
Choosing the Right Products
Not all products are created equal, and using the wrong ones can sabotage your efforts. For the no-sand method, select high-quality bonding primers or liquid deglossers specifically designed for slick surfaces. Ensure your stain is compatible with the primer you choose.
For example, using a latex primer with an oil-based stain might cause adhesion issues. Always read the product labels and look for recommendations or warnings about compatibility. If you are unsure, consult with staff at a reputable paint store.
They can guide you toward the best products for your specific project.
Using a gel stain can simplify the staining process for beginners. Gel stains are thicker, which means they are less likely to drip and can provide more opaque coverage. This makes them a forgiving choice for a no-sand project where you want a significant color change.
Conversely, a very thin stain might require more careful application and multiple coats over a primer to achieve a rich color. Researching different stain types and their application properties can help you select the best option for your desired outcome and skill level.
Enhancing Your Cabinets After Staining
Once your cabinets are stained and sealed, you might want to add a few finishing touches to elevate their look and functionality. These enhancements can make a big difference and give your kitchen a professional, updated feel.
Hardware Updates
New hardware can dramatically change the appearance of your cabinets. Consider upgrading your knobs and pulls to something that complements your new stain color and your kitchen’s overall style. Brushed nickel, matte black, or even antique brass can create a fresh look.
Measure the distance between existing screw holes before purchasing new hardware. This ensures a seamless swap. If you’re changing the size or placement of your hardware, you might need to fill old holes and drill new ones.
This can be done with wood filler and touch-up paint.
The right hardware can tie the whole project together. It’s like jewelry for your cabinets, adding a decorative element that enhances both form and function. Choosing hardware that is comfortable to grip is also important for daily use.
Adding Shelving or Organizers
While not directly related to the staining process, consider improving the interior organization of your cabinets. Adding pull-out shelves, drawer organizers, or spice racks can make your kitchen more functional. This makes the most of your newly refreshed cabinets.
Many DIY kits are available for easy installation. Even simple additions like drawer dividers can make a big difference in keeping your kitchen tidy. This is an excellent time to assess what storage solutions would benefit your kitchen workflow the most.
Lighting Considerations
Good lighting can showcase your newly stained cabinets. Consider adding under-cabinet LED lighting. This not only illuminates your countertops for better working conditions but also highlights the rich color and finish of your cabinets.
It creates a warm and inviting atmosphere in your kitchen.
These lighting solutions are often easy to install and can be powered by batteries or hardwired. They add a touch of modern elegance and can make your kitchen feel more spacious and luxurious. It’s a small change that makes a big visual impact.
Frequently Asked Questions
Question: Can I stain over cabinets that are already painted?
Answer: Yes, but it requires special products. You’ll need a good bonding primer designed to adhere to glossy surfaces, or a liquid deglosser, followed by your chosen stain. Ensure the painted surface is thoroughly cleaned and free of any wax or grease.
Question: How long does it take to stain cabinets without sanding?
Answer: The actual staining process can take a weekend or two, depending on the size of your kitchen and drying times between coats. The biggest time saver is skipping the sanding, but you still need to account for cleaning, priming, staining, and sealing.
Question: What is the best type of stain to use for this method?
Answer: Gel stains are often recommended for no-sand projects because they are thicker and less prone to dripping, offering better coverage. However, other interior stains can work well when used over a properly applied bonding primer.
Question: Will the stain last without sanding?
Answer: If you use a high-quality bonding primer or deglosser and follow all the preparation and application steps correctly, the stain will last. The primer or deglosser creates the necessary surface for adhesion, making sanding unnecessary for durability.
Question: Can I achieve a deep, dark color without sanding?
Answer: Yes, you can achieve a deep, dark color. This often involves using multiple thin coats of a darker stain over a bonding primer. The primer provides a solid base, and the multiple stain layers build up the desired depth of color.
Conclusion
You now have a clear path to refreshing your kitchen cabinets without the daunting task of sanding. By focusing on thorough cleaning, using the right bonding primer or deglosser, and applying stain and sealant in thin, even coats, you can achieve beautiful results. This method saves time and effort, making cabinet refinishing accessible to more people.
Enjoy your beautifully updated kitchen.