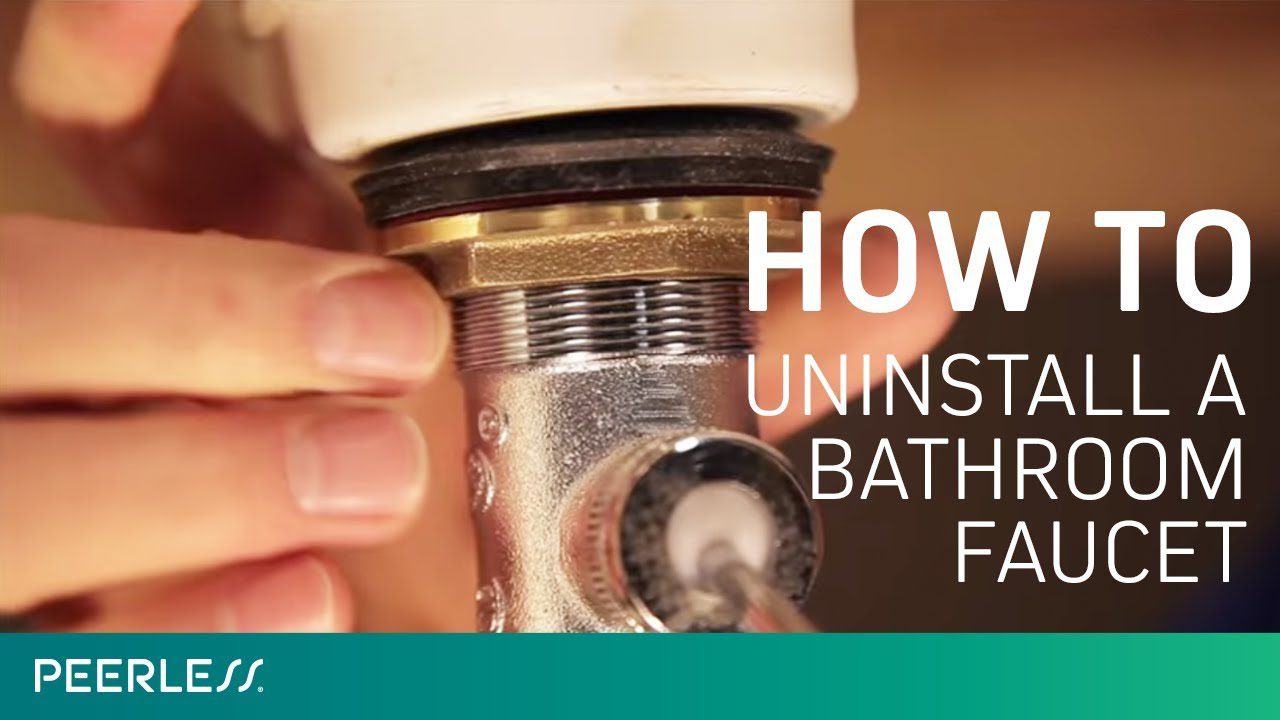
How to Take Out a Bathroom Faucet: Easy Step-by-Step Guide
Are you ready to tackle that leaky bathroom faucet once and for all? Removing a bathroom faucet might seem like a daunting task, but with a little guidance, you can handle it with ease.
Imagine the satisfaction of fixing something yourself and saving money on costly plumber fees. Plus, you’ll gain a valuable skill that will come in handy time and again. You’ll discover straightforward steps to take out a bathroom faucet without any stress.
We’ll break it down into simple, manageable tasks that anyone can follow. And by the end, you’ll not only have a sense of accomplishment but also a sparkling new faucet ready to be installed. So, roll up your sleeves and prepare to be empowered with practical knowledge that makes a real difference in your home. Don’t miss out on transforming your bathroom into a space that truly works for you.
Credit: homerepairtutor.com
Tools And Materials Needed
Removing a bathroom faucet is simple with the right tools. You will need a wrench. This helps in loosening the nuts. Next, a screwdriver is needed. It helps in unscrewing small parts. Plumber’s tape is useful. It seals any leaks later. Bucket is for catching water. You need it to avoid mess. Towels are handy. They soak up spills. Gloves are important. They keep hands safe and clean. Cleaning solution is good. It removes grime and dirt.
Flashlight is helpful. It brightens dark spots. Old rags are useful too. They wipe surfaces clean. Having these tools nearby makes the job easy. Safety goggles protect eyes. Always wear them while working. Adjustable pliers grip and turn parts. Putty knife scrapes off old caulk. Double-check your tools before starting. Missing tools delay work.
Credit: woodgears.ca
Safety Precautions
Protect your eyes with safety goggles. Wear gloves to keep your hands safe. Turn off the water supplybefore starting. Look for the valve under the sink. Check if the water is completely off. Use a towel to catch any spills. Ensure the area is dry and clean. Keep tools within reach. Make sure you have a bucket nearby. Inform others about your task. Tell them not to use the water for now. Avoid rushing, work slowlyand carefully. Take breaks if needed. Stay focused to avoid accidents. Do not force parts if they are stuck. Use a flashlight if the area is dark. Double-check all connections. Be patient and careful. Keep children away from the work area. Explain the importance of safety to them.
Turn Off Water Supply
Begin by locating the water valves under the sink. Twist the knobs to the right to turn off the water. Check the faucet by turning it on. No water should come out. If water still flows, you might need to shut off the main water supply. Main valves are usually near the water meter. It’s crucial to ensure no water is running. This prevents leaks and water damage. Keep towels nearby to dry any spills. Safety first. Make sure everything is dry before starting the next step.
Remove Faucet Handles
First, turn off the water supply. This stops water flow. You can find the valve under the sink. Now, use a screwdriver to remove handle screws. They hide under a cap or at the back. Be gentle to avoid scratching. Next, pull the handle up. It may be tight. Wiggle it a bit if needed. Handles can be different shapes. Keep all parts safe in one place. You will need them later. Now, check the base of the handle. Look for a nut or clip. Use a wrench to loosen it. Twist carefully so you don’t break it. Once loose, remove the handle completely. Handles come off easily if done right.
Disconnect Water Lines
First, turn off the water. Find the valve under the sink. Twist it to stop the water flow.
Use a wrench to loosen the water line nuts. These nuts hold the water lines. Be careful not to damage them.
Once loose, gently pull the water lines away. Water lines might drip a bit, so place a bucket underneath.
Check for any leftover water in the pipes. Dry the area with a towel.
Finally, make sure the lines are free from the faucet. You are ready for the next step.
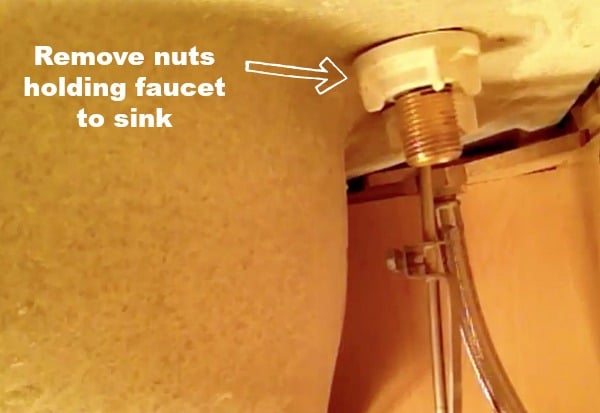
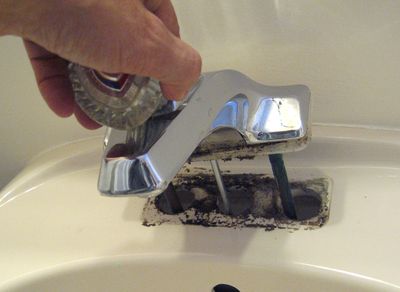
Detach Faucet From Sink
First, turn off the water supply. This stops water flow. Next, find the nuts under the sink. Use a wrench to loosen them. Twist slowly to avoid breaking. Once loose, remove the nuts. Now, lift the faucet up. It should come off easily. Check for any remaining parts stuck. If so, use a screwdriver to pry them out. Be gentle to avoid damage. Finally, clean the area. This helps in installing a new faucet. Make sure everything is dry. A clean sink means easy installation. You are now ready for the next step.
Clean The Sink Area
Start by removing all items from around the sink. Clear the counter space for easier access. Make sure the sink is empty and dry. Prepare a towel or rag nearby. This will help catch any water spills. Safety comes first. Turn off the water supply under the sink. Use a flashlight if it’s dark. Check for any tools you might need. A wrench or pliers can be useful. Remember to wear gloves. Protect your hands from dirt and grime. Cleaning the area will make removal easier. It also prevents any mess later. Organize your tools in a nearby tray. This saves time and effort.

Credit: m.youtube.com
Inspect And Prepare For New Faucet
Begin by turning off the water supply. Locate the valves under the sink. Turn them clockwise. This stops water flow. Next, place a bucket under the pipes. This will catch any water. Now, remove the faucet handles. Use a screwdriver for this task. Unscrew the nuts holding the faucet. You might need pliers for tight nuts. Check all parts for damage. Damaged parts may cause leaks. Clean the area around the sink. Remove any debris or old sealant. A clean area helps the new faucet fit well. Gather all your tools. Keep them within reach. This saves time later.
Read the instructions for the new faucet. Instructions provide important details. Each faucet is different. Follow the steps carefully. This ensures a good fit. Check you have all the parts. Missing parts can delay the job. It’s wise to double-check everything. Now you are ready for the next step.
Frequently Asked Questions
How Do I Remove A Bathroom Faucet?
To remove a bathroom faucet, first, shut off the water supply. Disconnect the water lines using a wrench. Unscrew the mounting nuts under the sink. Lift the faucet out carefully. Ensure you clean the area before installing a new one.
Always have a towel handy for any water spills.
What Tools Are Needed For Faucet Removal?
You’ll need a wrench, basin wrench, and screwdriver for faucet removal. A bucket or towel is useful for catching water drips. Having a flashlight helps illuminate hard-to-see areas. Always ensure you have the right size tools for your specific faucet model.
Gather all tools before starting.
Can I Remove A Faucet Without A Plumber?
Yes, you can remove a faucet without a plumber. Follow the steps carefully: shut off water, disconnect lines, and unscrew mounting nuts. Ensure you have the necessary tools and take safety precautions. If uncertain, refer to your faucet’s manual. DIY faucet removal can save time and money.
How Long Does Faucet Removal Take?
Faucet removal typically takes about 30 to 60 minutes. This depends on your experience and the faucet’s condition. Having the right tools and following a guide can speed up the process. Be patient and careful to avoid damage. Allocate extra time for unforeseen challenges.
Conclusion
Taking out a bathroom faucet is simple with the right steps. Gather tools and follow instructions carefully. Turn off the water supply first. Remove the faucet gently to avoid damage. Check for leaks after reinstallation. Practice patience and take your time.
A little effort saves on plumber costs. Remember, safety is key, so wear gloves. Feel free to seek help if unsure. Successfully removing a faucet boosts confidence in DIY tasks. Enjoy your updated bathroom space.