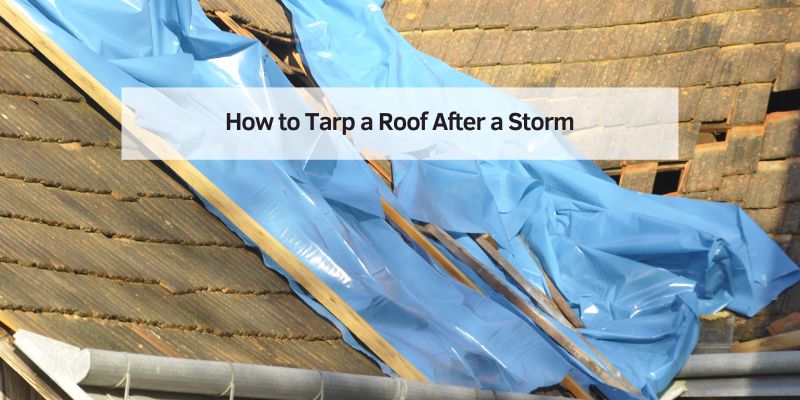
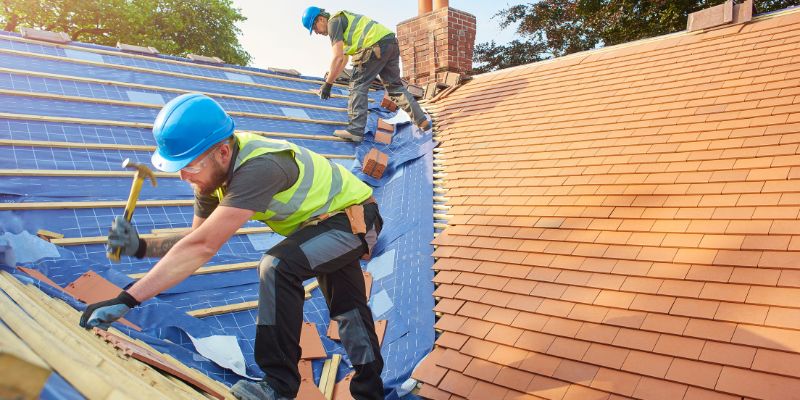
How to Tarp a Roof After a Storm
Storms can hit hard. I’ve seen it firsthand—shingles torn off, holes in the roof, and water sneaking into places it doesn’t belong. If your home’s roof takes a beating, you need to act fast. Tarping a roof is a quick fix to protect your home until repairs are done. I’ve done this myself after a nasty storm, and I’m here to guide you step-by-step. Let’s cover everything you need to know to keep your home safe and dry.
Why Tarping a Roof Matters
After a storm, your roof might have missing shingles or even holes. Water can seep in, ruining your ceilings, walls, and belongings. I learned this the hard way when a storm left my attic dripping. Tarping creates a temporary barrier. It stops leaks, protects your home, and buys you time until a roofer can fix things. It’s not a permanent solution, but it’s a lifesaver for short-term protection.
Assessing the Damage First
Before you grab a tarp, check the damage. I always start by walking around my house to spot obvious issues. Look for missing shingles, holes, or cracked flashing. If it’s safe, climb a ladder to get a closer look. Don’t rush this part—safety comes first. Storms can leave debris or weaken your roof, so step carefully. If the damage looks severe, call a professional roofer to assess it. Knowing the extent of the problem helps you choose the right tarp size and plan your approach.
Choosing the Right Tarp
Picking the right tarp is key. I made the mistake once of grabbing a flimsy tarp, and it tore in a day. Go for a heavy-duty, waterproof tarp made of polyethylene or canvas. These are tougher and last longer. Size matters too. Measure the damaged area and add a few extra feet on all sides for overlap. For example, a 10×10-foot hole needs at least a 12×12-foot tarp. Here’s a quick guide to help you choose:
| Tarp Size | Best For | Material |
|---|---|---|
| 10×12 ft | Small leaks or single missing shingle patches | Polyethylene |
| 20×30 ft | Larger holes or multiple damaged areas | Heavy-duty canvas |
| 30×40 ft | Full roof sections or severe damage | Reinforced polyethylene |
Check for UV resistance and mildew protection, especially if the tarp will stay up for weeks. I always keep a spare tarp in my garage for emergencies—it’s a habit that’s saved me time and stress.
Gathering Tools and Supplies
You don’t need a ton of tools, but having the right ones makes the job easier. Here’s what I grab before heading up:
- Ladder: Sturdy and tall enough to reach your roof.
- Tarp: Sized for the damaged area.
- 2×4 boards: To secure the tarp’s edges.
- Nails or screws: For anchoring the boards.
- Hammer or drill: To fasten the boards.
- Rope or bungee cords: For extra hold in windy areas.
- Gloves and non-slip shoes: For safety.
- Utility knife: To cut the tarp if needed.
I also keep a buddy nearby for safety. Tarping a roof alone is risky, especially in bad weather. Trust me, having an extra pair of hands makes all the difference.
Preparing the Roof Area
Before laying the tarp, clear the roof. I start by sweeping away debris like leaves, branches, or loose shingles. This ensures the tarp sits flat and doesn’t trap water. Check for sharp objects that could tear the tarp. If you see exposed nails or jagged edges, cover them with duct tape or plywood. A smooth surface helps the tarp stay secure and effective.
How to Lay the Tarp Properly
Now comes the main event—laying the tarp. I’ve learned a few tricks to make this go smoothly. Start by unrolling the tarp over the damaged area. Center it so there’s at least three feet of overhang on all sides. This overlap keeps water from sneaking under the edges. If the damage is near the roof’s peak, drape the tarp over the ridge to both sides. This stops water from pooling.
Smooth out any wrinkles as you go. Wrinkles can catch wind and loosen the tarp. If you’re working on a sloped roof, start at the top and work down. Gravity helps keep the tarp in place while you secure it. I always double-check that the tarp covers all damaged spots before moving to the next step.
Securing the Tarp to Stay Put
A tarp flapping in the wind is no good. I’ve had one rip off during a gusty night, and it was a mess to fix. To keep it secure, use 2×4 boards along the edges. Lay a board along one side of the tarp, fold the tarp’s edge over it, and nail the board to the roof. Repeat this on all sides. Use nails or screws long enough to grip the roof deck—1.5 to 2 inches usually works.
For extra security, tie ropes or bungee cords across the tarp and anchor them to sturdy points, like your home’s eaves or nearby trees. Don’t skimp here—wind is your tarp’s worst enemy. I also check for gaps where water could sneak in and seal them with duct tape or extra tarp pieces.
Checking for Proper Installation
Once the tarp is up, double-check your work. I walk around the house to make sure the tarp looks snug and covers all damaged areas. Climb up (safely!) to inspect the anchors. Tug gently on the tarp to test its hold. If it feels loose, add more nails or tighten the ropes. Look for low spots where water might pool and adjust the tarp to create a slight slope for runoff. This step saves you from headaches later.
Maintaining the Tarp Over Time
A tarp isn’t a set-it-and-forget-it fix. I check mine every few days, especially after rain or wind. Look for tears, loose anchors, or pooling water. If you spot a small tear, patch it with a tarp repair kit or heavy-duty tape. Tighten any loose boards or ropes. If the tarp starts to wear out, replace it before it fails. I learned this lesson when a worn tarp let water into my attic—don’t wait for trouble.
When to Call a Professional
Tarping is a temporary fix, not a cure. I always call a roofer as soon as I can after a storm. If the damage is extensive—like large holes or structural issues—skip the tarp and get a professional right away. Same goes if you’re not comfortable on a ladder or roof. Safety is more important than saving a few bucks. A good roofer can assess the damage and give you a timeline for permanent repairs.
Tips for Working Safely
I can’t stress safety enough. Roofs are slippery, especially after a storm. Wear non-slip shoes and gloves to protect your hands. Use a sturdy ladder and have someone hold it steady. Avoid working in high winds or rain—it’s not worth the risk. If you feel uneasy, trust your gut and call a pro. I’ve had close calls on wet roofs, and it’s taught me to respect the dangers.
Dealing with Insurance and Tarping
After tarping, contact your homeowner’s insurance. I always take photos of the damage before and after tarping to document everything. Most policies cover storm damage, but you’ll need proof. Send your insurer the photos and a detailed description of the damage. Tarping can also show you’re taking steps to prevent further loss, which insurers appreciate. Keep receipts for the tarp and supplies—you might get reimbursed.
Common Mistakes to Avoid
I’ve made plenty of mistakes tarping roofs, so let me save you some trouble. Don’t use a cheap, thin tarp—it’ll tear fast. Don’t skimp on securing the edges; wind will find any weak spot. Avoid stretching the tarp too tight—it can rip under pressure. And never walk on the tarp itself; it’s slippery and could tear. Learn from my errors, and your tarp will hold up better.
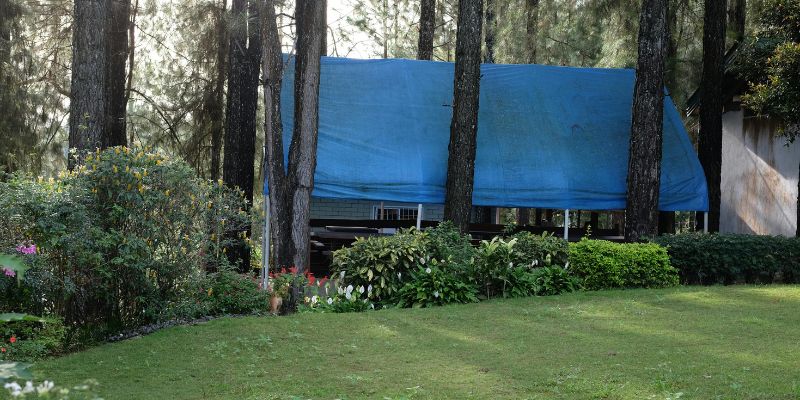
How Long Can a Tarp Stay On?
A good tarp can last a few weeks to a couple of months, depending on the weather. I’ve had tarps hold up for six weeks in mild conditions, but harsh sun or wind can wear them out faster. Check the tarp’s condition regularly and plan for permanent repairs as soon as possible. The longer you wait, the higher the risk of leaks or damage.
Why Tarping Feels Empowering
There’s something satisfying about taking control after a storm. When I tarped my roof the first time, I felt like I was protecting my home with my own hands. It’s not just about stopping leaks—it’s about keeping your family safe and your home secure. Every time I check the tarp and see it holding strong, I know I’ve bought myself time to plan the next steps.
Conclusion
Storms can leave you feeling helpless, but tarping a roof is a practical way to fight back. By assessing the damage, choosing the right tarp, and securing it properly, you can protect your home from further harm. I’ve been through this process, and I know it’s daunting at first. But with the right tools and a little patience, you can do it. Take it one step at a time, prioritize safety, and don’t hesitate to call a pro if you need one. Your home is worth the effort. Now, grab that tarp and get started—you’ve got this!
FAQs
How do I know if my roof needs tarping?
Look for visible damage like missing shingles, holes, or leaks inside your home. If water is getting in or you see exposed areas, a tarp is a smart move until repairs are done.
Can I tarp a roof by myself?
You can, but it’s safer with help. I always ask a friend to hold the ladder or pass tools. If you’re Motif: you’re not sure or the damage is severe, call a professional.
How long does a roof tarp last?
A good-quality tarp can last a few weeks to a couple of months. Check it regularly for wear and tear, especially after wind or rain.
What kind of tarp is best for a roof?
Go for a heavy-duty, waterproof tarp made of polyethylene or canvas. Make sure it’s UV-resistant and big enough to cover the damaged area with extra overlap.
Will insurance cover the cost of tarping?
Most homeowner’s insurance policies cover storm damage and temporary fixes like tarping. Take photos of the damage and keep receipts for supplies to support your claim.