How To Touch Up Paint On Walls Without It Showing Genius
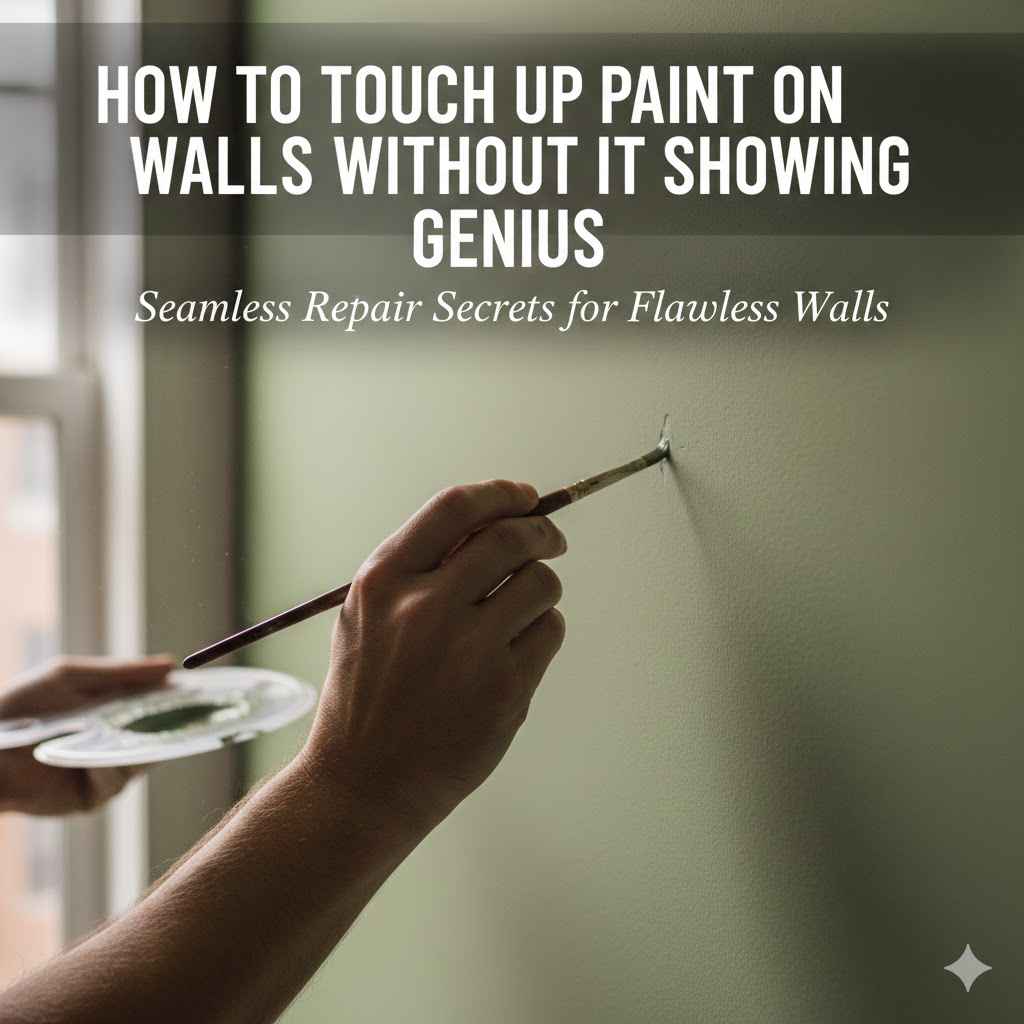
To touch up paint on walls without it showing, clean the area gently, then apply a tiny amount of the original paint using a small brush or foam applicator. Dab the paint lightly onto the spot, feathering the edges outward to blend it seamlessly with the surrounding wall. Using the exact same paint and sheen is crucial for a perfect, invisible finish.
Hello, friends! Md Meraj here. Have you ever noticed a small scuff or chip on your beautifully painted wall? It can feel like a tiny flaw that draws all the attention. Your first thought might be to grab a brush and dab some paint on it. But then you worry, will the new spot stand out even more? This is a common problem for so many homeowners.
Don’t worry, I’m here to help you fix those little imperfections like a pro. With a few simple tricks and the right approach, you can make those touch-ups completely disappear. It’s not about magic; it’s about technique. In this guide, I’ll walk you through every step to ensure your walls look flawless again. Let’s get those walls looking perfect together!
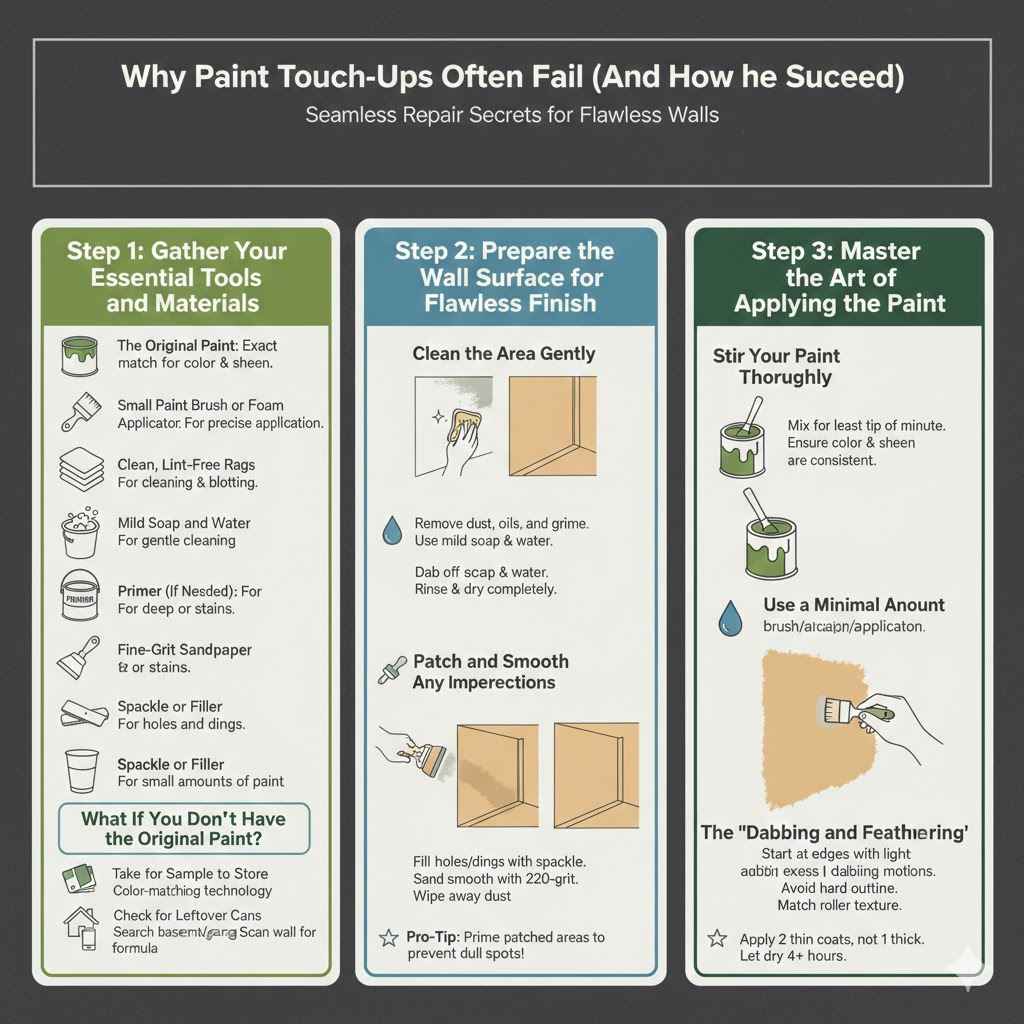
Why Paint Touch-Ups Often Fail (And How to Succeed)
Before we grab our tools, let’s understand why a quick dab of paint often looks worse than the original scuff. When a touch-up is noticeable, it’s usually due to a few common culprits. The new paint might have a different sheen, a slightly different color, or a different texture. This difference is often called “flashing,” and it catches the light differently, making the patch stand out.
So, how do we avoid this? Success lies in preparation and precision. It’s about creating an invisible repair by perfectly matching three things: color, sheen, and texture. It might sound complicated, but I promise it’s easier than you think. We’ll break it down into simple, manageable steps that anyone can follow. By the end, you’ll feel confident tackling any small blemish on your walls.
Step 1: Gather Your Essential Tools and Materials
Having the right tools on hand makes any job smoother. For a perfect paint touch-up, you don’t need much. Most of these items are probably already in your garage or can be picked up cheaply at any hardware store. Let’s get our toolkit ready!
- The Original Paint: This is the most important item! Using the exact same can of paint is your best bet for a perfect match.
- Small Paint Brush or Foam Applicator: A tiny artist’s brush, a Q-tip, or a small piece of a foam roller works best. Avoid large brushes.
- Clean, Lint-Free Rags: You’ll need these for cleaning the wall and blotting excess paint.
- Mild Soap and Water: A simple solution for cleaning the area before you start.
- Primer (If Needed): If you’re patching a deep gouge or a stain, a small amount of primer is essential.
- Fine-Grit Sandpaper (220-grit): Only needed if you have to smooth out a raised scuff or a spackle patch.
- Spackle or Filler: For filling in any nail holes or dings before painting.
- A Small Container: A disposable cup or a paint tray liner is perfect for holding a small amount of paint.
What If You Don’t Have the Original Paint?
This is a common hurdle! If you can’t find the original paint can, don’t panic. You still have great options:
- Take a Sample to the Store: Carefully chip off a small piece of paint from an inconspicuous area (like inside a closet or behind a large piece of furniture). A one-inch square is usually enough. Paint stores have color-matching technology that can create a near-perfect match.
- Check for Leftover Cans: Search your basement, garage, or storage shed. The previous homeowners might have left some behind.
- Use a Color-Matching Tool: Some companies offer small, handheld devices that can scan your wall and provide an exact color formula.
Getting the color and sheen right is 90% of the battle. It’s worth the extra effort to get a perfect match.
Step 2: Prepare the Wall Surface for a Flawless Finish
You wouldn’t paint a dirty car, right? The same logic applies to your walls. A clean, smooth surface is the secret to an invisible touch-up. Skipping this step is a common mistake that leads to a noticeable patch.
Clean the Area Gently
Walls collect dust, oils, and grime over time. Painting over this layer will prevent the new paint from bonding properly and can make the touch-up look dirty.
- Mix a few drops of mild dish soap into a bowl of warm water.
- Dip a clean sponge or rag into the soapy water and wring it out well. It should be damp, not dripping.
- Gently wipe the scuff mark and the immediate surrounding area.
- Rinse the area with a new, clean rag dampened with plain water to remove any soap residue.
- Let the wall dry completely. This usually takes about an hour.
Patch and Smooth Any Imperfections
If you’re dealing with more than just a surface scuff, like a small nail hole or a deep scratch, you’ll need to fill it first.
- Apply a small amount of spackle or wall filler to the hole using a putty knife. Overfill it slightly, as spackle can shrink as it dries.
- Scrape the putty knife across the patch to make it flush with the wall.
- Let the spackle dry completely, following the manufacturer’s instructions. This can take a few hours.
- Once dry, lightly sand the patch with 220-grit sandpaper until it’s perfectly smooth and level with the rest of the wall.
- Wipe away any sanding dust with a clean, dry rag.
For patched areas, it’s a good idea to apply a thin coat of primer before you paint. Primer seals the spackle and prevents the paint from soaking in, which would create a dull, noticeable spot. Just dab a little primer on the patch and let it dry.
Step 3: Master the Art of Applying the Paint
This is where the magic happens. The key here is “less is more.” We want to blend the new paint seamlessly into the old, not create a new, obvious blob.
Stir Your Paint Thoroughly
Paint that has been sitting for a while can separate, with the color pigments settling at the bottom. Before you do anything, open the can and stir it very well. Use a paint stirrer or a wooden stick to mix it for at least a minute, scraping the bottom to ensure everything is combined. This guarantees your color and sheen are consistent.
Use a Minimal Amount of Paint
- Pour a very small amount of paint into your disposable container.
- Dip just the very tip of your small brush or foam applicator into the paint.
- Dab off any excess on the side of the container. You want the brush to be almost dry.
The “Dabbing and Feathering” Technique
Instead of painting in broad strokes, we’re going to use a technique that helps the new paint blend in.
- Start at the Center: Gently dab the paint directly onto the center of the scuff or mark. Don’t press hard.
- Feather the Edges: Work your way outward from the center using light, dabbing motions. As you move away from the center, use less and less pressure. This technique, called “feathering,” creates a soft, undefined edge that melts into the surrounding paint.
- Avoid a Hard Outline: The goal is to avoid creating a distinct circle or square of new paint. The feathered edge is what makes the repair invisible.
- Match the Texture: If your wall has a slight texture from a roller, you can mimic this by using a small piece of a foam roller or by stippling (dabbing with the tip of a stiff brush) the paint on. This helps match the original application texture.
It’s better to apply two very thin coats than one thick one. Let the first coat dry completely for at least four hours before deciding if a second is needed. Often, one thin, well-blended coat is all it takes.
Understanding Paint Sheen and Why It’s Crucial
Paint sheen refers to how shiny the paint is once it dries. Matching the sheen is just as important as matching the color. If you put a satin touch-up on a matte wall, it will stick out like a sore thumb. For more details on choosing finishes, reputable paint companies offer guides that can help you understand the differences.
Here’s a quick breakdown of common paint sheens and how easy they are to touch up.
| Paint Sheen | Appearance | Touch-Up Difficulty | Best For |
|---|---|---|---|
| Flat or Matte | No shine, hides imperfections | Easiest | Ceilings, low-traffic areas like adult bedrooms |
| Eggshell | Very subtle, low sheen | Easy | Living rooms, dining rooms, hallways |
| Satin | Soft, velvety sheen | Moderate | High-traffic areas, kitchens, bathrooms, kids’ rooms |
| Semi-Gloss | Noticeable shine, very durable | Difficult | Trim, doors, cabinets, bathrooms |
| High-Gloss | Very shiny and reflective | Most Difficult | Trim, furniture, areas you want to highlight |
As you can see, the less shiny the paint, the easier it is to touch up. Flat and eggshell sheens are very forgiving. The higher the gloss, the more a touch-up will show differences in texture and application. For glossier sheens, your technique needs to be perfect.
Step 4: Let It Dry and Assess Your Work
Patience is key! Paint can look different when it’s wet. It often appears darker and shinier. You need to let it dry completely to see the true final result.
- Drying Time: Allow the paint to dry for at least 24 hours before making a final judgment. In humid conditions, it might take even longer.
- Check from Different Angles: Look at the touch-up spot from various angles and in different lighting conditions (natural daylight, artificial light at night). This will help you see if there is any flashing.
- If It’s Still Noticeable: If the patch is still visible, don’t worry. Sometimes a second, very thin feathered coat is all you need. If that doesn’t work, the issue might be an imperfect color or sheen match. In that case, your best option might be to repaint the entire wall from corner to corner. This guarantees a uniform finish.
For your safety, always ensure good ventilation when painting, even for small touch-ups. Open a window or use a fan to keep the air circulating. You can find more safety information on resources like the Environmental Protection Agency (EPA) website, especially if you are working in an older home that may contain lead paint.
Troubleshooting Common Touch-Up Problems
Even with careful steps, you might run into a small issue. Here’s a table to help you identify and fix common problems.
| Problem | Why It Happens | How to Fix It |
|---|---|---|
| The patch looks too dark or too light. | The color match wasn’t perfect, or the old paint has faded over time. | Get a new color match from a chip taken from the wall. If fading is the issue, repainting the entire wall is the best solution for a uniform look. |
| The patch is too shiny or too dull (“Flashing”). | The paint sheen doesn’t match the original wall finish. | Confirm the sheen of your original paint (check the can or test in a hidden spot). You will need to get new paint with the correct sheen and re-do the touch-up. |
| You can see the edges of the touch-up. | Too much paint was applied, or the edges were not feathered properly. | Lightly sand the edges of the patch with 220-grit sandpaper to smooth them out. Then, re-apply a very thin coat using the feathering technique. |
| The texture of the patch is different. | The new paint was applied with a brush on a wall that was originally rolled. | Use a small piece of a foam roller or a stippling technique to mimic the original roller texture. Apply a thin layer of paint this way over the patch. |
Frequently Asked Questions (FAQ)
Can I use a new can of paint if it’s the same color and brand?
Yes, but be cautious. Even paint from the same brand and color name can have slight variations between batches. It’s always best to use paint from the original can. If you must use a new can, test it in an inconspicuous spot first to ensure it’s a perfect match before applying it to the middle of your wall.